
Technology and Equipment, Page 2
List of articles
Prima Klima - odour filters with activated carbon you can rely on
Are you dealing with unwanted odours drifting indoors from your grow tent? It is the right time to install an odour filter with activated carbon into the ventilation system. Effective carbon filters from the leading manufacturer Prima Klima are used not only in indoor plant cultivation, but also in industrial premises or in the home. This article introduces their features so that you can more easily choose the right one across the product ranges.
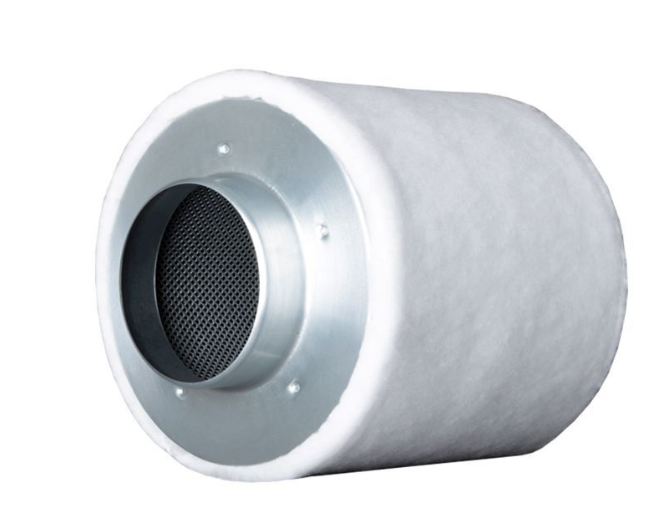
Depending on requirements and needs, filters from the Prima Klima brand cater to all customer categories and offer the right carbon solution, whether you prefer affordability or the longest possible odour filter lifespan. Regardless of the product range, they have long been a guarantee of high quality and reliability for customers. The German manufacturer, which produces these popular, high-quality odour filters in the Czech town of Radnice, does not take the environmental aspect lightly either and has long paid attention to sustainability in production. That is why Prima Klima odour filters with activated carbon are almost 100% recyclable.
Highly porous activated carbon as the basis
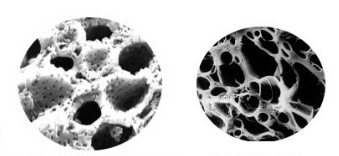
This is also related to the use of activated carbons, which perfectly absorb odour particles. CTC-75 carbon is a product of human activity and easily solves the problem of unwanted odours in enclosed spaces. If we enlarge this activated carbon from coconut shells under a microscope a thousand times (image on the left), we find that its porosity is much greater than in the case of commonly used activated carbon (image on the right).
We now come to the individual product ranges. Which are they?
The Pit Puk range represents a specific modular filtration system, characterised by excellent adsorption of odour particles using pellets of highly active virgin carbon. Adsorption is a process in which gaseous, liquid or solid particles (odour particles) accumulate on the surface (carbon layer). This type of carbon filter can be used for both intake and extract air. Depending on airflow, humidity level and the presence of organic compounds, expect an average service life of two years.
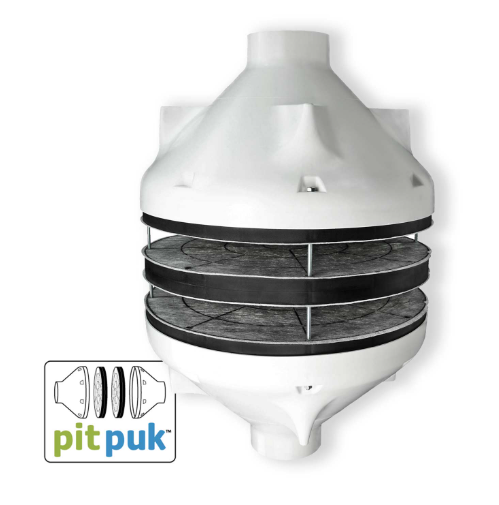
The unique odour-removal filtration system consists of the following parts:
- PIT: plastic flange - an impact-resistant part made of high-quality, durable nylon (polyamide). This material is also non-flammable and completely odourless.
- PUK: carbon filter cartridge - the activated carbon cartridges are easy to replace and can also be conveniently stored as needed.
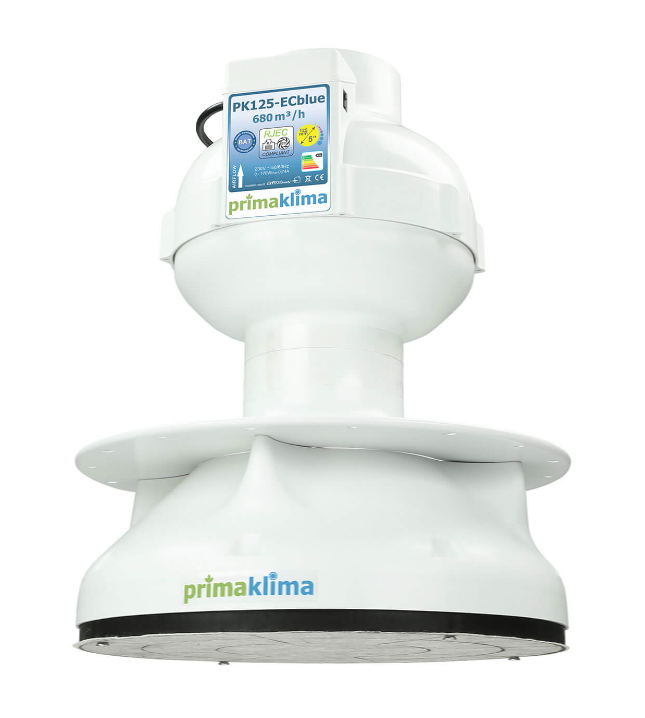
How to assemble the Pit Puk filtration system is shown in the manufacturer's video. We recommend buying the complete PITPUK filtration system straight away: Prima Klima PITPUK Starter Kit 125 mm. In the image you can see what it looks like when connected to the extra powerful PK125ECblue fan.
The ECO Line filters provide reliable odour removal and are characterised by an excellent price-performance ratio, which is also the main reason why they have long been among the most popular on the market. They are the ideal choice if you do not know which odour filter to choose, as ECO Line filters are simply a timeless classic, with a whole range of variants to choose from. (At the end of this article, we will guide you so that you know what to look for when choosing a specific filter.)
To ensure an optimal level of air filtration, each filter in the ECO range has a 3 cm layer of highly active carbon with an area of >1200 m²/g and the same quality as in the professional Industry LINE filters.
Given the price, it is then a pleasant surprise that even the “economy” variants in this range are equipped with a pre-filter against dust.
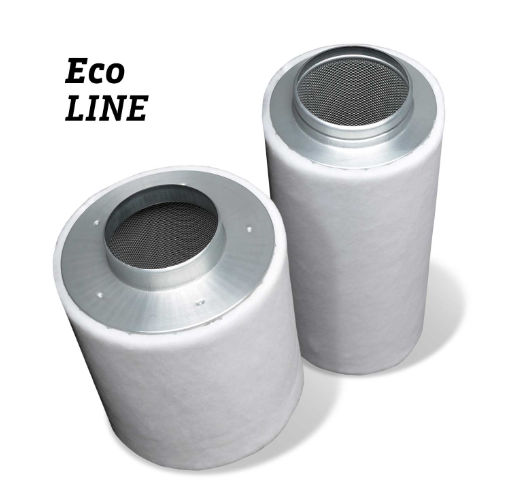
Filters from the Prima Klima Eco range cannot be refurbished. Their service life is usually around 9 months. In some cases, it reaches one year. As with any filter, the above factors (airflow and humidity of the filtered air, impurities, etc.) can again affect it.
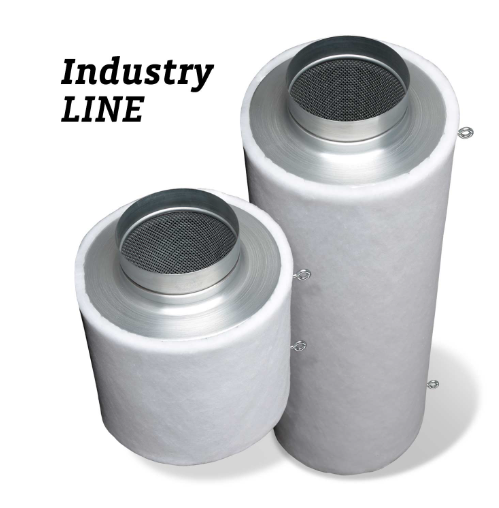
The premium INDUSTRY range includes professional carbon filters with a pre-filter against dust, which will satisfy even the needs of demanding customers. The refillable filters are characterised by a 4 cm thick bed of highly active CTC75 carbon with an area of >1200 m²/g, as well as a robust and stable steel construction. What can you expect if you pay extra for them?
- Extra long contact time between air and the activated carbons. It is simple: longer contact allows better air purification. The result is an exceptional level of odour absorption.
- The above-standard service life of these filters is usually in the range of 1.5–2 years, again depending on the factors mentioned above.
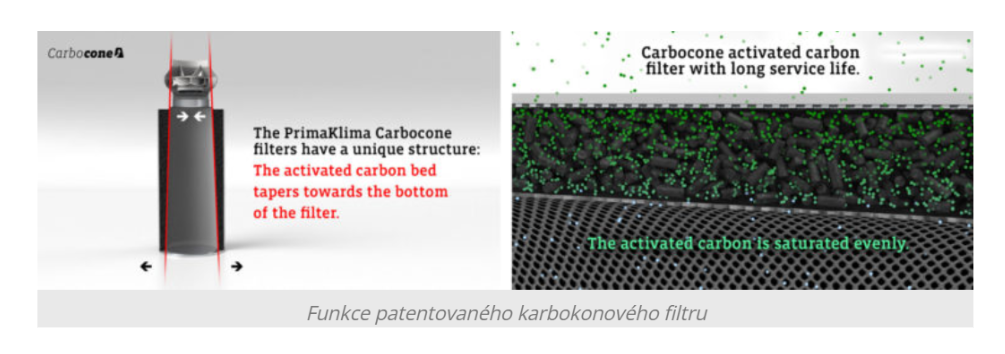
Finally, we have high-tech odour filters with a patented conical inner basket design, whose uniqueness is best illustrated by the manufacturer's video or our separate article: Prima Klima CARBOCONE: innovative activated carbon filters. In short, it is their unique structure, thanks to which they can boast the longest service life on the market. While the carbon layer of ordinary odour filters gradually fills with odour particles unevenly over time, the structure of Carbocone filters guarantees even saturation of the carbon. This brings the following benefits for users:
- Lower consumption of activated carbon
- The longest service life on the market (+ 30%)
- Significantly more efficient absorption
Our TIP: Do not forget that the specific odour filter model should be chosen mainly according to the flange size or airflow. So if you are choosing your first activated carbon filter, be sure to read what to watch out for when selecting a carbon filter. For this purpose, we have prepared a separate article for you: Odour Filter – How to Choose?
We will also be happy to advise you on anything you are interested in, for example at the well-known e-mail address info@higarden.eu.
We also recommend these products:
- Activated carbon
- Replacement Pre-Filters Prima Klima
- PRIMA KLIMA fan 400 m3/h, 125 mm, with thermal control (PK125-TC)
What to read next?
VIPARSPECTRA and Growing Under LED – Definitely a Good Idea!
After a week, there is once again an opportunity to take a closer look at our shop’s range. Today we will focus on the popular LED lighting from the American brand Viparspectra. Technically advanced, lightweight and at the same time affordably priced LED luminaires have risen to the top of bestseller lists at many retailers around the world in recent years. Among other things, the manufacturer works closely with brands such as SAMSUNG and MEAN WELL. It invests heavily in its own research with the aim of using technological progress to improve the growing experience for herbs, fruit or vegetables in the comfort of home for as many customers as possible. Read on to find out how it has managed to win over more than 20 million growers from around the world at various levels over the past ten years!
Viparspectra is also a hit here. Proof of this is the best-selling LED luminaire in the form of the ViparSpectra PRO Series P600 model, which we will come back to later. First, however, let us briefly summarise what specifically connects the individual models and product ranges of Viparspectra LED lighting:
- The defect rate for LED lighting by ViparSpectra does not even reach one tenth of one per cent, which is truly an impressive result given the genuinely massive production capacity. Incidentally, we can also mention that Viparspectra’s fully automated production plants, which have recently undergone costly modernisation, cover an area of approximately three football pitches.
- Viparspectra has its own research and development team, and it must be said that it is made up entirely of top experts. Thanks to a team of 180 experts, the American manufacturer has full control over the development of each high-tech grow lamp. This is driven by considerable ambition to gradually outpace all competition. The products therefore undergo extensive testing, which is also reflected in the significant certifications (EC, UL). We can therefore also add the long service life of these LED luminaires to their exceptional reliability. Compared with discharge lamps, it is around 5 times longer!
- A waterproof board and a perfectly designed
- The third point relates to the general advantages of LED lighting, which include:
- Full light spectrum, thanks to which you can make do with a single source of artificial lighting throughout the entire growing cycle, when plants receive light usable in the relevant life stage for rapid growth and comprehensive development. This means a light spectrum from infrared (730 nm) to almost ultraviolet (all wavelengths).
- Low thermal emission. Because modern LED lighting, which certainly includes Viparspectra grow lamps, emits only a minimal amount of heat into its surroundings, even smaller grow boxes do not experience excessively high temperatures that could slow the healthy development of your plants.
- The light source emitted by powerful LED diodes can also be placed closer to plants and make maximum use of the growing space available to you.
- LED lamps by ViparSpectra do not only save space inside the grow tent or grow room, but are also defined by low electricity consumption and high efficiency. These features are further proof that the purchase cost of quality LED lighting will soon pay for itself. For every watt of input power, an LED lamp produces approximately 10 times more light than a light bulb, about 3 times more than a discharge lamp, and even roughly half again as much as a fluorescent tube.
- It is worth bearing in mind that when growing under a discharge lamp, you also absolutely need a ballast and a shade (reflector). By purchasing a compact full-spectrum LED lamp, these costs fall away, regardless of the price at which we offer reliable and efficient ViparSpectra LED luminaires. That is why they are also a common choice for beginner growers, who would otherwise initially look for the cheapest, sufficient solution for a start and only later seek a more sophisticated light source. With ViparSpectra, even a beginner does not have to make compromises and can immediately give their plants full-spectrum lighting with even light distribution and stable PAR values, simulating natural sunlight for plants (Sun-like technology).
Our TIP: Thanks to their unquestionable quality, innovative LED lamps with a favourable price tag have also become part of our discounted 200W and 100W LED growing sets.
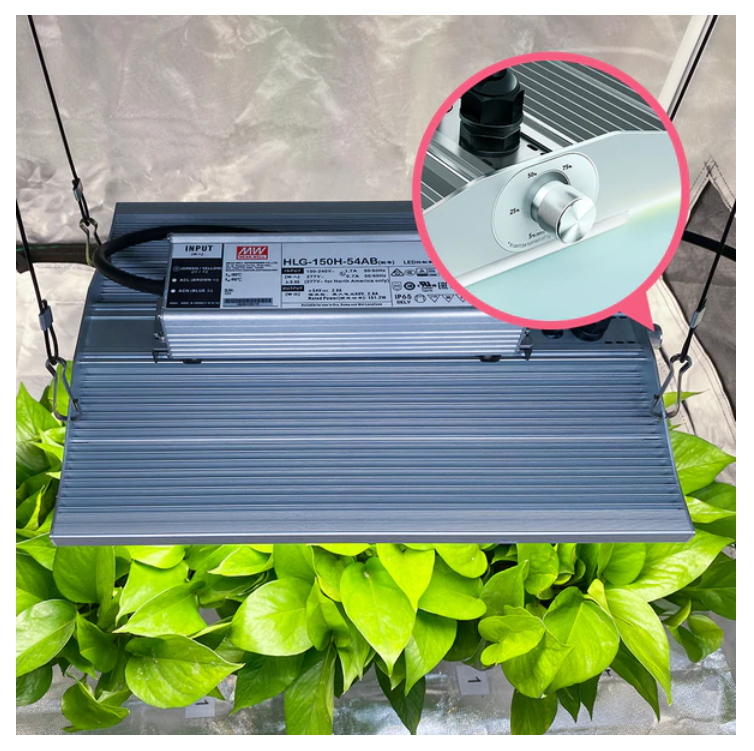
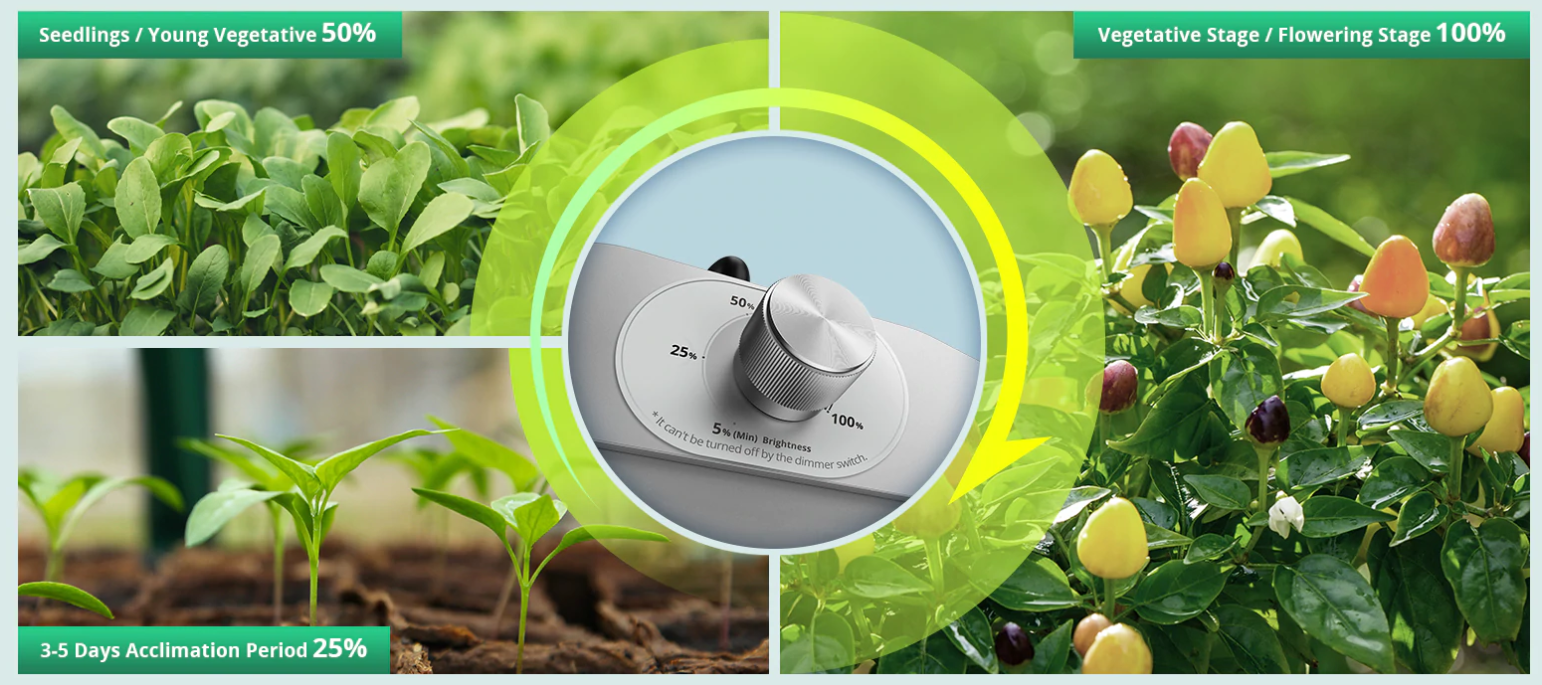
- ViparSpectra plant lighting also offers the option of adjusting the lighting period (see photoperiod) according to the cultivated plant species. In practice, this allows growers to increase yields by up to half! The image shows a detail of the flexible dimming knob for controlling diode dimming on a luminaire from the XS range (see below). But do you know what is best about it? The built-in dimmer with light intensity regulation in the range of 15% - 100% is available not only on the more expensive and more powerful models, but also on the best-selling one - ViparSpectra PRO Series P600. And now look at its price tag. Especially at the beginning, compared with conventional luminaires, there is nothing to think about, is there?
VIPARSPECTRA grow lights
We can now move on to a detailed overview of the options that ViparSpectra offers growers within indoor plant cultivation. Both product ranges clearly demonstrate that, despite the long list of benefits, the initial investment in ViparSpectra LED lighting is by no means high.
PRO range (Pro Series)
- Viparspectra PRO Series P600
- Viparspectra PRO Series P1000
- Viparspectra PRO Series P2000
- Viparspectra PRO Series P4000
The grow lights listed above are the most affordable in the VIPARSPECTRA range. That makes what you get for your money all the more impressive:
- More power per watt, as already mentioned, means saving more than just a few pounds. The best-selling LED light P600, as well as the even more powerful variants, generates more light at lower energy use, which the plant can actually use for its development during the individual life stages from germination through growth and flowering to the ripening of juicy fruits. A high standard of efficiency is ensured by 4 types of top-quality Samsung LED diodes.

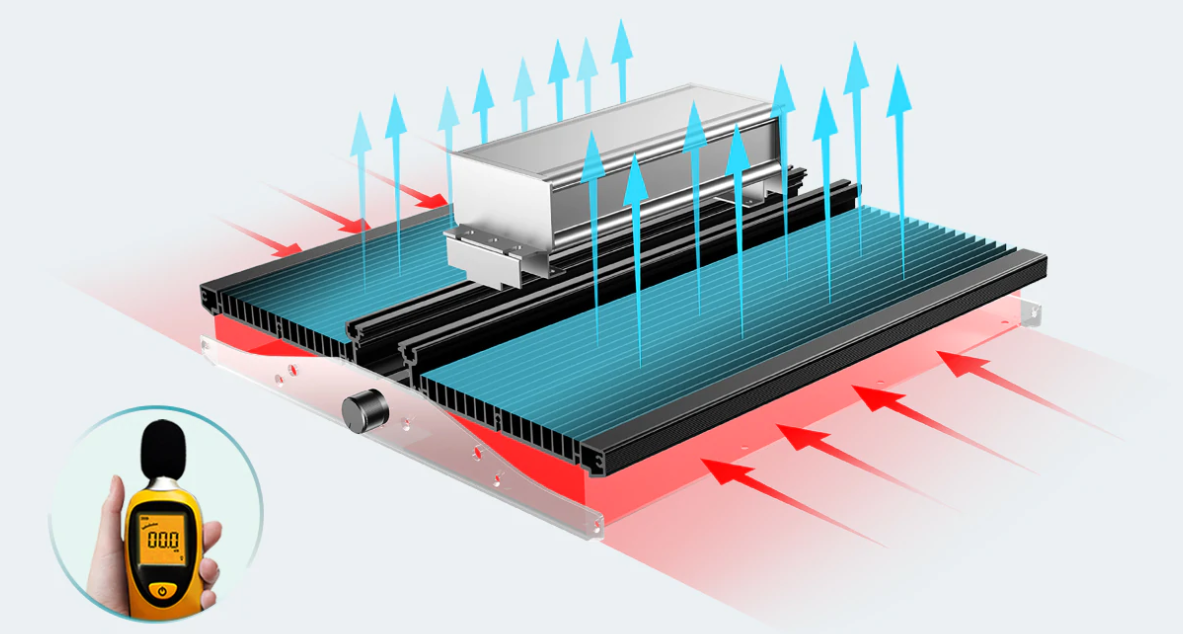
- The entire PRO product range also features a powerful Sosen driver and a well-designed cooling system.
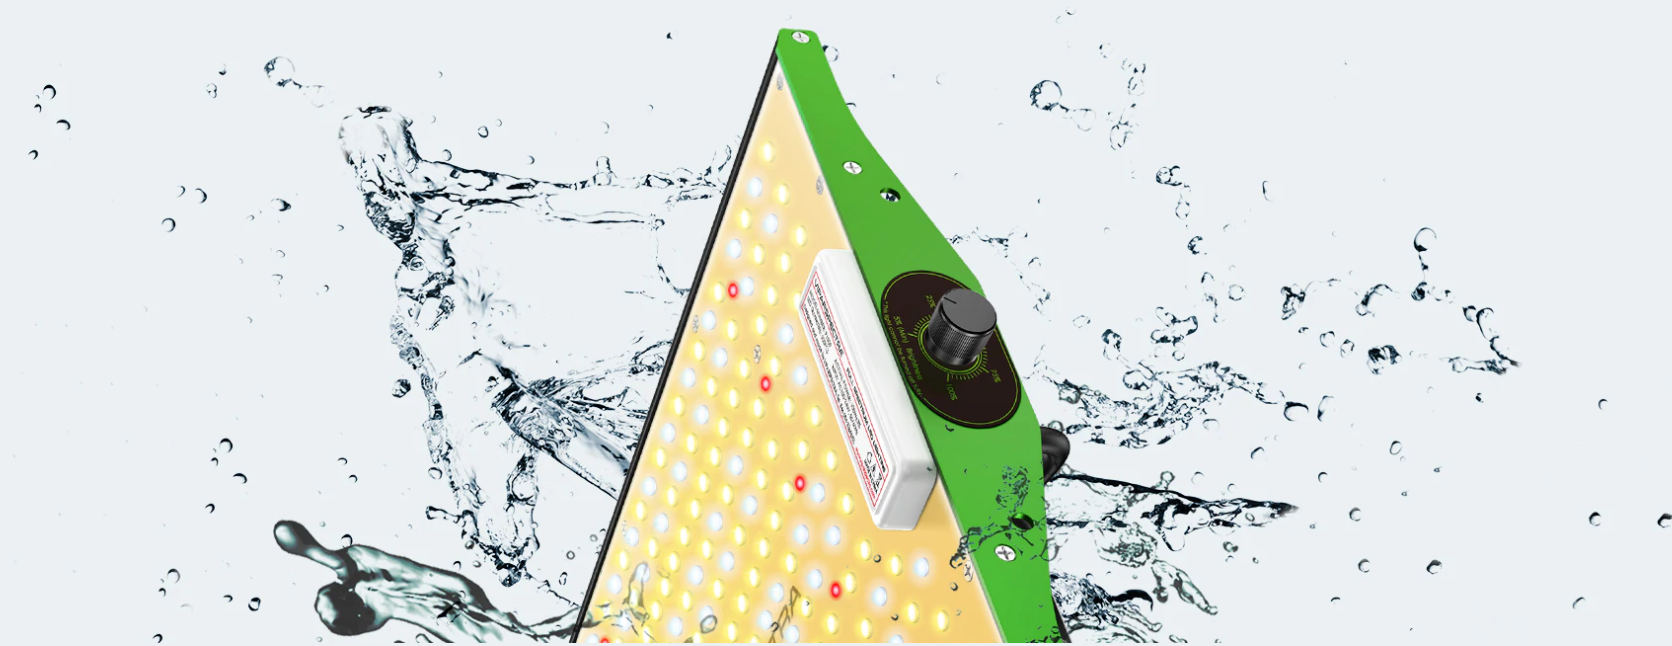
- The LED luminaires in the Pro range can boast a waterproof board, which easily copes with increased humidity inside the growing space, and therefore these luminaires are fully compatible with any indoor growing environment. The waterproof design naturally increases the overall service life of the luminaire again.
XS range (XS Series)
The higher XS range is a step ahead of the previous PRO range. It has 5% higher output and at the same time brings 5% savings on electricity. However, many great features remain, from perfectly quiet operation through perfectly designed passive cooling to the waterproof board. So what does XS offer in addition to the PRO range?
- Even better and newer diodes. The Pro range uses LM281B+ diodes, but the XS range uses even more advanced LM301B grow LEDs with high energy efficiency and the potential to increase your yields by up to 50%!
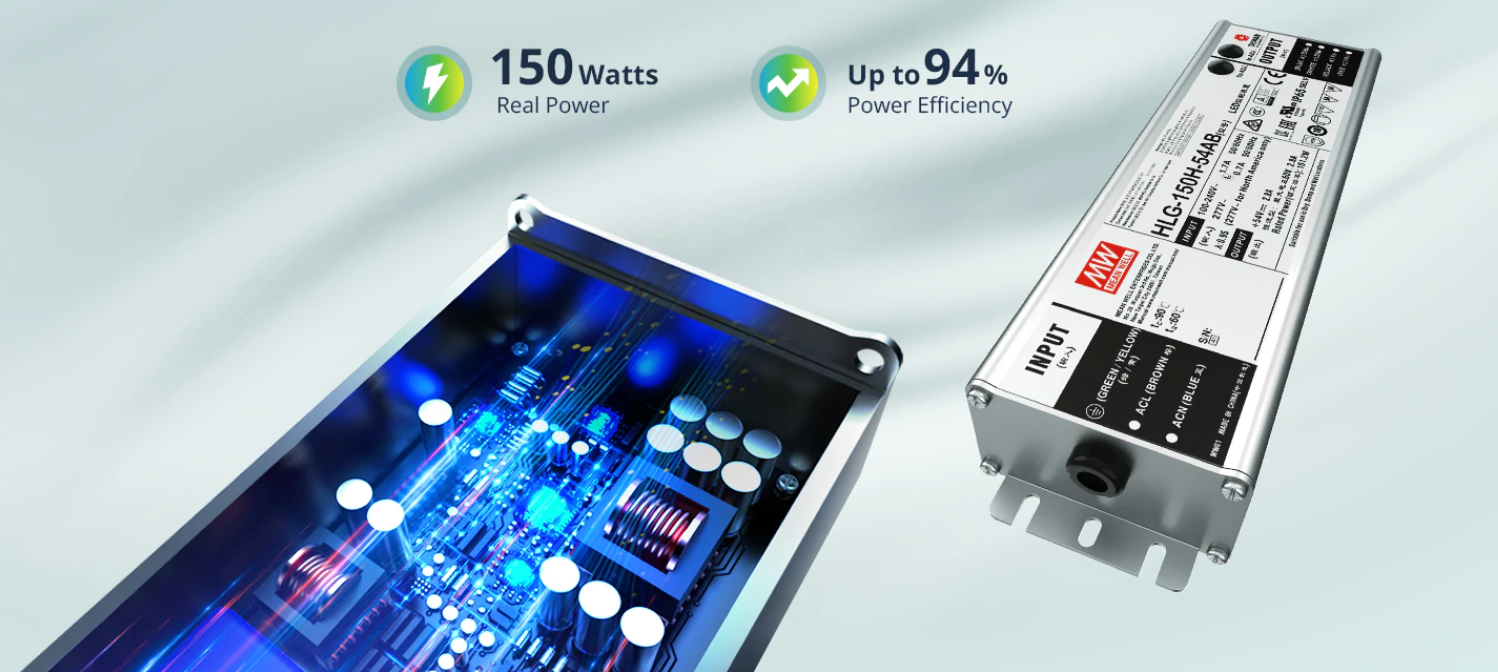
- Another difference is the presence of a high-tech MEAN WELL driver, which gives more demanding growers yet another step up in lighting energy efficiency and lower electricity use. With long-term use of the luminaire and continuous, intensive operation, it becomes a guarantee of stable performance. It also contributes to the long service life, which for luminaires in the XS range exceeds 100,000 hours of lighting.
We can warmly recommend all ViparSpectra LED luminaires. The detailed description of each luminaire then allows you to read the detailed technical specifications and the small nuances between the individual variants.
The package always contains everything needed for easy and quick Plug & Play installation. If the LED lamps from this popular American brand have caught your interest and you are thinking of joining the more than 20 million satisfied growers, we will be happy to help you choose. We look forward to your questions at the well-known email address info@higarden.eu.
We also recommend these products:
- ExHale XL CO2 Bag, natural CO2 generator
- Aqua Master Tools P700 PRO2, pH and EC/CF/PPM metre and thermometer
- Guanokalong Veg Pearls
What to read next:
- Discover modern Garden Highpro grow boxes
- How to choose a propagator and what to equip it with?
- Substrates and fertilisers CANNA: 30 years of research for successful plant cultivation indoor and outdoor
Do you know what VPD is? Discover the key to perfect conditions for plant development
VPD (vapour pressure deficit = the difference in water par) is still a big unknown for many growers. On the other hand, more and more home growers have recently been getting acquainted with the topic of VPD, especially those who devote themselves to indoor gardening in their grow box. Join them thanks to the information you will absorb in this article. For professionals, knowledge of VPD and its use in growing practice is then a matter of course. Join them and reach a new level!
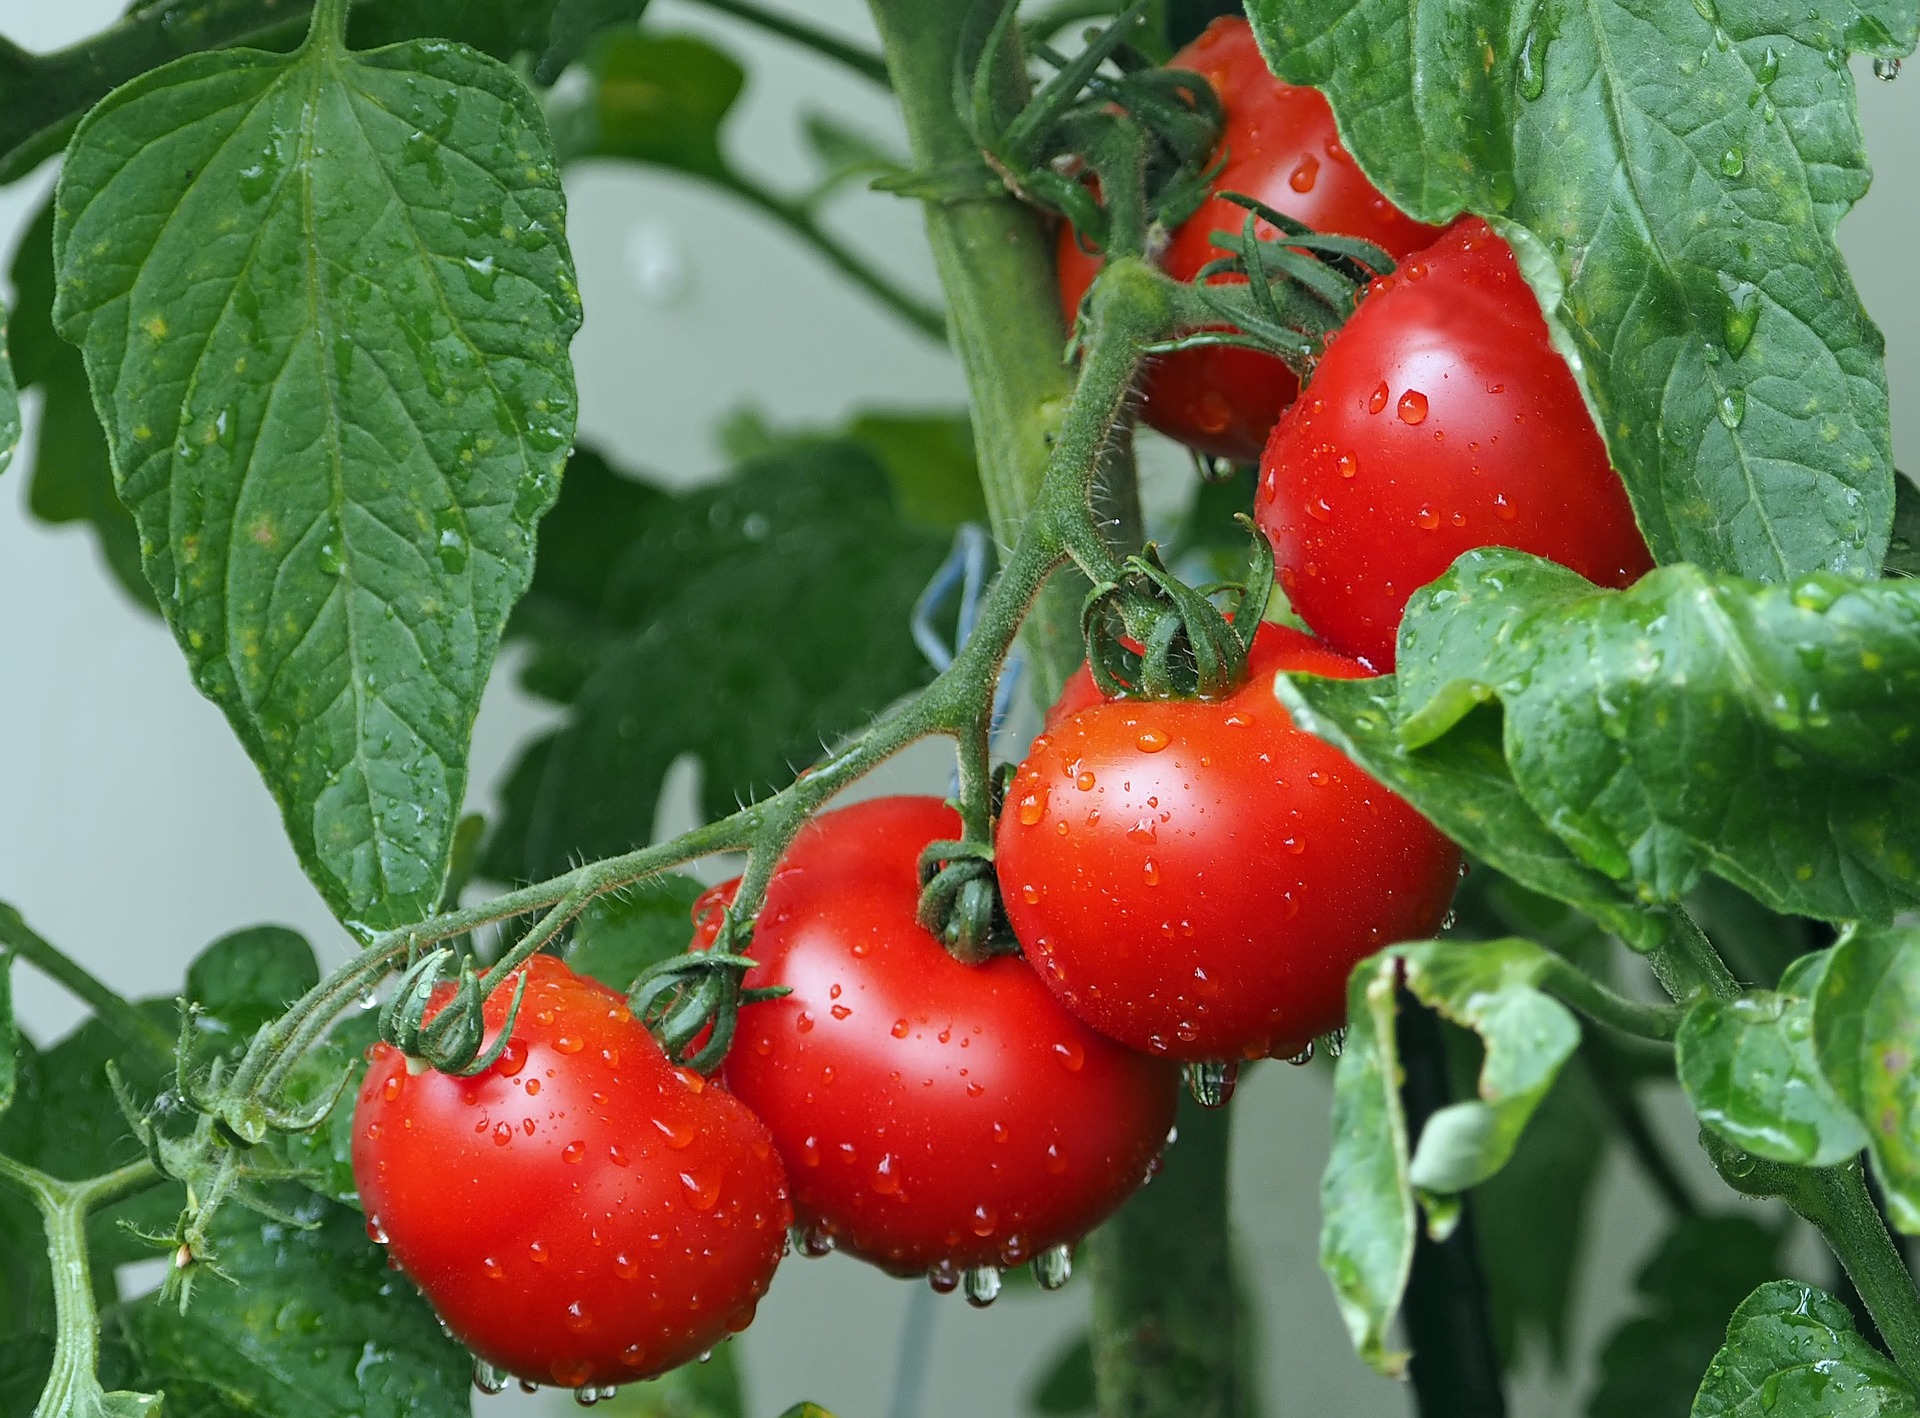
All growers certainly want to provide their plants with perfect conditions for development. To give them an ideal climate inside the growing space so that they can later enjoy a wonderful, flawless, abundant harvest. However, when it comes to the climate inside a grow tent or indoor grow room, most growers deal only with factors such as temperature or humidity. These factors can be directly influenced using common equipment, whether it is quality ventilation equipment or suitably chosen artificial lighting for plants. Even measuring temperature and humidity is no science at all.
VPD and the importance of plant transpiration
Transpiration is the process by which plants breathe and release water through stomata, which are pores on the leaves. Intensive transpiration of plants through the stomata on the leaves is extremely important for plants, because the amount of water a plant exhales is always closely related to how much water with nutrients (feed solution) it is able to take up through its root system.
Now comes an important fact. The rate of plant transpiration largely depends on the difference between the water vapour pressure in their stomata and the water vapour pressure in the surrounding air. This also explains the concept of VPD without unnecessarily technical wording. The difference in water vapour pressure simply tells us how strong the “drying” power of the air around the plants is, which directly affects the intensity and overall quality of their transpiration.
The water vapour pressure around plants always depends on the temperature and humidity of the air in the growing space. The humidity inside the stomata on plant leaves can generally be considered 100%. The pressure is influenced mainly by leaf temperature. If we measure leaf temperature in addition to air temperature and humidity, we are able to calculate the difference in water vapour pressure between the stomata and the surroundings of the leaves from the measured values. In relation to the current stage of the plant’s life, we can therefore maintain and control VPD. And that is great news, because if you can keep VPD under control throughout the growing cycle, your plants will thrive much more!
How to achieve the correct VPD?
You may be wondering what the catch is. The best thing about it is that there is practically none. It is enough to measure responsibly the main factors affecting the difference in water vapour pressure. Repetition is the mother of wisdom and, in this case, of high yields too, so for completeness we provide a clear summary of them:
- air temperature
- leaf temperature
- relative humidity of the air
- light intensity
- substrate moisture and EC substrate
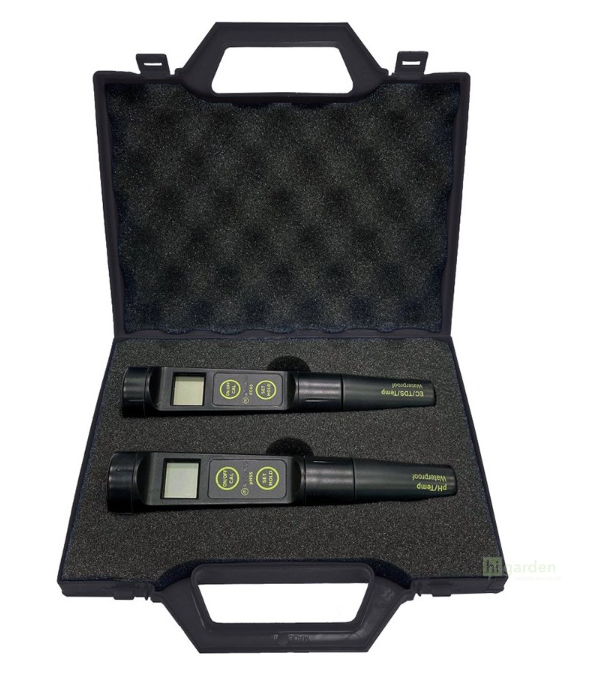
Our TIP: Get the practical and elegant Milwaukee KIT case with waterproof instruments for reliable, regular measurement of pH and EC.
Accurate measurement and influencing of the individual factors affecting VPD is truly essential if you want to use this knowledge for a better harvest. On the internet you will also find many tables with generally recommended values for the difference in water vapour pressure. To begin with, remember a simple but most important rule: The leaf surface must always have a lower temperature than the surrounding air! If it were the other way round, the rate of plant transpiration would not be sufficient, the plants would not cool down enough and, in the end, they could suffer irreversible damage or, in the worst case, die.
This description of the opposite and undesirable state again clearly shows how important the difference in water vapour pressure is when growing indoor. At a certain point, most growers (especially in the beginning) encounter seemingly inexplicable problems. At first glance, the plants do not look vigorous, show signs of nutrient deficiencies and their leaves are wilting. In this situation, growers ask themselves and more experienced colleagues where the problem is, and they search in vain for the reason why they still cannot achieve satisfactory results. After all, they apply fertilisers exactly according to the manufacturer’s dosage tables and give their plants almost more care than they give themselves!
Practical examples
- If the difference in water vapour pressure is too high, the plants cannot cool down sufficiently because the surrounding air dries them out too quickly. As a result, the plants do not develop as they should. They usually also show symptoms of nutrient deficiencies, which we covered in a separate article: Symptoms of a lack of important nutrients. In these situations, the leaves of the plants often dry out, curl up or gradually die off.
- How does this happen? In indoor gardening, the most common cause is a combination of low air humidity and a powerful discharge lamp.
- Now the opposite scenario. A too low difference in water vapour pressure prevents plants from transpiring, the importance of which you already know from the previous lines. It is therefore no surprise that, as a result of too low VPD, the surrounding air is no longer able to absorb additional moisture and transpiration cannot take place. A clear indicator of this scenario is moisture condensed on the leaves of the plants and their slow growth. Again, signs of deficiencies in important nutrients can be observed and an ideal environment is created for the development of fungal diseases in plants.
- How does this happen? A classic example from the world of indoor plant growing is the combination of low temperatures and LED lighting, whose diodes heat the surrounding air in the growing space much less than discharge lamps.
Would you like to ask us something? We are here for you, whether by phone or at the well-known e-mail address info@higarden.eu. We look forward to your questions!
We also recommend these products:
- HUMIPRO 4L ultrasonic humidifier
- Garden Highpro Clip Fan 15CM / 15W, 2 speeds
- PRIMA KLIMA EC WHISPERBLOWER fan
What to read next:
- Symptoms of a lack of important nutrients
- Discover modern Garden Highpro grow boxes
- CANNA substrates and fertilisers: 30 years of research for successful plant growing indoor and outdoor
Put an End to Odours from the Grow Room Once and for All
For many growers, the main advantage of indoor cultivation is the discretion that this method of plant cultivation offers. However, a grow room or grow tent can easily give itself away through compromising odours that may be bothersome or attract unwanted attention from the surroundings. In the following article, we will focus on methods that will help you effectively neutralise odour from a grow room or grow box.
Odour filters with activated carbon
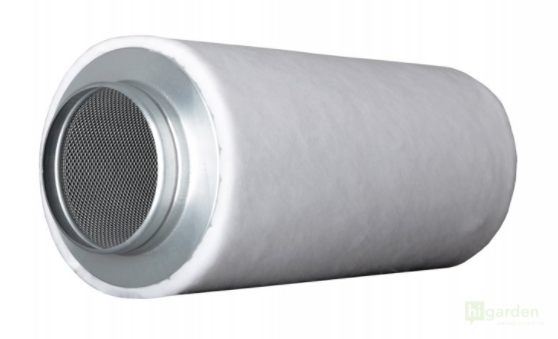 Carbon filters that absorb odours are now part of the basic equipment of every grow room or grow tent. They work on a simple principle, where air from the extract fan passes through a cylinder filled with activated carbon, which captures the particles causing the odour.
- Appropriate size: For a carbon filter to work properly, its size and capacity must match the output of the extract fan. For example, for the PRIMA KLIMA extract fan with an output of 400 m3/h, a PRIMA KLIMA odour filter with a capacity of 480 m3/h is suitable. The maximum permitted airflow should always be higher than the fan output so that clogging of the ventilation system does not occur as the filter wears.
- Installation: Most growers connect the odour filter before the extract fan so that all air from the growing space comes into contact with the activated carbon. Air without odour then exits the ventilation duct outside the grow box or grow room. If the layout of your growing space does not allow this setup, you can also connect the filter at the end of the ventilation system in the direction of airflow. However, this method may not be as effective due to possible leaks in the ducting or tent. When installing an odour filter, you will need cable ties and ventilation ducting to connect the individual components.
- Regular maintenance and replacement: Activated carbon filters are extremely effective, but they do not last forever. Roughly every 6-10 months or every three growing cycles, replace the worn odour filter with a new one. You can extend the service life of the carbon filter by cleaning or replacing the white protective fabric after each cycle, as it traps dust and solid particles.
Do you not want to worry about assembling a ventilation system for your grow box? We have prepared ventilation kits for you, which include an extract fan with a custom odour filter and all the accessories needed for installation.
Gels and sprays for odour neutralisation
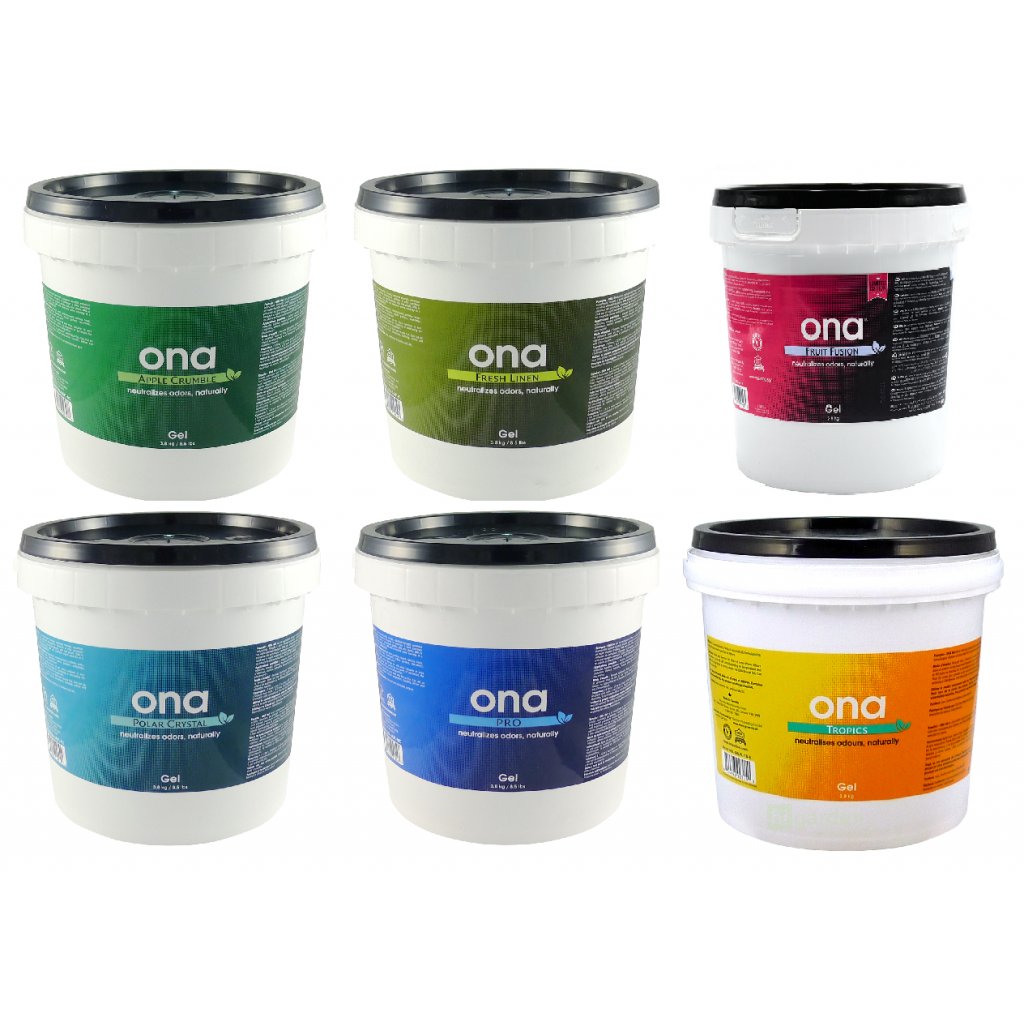 Chemical products for odour neutralisation contain aromatic substances that release an intense fragrance while also absorbing other odours. Thanks to their easy handling, the main advantage of odour absorbers is their universal application. Another benefit is their immediate effect, which you will appreciate, for example, during harvest.
- Use: To avoid affecting the terpene profile of the plants, we recommend placing chemical odour absorbers outside the growing area.
- Installation in ventilation ducting: For maximum effect, we recommend connecting a duct connector with space for placing an odour neutraliser in gel or a similar form into the ventilation system.
- Automatic dispensers: We recommend placing the ONA Block Dispenser and other automatic dispensers near the entrance doors to the grow room or room with the grow box.
Further tips for odour control
In addition to using carbon filters and chemical odour neutralisers, you can take several simple measures that will further reduce unwanted odours in your grow room or grow box.
- Adequate ventilation: Make sure that your growing space is sufficiently ventilated. It is important not only to have a sufficiently powerful extract fan, but also access to fresh air.
- Seal all gaps: Leaks in the grow box or in the ventilation ducting are a common cause of unwanted odour. It is important that as much air as possible passes through the extract fan with the carbon filter.
- Air ionisers: High-performance air ionisers are suitable for large growing rooms for medicinal plants. These are generators of negative ions that absorb odours and remove dust particles from the air.
Would you like to learn more about indoor growing and the most modern gardening techniques? You can find all this and much more on our Higarden blog!
Growing Indoors: How to Switch to Flowering
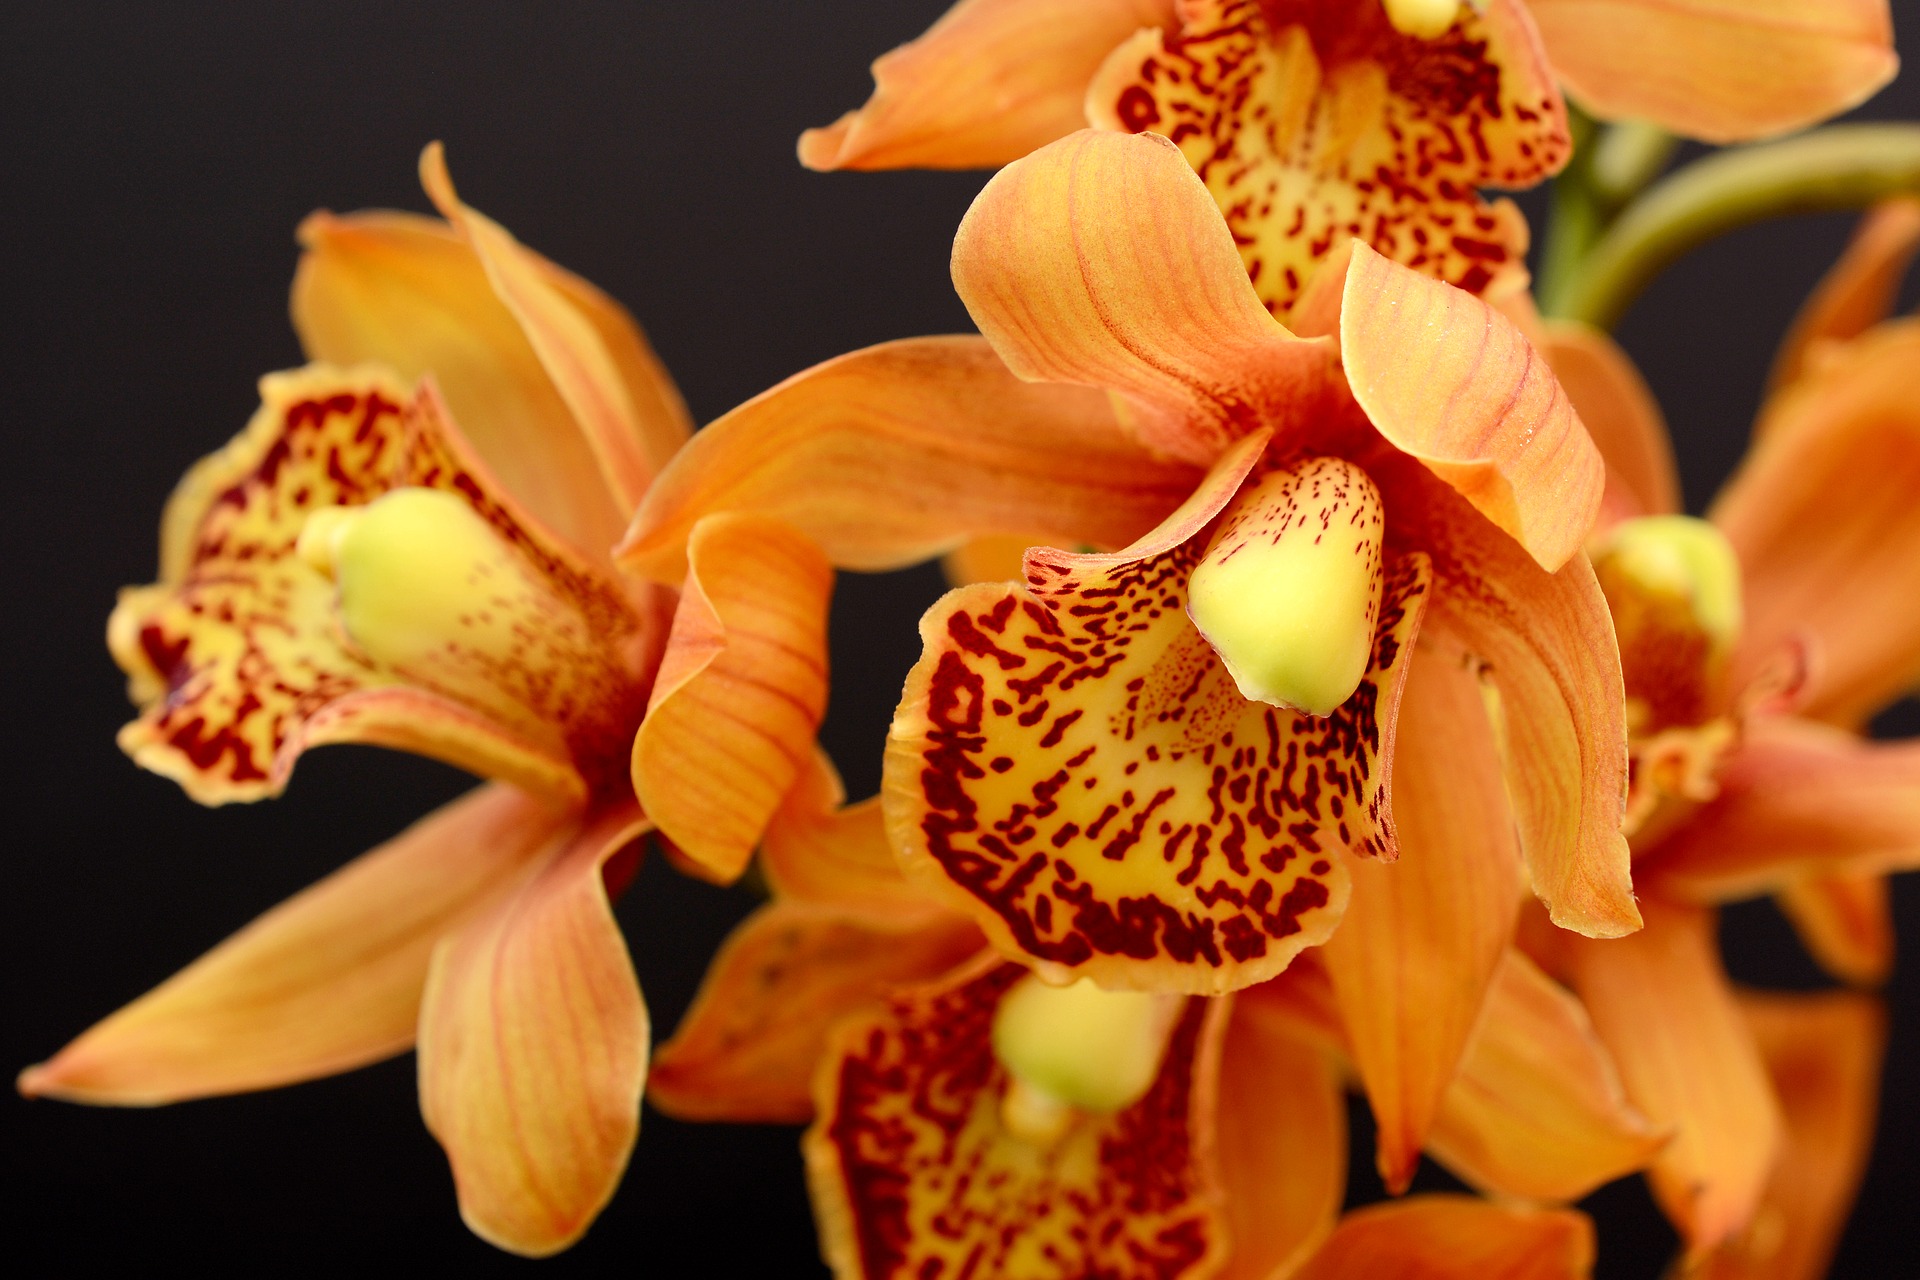 When growing indoors, the transition from the vegetative phase to flowering is one of the most important moments in the entire cultivation cycle. A number of factors determine when the right time has come, and correct timing of the switch will greatly affect the quantity and quality of the harvest. We will guide you through the most important aspects of the transition to the flowering phase and advise on some advanced cultivation techniques that will help you achieve a better harvest.
What is the difference between the vegetative phase and flowering?
To begin with, let us clarify what we actually mean when we speak about switching or transitioning from the vegetative to the flowering phase. Plants go through four phases during their life: first they germinate, then they become seedlings, followed by the vegetative (growth) phase and finally flowering. While in the early stages of life plants focus on producing new leaves and roots so they can capture more sunlight and nutrients, during flowering they begin to form buds that mature into flowers, fruits and seeds.
But how do plants know when they should start flowering? Just as with the energy for photosynthesis, they rely on sunlight in this case too, which signals the change of seasons. In the case of short-day plants, the earlier the sun sets, the faster they move into flowering. In the case of long-day plants, it is the opposite. This phenomenon is called photoperiodism, and we discuss this topic in more detail in one of our previous articles on our blog.
Outdoors, plants do not need much help, but in indoor growing the alternation of day and night is in the gardener’s hands. The grower decides whether the light schedule keeps the plants in the vegetative stage or whether it is time for flowering. The critical length of day and night can vary between species, but for most short-day plants (which include most popular indoor crops, including medicinal and aromatic herbs) the trigger for the transition to flowering is shortening the day to 12 hours (12/12 schedule). During the vegetative phase, most growers maintain a light schedule of 16-18 hours of light and 6-8 hours of darkness.
What to watch out for when switching to flowering
Although indoor growers have a number of factors under control, the timing of the light switch often also depends on factors that we cannot fully influence. Plant height and shape, the condition of the root system and, where relevant, various horticultural techniques to which they have been exposed all play a role.
Plant height and shape
Many beginner growers underestimate how much plants will grow after switching to flowering. Some species and varieties can stretch to as much as three times their length during the first weeks of flowering. Always keep in mind how much space the plants have above them. During the vegetative phase, try to shape plants using pruning and other techniques so that after the switch they fill the entire growing area and as many tops or flowers as possible are exposed to light.
Root system
In addition to growing taller and producing new leaves, plants spend a large part of the vegetative phase developing their root system. The amount of space for roots will vary depending on the growing method, but whether you grow in hydroponics or in pots, you must not rush root growth. Once a plant starts flowering, it focuses most of its energy on bud formation and needs all the nutrients it can take up through its roots. If you switch to flowering too early, you will lose part of the harvest at the end of the cultivation cycle. There is no exact science to timing, but most plants need at least three weeks from transplanting to their final position before they can start flowering.
 Advanced cultivation techniques
To maximise yields, many growers use various innovative techniques that influence plant growth and development. It should be added that not all of them are suitable for all species and varieties of plants, and we leave their use to the reader’s consideration.
Sea of Green (SOG)
The Sea of Green (SOG) method involves growing many small and short plants packed closely together. The aim is for the plants to start flowering as early as possible and not have time to form side branches. Growers using this technique usually switch to flowering when the plants are 15-30 cm tall. The result should be many plants with one main top.
Screen of Green (ScrOG)
Although it shares a similar abbreviation with the previous method, the Screen of Green technique is its exact opposite. ScrOG consists of placing a support net roughly 30-60 centimetres above the base of the plants and then weaving the tops through it so that the resulting canopy is spread out as much as possible. With this method, with a certain amount of patience and experience, it is possible to fill the entire growing space with a single plant or just a few plants.
Lollipopping
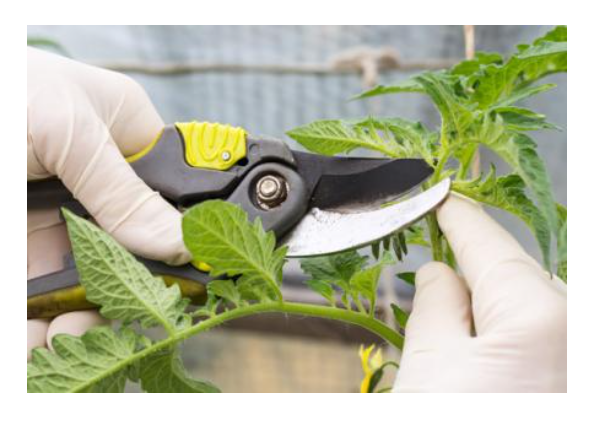
The very popular pruning method known as “lollipopping” consists of removing all branches from plants except those that are largest and promise the greatest yield. Supporters of the method point out that flowers in the lower and shaded parts often do not mature and it makes no sense for plants to waste energy and nutrients on them. Before you start pruning, make sure the plants are healthy and sufficiently developed so that you do not slow their growth.
Would you like to learn how to grow indoors like professionals? Read the latest articles on our blog!
How High Should Grow Lights Be Hung?
If you are just starting out with growing, it can be difficult to estimate the correct hanging height for grow lights. How high you should hang the fixtures will depend not only on their output, but also on the age of the plants and other factors. In this article, we explain how to determine the hanging height of different types of lights according to the growth stage of the plants.
In indoor growing, light is one of the main factors affecting plant development. While the length of the light period determines whether plants will flower or invest energy in vegetative growth, light intensity is crucial for the amount of energy they obtain through photosynthesis. If plants receive just the right amount of light, they will grow quickly and develop according to their genetic potential. Too intense light will burn the leaves, and if there is too little light, they will have elongated stems and grow slowly.
You may also be interested in: The most important criteria for choosing grow lighting
The best way to measure the intensity of grow lights is by using photosynthetic photon flux density (PPFD), which expresses the amount of active photons falling on a given surface per second (μmol/m²/s). The older the plants are, the more light they are able to use effectively for photosynthesis.
- PPFD for seedlings: 200 to 400 μmol/m²/s
- PPFD for plants in the vegetative growth stage: 400 to 600 μmol/m²/s
- PPFD for the flowering stage: 600 to 1000 μmol/m²/s
- With CO₂ supplementation: up to 1,000 µmol/s/m² during the growth period and up to 1,500 μmol/m²/s during the flowering period.
Grow LED lights are designed so that at a certain distance from the plants they cover the largest area at the ideal PPFD for growth and flowering. You will usually find this value in the manual. It is not recommended to illuminate a larger area than corresponds to the light’s output. You will end up with weak plants and slow growth. If you buy a light with a dimmer, you can easily change the intensity by turning the dial. If you have a fixture without dimming, hang the light high above the plants during the first days and weeks of the plants’ life and gradually move it closer.
Approximate hanging height of LED modules for different growth stages according to power input (W)
|
Light output |
Seedlings |
Vegetative growth |
Flowering |
|
200 W |
50 cm and above |
30 to 50 cm |
20 to 40 cm |
|
400 W |
70 cm and above |
50 to 70 cm |
35 to 55 cm |
|
600 W |
100 cm and above |
75 to 100 cm |
45 to 75 cm |
|
110 cm and above |
80 to 110 cm |
50 to 85 cm |
|
|
120 cm and above |
90 to 120 cm |
55 to 90 cm |
HPS and HID discharge lamps
If you are lighting plants with high-pressure sodium discharge lamps, follow these parameters:
- 250 W HPS will effectively illuminate 0.3 m2 of growing area and you will achieve the optimal PPFD for growth and flowering at a distance of 30 cm from the tops of the plants
- 400 W HPS will effectively illuminate 0.5 - 1 m2 of growing area and you will achieve the optimal PPFD for growth and flowering at a distance of 30-40 cm from the tops of the plants
- 600 W HPS will effectively illuminate 1 – 1.4 m2 of growing area and you will achieve the optimal PPFD for growth and flowering at a distance of 40-50 cm from the tops of the plants
- 1000 W HPS will effectively illuminate 1 – 1.5 m2 of growing area and you will achieve the optimal PPFD for growth and flowering at a distance of 70 cm from the tops of the plants
Although it may sound complicated, after a few growing cycles you will easily recognise whether the plants are receiving just the right amount of light, too little or too much. The first signs of light burn are burnt tips or yellow faded spots on the leaves, usually around the tops closest to the fixture. If you notice such damage on the plants, reduce the light intensity. If you notice that the plants are weak, stretching towards the light or developing leaves without chlorophyll, give them more light. If you want to measure light intensity really accurately, equip yourself with a PAR metre.
You can find more useful tips and guides for indoor and outdoor growers on the Higarden blog.
The most important criteria for choosing grow lighting
Grow lights are the centrepiece of every grow box or indoor growing room, and it is worth paying them plenty of attention when choosing them. This is by no means only about electricity consumption – more important are parameters such as the light spectrum, efficiency and even coverage of the growing area. Modern LED technology offers higher efficiency than older HPS discharge lamps, as well as the option to adjust light conditions. In this article, you will learn how to choose the right LED grow light from a wide range of options for your exact needs.
Consumption is not everything
In the past, growers focused primarily on input power expressed in watts (W) when choosing lighting. From this figure, you can easily calculate consumption and at the same time obtain a rough estimate of how much light energy plants will have available for photosynthesis. Contrary to general belief, however, the input power of a light is not the best measure for assessing how much light from grow lighting reaches the plants. The true measure of a light’s performance lies in the amount of light energy it delivers to plants in exchange for the electricity consumed.
PAR (photosynthetically active radiation) is an abbreviation for photosynthetically active radiation, that is, light of such wavelengths that plants use during photosynthesis. The photosynthetically active light spectrum roughly corresponds to that visible to the human eye (400-700 nanometres). The most efficient grow lights are those that most effectively convert the supplied electrical energy in watts (W) into the greatest number of photons in the PAR spectrum, measured in micromoles (µmol). While the most efficient HPS grow lights emit approximately 1.4 to 1.8 µmol/W, the best LED lamps achieve almost double the efficiency, up to 2.8 µmol/W. To produce the same amount of photons in PAR, the most modern LED diodes require almost half as much electricity as HPS discharge lamps.
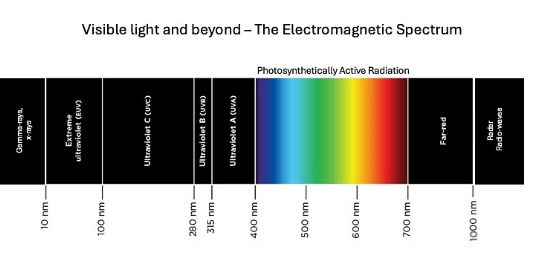
Each wavelength in the PAR spectrum (light colour) has a different effect on plants. Light in the red and blue parts of the spectrum has the most pronounced effect on plant growth. Blue light stimulates plants to grow quickly and form new leaves and stems, which is important for them during the vegetative growth phase. Red light supports flowering and ripening and encourages them to grow taller. However, plants use all colours of the light spectrum, including those outside PAR. For example, exposure to infrared and ultraviolet light leads to increased production of resin and secondary metabolites. In general, most LED lights emit light in the PAR spectrum, but you can also find specific models with UV and infrared wavelengths.
Consider the quality of the LED diodes
Manufacturers of LED grow lighting like to talk about the quality of the LED diodes they install in their lights. LED diodes are small semiconductor chips that convert electrical energy into light and at the same time determine its wavelength. High-quality LED lights use diodes with an output of at least 3 W. The lower the diode output, the lower the intensity of the emitted light will be. The standard for measuring light efficiency is micromoles per joule (μmol/J).
PPF (photosynthetic photon flux) is an abbreviation for photosynthetic photon flux, that is, the amount of photosynthetically active photons that a light source emits per joule of consumed electrical energy. Some manufacturers also express PPF in micromoles per second (μmol/s). PPF in cheap LED grow lamps ranges from 0.8 to 1.5 μmol/J, while quality lights achieve up to twice the efficiency.
In addition to (PPF), the efficiency of a grow light can also be expressed by photon flux density (PPFD). This metric tracks the amount of photosynthetically active photons falling on a given surface per second (μmol/m²/s). The older the plants are, the more light they are able to tolerate and use effectively during photosynthesis.
- PPFD for seedlings: 200 to 400 μmol/m²/s
- PPFD for plants in the vegetative growth phase: 400 to 600 μmol/m²/s
- PPFD for the flowering phase: 600 to 1000 μmol/m²/s
- If you use CO₂: up to 1,000 μmol/m²/s during the growth period and up to 1,500 μmol/m²/s during the flowering period.
What else not to forget when choosing LED grow lighting
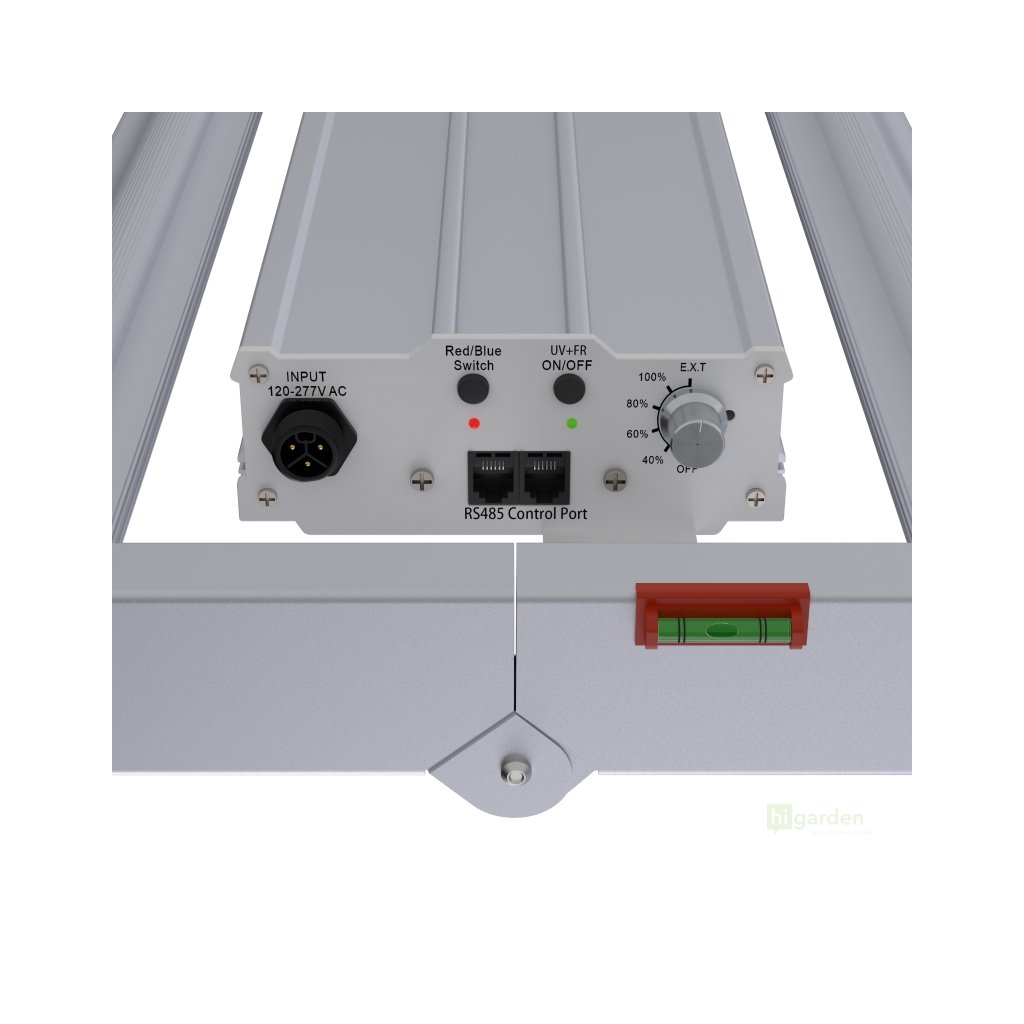 In addition to technical parameters, other factors also play a role when choosing the right lighting for your grow room. Ideally, the light intensity should be the same across the entire growing area available to you. For example, Maxibright Daylight PRO Full Spectrum LED with an input power of 300 W covers a growing area measuring 1x1 metre. The SANlight EVO 3-60 grow light with an input power of 200 W covers only an area of 0.6x0.6 metre, and for medium-sized tents it is better to use two models of this type at once.
Another aspect is the angle at which light from the LED diodes falls on the plants. The wider the angle, the larger the area the LED diode illuminates, but at the same time the light intensity and penetration decrease. The standard for most grow lights is LED diodes with a beam angle of 120°. Additional functions such as dimming, external control or the option to adjust the spectrum are not essential, but they can make life easier for the grower.
Our final point is that before buying grow lights, you should always take the price-to-quality ratio into account. Although the cheapest equipment may seem like a major saving, it often offers a shorter lifespan and outdated technology, and in the long term it does not pay off.
Are you unsure when choosing equipment for indoor growing? At Higarden, we have you covered! Visit our growing blog or contact our expert sales staff.
Winter Is Coming: Prepare Your Grow Box for Winter
One of the main attractions of indoor growing is that you can cultivate all year round, regardless of the whims of the weather. However, it is not entirely true that indoor growers are unaffected by the changing seasons. Even a small drop in temperature in the growing area causes fluctuations in VPD and slows down plant metabolism. You can learn how to prevent this in the following article.
Most plants grown indoors grow best at temperatures in the range of 21-29 °C, with the difference between day and night temperatures not exceeding 5 °C. As soon as temperatures fall, plants slow down their metabolism and the rate of photosynthesis. This means that even if we provide them with a large amount of energy in the form of light, they will not be able to use it to produce sugars and will grow more slowly than they would at higher temperatures. If the temperature drops below 15 °C, plants stop growing and remain stunted.
Plants also respond to low temperatures by slowing transpiration, that is, the rate at which they evaporate excess water through their leaves. Transpiration is crucial for the transport of nutrients and water. A smaller volume of water evaporated through the leaves means that plants use less water, but at the same time they stop taking up nutrients from the substrate or nutrient solution. The result is again slower growth and also an increased risk of overwatering substrates and root rot.
Growing at lower temperatures can also bring some advantages, especially in the prevention of pests and mould. Cold air retains less moisture and is drier than warm air. This can be useful in preventing moulds such as powdery mildew or Botrytis cinerea, which causes flower rot. At low temperatures, some insect pests, such as spider mites or aphids, also reproduce more slowly. However, remember that if the temperature drops below 15 °C, plant metabolism stops completely and they cease to grow.
The effect of low temperatures on VPD
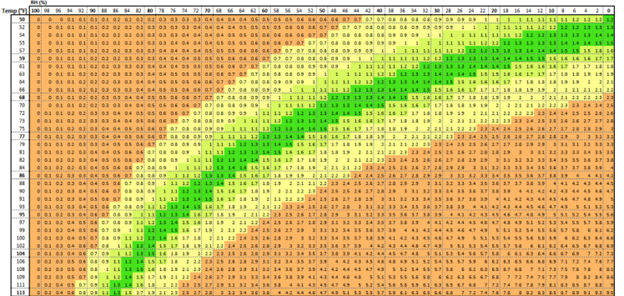 Plants are affected by the temperature and humidity of the air surrounding them. Air temperature affects transpiration and relative humidity plays a significant role in CO2 uptake, which is important in the process of photosynthesis. The effects of climatic conditions on plants are best expressed by vapour pressure deficit (VPD). We covered this topic in detail in an older article on our blog. VPD values are derived from the temperature and relative humidity of the air in the growing area, and even small fluctuations in temperature (+-1 °C) or humidity (+-5 % RH) can represent significant changes in vapour pressure deficit. If you use VPD as a guide when growing plants indoors, it is extremely important to maintain a consistently stable and optimal temperature and humidity in the growing area.
How to keep the grow box sufficiently warm
During winter, you have several options for increasing the temperature in the grow box. The simplest and cheapest solutions consist of insulation, or alternatively blowing in warm air or moving the grow tent to another location. Slightly more expensive (but more reliable) is heating the growing space with a heater or replacing the grow lighting.
 Insulate the grow box: Before you start heating the growing area, make sure that the grow box seals properly and check all zips so that warm air does not escape. If pots or the irrigation system stand on a cold floor, place them on a suitable insulating material, such as polystyrene.
Use warm air from another part of the house: During the winter months, it may be advantageous to bring warm air from heated rooms into the growing area. It is also a good idea to place the grow tent closer to heat sources, for example next to a radiator.
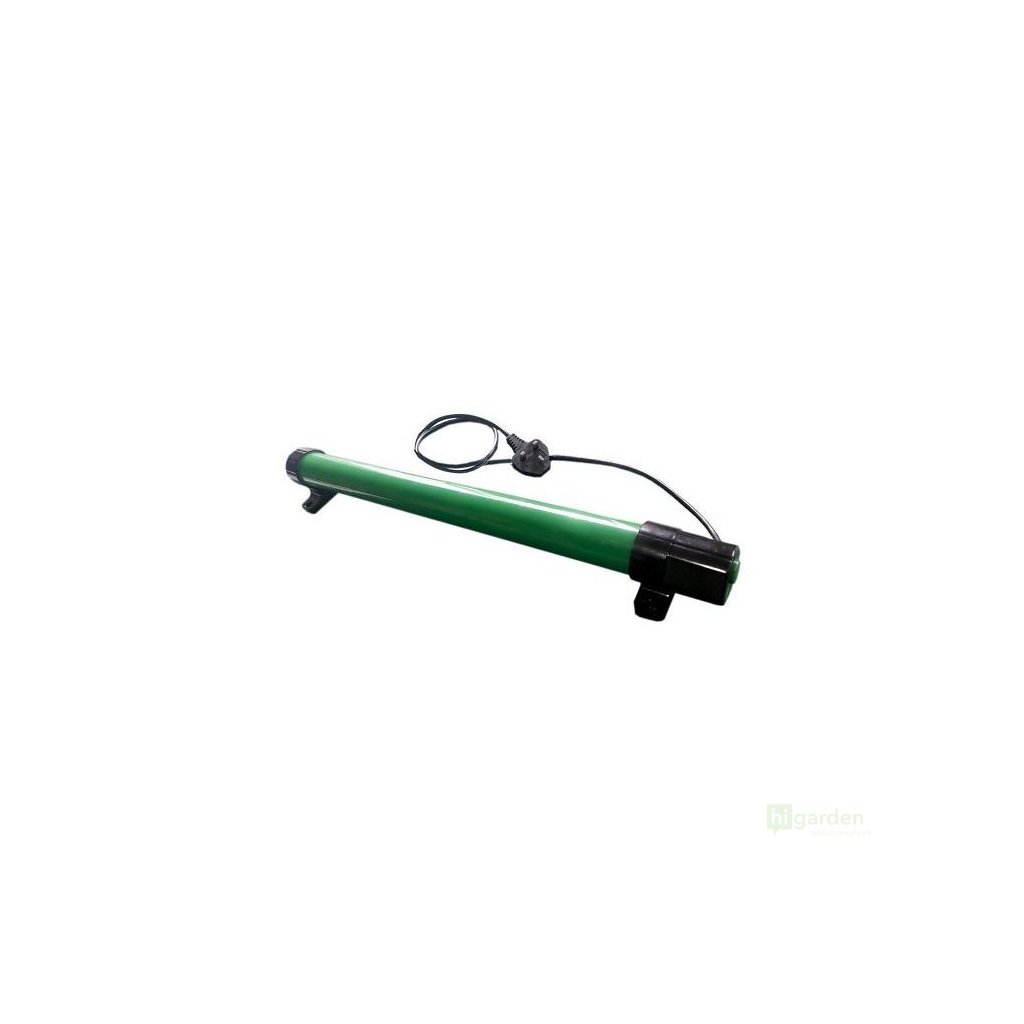
Heaters for the grow box: If insulation and the supply of warm air are not enough, consider getting a suitable heater. For grow boxes, tubular greenhouse heaters are particularly suitable, or hanging heaters. Most heaters are equipped with a thermostat, which keeps the temperature in the growing area stable. Heating the room in which the grow tent stands can also be a solution. Oil-filled or electric radiators are suitable.
Switch to another type of grow lighting: Modern LED grow lights stand out for their efficiency and therefore do not emit too much heat into the surroundings. Older grow lights using sodium discharge lamps (HPS) emit a considerable amount of heat, which can be an advantage in the winter months.
Whether you decide on insulation, moving the grow box, or investing in heating and new lighting, always keep in mind that a stable temperature is the key to success. For more tips and tricks on how to grow even in the winter months, visit our Higarden blog.
Light Spectrum and Its Effect on Plant Growth: Outdoor vs. Greenhouse vs. Indoor
Plant cultivation can take many forms, from traditional outdoor growing, through greenhouses, to indoor cultivation under artificial lighting. Each of these methods offers unique advantages, but also has some disadvantages. In today’s article, we will look at the differences in the light spectrum when growing outdoors, in a greenhouse, and indoors under LED grow lights.
Plants perceive light through photosensors called photoreceptors. Most of them are responsible for capturing light photons and converting them into energy during the process of photosynthesis. However, plants are also equipped with specialised photoreceptors that function differently from the others, do not always take part in photosynthesis, and some of them even detect light outside the visible light spectrum. These photoreceptors are important for plants because they affect circadian processes, developmental signals, gene regulation, and much more.
Different colours of light
To understand the light spectrum, it is important to realise that light is electromagnetic radiation, which can be characterised both as a particle (photon) and as a wave. Individual types of electromagnetic radiation are divided according to wavelength and the corresponding frequency. The term “spectrum” originally referred to the colour spectrum visible to the human eye (the colours of the rainbow), but over time other types of radiation were also discovered that people cannot perceive visually.
Visible light: The visible part of the light spectrum with wavelengths of 400-800 nanometres. The individual colours in the light spectrum are called spectral colours (red, orange, yellow, green, cyan, blue, violet).
Photosynthetically active radiation: PAR (photosynthetic active radiation) overlaps with visible light and refers to the range of light wavelengths (400 to 700 nanometres) that plants use for photosynthesis. Most LED grow lights include only photosynthetically active wavelengths.
UV: Ultraviolet radiation (400-10 nanometres) is dangerous for both people and plants, damages DNA, and can cause cancerous growth. Most UV radiation is captured by the Earth’s atmosphere, but a small amount reaches the surface.
Infrared radiation: Infrared radiation has a wavelength between 760 nanometres - 1 nanometres and is further divided into near-IR, mid-IR, and far-IR.
X-rays: X-ray radiation with wavelengths of 10 – 0.1 nanometres is used in practice thanks to its ability to penetrate a range of materials (radiography, CT). It has no significance for plant cultivation.
Gamma radiation: Radioactive radiation that arises during nuclear processes. It has no significance for plant cultivation.
Outdoor growing: All colours of light
It will probably surprise no one if we say that natural sunlight is the most complex and covers the widest possible spectrum. Plants grown outdoors are exposed not only to the visible part of the light spectrum, including photosynthetically active radiation, but also to infrared, UV, and other types of radiation. While the effects of extremely short or extremely long light wavelengths are not very well documented in relation to plants, some of the invisible wavelengths, such as UV and far-red radiation, can be crucial for plants, even though they do not affect photosynthesis.
Greenhouses: The absence of UV radiation
 Greenhouses can be made from various types of glass or even plastics, which may have different effects on the light passing through the material. In general, however, glass transmits most of the light spectrum, but naturally blocks a significant part of UV and lower-wavelength radiation. In this sense, greenhouses can be considered semi-permeable, and the absence of UV light can affect plants, for example in the production of terpenes or active compounds.
It is known that in some plants UV radiation stimulates the production of secondary metabolites. There are theories that such plants produce more of these substances because they act as natural protection against the destructive impact of UV rays on DNA. In addition, the unusual photoreceptor UVR8 has been discovered, which is directly activated by UV-B radiation and detects light with a wavelength of (280-320 nanometres). This photoreceptor consists of two UVR8 molecules, which separate after exposure to UV-B and become monomers, changing its function and leading to changes including increased stress resistance, gene function, and the development of the plant.
The absence of UV radiation does not threaten plants’ survival, but it can significantly affect how they cope with stress and pass through individual stages of life. For these reasons, some growers in greenhouses and indoors use special grow lights that enrich the light spectrum with UV-A and UV-B radiation.
Indoor: PAR tailored to plants
Most modern LED grow lights emit a standardised light spectrum corresponding to the wavelengths of PAR radiation (400–700 nanometres). Such a spectrum is more than sufficient for plants to thrive under artificial lighting, and under certain circumstances they may grow faster than they would outdoors or in a greenhouse. On the other hand, the spectrum of LED grow lights lacks not only UV, but also infrared light.
The amount of infrared light reaching plants grown outdoors or in a greenhouse changes throughout the day and year depending on the sun’s movement across the sky, because the angle at which light passes through the atmosphere changes. Plants use this fact to control their circadian rhythms and, thanks to specialised photoreceptors called phytochromes, they can recognise, for example, when it is time to start flowering. Therefore, when growing indoors under artificial lighting, plants may begin flowering a little more slowly (when switching to 12/12) than they would outdoors. As with UV radiation, you can also supplement the infrared spectrum in a grow room or greenhouse using supplementary lighting with an infrared spectrum.
Also read: Indoor growing: How to switch to flowering
Maxibright Daylight: A New Player on the Market with Highly Efficient LED Grow Lights
More and more people are taking up indoor growing under artificial lighting. Beginner growers usually do not want to start with large projects straight away and look for compact LED lights that are suitable for smaller grow boxes. In its range, the manufacturer Maxibright LED focuses precisely on energy-efficient and highly powerful LED grow lights. Can its range compete with established brands such as Lumatek or SANlight? We answer this in the following lines.
Daylight from Maxibright is a range of full-spectrum LED grow lights with dimmable LUMLED LED chips. These lightweight lights are available in 300 W versions (suitable for a growing area of 1 m²) and 200 W (area of 0.8 m²) and are ideal as a universal light source for plants in the vegetative growth stage, flowering, as well as for cuttings and germination indoors.
Main advantages of Maxibright Daylight LED lights
Unique construction: The optimal arrangement of LED diodes along the entire structure creates an even spread of light at a short distance from the tops of the plants, which allows sufficient penetration through the canopy without creating hot spots.
Passive cooling: The innovative passive heatsink naturally dissipates heat without the need for a fan. As a result, the unit is quieter and also significantly extends the life of the light, because it has no moving parts.
Full spectrum: The Daylight range uses a combination of white, red and far-red diodes to create a highly efficient light source that is very similar to natural sunlight. Older generations of LED grow lights used a combination of blue and red diodes, which was effective, but omitted parts of the spectrum 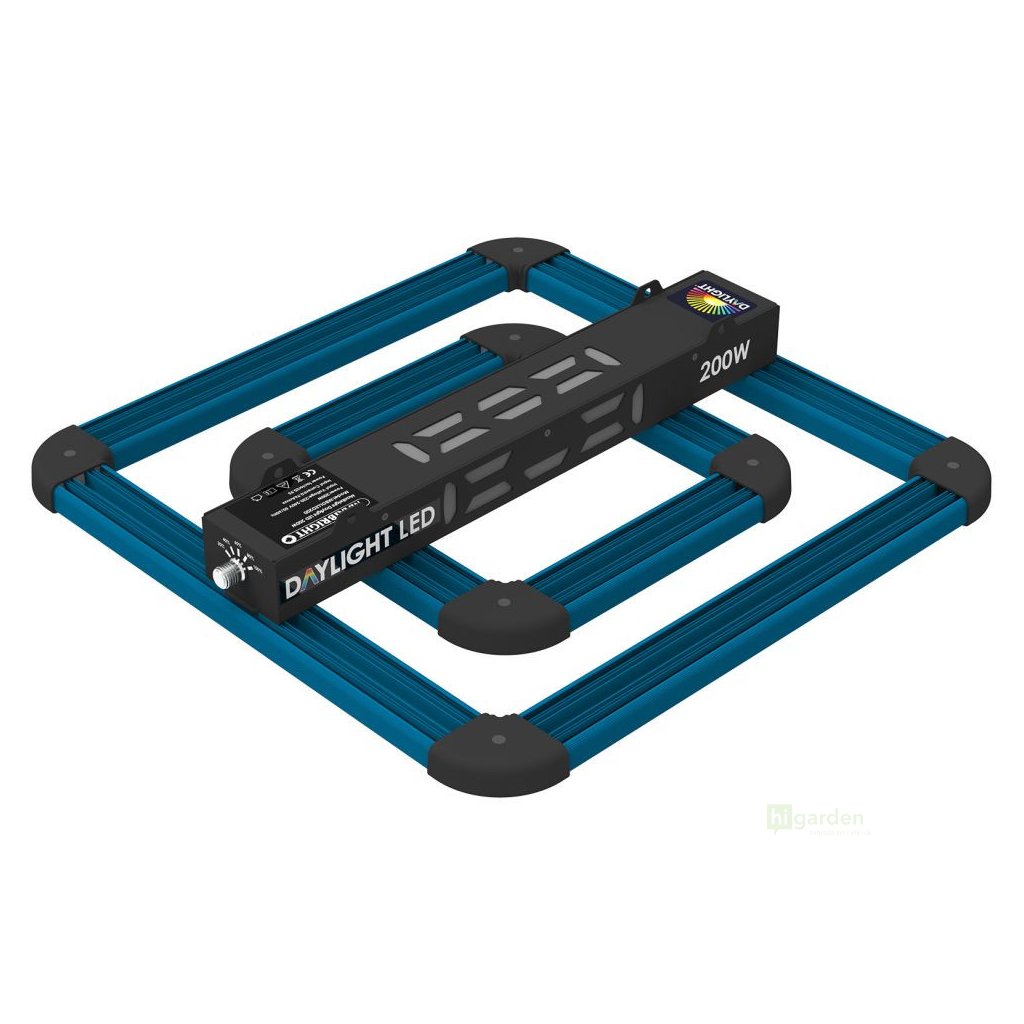 important for healthy plant growth, did not penetrate the canopy sufficiently and provided poor visibility in growing spaces.
Maxibright Daylight range
The basic Maxibright Daylight range includes two lights with input power of 200 W and 300 W, both with high efficiency of 2.3 µmol/J. Both units offer high PPF values (200 W – 460 μmol/s, 300 W 690 μmol/s) comparable to the most powerful LED lights available on the market. These lights also compare well with the competition in other parameters, such as service life (up to 50,000 hours of operation) or dimming capability.
Beginner growers and those looking for compact LED lights for smaller grow boxes at a reasonable price will especially appreciate the simplicity and efficiency of the Maxibright Daylight range. The 200 W model is ideal for a growing area of up to 0.8 m², while the more powerful 300 W version is suitable for an area of up to 1 m².
Maxibright Daylight PRO Full Spectrum range
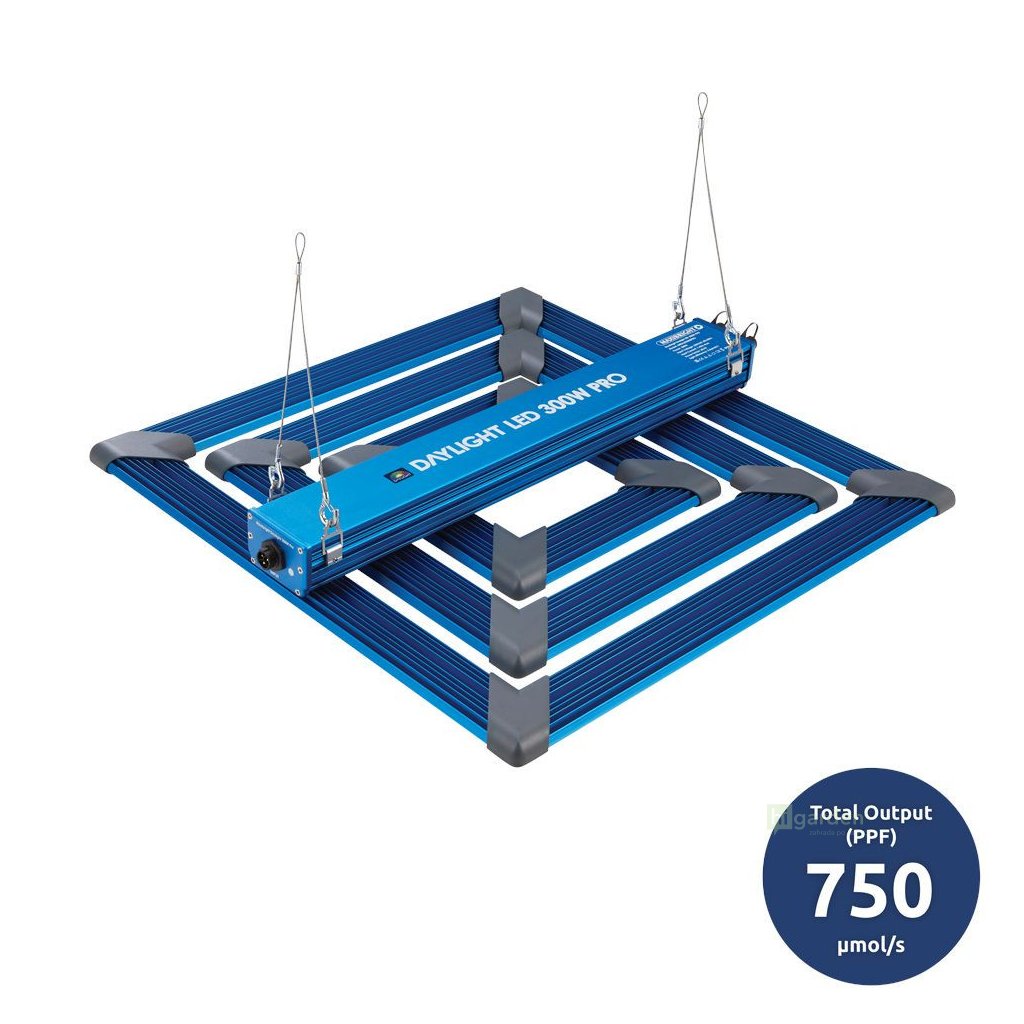 The more modern Daylight PRO Full Spectrum range is made using the latest generation of LUMLED diodes, which increase efficiency to 2.5 µmol/J, matching even the currently most powerful lights in the same category LUMATEK ATS PRO. The units also impress with high PPF values (200 W - 500 460 μmol/s, 300 W – 750 460 μmol/s) and even coverage.
Other improvements in the new range include IP65 protection, which means the lights have the highest level of protection against dust and are able to withstand splashing water. Of course, dimming is also possible, as is the installation of an external remote controller.
- Maxibright Daylight PRO Full Spectrum 200 W 2.5 µmol/J
- Maxibright Daylight PRO Full Spectrum 300 W 2.5 µmol/J
Although there are slight differences between the Daylight and Daylight PRO Full Spectrum ranges, we can recommend these LED grow lights with a clear conscience. Those of you who are just starting with indoor growing will appreciate the simplicity, efficiency and lower price of the lights from the Maxibright Daylight range. Maxibright Daylight PRO is the right choice for those aiming for professional results and those looking for lighting that is highly resistant to external influences.