
Measurement and automation
List of articles
How to Measure Electrical Conductivity (EC) Correctly?
The topic of this article is proven methods for measuring the electrical conductivity of a solution, a value that plays a very important role especially in indoor plant cultivation. If you are interested in how to use EC metres, or EC/TDS probes, or how to care for them properly so that your measuring instruments last as long as possible, you are in the right place.
If you would first like to learn what EC actually is, you can start with a separate article: Electrical conductivity of a solution – EC. In practice, this means determining the amount of mineral (“nutrient”) salts dissolved in the nutrient solution.
Measuring EC frequently and accurately is an indispensable part of plant cultivation not only in a growbox. Many beginner growers then wonder what the difference is when measuring between EC (the measured value stated in μS/cm) and TDS (the measured value stated in ppm). The difference lies only in the fact that from the TDS value (Total Dissolved Solids) you can read the total amount of dissolved solids in ppm units.
EC metres and their calibration
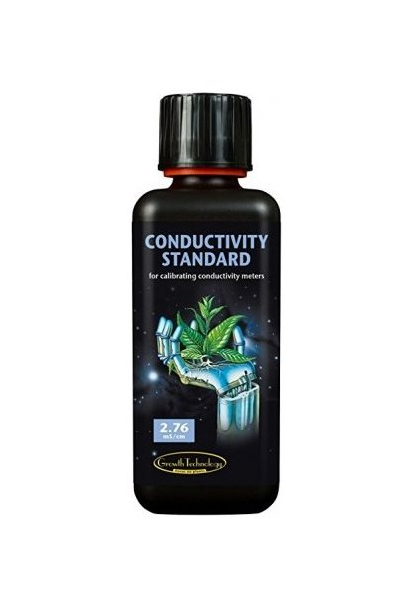
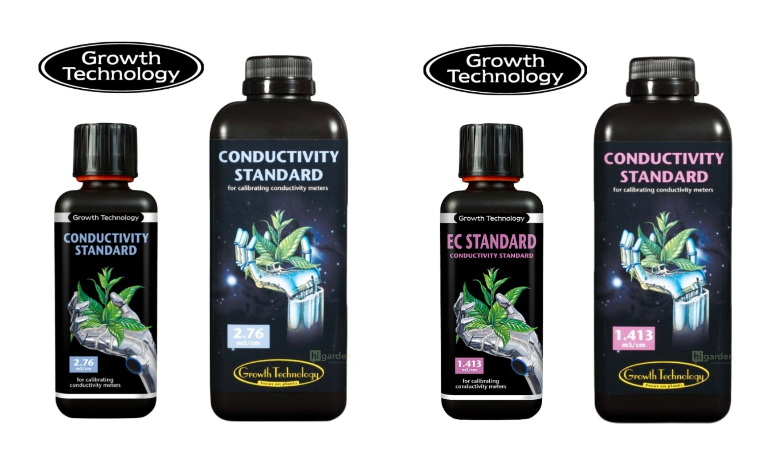
EC calibration solutions are available in 1.413 mS and 2.76 mS variants. However, do not be misled by the 2.8 mS or 2.77 mS variants either, which are equivalent to 2.76 mS solutions and the only difference is rounding.
How often should you calibrate an EC metre?
The answer here is straightforward. To ensure maximum measurement accuracy, the electrodes should ideally be calibrated using the above calibration solutions before each use. If the probe is used on a daily basis, it should also be calibrated every day.
And now we come to further proven methods for measuring conductivity:
- Always use a fresh calibration solution! In other words, calibration standards are easily contaminated and, moreover, they do not have buffering capacity, so there is no point in trying to use them repeatedly.
- Before you start calibrating, rinse the probe with deionised water (see separate article: Reverse osmosis). Only then can you safely immerse the probe in the calibration standard. For even more accurate measurement results, prepare a second separate beaker with calibration solution or sample for rinsing in advance. Proper rinsing of the electrode with deionised water is truly very important. Accumulated salts and other residues can contaminate solution samples and cause inaccurate readings. Therefore, rinse the probe every time you remove it, before storage, or when measuring conductivity of different samples in multiple beakers.
- Plastic beakers are generally recommended because other materials, such as glass or metal, cause electromagnetic interference with the measured electrical conductivity.
- Correct placement of the electrode in the beaker means the same distance from the beaker wall in all directions.
- Also make sure that the electrode is sufficiently immersed. Otherwise, you will only get distorted results when measuring conductivity. Therefore, check that all openings are actually below the surface and that there are no bubbles between the sensors.
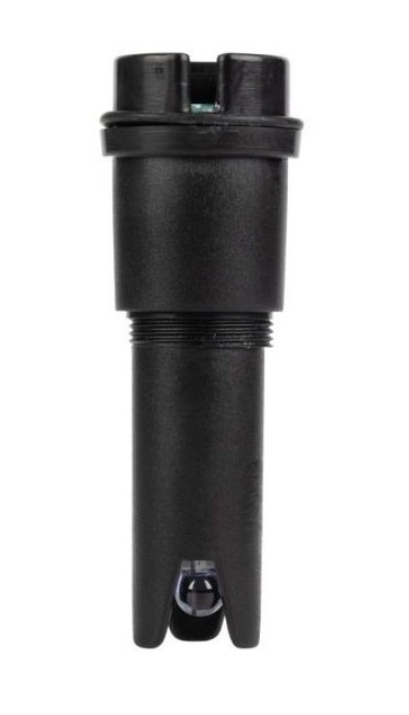
Example of a replacement electrode for an EC metre.
- Check for air bubbles, because air may remain trapped in the body, or on the body, of the electrode even when it is immersed, causing inaccurate measurement. If you notice air bubbles, immerse the probe sufficiently and move it up and down. You can then release any bubbles from the openings by gently tapping it.
- Although electrodes usually have so-called temperature compensation, bear in mind that it takes them some time to reach thermal equilibrium, so always wait until the measured conductivity or temperature value stabilises.
- Choose the appropriate type of electrode, because not all electrodes are suitable for the given range or sample. Sometimes, when selecting a measuring device, the suitable range as well as chemical compatibility may therefore matter. For certainty, you can always consult us (see below).
- In addition to frequent calibration, regular cleaning is also a prerequisite for ensuring the longest possible service life and proper functioning of every EC electrode, although this is often underestimated. This is despite the fact that deposits can accumulate in the electrode section as well as on the vent openings of the probe, which is a common cause of calibration problems and inaccurate measurement results. So how should you clean the electrode properly? A proven method is to use warm soapy water, with which you thoroughly rinse the electrode. Do not use chemical cleaning solutions or solvents.
Some multifunction measuring instruments use so-called combined electrodes, and we discuss their proper storage at the end of a separate article entitled: What is the storage solution (KCL) for? For proper storage of the EC electrode, it is essential that in the case of a combined EC/pH electrode, improper storage may cause the electrolyte to dry out undesirably. Sometimes dried-out probes can be regenerated by immersion in storage solution for pH.
If you are interested in working with pH metres, we have also prepared a separate article for you: How to use calibration solutions and pH metres?
If you would like to ask us anything, not only about the correct measurement of conductivity, we will be happy to advise you, for example at the well-known e-mail address info@higarden.eu.
We also recommend these products:
- Measuring sets
- Replacement probes for pH and EC metres
- Aqua Master Tools P160 PRO, pH and EC/TDS/PPM metre and thermometer
What to read next:
- Hydroponics – what does it involve and how do you start?
- Do you know what VPD is? Discover the key to perfect conditions for plant development
- ONA Block: solid odour absorber
How to Use Calibration Solutions and pH Metres?
Quality pH metre is a very useful and at the same time the most accurate available tool for testing pH values, which tell us whether a given solution reacts acidically or, conversely, alkalinely. To be able to rely on the accuracy of your pH metre, it needs to be calibrated often enough. For this purpose, calibration solutions are used, which not only help you ensure correct measurement results, but also extend the service life of metres.

Calibrate often
First of all, it should be emphasised that there is no universal answer to the question of how often to calibrate a pH metre. Every manufacturer has a slightly different device, and therefore also a different procedure. We therefore always recommend reading the manufacturer’s instructions for use carefully. That is the best start. It also depends on the required measurement accuracy, which determines the calibration frequency. The ideal situation is calibration every day, or before every measurement.
Preparing the pH metre for calibration
- Switch on the pH metre.
With the first point, we again return to the importance of the instructions for use for every instrument for measuring pH. Among other things, it tells you the exact time needed to warm the device up to the ideal operating temperature. After you switch on the pH metre, it usually needs half an hour to warm up. Only then can you begin calibration and subsequently start using it.
- Clean the electrode.
Remove the electrode from the storage solution and then rinse it with distilled water under an empty waste beaker. Sometimes the electrode is extra dirty. In these cases, the manufacturer’s manual should again provide you with a safe solution. After rinsing, dry the electrode carefully with a cleaning wipe. Try to avoid excessive rubbing of the electrode, which has a very sensitive membrane around it. Do not forget that you need separate containers for rinsing and calibrating the pH metre (i.e. waste and calibration).
- Prepare a pH calibration solution, also known as a buffer.
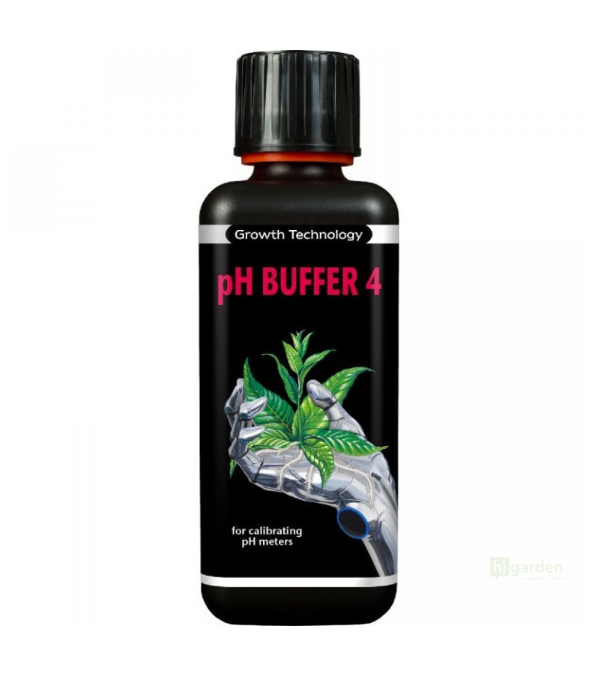
For calibrating a pH metre, you will usually need more than one buffer. To ensure proper operation of the pH metre, two buffers are usually used, because two different concentrations have different results. The first will be a “neutral” buffer with pH 7. The best-selling one is Growth Technology pH BUFFER 7. The pH value of the second calibration solution should be close to the expected pH of the sample. That means either pH 4 or pH 9.21. Buffers with a higher pH (9.21) are best for measuring alkaline solutions, while buffers with a low pH (4) are best for measuring acidic samples. Given that the correct pH of the substrate ranges between 6.5–7.0 and in hydroponic growing the optimal value is usually even lower (between 5.5 and 6.5), as a grower you will be interested only in the first of the two mentioned options, for example again the most popular one from Growth Technology. The procedure in which you use two calibration solutions for calibration at pH 7 and pH 4 is called two-point calibration, which is more accurate than one-point calibration (only at pH 7).
pH values depend on temperature. Make sure, therefore, that the buffers reach the same temperature as the pH metre. Then pour the buffers into the individual calibration beakers. The buffers should be kept in the calibration beaker for a maximum of two hours.
Calibrating the pH metre
- Place the electrode into the pH 7 buffer and start reading.
Press the “measure” or “calibrate” button and start reading the pH as soon as the electrode is immersed in the calibration solution. First wait until the pH value stabilises (1-2 minutes).
- Set the pH.
Once you have a stable reading, set the pH metre to the buffer’s pH value by pressing the measurement button a second time. Setting the pH metre after the reading has stabilised allows for more accurate and refined readings. Stirring the buffer before measuring is not necessary, but if you do, remember to stir all other buffers and samples in the same way.
- Rinse the electrode with distilled water and dry it.
Gentle drying of the electrode is again made easier by a lint-free cleaning wipe.
- Place the electrode into a suitable buffer for the sample and start reading.
As soon as the electrode is placed in the buffer, start “reading” the pH value by pressing the measurement button.
- Set the pH a second time.
Once the reading stabilises, set the pH metre to the same pH value as the calibration solution by pressing the measurement button.
- Rinse the electrode.
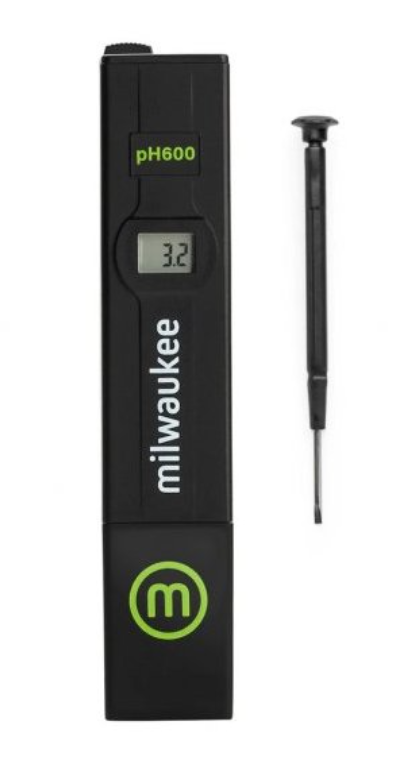
Correct use of the pH metre
- Place the electrode into the sample and start the measurement process.
As soon as the electrode is placed in the sample, press the measurement button and leave the electrode in the sample for approximately 1-2 minutes.
- Set the pH value.
Once the reading stabilises, press the measurement button. This is the pH value of your sample!
- Clean the electrode after use.
Rinse the electrode with distilled or deionised water. You can also carefully dry it with a lint-free cleaning wipe. In practice, however, it is recommended to only blot away excess water droplets with a cleaning wipe. Using a regular wipe could create a static charge that interferes with the electrode reading.
What are the other best practices when measuring pH?
- Regular electrode cleaning: Use high-quality cleaning solutions for pH electrodes to prevent incorrect calibration and measurement, as deposits gradually form on the electrode during pH measurement, covering the measuring glass.
- Check the electrode from time to time: Inspect whether it is damaged, as the sensitivity of the glass decreases over time. Even the slightest damage to the electrode results in incorrect measurement, so pay proper attention to its condition.
- Full electrolyte level: Electrolyte flows out through the ceramic bridges continuously. Inaccurate measurement can also be caused by a low electrolyte level, although this does not apply to non-refillable electrodes. It is recommended to ensure that the electrolyte level is at most 1 cm below the tip of the electrode.
- Correct immersion of the electrode: Always make sure that not only the sensing glass, but also the electrode’s reference bridge, is properly immersed in the electrolyte. If this is not the case, simply add an adequate amount of sample to the beaker so that the electrode is completely submerged.
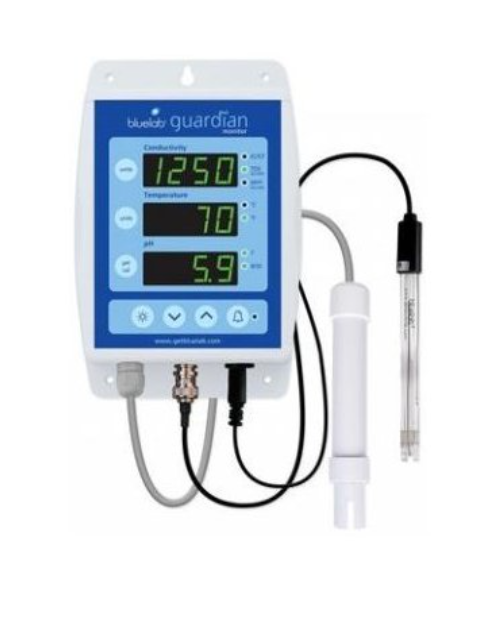
In most cases, the more sophisticated the pH measuring device you have, the more convenient and simpler its calibration is. One example is the combined pH/EC Bluelab Guardian Monitor, which has a practical button for pH calibration.
In addition to pH calibration solutions, EC calibration solutions are also used. Customers usually prefer EC calibration solutions CONDUCTIVITY STANDARD from the brand Growth technology or solutions from the traditional company Milwaukee. It should, however, be said that while some pH metres need to be calibrated practically every day, the consumption of EC calibration solutions is significantly lower, because EC metres last quite a long time without calibration, unlike pH metres, and some more advanced EC monitors do not need calibration at all.
If you need any further information regarding calibration solutions and pH metres, we will be happy to provide it, for example via the well-known e-mail address info@higarden.eu. We look forward to your questions!
We also recommend these products:
- Aqua Master Tools P110 PRO, pH and EC metre and thermometer
- Milwaukee KIT - Martini pH55 + EC60
- Torus Hydro perfectpH capsules
What to read next:
How to Use EC Metres in Hydroponics and Growing in Soilless Substrates
In hydroponic and soilless growing systems, mineral nutrients are the only source of nutrients for plants, and their precise dosing is crucial for proper metabolism and root development. Electrical conductivity (EC) is a quick and reliable method of determining the concentration of dissolved salts in the nutrient solution and substrate. In this article, we will look at the principle of measurement, common grower mistakes, and the correct use of EC metres in practice.
Indoor growing is not free, so most growers try to ensure that their plants make the most of the energy from grow lighting. In an ideal case, the conditions in the grow room are set so that plants in full growth receive light all day long that corresponds to the midday sun on a summer day. For plants to convert this energy into growth and the production of metabolites, their nutrition must match it as well. The only way to dose highly effective mineral fertilisers used in indoor growing accurately is to measure the concentration of dissolved salts in the irrigation water and growing medium precisely.
What EC means and why it is important for growers
EC (electrical conductivity) is a quantity that expresses the electrical conductivity of a solution. Growers measure the EC of the nutrient solution to find out how many nutrients it contains in the form of mineral salts. The unit of EC is µS/cm2 (microsiemens per square centimetre), and the higher the EC value, the more concentrated the solution is. Tap water contains small amounts of dissolved calcium, magnesium, sodium and potassium, which increase its EC. It is extremely important to know the EC of the water you use to prepare the irrigation solution. The more dissolved salts tap water contains, the less fertiliser you can add to it. Too high a concentration of mineral salts can burn plants. Tap water usually has a value of around EC 0.3 µS/cm2, but in some regions it may be higher. Water with an EC above 0.5 µS/cm2 is not suitable for watering, and it is better to remove the minerals first using reverse osmosis.
Approximate EC values for different growth stages
- Seedlings and the beginning of the vegetative phase – EC 1.0– 1.5
- Peak vegetative phase – EC 1.5 – 2.0
- Peak flowering – EC 2.0 – 2.5
- Ripening – EC 1.5 -2.0
How to measure EC
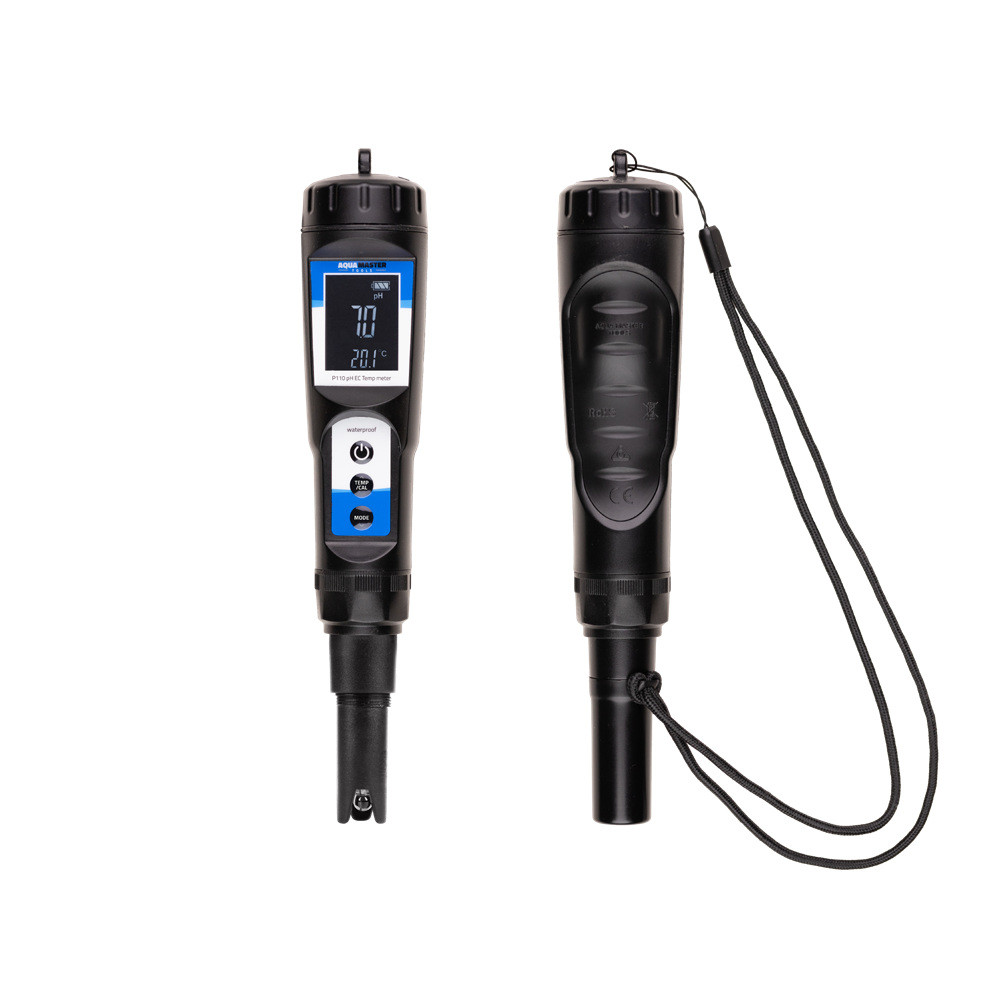 Electronic EC metres are used to measure EC, and they usually take the form of a digital pen with a measuring probe at the tip. Reading the values takes only a few seconds, and some devices also measure the temperature or pH of the solution. The method and frequency of measurement will vary depending on whether you are growing hydroponically or in soilless substrates.
Measuring EC in hydroponic systems
When growing hydroponically, measure the EC of the nutrient solution at least once every two days. First top up the tank with clean water, measure the EC, and then add fertilisers to raise the EC to the required value. A common problem for beginner growers is fluctuations in the EC of the nutrient solution flowing through the hydroponic system. This is usually caused by the nutrient solution tank being relatively small compared with the amount of water the plants use. If this is also your case and you have to top up the tank too often, look for a larger one.
Measuring EC in soilless substrates
When growing in coco, rockwool and other soilless substrates, EC does not fluctuate as quickly as in hydroponics, and measurements only need to be taken roughly once a week.
- Before measuring, water the plants in the usual way. A few drops of water should drain from the bottom of the pot after watering.
- Leave the pots to stand for one hour.
- Place a tray under each pot and water with 150–350 ml of distilled water, depending on the volume of the growing container.
- Wait a few minutes for the leachate to drip into the tray, then measure it with the EC metre.
Remember that the EC of the substrate will be slightly higher than the EC of the irrigation water, due to salt build-up in the root zone. However, if you measure a significantly higher EC in the substrate than in the nutrient solution, the plants are at risk of overfertilisation. If you want to reduce the EC of the substrate, flush the pots with clean water with adjusted pH until approximately 30% of the volume runs out of them.
OUR TIP: Would you like to make measuring the EC of the substrate around the root zone easier? Try the Aqua Master Tools EC metre with a sodium probe for substrate!
You may also be interested in: Tips for measuring EC
Care for EC metres
EC metres are essentially laboratory equipment and, as such, require proper handling and care. Without regular calibration and careful hygiene, even the best EC metre will not measure correct values. After each measurement, the probe must be rinsed with clean water so that salt residues from the nutrient solution do not dry on and affect the next measurement. For this purpose, we recommend using distilled water, which contains not even trace amounts of minerals.
EC metre probes need regular calibration. Ideally, the device should be calibrated before each use, although once a week is sufficient. When calibrating, follow the manual, which will also tell you which type of calibration solution to use. Use a fresh calibration solution each time you adjust it, pouring some into a cup so that the rest in the bottle does not become contaminated.
It is true that even the most expensive EC metre will not last forever and will need replacing. The disadvantage of cheaper devices is that only the probe cannot be replaced. So if you are serious about growing, it is worth looking for an EC metre with a replaceable probe, which will last much longer with good care.
For more advice and tips for beginner and experienced growers, and industry news, follow our Higarden blog for growers.
Top 5 Must-Have Gadgets for Indoor Growing You Shouldn’t Be Without
Indoor cultivation is an art that can take many years to master. While you can learn the basics from books, some tricks you have to discover for yourself or pick up from more experienced colleagues. We asked seasoned growers what must not be missing from their equipment, and we have also selected five of the best tips for you that will take your cultivation to a higher level.
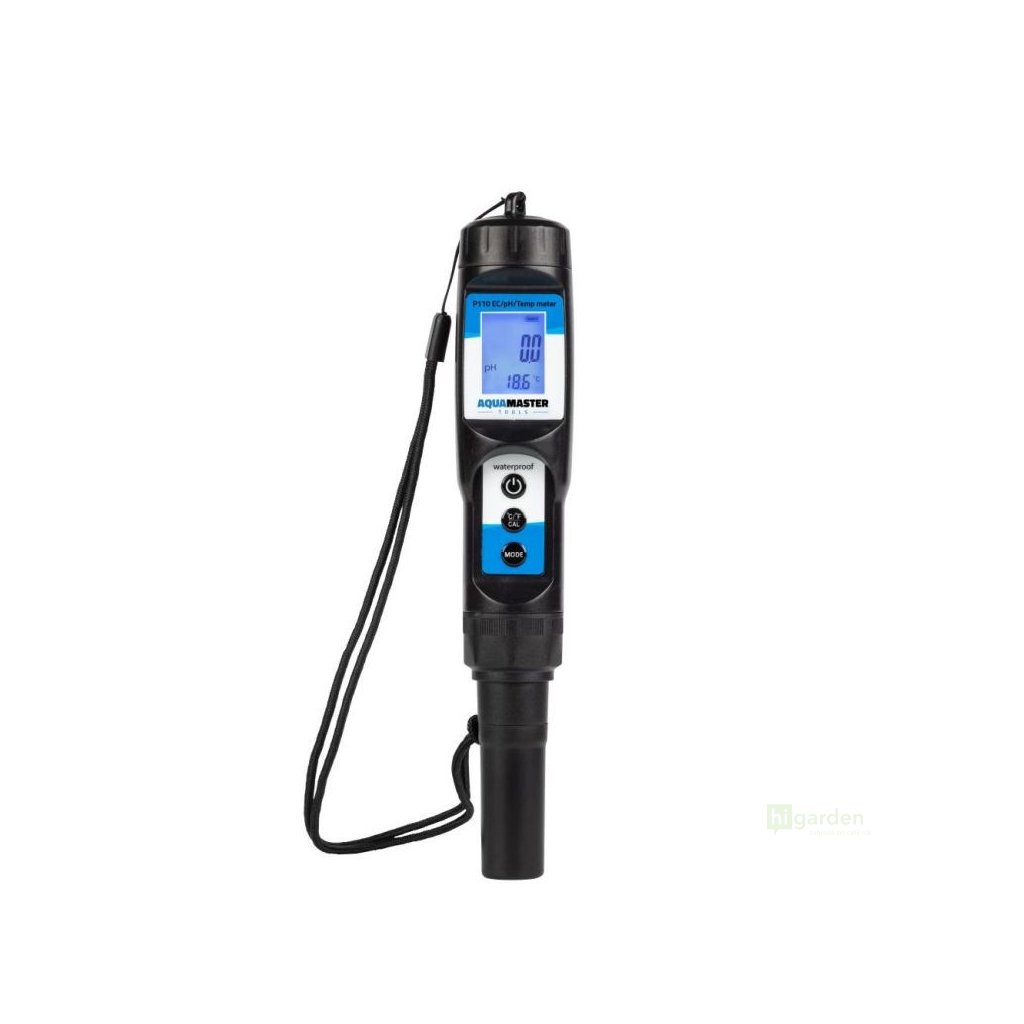
pH and EC metre – When cultivating indoors, it is very important to pay attention to the quality of the water you use to water your plants. pH metres are used to check the acidity of the nutrient solution, which affects the plants’ uptake of nutrients. An environment that is too acidic or too alkaline prevents plants from taking in important nutrients. An EC metre (conductivity metre) is indispensable for correct fertiliser dosing. With this device, you can find out how many dissolved salts (nutrients) the water contains. Investing in a pH and EC metre will save you a lot of trouble and money. Incorrect pH or overfeeding with mineral fertilisers can easily deprive you of the entire harvest.
You may also be interested in: What you need to know about the water you use for watering

Heating – A stable and controlled temperature is the key to high yields when cultivating indoors. A large difference between night and day temperatures, or a temperature that is a few degrees lower, affects plant metabolism and, above all, how quickly they absorb nutrients. Tube heaters are especially useful in the winter months, but you will also use them to balance temperature differences when the lights are off and when they are on.

Dehumidifier – Excessive humidity in the growing space is a common source of problems indoors. Mould and many pests thrive in a humid environment, and plants cannot transpire sufficiently. Dehumidifiers are especially useful in the second half of the growing cycle, when plants consume large amounts of water and at the same time need a drier environment for ripening.
You may also be interested in: Advanced climate control – VPD and transpiration

Support nets – Less experienced growers often misjudge how much their plants will grow after switching to flowering. By the time the tops are almost brushing the grow lights, it is often too late to bend or trim the plants. In the best case, overgrown plants can mean losing the best part of the harvest; in the worst case, there is a risk of fire. That is why our sales staff often advise customers to buy a support net with their new grow box, which gives the grower greater control over plant growth. Support nets also serve as support for ripening tops weighed down by flowers.

Sprayer – Many growers regularly mist plants with water or treat them with preventive sprays. If you are just starting with indoor cultivation, then the idea of regularly treating your little garden with a small hand sprayer may not seem like much hard work. Experienced growers, however, know that investing a few hundred crowns in a quality pressure sprayer pays off many times over in saved time and effort.
Are you only just starting to grow and looking for tips on basic equipment? Take a look at Buying a grow box from A to Z and at other articles on the Higarden blog, where you will find everything about indoor cultivation under artificial lighting.
Aqua Master Tools - digital measuring instruments from the Netherlands
One of the basic prerequisites for an excellent harvest when indoor growing of plants is precise measurement, for which growers mainly use digital measuring instruments. The brand Aqua Master Tools, which has been active on the market for the fourth year, has been receiving excellent feedback from users thanks to the quality and reliability of its products, practically since the beginning of its market presence. In this article, we will therefore focus both on the most important features that characterise the individual Aqua Master Tools combined metres, and on their practical use in specific devices.
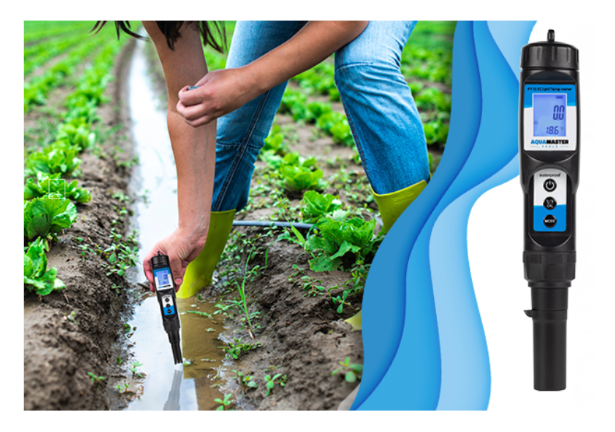
So what makes these pH metres, EC metres and thermometers in the form of compact devices for measuring acidity, electrical conductivity or temperature truly exceptional? And why are they selling more and more as measuring instruments for growers? Growers of varying experience who are involved in hydroponics, as well as other cultivation techniques, appreciate not only the high level of accuracy, but also the overall build quality and the long service life associated with it, as well as the comfortable use in everyday growing routines.
In all these respects, the relatively young, progressive Dutch company Aqua Master Tools, which has been producing complete products since 2018, has brought growers focused on results new and affordable options, thanks to which you can keep cultivation processes under control without having to unnecessarily purchase a range of additional devices and batteries. This saves you time and energy, and also ensures that by the end of the growing cycle you will be harvesting with a smile exactly the crop you have dreamed of!
In addition to enriching our range with the specific new products from this Dutch manufacturer listed below, we also prepared the following separate articles some time ago so that your pH and EC metres, whether from Aqua Master Tools or another manufacturer of measuring technology for growers, would serve reliably for as long as possible and always display the correct values. We recommend reading:
- How to use calibration solutions and pH metres?
- What is the storage solution (KCL) for?
- How to measure conductivity correctly (EC)?

Why choose pH and EC metres from Aqua Master Tools?
- A wide selection of affordable products depending on what you will measure and how often.
- User-friendly and pre-calibrated devices with modern software and batteries, enabling fast and accurate measurement.
- Versatile use from liquid plant nutrition through aquariums and ponds to swimming pools or hot tubs. Suitable for growers involved in hydroponics as well as growing in coco or traditional growing in soil.
- Clear instructions for the use and calibration of each model (see below).
- Above-standard warranty. The manufacturer (AMT) provides a warranty that is twice as long as usual. Why most manufacturers provide only a six-month warranty can be read in the article on calibration solutions (see above).
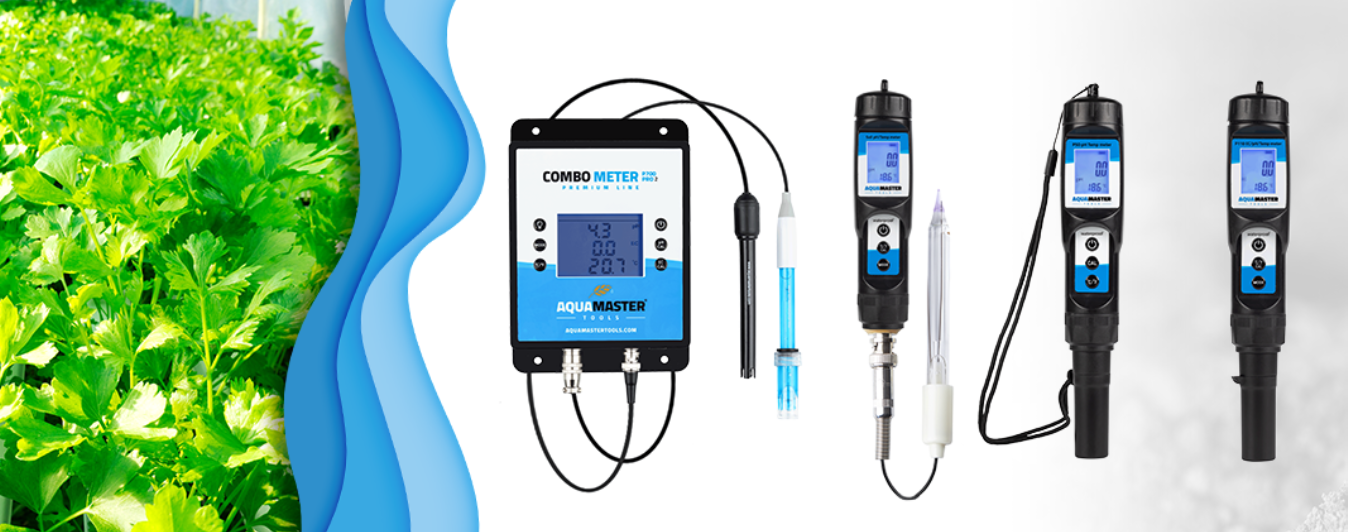
We will now introduce the individual variants, from the basic ones to the unique “COMBO” model. For each device, you can simply click through via its name (for example AMT E50 Pro) to the detailed product description, where you will also find instructional videos from the manufacturer in addition to detailed information.
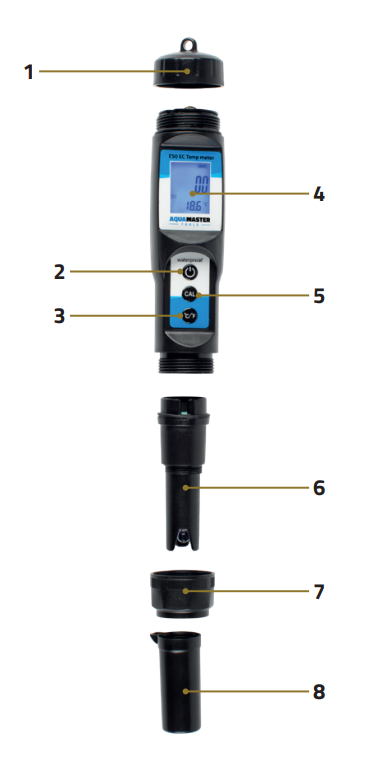
- Aqua Master Tools E50 Pro - digital EC metre and thermometer is the ideal helper for measuring the EC of the nutrient solution and the water temperature in the tank (see Why and how to maintain a stable temperature of the nutrient solution?). As you can see in the picture, the device consists of a top cap (1), an on/off button for switching on and off (2), a C/F button for switching temperature units (3), a clear display (4), a CAL calibration button (5), a replaceable electrode / probe (6) and a lower screw cap (7), followed by a protective cover (8).
- Aqua Master Tools P50 Pro is, at first glance, indistinguishable from the model above, as it is made from the same parts and the price tag is similar in both cases. The obvious difference between the two models, however, is that the P50 Pro probe is designed for measuring pH instead of measuring the electrical conductivity of the solution. It is therefore a digital pH metre and thermometer in one.
After the basic but exceptionally reliable devices for separate measurement of EC, or pH with liquid temperature, it is time to combine everything together! The following variants give not only growers this very option:
- Aqua Master Tools Combo Pen P110 Pro already represents a comprehensive solution for measuring the most important values, namely EC, pH and temperature, with improved software that means even faster readings. The robust casing again consists of the parts listed above. The combined digital measuring pen is supplied fully pre-calibrated, just like the basic variants, and includes a set of three button batteries.
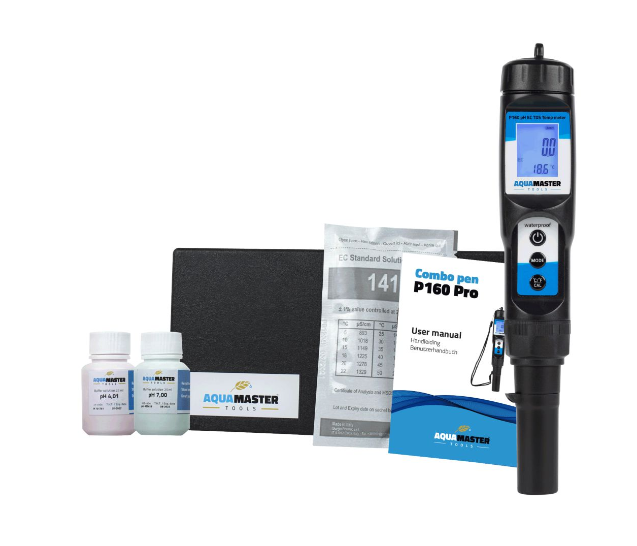
- Aqua Master Tools P160 Pro costs only a little more than the previous model, yet it is a combined digital metre that is ideal not only for pH, EC and temperature, but also for measuring TDS and PPM values. As you can see in the picture, this fully pre-calibrated device is supplied including the necessary buffered solutions for later calibration and other accessories (see the detailed product description). A major advantage of this model is then analogue EC calibration, thanks to which it is not necessary for the calibration solution to have an exactly specified temperature (25 °C).
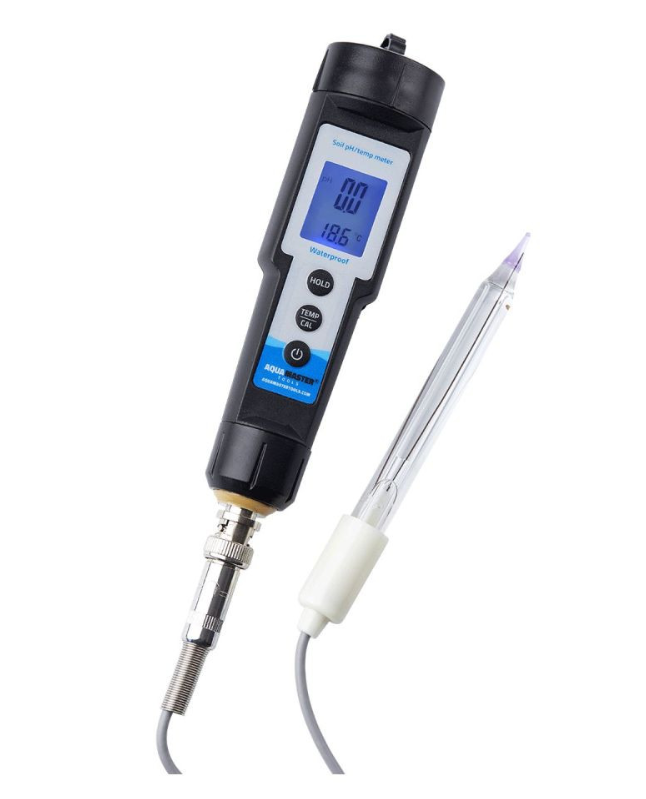
- Aqua Master Tools S300 Pro - while up to now we have shown modern devices for measuring important values in liquids (nutrient solution, water, etc.), this waterproof model stands out especially in growers’ eyes for its ability to measure, in addition to liquids, pH and the temperature of soil or coco substrate. The replaceable probe (electrode) of unprecedented quality features a BNC connector.
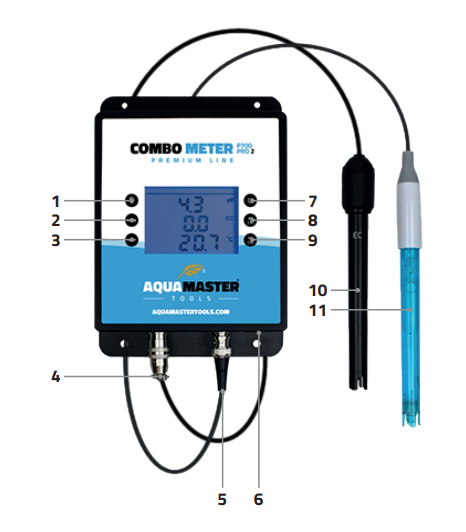
- The most technically advanced high-tech new product from Aqua Master Tools is the model designated P700 Pro 2. It is a combined digital metre for pH, EC, CF, PPM and nutrient solution temperature, which has two probes. It is perfectly suited for long-term use with low maintenance requirements and is equipped with an integrated rechargeable battery. The robust design is dominated by a large display on which all necessary values can be easily read. What this device consists of can be seen in the picture: 1. Light on/off button, 2. Mode button, 3. Celsius/Fahrenheit button, 4. EC electrode port, 5. pH electrode port, 6. USB port, 7. On/off button, 8. pH CAL button, 9. EC CAL button, 10. EC electrode, 11. pH electrode.
We have already referred you above to articles in which you will learn, among other things, how to extend the service life of the probe to the maximum. However, once the probe reaches the end of its service life, you will also find replacement probes (electrodes) for Aqua Master Tools pH and EC metres with us. We also recommend the original Aqua Master Tools calibration solution EC 3.0 directly from the manufacturer.
If you would like to ask us anything, please do not hesitate to write to us at the well-known e-mail address info@higarden.eu so that we can make your choice as easy as possible. We look forward to your questions!
We also recommend these products:
- Growth Technology KCL storage solution, 300 ml
- Growth Technology pH 7 calibration solution
- pH 4 calibration solution
What to read next:
- Electrical conductivity of solution - EC
- Why and how to maintain a stable temperature of the nutrient solution?
- Torus Hydro perfectpH: a revolutionary pH stabiliser
TechGrow timer: a whole different league of switching!
Are you looking for the perfect water pump timer? The Dutch manufacturer raised the bar in irrigation timing to a completely new level when it launched innovative digital second and interval irrigation timers for exceptionally reliable, precise and user-friendly switching. In this article, you will learn what these perfected digital timers from the Netherlands can do, and we will also explain the differences between the individual variants.
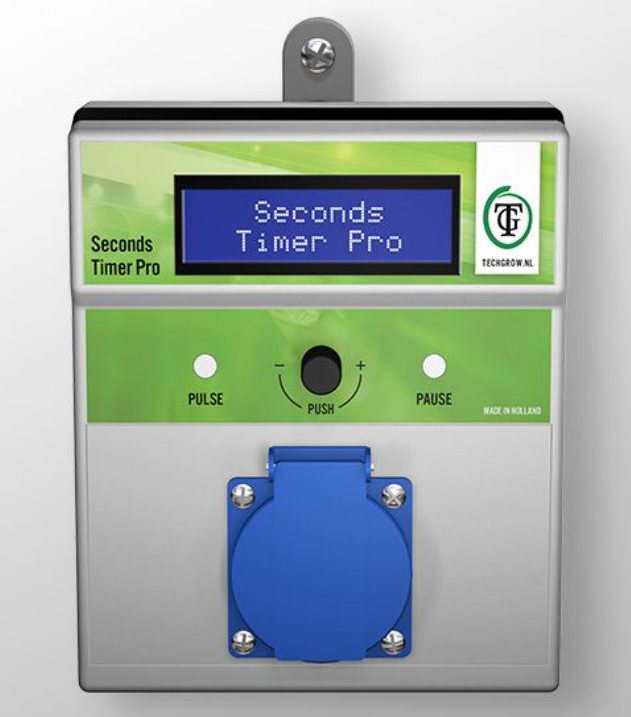
To begin with, it is important to highlight the fact that, especially with regard to the advanced technical solution and top-quality workmanship, all TechGrow timers are available at a very favourable price. Not to mention that truly reliable modern timers are associated with further energy savings.
TechGrow second and interval timer
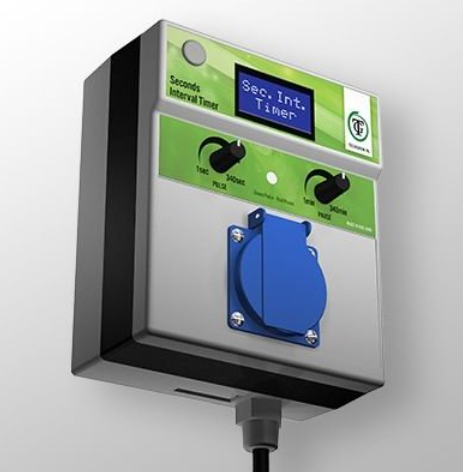
This is the cheapest variant from the trio of digital timers from the Techgrow brand, ideal for efficient water distribution. It stands out from other digital timers mainly thanks to its built-in light sensor. What are its advantages?
- You can choose whether you want to use the timer only during the day, only at night, or for the full 24 hours. This means you can choose from 3 modes straight away.
- You can just as easily switch the sensor off as on, depending on current needs.
- As soon as you switch off the light sensor, the timer automatically operates in interval mode indefinitely.
These digital timers allow a greater number of settings for the required switching intervals, and with exceptional precision. For example, for timing a pump, this function is truly invaluable.
The number of switching moments is not limited in any way. The range for setting the period during which the timer is on or off, which can also be set in seconds for the on function, is as follows:
- On time is adjustable in the range of 1 – 340 seconds.
- Off time is adjustable in the range of 1 – 340 minutes.
This makes it easy and efficient to set ideal intervals for switching on and off, for example 120 seconds on / 100 minutes off.
This second and interval timer is protected by a 6A fuse. In practice, you will certainly also appreciate the LCD display, which gives you an immediate overview of the current status of the timer. LED indicator shows when the timer is active.
To the second! That is exactly how these professional timers can switch various growing electronics on and off, such as circulation pumps, duct fans or other ventilation equipment or even powerful artificial plant lighting.
As with the previous variant, here too we find an LED diode indicating whether the device is currently active. However, the clear LCD display is twice as wide so that you can comfortably and fully use the extensive menu, which allows easy programming of switching times on a weekly, daily or weekend basis. The fourth option is to programme the timer for half of the week. The programmed cycle then repeats continuously until you set a new programme. The menu of this innovative digital controller offers a total of 50 switching times for setting. You can therefore set up to 25 on and 25 off times.
Right at the beginning of this article, we mentioned an important aspect not only of indoor plant cultivation, namely the economical operation of mutually cooperating growing technology. The display backlight therefore switches off automatically after one minute.
In addition to reliability, precision and variability in terms of setting individual programmes, these digital timers also impressed us with their intuitive operation, which will suit enthusiastic beginners, but experienced users will of course appreciate it too. One press and a turn of the knob is all it takes! The smart software takes care of everything else for you.
It is also worth highlighting the extra-heavy relay with an above-standard capacity of 10 A. That is, after all, why these timers can easily handle even powerful growing electronics such as LED lamps.
TechGrow Pro second timers are also supplied with a spare 10A fuse, which you can replace in no time.
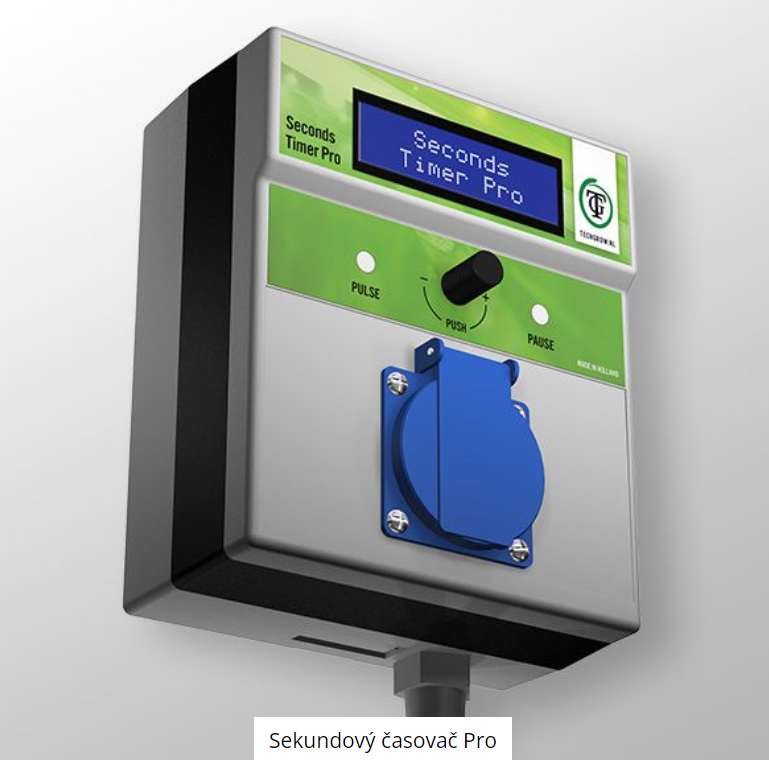
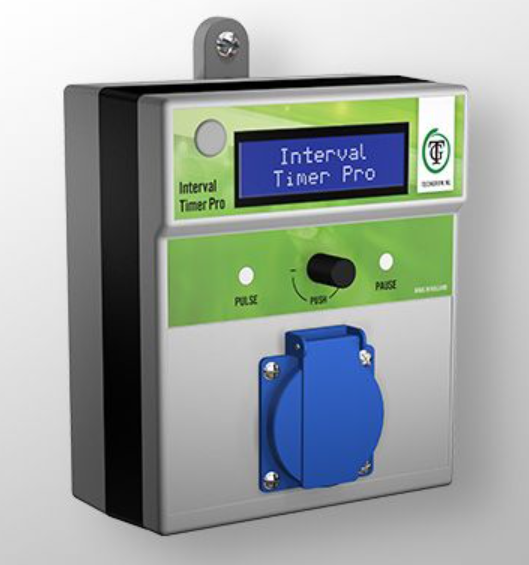
This interval irrigation timer from the TechGrow brand also has a heavy-duty relay and therefore allows reliable switching of growing electronics up to 10 amps.
The LCD display is the same size as on the Second Timer Pro. You can also count on easy installation and operation in a Plug & play style.
The main specific feature of this TechGrow timer variant is therefore switching in interval programme mode, with users being offered a whole range of schemes for precise on and off time settings:
- seconds / seconds
- seconds / minutes
- seconds / hours
- minutes / seconds
- minutes / minutes
- minutes / hours
- hours / hours
- hours / minutes
- hours / seconds
Quite variable, wouldn’t you say? Another specific feature of this device is that it can work solely on the basis of detecting daylight using a built-in light sensor. Therefore, just as in the case of the second-interval timer, it is entirely up to you whether you let the digital timer work at night as well, or only during the day. This brings us back to the benefit of 3 modes. And if you want to allow it to work continuously for an indefinite period, there is nothing easier than simply switching off the light sensor.
Now to the actual range of time unit settings. Nothing complicated. Both the on time and the off time are adjustable on a scale of 1 to 99. It is only a question of whether this refers to seconds, minutes or hours.
Techgrow timers are still among the long-awaited new products that many of you asked us about. We hope this article has helped you to get a clear overview of the basic information and differences between these unique digital timers from the Netherlands. And if you still have any questions or are still not sure which variant is right for you, write to us by email. We look forward to your questions at the well-known address info@higarden.eu.

We also recommend these products:
- TechGrow Connect Micro distribution board, 2x600W
- TechGrow S-2 CO2 sensor (2000ppm)
- Tbox Timer Box 1M
What to read next:
- WHISPERBLOWER: professional fans with unrivalled efficiency
- 100W full-spectrum supplementary light Lumatek BAR 2.9
- Hydroponics made easy: drip irrigation (drip)
How to Regulate Grow Room Electronics?
Indoor grower can harvest crops in the comfort of home throughout the year thanks to a controlled growing space, which is provided by a quality grow tent. However, without ensuring optimal conditions for cultivated plants using various electrical devices, the cultivation of herbs, fruit or vegetables would not make much sense. That is why you should read how to switch growing electronics on and off regularly. Automating these growing processes ultimately always saves both your time and your money.
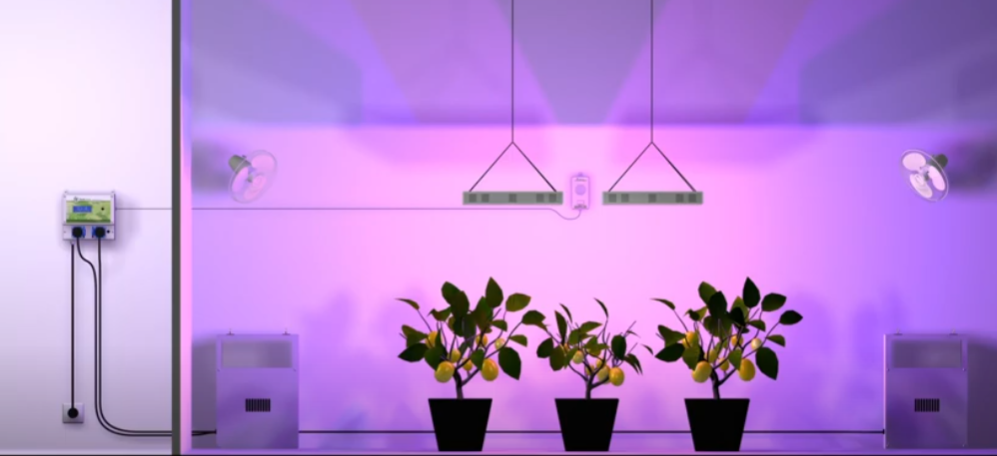
Let us begin with an overview of the basic growing electronics that can be included in the automation of growing processes. These are mainly the following devices:
- Lighting
- Fans
- Heating
- Pumps
- Humidifiers and dehumidifiers
- Carbon dioxide generators
- Temperature, humidity and CO2 sensors
The above-mentioned growing electronics and other devices are used by indoor growers according to their needs and experience to easily achieve in the growing space the maintenance of the correct temperature, humidity, CO2 level, pH and EC. It is probably not difficult to guess that keeping all these values constantly under control would be almost unthinkable, and at the very least very difficult, without automation and regulation of key electrical devices when growing indoors, and not at all fun either. The correct values in the areas mentioned create an ideal environment for plant development together. This means that the following will improve significantly:
- photosynthesis
- water loss through the surface of plant leaves (transpiration)
- nutrient uptake
- growth, flowering and ripening, as well as other aspects important for healthy plant development.
Growers’ needs in terms of automation and regulation of growing electronics usually increase in line with ever greater experience and possibilities. At the beginning, you will need to control at least lighting so that plant cultivation is truly efficient in indoor.
- If you use classic discharge lamps for lighting in a grow tent or room, we recommend choosing distribution boxes straight away, which we will focus on in the next part of this article.
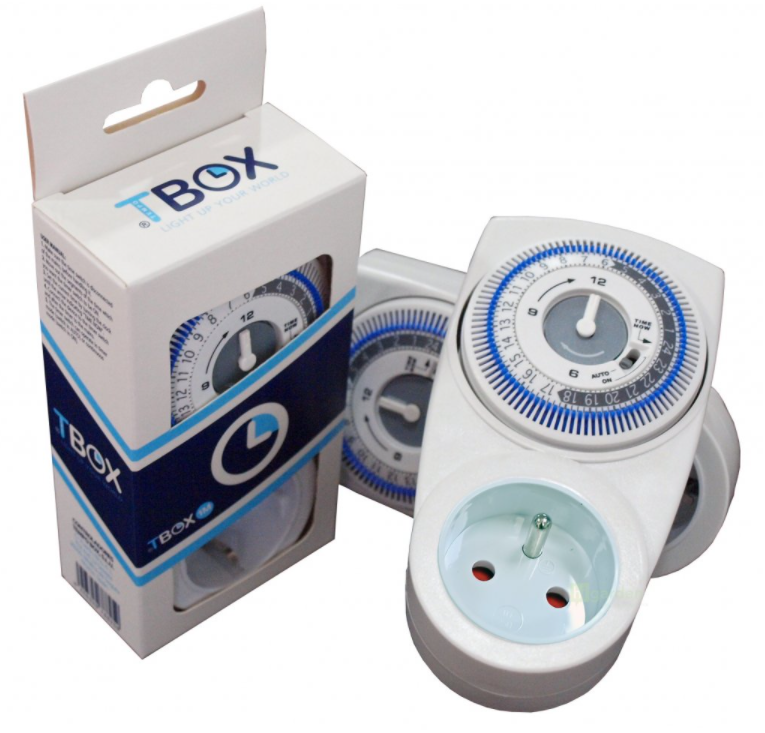
- For fluorescent tubes, CMH lamps, or LED lights, reliable timers will also serve well as a basic solution. They are also capable of ensuring regular irrigation in watering systems by switching the pump on and off. At the beginning or for hobby purposes, mechanical timers are often sufficient; they allow you to switch any electrical device on or off at the required time and are easy to set. The simple but reliable TBox Timer Box 1M best meets these parameters. In addition, the Spanish brand Tempobox also manufactures top-quality distribution boards, which we will cover a little further below. It is definitely worth reading the complete range in the separate article TBOX: a new product that pays off!
- A different league of switching - that is how we can, without exaggeration, call the second and interval timers from the renowned Dutch manufacturer TechGrow, which already allow easy and at the same time very precise setting of intervals for controlling a given electrical device, thanks to an extra-heavy relay with a capacity of up to 10 A. The technically advanced TechGrow time switches are equipped with a built-in light sensor, which makes growing herbs in a grow box considerably easier, because it gives you the choice of whether you want to use the timer only during the day or also at night.
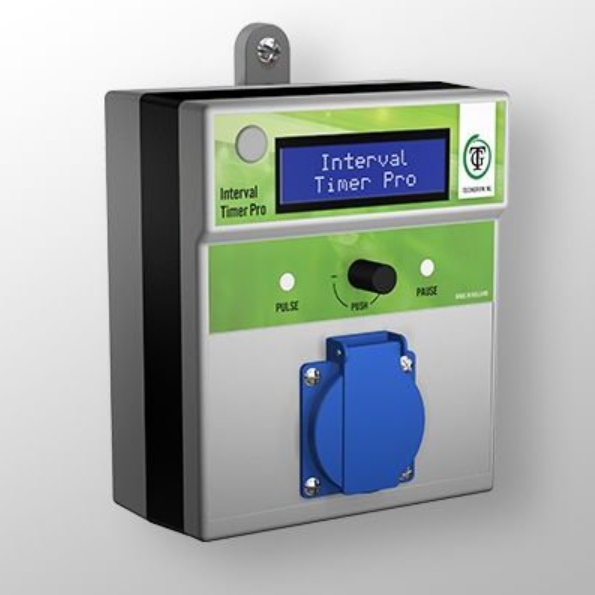
Control units, distribution boards, controllers and other equipment for regulation
We are now getting to the regulation of growing electronics equipped with a contactor, which can handle a considerable inductive load, allowing growers in practice to reliably switch even a larger number of powerful appliances. This is also the fundamental difference compared with time switches. And as we have already mentioned, if you use high-pressure or sodium lamps as the source of artificial lighting for plants in a grow tent, then the safest choice is precisely control units or distribution boards, also known as switchboards.
Likewise, wherever one or two timers are sufficient at the beginning, the number of devices that need to be regulated and incorporated into the automation of growing processes usually increases with growing experience. Some switching distribution boards also offer, for example, a temperature sensor for fan regulation and other useful functions. Here we also begin to distinguish the boundary between where “ordinary” distribution boards end and sophisticated automatic control units begin, meeting the needs of experienced professionals as well.
For example, GSE Smart Grow Controller replaces a whole range of expensive devices, from light timers to heating controllers and fan controllers. This device is a well-known mainstay in the field of growing electronics regulation on the market. It is equipped with a temperature, humidity and light sensor.
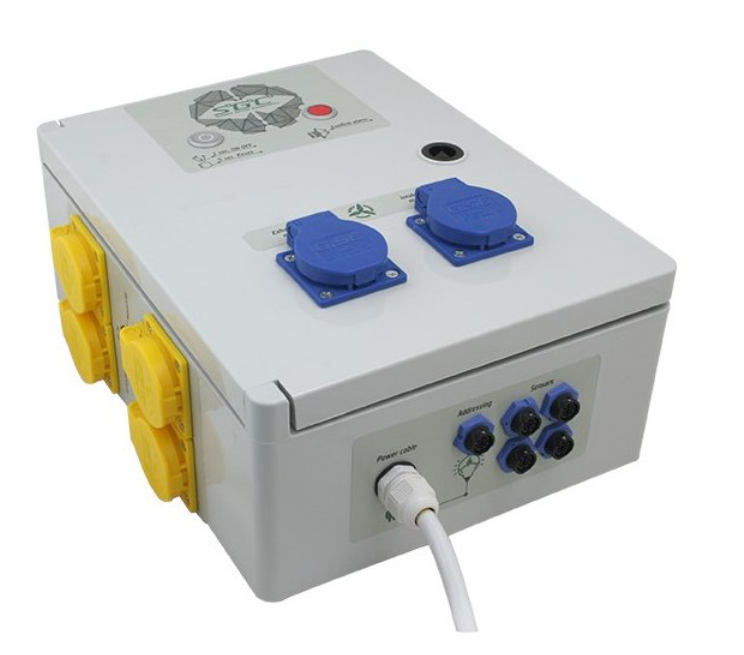
The same applies to other GSE controllers and regulators, with which maintaining the ideal temperature, humidity or carbon dioxide level in the growing space is truly effortless. For a long time, these devices had practically no competition. That changed recently when products from a direct and more than worthy competitor entered the Czech market - the Dutch brand TechGrow, from which we have already introduced the time switches and, in terms of price in relation to performance and quality, we definitely also recommend other top-quality devices, such as regulators for temperature, humidity, negative pressure and minimum fan speed. The hysteresis regulator - the temperature range - is very useful, as it can regulate the fan output in such a way that the temperature inside the grow tent never exceeds the set temperature range. If the temperature inside the grow box were to fall, the fan speed would be reduced to the set minimum. With these high-tech innovations for regulating growing electronics, automating all growing processes is child’s play!
- Distribution boards:
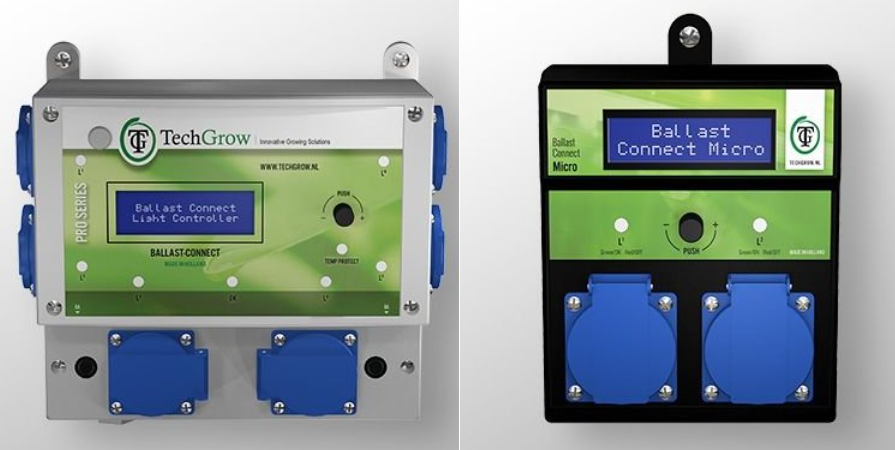
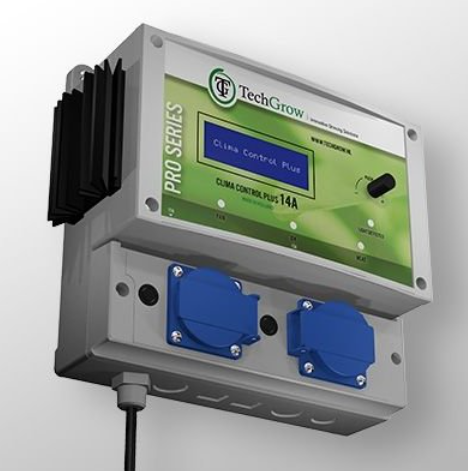
- Sensors and probes for climate adjustment
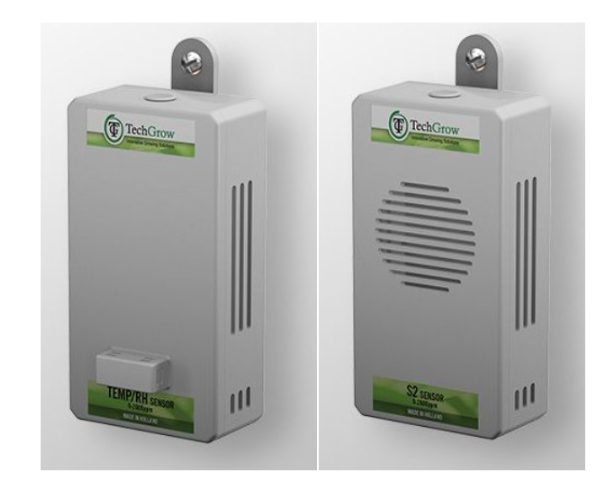
- Generators and dispensers of CO2
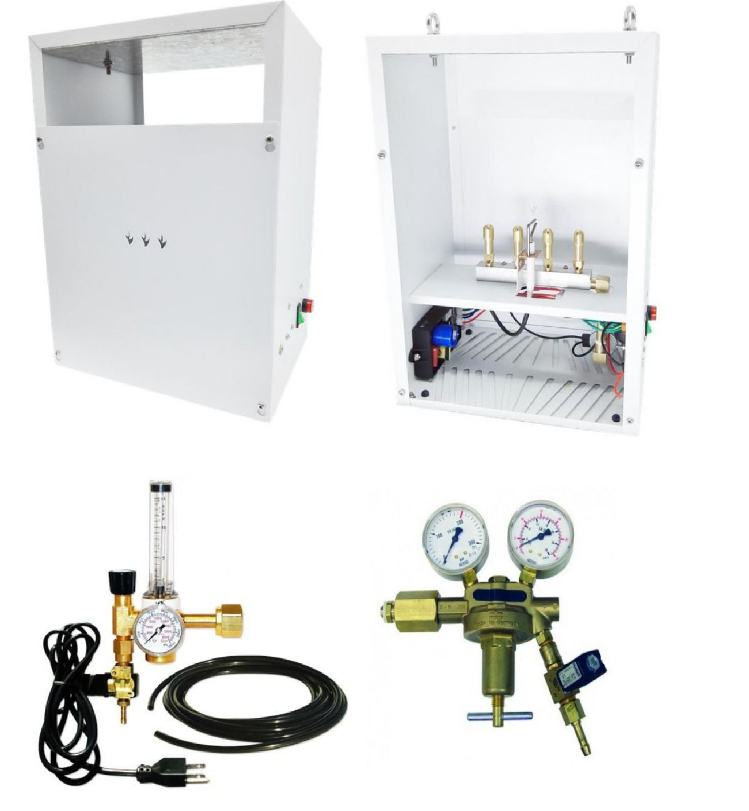
Our TIP: We have prepared complete sets for CO2 dosing and measurement in the growing space for customers, divided into three variants so that all categories of growers can choose:
The modular control units GroLab are here to make sophisticated control over the growing environment available not only to commercial but also to enthusiastic home indoor growers! Take a look at the video directly from the manufacturer.
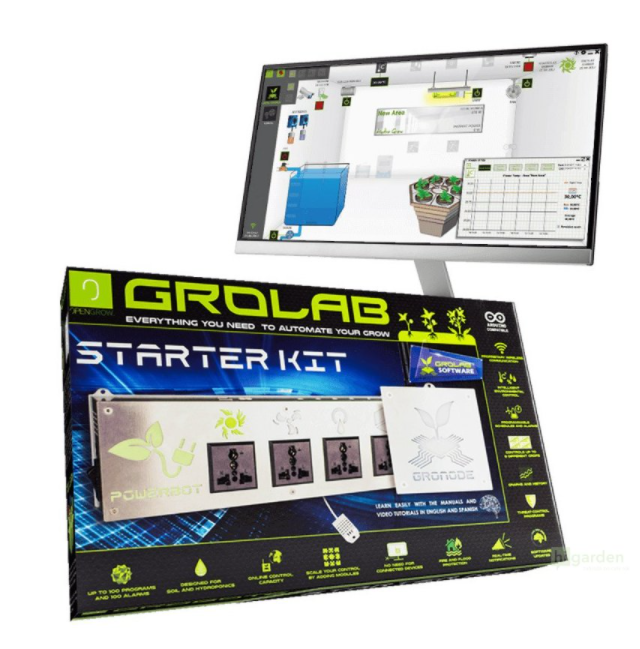
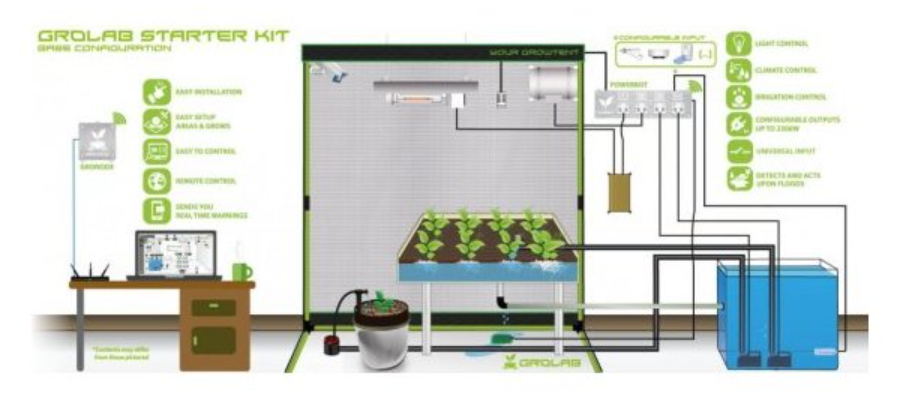
Automatic regulators are simply an indispensable helper for anyone who wants to achieve a rich harvest of the highest quality indoors. There are many reasons for ongoing optimisation of the growing environment. It is worth summarising the most important ones at the end:
- Ideal climate conditions in the grow box, from temperature and humidity through fresh air flow to the correct concentration of carbon dioxide, are a prerequisite for high yields and overall greater success in the process of indoor plant cultivation.
- Optimising these processes also means better management of water, fertilisers and electrical energy, and in the long term you will therefore save a considerable amount of money, which later allows you to move up another level again. As is well known, time is money. It is therefore also necessary to emphasise the significant saving of time.
- A perfectly managed environment in which your plants develop does not give pests or diseases many opportunities, so you can look forward to a healthy harvest of the highest quality without unnecessary complications that would spoil your enjoyment of growing.
As you can see, there are many options for optimising your grow room, and therefore you should choose mainly according to which devices and in what number you currently need to control and monitor. If you want to be sure of making the right choice, our specialists are available to you at the well-known e-mail address info@higarden.eu.
We also recommend these products:
- TBox distribution boards (TEMPOBOX)
- GSE Digital Temperature and min. extract speed regulator
- Prima Klima WHISPERBLOWER
What to read next:
Electrical Conductivity of a Solution – EC
The correct concentration of mineral salts in the nutrient solution is essential for healthy plant development and is one of the most important values a grower needs to monitor during the cultivation cycle. This concentration is indicated by the EC value (Electric Conductivity). How do we measure it, and which values are best for a juicy harvest?
Based on the electrical conductivity values of the solution, we can easily determine the amount of nutrients in water for watering or in the tank of hydroponic systems. It is precisely for hydroponics or, alternatively, aeroponics that the correct concentration of salts present in fertilisers, but also in tap water or well water, is absolutely crucial...
Electrical conductivity can also be described as the potential of electric current transported by water. There is no point in going into detailed physical definitions; for the enjoyment of cultivation, it is enough that we can imagine this physical phenomenon and learn how to work with it.
In growing practice, ordinary tap water is most commonly used. The EC of tap water depends primarily on the location. Within the Czech Republic, we are in the range of 0.3–0.7. That is not a given, so the Czech grower has reason to be pleased. For comparison, there are areas beyond the borders of our country, and there are many of them, where tap water commonly has EC values in the range of 1–2. The lower the EC value of the water itself, the better, because water as such is not yet the main source of nutrients for cultivated herbs, flowers and crops. We supply nutrients to them through fertilisers. When fertilising, it is therefore necessary not to overlook the EC of the input water. Let us give a clear example: if we have a predefined recommended EC value for fertilising, for example 1.9, and we know that the water we use has an EC of 0.6, we can enrich the water with nutrients only to an EC value of 1.3. The key point is therefore that it is good to have water with as low an electrical conductivity as possible. The lower the EC value the water has, the more nutrients we can provide to plants through fertilisers. An excess of nutrients could so-called burn your crop, and is therefore just as harmful to plants as a deficiency. Consistency is important when fertilising. Experienced growers prevent both excess and deficiency of mineral salts by gradually increasing or decreasing EC values, for example by 0.1 to 0.3 each week. In this way, plants are much better able to absorb the nutrients contained in fertilisers than with a sudden increase in doses. Avoid over-fertilisation!
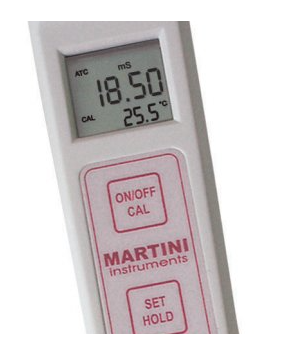 Values shown on the display of a pocket digital EC metre
The EC value is not stable and changes during the life stages of plants. It should be emphasised here that plant needs are individual and depend to a large extent on the species and variety. With this reminder, we can specify the recommended values as follows:
- Young plants: EC 0.6–1.2
- Older and larger plants: EC 1.2–2.5
For measuring and maintaining optimal values, EC metres are an excellent tool. Unlike pH metres, they usually do not even require maintenance solutions and are fitted with a metal probe. In terms of calibration, devices allowing digital or manual calibration are available on the market. However, nowadays the vast majority of growers use the digital version, which is also very convenient for beginners, because automatic temperature compensation means there is no risk of the device malfunctioning due to an incorrect procedure during calibration. EC metres are indispensable, among other things, during the flowering phase and also during flushing. At Higarden.cz you will also find replacement probes or practical measuring sets if needed. Calibration solutions designed for EC metres are produced mainly in the 1.413 and 2.78 mS variants. Solutions in the 2.8 variant are intended for the same use as 2.76, so do not be misled; the difference is only in rounding.
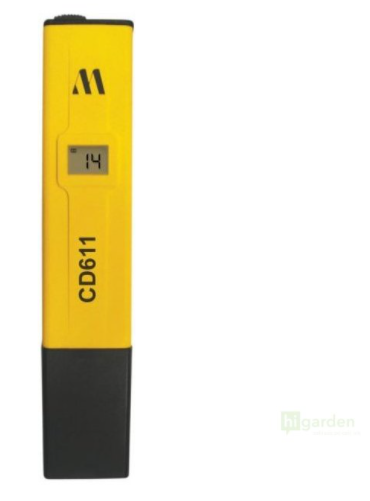
An economical version of an EC metre from Milwaukee
In conclusion, we would like to point out that tables and recommended values are one thing, but just as important as measurement accuracy is simple observation of your plants. With a little attention, and also with growing experience, you will soon recognise on the stems and leaves whether they are at risk of over-fertilisation and burning or, conversely, suffering from a nutrient deficiency. We hope they will thrive under your care, and that both the products you can buy in our e-shop and the advice in this article will help you achieve that. If you would like to know anything else, we will be happy to answer your questions, which you can send to the well-known address info@higarden.eu.
TechGrow for the Second Time: Microclimate Under Control Thanks to Flawless Multifunctional Controllers!
Last week we introduced you in more detail to the unique timers from the TechGrow brand. The Dutch manufacturer is also a leader in the field of fan speed control fans or, for example, carbon dioxide levels in the growing environment, increasing the yield and final quality of your crops. It is precisely innovative and multifunctional products of this kind that are in focus today. Relative humidity, temperature and CO2 concentration. All this, and more, can play a role in plant cultivation in a grow box or greenhouse to your advantage once and for all. There is certainly plenty to look forward to!
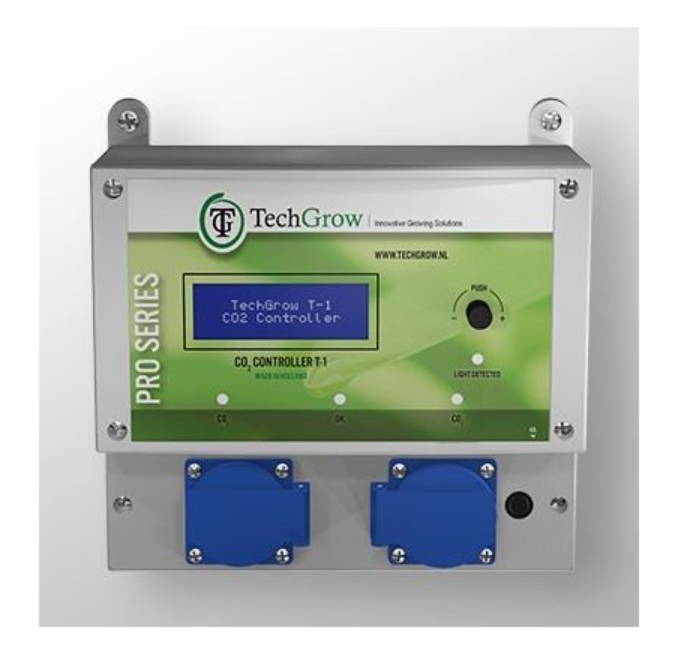
Enriching the growing space (for example inside a grow tent) with carbon dioxide makes it possible to increase your yields by up to a fifth. If this is new information for you, you can read a separate article on plant cultivation and carbon dioxide. It is not the only reason to generate enough CO2 where you grow your plants. And when it comes to the most advanced methods available on the market, TechGrow is making a strong statement through a varied range of exceptional products, which we will now look at more closely.
TechGrow T-1 Pro CO2 controller
Why start with anything other than the most advanced CO2 controller of its kind on the market, right? This device ensures the optimal CO2 concentration inside a grow tent or room, while also allowing convenient control and precise monitoring. Controller, regulator, monitor. In short, it is all in one, because a rich, high-quality harvest is usually the advantage of growers who have their growing spaces perfectly under control, whether it is the CO2 level or, for example, temperature or humidity. Although this professional CO2 controller offers indoor growers plenty of useful functions, which we will come to shortly, its configuration is usually a matter of a single minute! For that reason, it suits not only professionals and commercial growers, but also beginners who want to put together their first growing setup with a high level of efficiency and reliability.
Are you asking what all this smart box can do?
- It features an automatic counter for accurate and reliable dosing of carbon dioxide. It is important to mention that it allows dosing to be set so that you can easily achieve a stable CO2 level in a closed growing space during indoor plant cultivation.
- T1 Pro automatically stores a weekly log. The 7-day storage capacity allows you to track your progress during the process of indoor plant cultivation.
- It also controls delayed activation of CO2 enrichment in the grow tent or room. This function makes it a truly intelligent sensor capable of ensuring optimal plant growth even during your absence.
- An important part of this smart device’s equipment is a sensitive ppm sensor, thanks to which the T1 Pro is fully adjustable in the range from 300 ppm to 2000 ppm or from 300ppm to 10,000 ppm.
- The clear display, which updates itself every second and whose backlight switches off after 60 seconds in line with energy efficiency, allows the connected sensors to read actual as well as minimum or maximum values. In addition to the CO2 level, it also displays temperature and humidity if the temperature and humidity sensor is also connected. The sensors can be connected using a standard network cable.
- The built-in calibration function allows the CO2 sensor to be calibrated in fresh air.
- There are also LED indicators for CO2 dosing, light detection and stable climate.
- If there is a power cut, all current settings are automatically saved. Automatic fault detection also prevents complications caused by cable failure or poor connection to the sensors.
- If a light sensor is connected, the T1 Pro automatically switches between day and night mode.
We started with the best, and that is why the multifunctional T1 Pro is the basis of the complete professional set: TechGrow CO2 kit – PROFI. It is ready for immediate use thanks to the balanced combination of the following three components:
These complete sets are our TIP for today. In addition to the PROFI set (pictured), we will shortly introduce two lower variants as well, namely MEDIUM and BASIC.
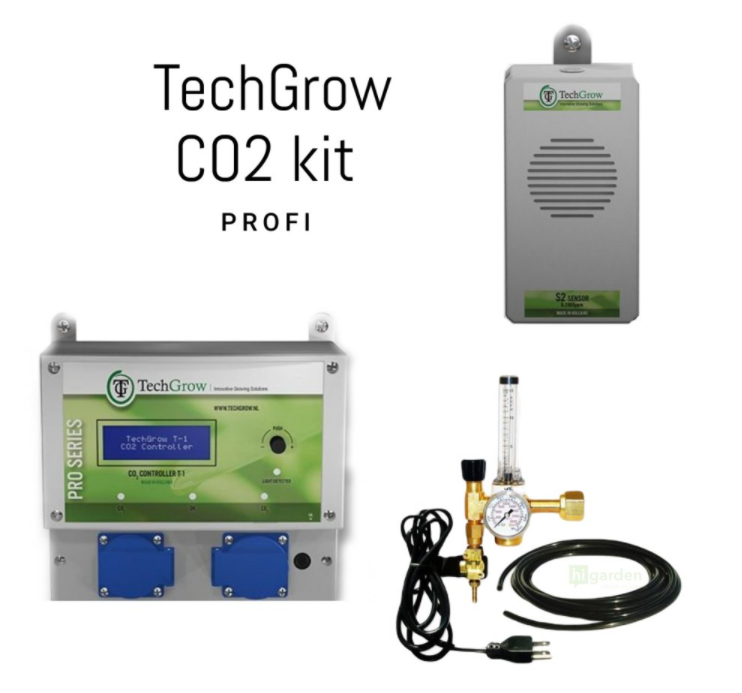
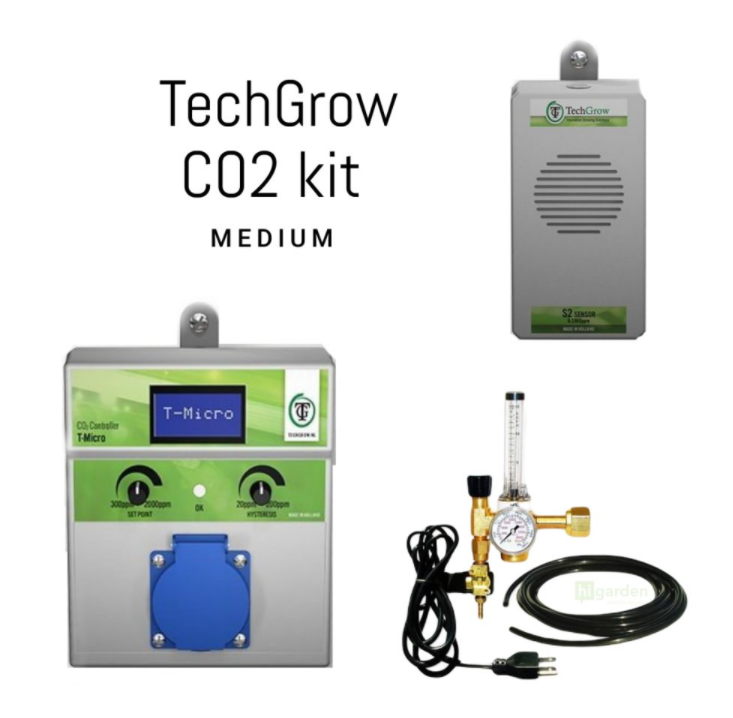
TechGrow T-Micro CO2 controller
In this case, it is the smallest CO2 metre in the TechGrow range. However, the size of this digital device does not change the fact that, just like the more advanced T1 Pro it is among the most reliable devices for monitoring and regulating carbon dioxide in the growing space. That is beyond dispute. This device offers professional and hobby growers a fully flexible and scalable solution in every growing room, whether small or large. Even without your presence in the grow room, it reliably ensures that the carbon dioxide source switches on or off at the right time. What are its other advantages?
- Automatic voltage detection (110 V / 230 V), as well as cable failure or poor connection to external sensors.
- The light sensor allows automatic switching between day and night settings.
- T-Micro is a metre and controller in one, offering easy Plug & Play commissioning.
- It is adjustable from 300 to 2000 ppm.
- It measures every second.
- The LCD display shows actual values, including the set value and hysteresis. If there is a power cut, the set values are automatically restored thanks to the internal memory.
- LED indicator provides up-to-date information at all times on whether CO2 is being dosed or not.
- This control unit is also equipped with a calibration function, thanks to which the CO2 sensor can be calibrated in fresh air.
T-Micro forms the basis of the complete MEDIUM set (pictured), which you can start using immediately. Recommended!
TechGrow T-Nano CO2 controller
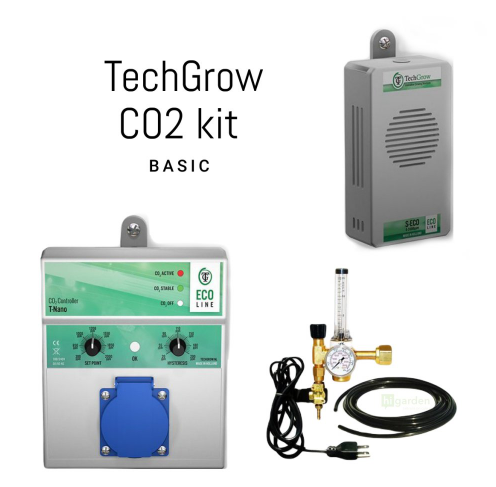
If you do not yet have much experience with indoor plant cultivation, the simpler CO2 controller T-Nano will probably be more than sufficient for you. It is logically the cheapest, but it still relies on top-quality workmanship, high performance and ease of use, while carrying out highly accurate measurements inside small and large grow boxes, greenhouses or other growing spaces. How does the TechGrow T-Nano controller work?
- It automatically detects voltage (110 V / 230 V).
- You can easily set the desired carbon dioxide level in the growing space or the value and hysteresis using a pair of rotary knobs. The controller takes care of the rest for you.
- In this model too, you can rely on indicator “LEDs” that inform you whether CO2 is being dosed at the moment or not, whether the climate is stable, or whether the relay is currently switched off due to the night mode in progress.
- As with the higher variants, the T-Nano CO2 controller also allows for a power cut. In such a case, fully autonomous backup of the set value and hysteresis is activated.
- The external sensor has a light sensor that allows automatic switching between day and night mode.
- As soon as an error occurs in the connection between the controller and the external sensor, or if the cable fails, the device automatically alerts you to the error.
As you have probably already guessed, the basic set BASIC (pictured), which you can use immediately just like the higher configurations, is built on this economical variant (Eco Line) of the multifunctional controller from TechGrow in the form of the T-Nano. In short, Plug & Play!
TechGrow T-Mini Pro CO2 Controller
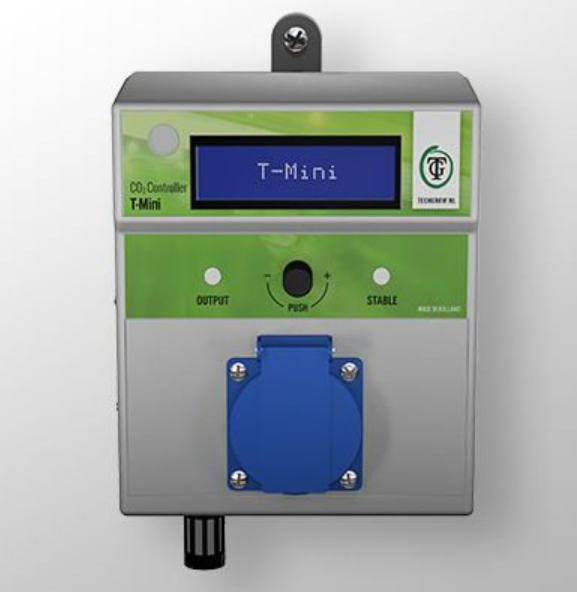
If you are looking for simplicity, for example because you are still gaining your first experience in the field of indoor plant cultivation, but at the same time want a compact digital controller / monitor with a clear display, then you will appreciate the smallest variant complementing the Pro range – TechGrow T-Mini. Once again, this is an “all-in-one” device. However, one single knob is enough to operate this multifunctional controller! At the same time, you can rely on a professional device representing a welcome upgrade even for the growing equipment of experienced growers. Let us state its key features:
- It is fully adjustable in the range from 300 ppm to 2000 ppm.
- It has a built-in sensor for carbon dioxide, temperature and relative humidity. The device therefore displays the exact current value as well as the minimum and maximum values of CO2, temperature and humidity on a display that refreshes every second and automatically switches off the backlight after 60 seconds to save energy.
- The integrated light sensor allows automatic switching between day and night mode.
- As with the above versions, a calibration function is also available for calibrating the CO2 sensor in fresh air or indoors.
- In the event of a power cut, you can rely on memory for the set values and hysteresis.
- There are also indicator LED diodes for CO2 dosing and stable climate.
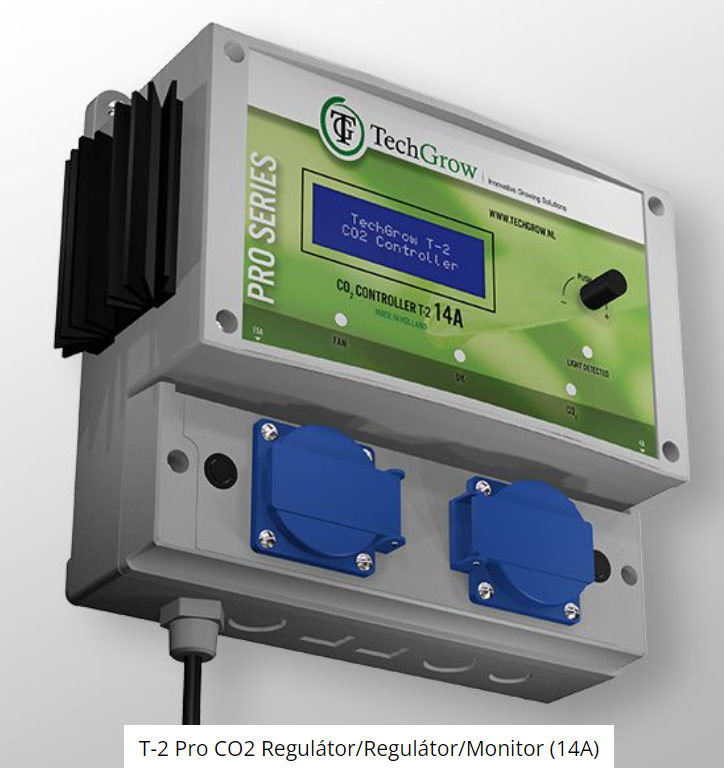
At the beginning of this article, we introduced the TechGrow T-1 Pro CO2 controller in detail as the most advanced CO2 controller of its kind on the market. The good news for all connoisseurs and seasoned growers who value top-quality equipment for their grow room is that we also have its expanded version in stock, the TechGrow T-2 Pro CO2 controller 14A, or alternatively the TechGrow T-2 Pro CO2 controller 7A. What extra benefits does the expanded version, whether with 14 A or 7 A capacity, bring from the user’s perspective?
- The 14A version is suitable for connecting fans with a maximum airflow of up to 10,000 m3/h! The fan control has 2 setting options: automatic or manual. The 7A version has half the capacity, which means that a fan with a maximum airflow of 5,000 m3/h can be connected to it.
- Continuous measurement and regulation of CO2, temperature and relative humidity.
- At night it extracts excess CO2 from the air.
- Pulse dosing for measured addition of CO2.
- Quick menus for a practical overview of all settings.
We also recommend other top-quality controllers from TechGrow
- Fan speed controller with day and night mode: This climate control unit can distinguish between the fan speed that is desirable during the day or during the night. Unlike the products above, it no longer allows external sensors to be connected. It is therefore an advanced air handling controller without the function of measuring relative humidity, temperature or CO2 concentration inside the growing space.
- TechGrow Clima Control Basic Plus 14A is used to regulate the speed of up to 2 fans and also to regulate temperature based on data from a temperature probe.
- The speed of two fans at once and the temperature are also controlled by the handy TechGrow Clima Control ECO 15A controller, which is also exceptional for its ability to accelerate more smoothly than other controllers. The result is a more stable climate inside the grow tent or room. Your plants will therefore not be exposed to unnecessary temperature shocks.
- TechGrow also manufactures the quality Humi Heavy hygrostat for convenient control of a humidifier or dehumidifier.
You may have noticed that TechGrow products are often available in several configurations. For example, the TechGrow Clima Control Plus 14A, which allows you to regulate relative humidity in addition to temperature and speed, is available either in a cheaper version as a standalone controller, or you can pay extra for a model equipped with sensors measuring temperature and humidity.
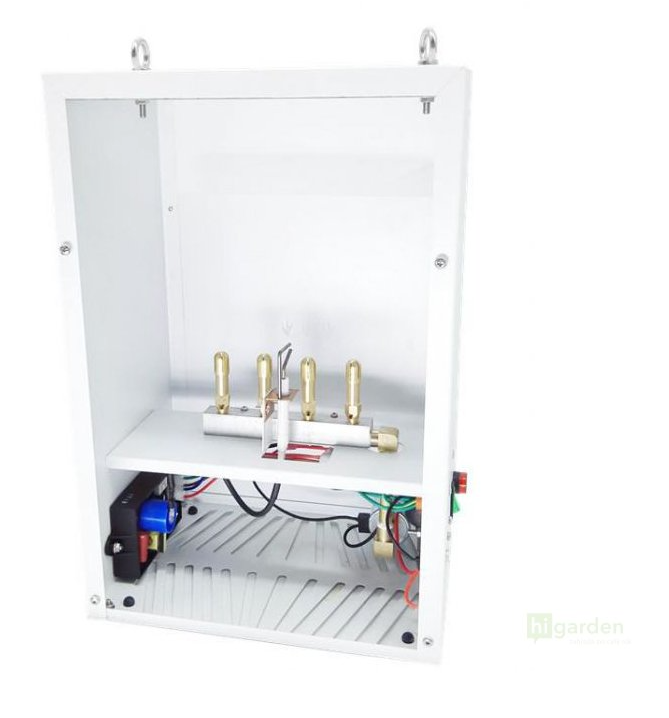
Repetition is the mother of wisdom, so it is worth emphasising how significantly achieving a stable and optimal CO2 level in the growing space helps faster growth and ripening of crops. That is why extra-powerful CO2 generators also have their irreplaceable place here. They run on natural gas and are especially perfect for greenhouses or other larger enclosed growing spaces. Because their generator works with electric ignition, the overall gas consumption is much lower than with other generators. These CO2 generators can be easily connected to a gas cylinder and are supplied with 4 burners. Through the illustrative photograph, you can get an idea of what it looks like inside them.
The complete range of the Dutch manufacturer TechGrow is simply top-class, but also very extensive. Therefore, we hope that this article has helped you to orientate yourself better in it and gain an overview of at least the most important benefits it offers users in practice. If you have any other questions, please do not hesitate to ask us at the well-known address info@higarden.eu. We are here for you and look forward to your questions!
We also recommend these products:
- TechGrow Clima ECO 5A controller (minimum and maximum speed)
- TechGrow Clima ECO 5A controller (minimum speed and temperature)
- TechGrow Clima ECO 5A controller (temperature and relative humidity)
What to read next:
- How do you choose a circulation fan?
- WHISPERBLOWER: professional fans with unrivalled efficiency
- Torus Hydro perfectpH: revolutionary pH stabiliser
Automating Growing Processes
Systems. The magic word of modern and efficient gardening. Automatic growing systems take care of regular irrigation, and sophisticated control units ensure the optimal climate and lighting for plants in day or night mode. This applies even in your absence, so if indoor growing has caught your interest and will not let go, why not do it systematically like a true professional? You will enjoy higher yields, and you can use the time or energy saved as you wish!
It is tempting and easy to forget manual routines and hand watering! But when, a few years ago, you wanted to buy a system for indoor growing of vegetables, fruit or herbs, the only solution was to spend a lot of money. Today, the market offers a more or less advanced range of self-watering systems and control units, which is fortunately so broad that both enthusiastic beginners and commercial gardeners can choose without any problem, so literally anyone can grow like a professional. This, after all, explains the enormous popularity currently enjoyed by various hydroponic and aeroponic systems.
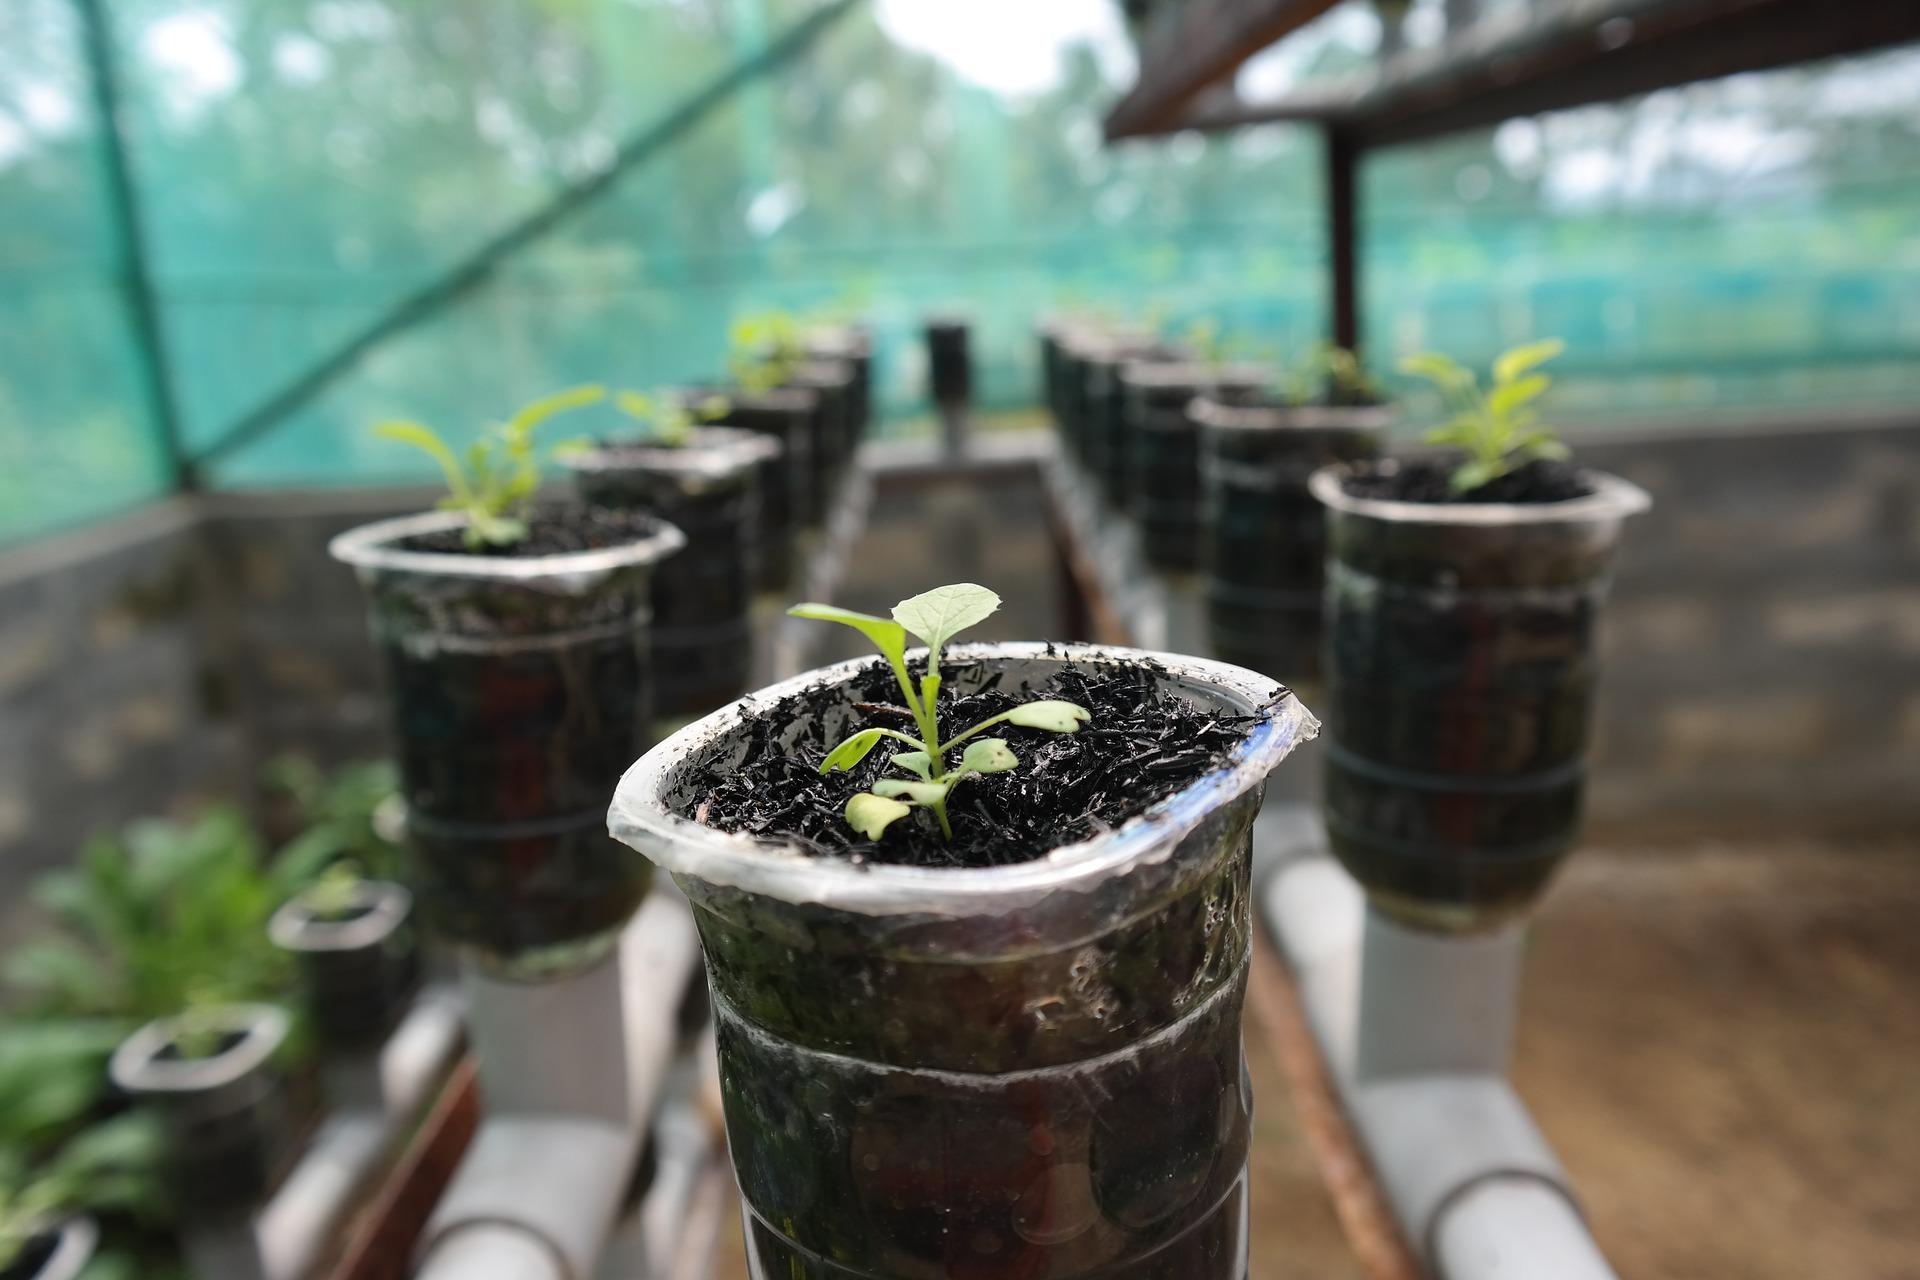
Automatic solar irrigation also allows you to make outdoor growing much easier, whether it is watering your garden, a field bed, young trees in an orchard, or even the English lawn in front of the house.
Efficiency is what it is all about...
Before you start automating your current growing activities at home and take them to a professional level, or if you want to simplify the beginning straight away with some basic self-watering system, it is a good idea to clarify a few basic parameters first, much like when choosing a grow box. The main one is the scale of the planned harvest, which is usually what determines the level of investment in new equipment for the home grow room. This, of course, is closely related to the size of the growing area you have available. After that, it mainly depends on your budget.
A great harvest as standard? Automation of the main and supporting growing processes allows you to optimise growing conditions perfectly. In addition, you save on water, energy and fertiliser consumption.
Thanks to a suitable investment in autonomous systems, you no longer need to worry unnecessarily about the correct timing and actual implementation of the following processes:
- Switching day / night mode based on the entered input parameters
- Automatic irrigation and monitoring the water level in the reservoir
- Humidity control
- Climate monitoring
Another difference lies in whether you want to have only selected functions, or all of them, within indoor growing processes without worries, because in such cases every grower will find a universal automatic control unit useful, such as the GSE Smart Grow Controller, which has a higher purchase price, but in return you get a fully fledged alternative to a large number of similarly expensive devices. The unit ensures everything from switching on lights, through regulating fans or humidifiers depending on the microclimate, to dosing carbon dioxide.
Less is sometimes more
If you were to take away just one piece of information from this text, keep in mind that plants of all kinds generally benefit from a lower dose and intensity of watering, but they welcome the highest possible watering frequency. That is precisely why automatic irrigation always brings a far better harvest than time-consuming and physically demanding hand watering!
Now let us introduce the individual types and examples of automatic irrigation systems.
Hydroponic systems
A reliable passive type of irrigation that is easy to operate is represented by the growing systems AutoPot, which work well with all types of growing media.
Among growers of varying experience around the world, the hydroponic systems Atami Wilma are well known, and they are a convenient gateway to the world of the diverse possibilities that hydroponics brings to growers and will bring a joyful harvest even to complete beginners! Higher-end sets also cater to experienced or commercial growers. In the image you can see what one of the most sought-after models looks like – Atami WILMA Large.
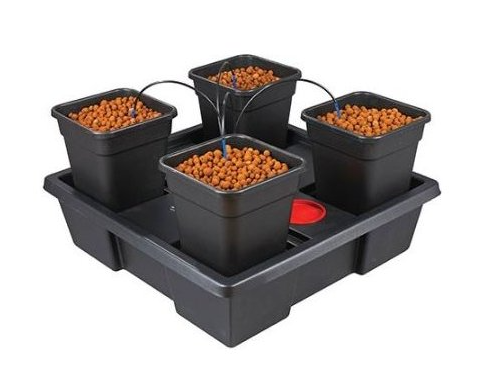
In this type of drip irrigation, the nutrient solution travels through tubes to the top of the pots, where it is absorbed directly into the substrate and each plant then takes exactly as much as it needs. This applies to water with nutrients and oxygen. In addition, nothing goes to waste, because all the solution that is not absorbed is used later, which brings us back to one of the main reasons for buying an automatic system, namely efficiency. The timer accommodates the individual needs of each plant during feeding.
For the roots of large plants, or for cultivating a mother plant, the self-watering pots Flo Gro are ideal. Other types of hydroponic systems also include vertical NFT.
Aeroponic systems
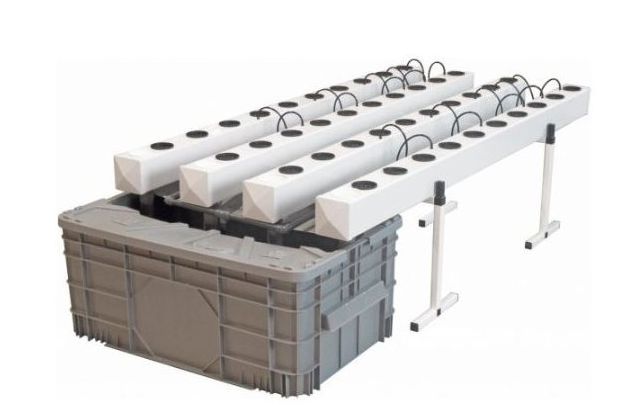
We have saved the best for last! We mean automatic irrigation systems that do not need any substrate to function and will provide you with a truly dream harvest thanks to precise dosing of the solution with an ideal oxygen level. This assumption is based on the fact that the same technology is used, among others, by NASA in research into plant cultivation in space. A typical example is the Aeroflo 40 shown in the image.
We hope that this article has helped you form a clear idea of what automatic growing systems and control units can bring you. Do not forget proper care of hydroponic, or aeroponic, systems either, thanks to which they will function at 100% for a long time. Do not hesitate to ask us anything you are interested in on this topic. We will be happy to answer your questions at the well-known e-mail address info@higarden.eu.
- Hydroponic systems
- AutoPot
- Atami Wilma
- Self-watering pots Flo Gro
- Aeroponic systems