
Technology and Equipment
List of articles
How to Measure Electrical Conductivity (EC) Correctly?
The topic of this article is proven methods for measuring the electrical conductivity of a solution, a value that plays a very important role especially in indoor plant cultivation. If you are interested in how to use EC metres, or EC/TDS probes, or how to care for them properly so that your measuring instruments last as long as possible, you are in the right place.
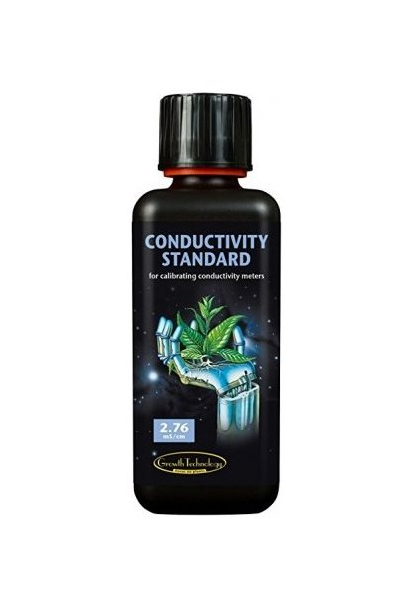
If you would first like to learn what EC actually is, you can start with a separate article: Electrical conductivity of a solution – EC. In practice, this means determining the amount of mineral (“nutrient”) salts dissolved in the nutrient solution.
Measuring EC frequently and accurately is an indispensable part of plant cultivation not only in a growbox. Many beginner growers then wonder what the difference is when measuring between EC (the measured value stated in μS/cm) and TDS (the measured value stated in ppm). The difference lies only in the fact that from the TDS value (Total Dissolved Solids) you can read the total amount of dissolved solids in ppm units.
EC metres and their calibration
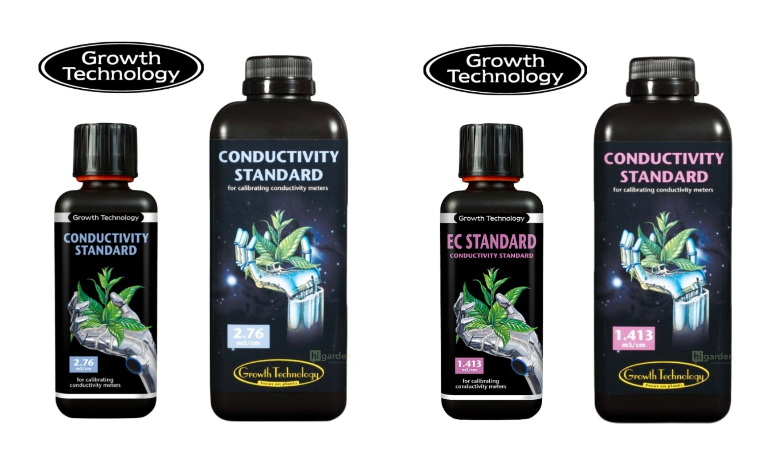
EC calibration solutions are available in 1.413 mS and 2.76 mS variants. However, do not be misled by the 2.8 mS or 2.77 mS variants either, which are equivalent to 2.76 mS solutions and the only difference is rounding.
How often should you calibrate an EC metre?
The answer here is straightforward. To ensure maximum measurement accuracy, the electrodes should ideally be calibrated using the above calibration solutions before each use. If the probe is used on a daily basis, it should also be calibrated every day.
And now we come to further proven methods for measuring conductivity:
- Always use a fresh calibration solution! In other words, calibration standards are easily contaminated and, moreover, they do not have buffering capacity, so there is no point in trying to use them repeatedly.
- Before you start calibrating, rinse the probe with deionised water (see separate article: Reverse osmosis). Only then can you safely immerse the probe in the calibration standard. For even more accurate measurement results, prepare a second separate beaker with calibration solution or sample for rinsing in advance. Proper rinsing of the electrode with deionised water is truly very important. Accumulated salts and other residues can contaminate solution samples and cause inaccurate readings. Therefore, rinse the probe every time you remove it, before storage, or when measuring conductivity of different samples in multiple beakers.
- Plastic beakers are generally recommended because other materials, such as glass or metal, cause electromagnetic interference with the measured electrical conductivity.
- Correct placement of the electrode in the beaker means the same distance from the beaker wall in all directions.
- Also make sure that the electrode is sufficiently immersed. Otherwise, you will only get distorted results when measuring conductivity. Therefore, check that all openings are actually below the surface and that there are no bubbles between the sensors.
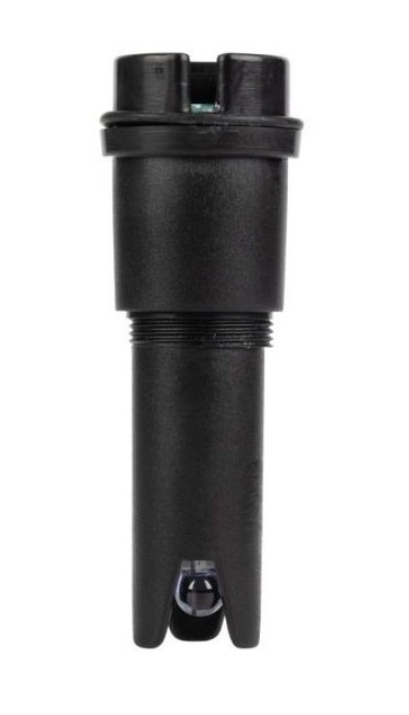
Example of a replacement electrode for an EC metre.
- Check for air bubbles, because air may remain trapped in the body, or on the body, of the electrode even when it is immersed, causing inaccurate measurement. If you notice air bubbles, immerse the probe sufficiently and move it up and down. You can then release any bubbles from the openings by gently tapping it.
- Although electrodes usually have so-called temperature compensation, bear in mind that it takes them some time to reach thermal equilibrium, so always wait until the measured conductivity or temperature value stabilises.
- Choose the appropriate type of electrode, because not all electrodes are suitable for the given range or sample. Sometimes, when selecting a measuring device, the suitable range as well as chemical compatibility may therefore matter. For certainty, you can always consult us (see below).
- In addition to frequent calibration, regular cleaning is also a prerequisite for ensuring the longest possible service life and proper functioning of every EC electrode, although this is often underestimated. This is despite the fact that deposits can accumulate in the electrode section as well as on the vent openings of the probe, which is a common cause of calibration problems and inaccurate measurement results. So how should you clean the electrode properly? A proven method is to use warm soapy water, with which you thoroughly rinse the electrode. Do not use chemical cleaning solutions or solvents.
Some multifunction measuring instruments use so-called combined electrodes, and we discuss their proper storage at the end of a separate article entitled: What is the storage solution (KCL) for? For proper storage of the EC electrode, it is essential that in the case of a combined EC/pH electrode, improper storage may cause the electrolyte to dry out undesirably. Sometimes dried-out probes can be regenerated by immersion in storage solution for pH.
If you are interested in working with pH metres, we have also prepared a separate article for you: How to use calibration solutions and pH metres?
If you would like to ask us anything, not only about the correct measurement of conductivity, we will be happy to advise you, for example at the well-known e-mail address info@higarden.eu.
We also recommend these products:
- Measuring sets
- Replacement probes for pH and EC metres
- Aqua Master Tools P160 PRO, pH and EC/TDS/PPM metre and thermometer
What to read next:
- Hydroponics – what does it involve and how do you start?
- Do you know what VPD is? Discover the key to perfect conditions for plant development
- ONA Block: solid odour absorber
Why We Have Come to Like Secret Jardin Grow Boxes
 When it comes to indoor growing, the quality of a grow tent often decides whether the work in your grow space will be exhausting drudgery or pure pleasure. Faulty zips, light-leaking seams or poorly thought-out design can damage the reputation of even many established brands. At Higarden.cz, our aim is to offer only proven and reliable equipment, which is why we continuously test the products we sell ourselves. The Secret Jardin brand quickly became one of our favourites.
Secret Jardin are true pioneers in the field of indoor growing. Since their founding in 2006, they have continually surprised us with their innovative solutions for professional and hobby growers alike. Their range includes grow boxes, modern LED grow lights, fans and other equipment for indoor growing. In today's article, we will take a closer look at Secret Jardin grow tents and explain why they are among our favourite brands.
Versatile design
Perhaps the main reason we have fallen in love with Secret Jardin grow tents is their incredible versatility. Secret Jardin offers grow boxes in classic sizes, as well as multi-chamber tents, unusual shapes (loft-style) or models adapted for growing microgreens and for propagation or cloning plants. There is truly something for everyone. In addition, Secret Jardin offers a wide range of unique accessories, thanks to which you can customise your grow box. Missing an opening for an extract fan, or do you need a patch for your old tent? Secret Jardin have really thought of everything, and that is what won us over.
Build quality and durability
The first thing you notice when assembling Secret Jardin grow boxes is the excellent build quality. The tents are made from thick canvas that is resistant to tearing, and the inner side is covered with a highly reflective Mylar lining that increases the efficiency of grow lights. The individual parts are stitched together with robust seams through which no light penetrates. The zips, which are often a weak point even in the most expensive grow boxes, are durable and glide smoothly without sticking, even after several years of use. The frame is made from reinforced metal poles which lock securely once assembled, creating a stable structure that can easily support the weight of lights and fans.
Smart ventilation solution
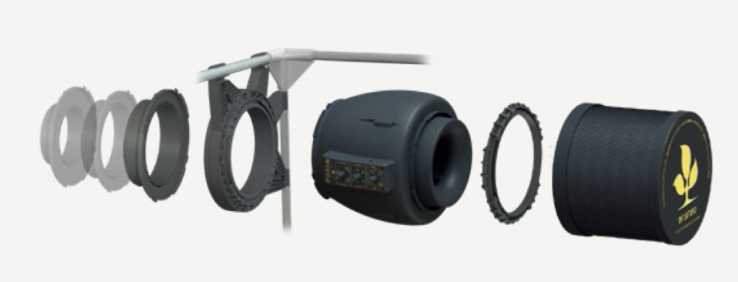
Secret Jardin does not focus only on grow boxes; under this brand you will also find odour filters and fans. The advantage is that all Secret Jardin equipment fits perfectly into their grow tents, and thanks to the simple flange system you can easily connect fans or odour filters to any grow box (not only those from Secret Jardin).
Great price
Although at Higarden.cz we have the privilege of being able to handle every new product on the market for free, our customers do not have that advantage and also choose with their wallets. Here, Secret Jardin really surprised us, because it offers first-class quality at a budget price. Compared with premium brands on the market, you can buy Secret Jardin tents for roughly half the price, and you will only notice the difference in the smallest details.
Secret Jardin grow tent product ranges
 Dark Propagator – Grow tents for cuttings, seedlings and mother plants
Dark Propagator are miniature grow tents designed for plants up to a maximum height of 80 cm and provide a growing area from 0.24 m² to 3.60 m² (with additional grids). These tents are ideal for seedlings and small plants or microgreens. Thanks to the GRID6040 system, additional shelves can be added to the growing space, which will multiply the growing area several times over.
Dark Street – Space-saving grow tents
Grow boxes from the Dark Street range are designed for plants with a height from 50 cm to 150 cm and offer a growing area from 0.36 m² to 1.44 m² depending on the model. They are suitable for growing herbs, chilli peppers, ornamental species or medicinal plants. The grow tent is packed in a sturdy bag with a shoulder strap for easy carrying, and the package includes a set for installing the flange for air extract/intake (DF16).
- DS60 – 60x60x158 cm
- DS90 – 90x90x178 cm
- DS120 – 120x120x200 cm
- DS120W – 120x60x178 cm
- DS150W – 150x77x200 cm
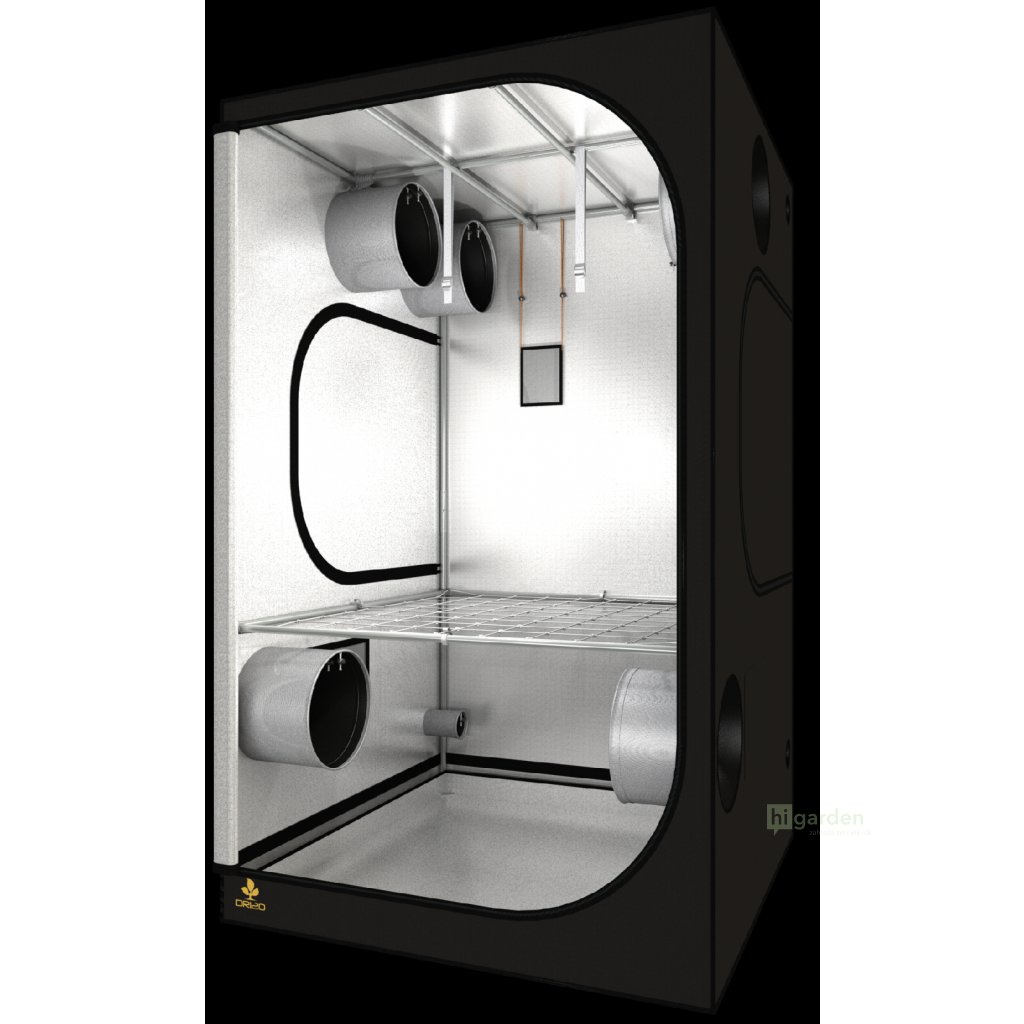 Dark Room – Grow tents for medium-sized spaces
Grow boxes from the Dark Room range are intended for plants with a height from 50 cm to 150 cm and provide a growing area from 2.25 m² to 9.00 m² depending on the model. They are suitable for growing herbs, chilli peppers, ornamental species or medicinal plants. The grow tent is packed in a sturdy bag with a shoulder strap for easy carrying, and the package includes a set for installing the flange for air extract/intake (DF25).
- DR150 – 150x150x217 cm
- DR240 – 237x237x200 cm
- DR300 – 297x297x217 cm
- DR240W – 237x120x200 cm
- DR300W – 297x150x217 cm
Intense – Portable grow rooms
The Intense range is intended for large-scale growers and, depending on the model, offers a growing area of 11.5 m² or 21.5 m². Both Intense models have raised ceilings (233 cm) and are equipped with a 60 cm wide central corridor, so you have access to the plants from both inside and outside. Alternatively, you can choose not to use the corridor and turn it into growing space using the SPACE BOOSTER & WEBIT kits, which are sold separately. Intense grow tents are equipped with connections (DF25 & DFM315) for air intake/extract and come with everything you need to install the entire system.
Hydroshoot – Grow boxes for DIY growers
The Hydroshoot model range from Secret Jardin is ideal for growers who already have their own equipment or want to build their grow box from scratch. In terms of size, Hydroshoot tents correspond to the Dark Street and Dark Room ranges, but they are supplied without accessories, with the exception of the Mylar flood tray. The grow boxes are equipped with ventilation openings with sleeves, to which you can simply connect ducting and flanges of various diameters, filters and other equipment. Although Hydroshoot grow boxes are made from the same high-quality materials as the other Secret Jardin tents, they are slightly cheaper than the other models.
 Secret Jardin Growstation
Original 60 is an elegantly designed growing kit for growing vegetables, fruit, herbs or microgreens. The kit includes a grow tent (60x40x116 cm), 3 LED grow panels with a power draw of 20 W, a 150 m³/h extract fan, 3 circulation fans, a timer and a support net. When assembling this set, Secret Jardin placed emphasis on quiet operation, so you can grow wherever it suits you at home. You can also easily adapt this flexible mini grow room for cloning or for raising seedlings for outdoor planting.
Has the Secret Jardin brand caught your attention and would you like to learn more about this manufacturer’s products? Next time on the Higarden blog, we will look at Secret Jardin lights, extract fans and odour filters.
Useful links
Advanced Climate Control – VPD and Transpiration
VPD (Vapor Pressure Deficit – the difference in water vapour pressure) is an important factor for indoor growers. It is closely linked to temperature and relative humidity, affects plant transpiration processes and their ability to take up water and nutrients. Proper climate and VPD control are essential for healthy growth and development at every stage of a plant’s life. In today’s article, you will learn why it is important to monitor VPD indoors.
Even small changes in climate can have far-reaching consequences for plant development in indoor growing, and VPD is a good example of this. Maintaining the correct VPD values requires proper regulation of temperature and humidity, as well as adapting the climate in the growing space to the age and type of plants. In the following lines, we will look at how VPD works, why it is important to monitor it, and how to achieve ideal conditions at every stage of plant development.
What is VPD
VPD is closely related to the data we commonly monitor when growing plants indoors, specifically temperature and relative humidity (RH) in the growing space. Air temperature affects its ability to retain water in the form of vapour. Warmer air can hold more water than colder air. Relative humidity then indicates how much of the maximum possible water vapour capacity the air is currently holding. VPD expresses the difference between the amount of water vapour currently in the air and the amount it could hold at full saturation (i.e. at 100% relative humidity).
VPD is an important concept for understanding how the surrounding air affects plant transpiration processes. The unit of VPD is pressure expressed in kilopascals (kPa). The lower the VPD value, the more saturated the air is with water, which limits the plant’s ability to evaporate water and slows the rate of transpiration. This leads to lower water and nutrient uptake and creates a humid environment where mould, bacteria and other pathogens can easily spread. On the other hand, a high VPD value means that the air in the growing space is very dry and can hold more water. In such an environment, transpiration speeds up and the roots take up more water and nutrients. However, excessively rapid transpiration forces plants to close their stomata, which are pores on the leaves that serve for gas exchange (primarily CO₂ and O). with the surrounding environment. Excessively high VPD can lead to overfeeding and problems with water uptake.
VPD control
The exact VPD range may vary slightly depending on the species being grown; however, the decisive factor is primarily the age of the plants. In general, the younger the plants, the lower the VPD that is suitable for their optimal development.
- Optimal VPD range for seedlings and clones – 0.45 - 0.8 kPa - Clones, seedlings and young plants do not have enough leaves for rapid transpiration and require a humid environment. During the first weeks of a plant’s life, keep VPD at the lower end of the range.
- Optimal VPD for vegetative growth 0.75 – 1.25 kPa - During the vegetative growth period, plants have enough leaves to transpire large amounts of water and thus also take up larger amounts of nutrients. The aim is to increase VPD to the maximum without causing the stomata to close and reducing the supply of CO₂, which would slow growth.
- Optimal VPD for the flowering stage 1.2 – 1.5 kPa - During flowering and ripening, plants are sufficiently robust and able to transpire large amounts of water; however, flowers and fruits are sensitive to a humid environment. During the flowering stage, increase VPD to prevent water condensation.
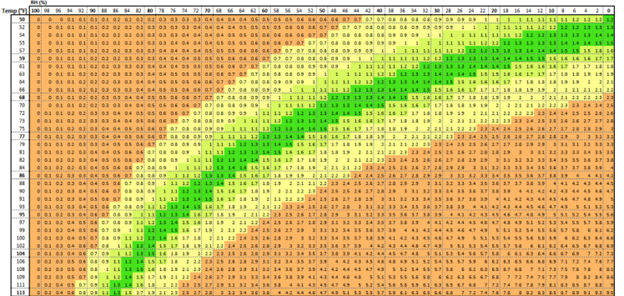
If you want to know the exact VPD values for a specific temperature and RH, look for online VPD calculators (VPD Calculator).
Steps for controlling VPD
Given how the VPD value relates to the current temperature and humidity in the growing space, the key to correct values is controlling these two variables. For example, when the air temperature drops after the lights are switched off, relative humidity usually increases and VPD decreases, which limits the rate of transpiration. In practice, this also means that more water condenses in the growing space. If you want to maintain the current VPD in such a situation, it is necessary to increase the air temperature in the grow room. Essential tools for controlling VPD are greenhouse heaters, dehumidifiers or humidifiers, and additional extract fans.
- Measuring temperature and humidity: Place a sufficient number of thermometers with hygrometers in the growing space. Make sure you measure the readings not only at the tops, but also in the lower parts of the plants.
- Temperature control: If the temperature in the growing space rises too high, increase the output of the extract fans, or consider installing air conditioning. In cooler conditions, you can use greenhouse heaters. Use a sufficient number of circulation fans to prevent cold or hot air from building up.
- Humidity regulation: If the relative humidity in the growing space is too low, use humidifiers. They are especially suitable in the summer months and at the beginning of the growing cycle. Excessively high humidity can be solved with a dehumidifier, which is particularly important after the lights are switched off or during flowering, when there is a greater risk of mould.
- Automating climate control: Climate control units (grow room controllers) automatically adjust temperature, humidity, ventilation and lighting based on the set parameters. Some modern devices can also calculate and monitor VPD.
Are you looking for complete guides on indoor and outdoor growing or the latest gadgets for growers? Do not hesitate to visit the Higarden blog!
Choosing Lighting for Growing Microgreens
Microgreens are an excellent source of vitamins, minerals and antioxidants, and growing them is not difficult at all. However, the quality of microgreens depends to a large extent on the type of lighting you use when growing them. In today’s article, we will advise you on how to choose an LED grow light for microgreens and recommend several proven products from our range.
The basic prerequisite for healthy growth and development of plants is sufficient light. This drives photosynthesis, during which plants convert light into energy. While outdoors we can rely on sunlight, when growing indoors it is often necessary to provide supplementary lighting. This applies both to larger fruiting species, such as tomatoes or chilli peppers, and to microgreens, which have slightly different lighting requirements from other plants.
Microgreens go through several growth stages during the cultivation cycle, and their light requirements change accordingly. It all begins with the germination stage, when seeds absorb water and begin to grow. During germination, seeds do not require light, only a moist and warm environment. Once the seeds have germinated, microgreens move into the growth stage, during which they require bright light. The demands for the amount and intensity of light vary, but in general we can say that microgreens need light in the PAR (photosynthetically active) spectrum with wavelengths of 400–700 nanometres. After several days to weeks, microgreens are ready for harvesting and no longer require additional light; they can be stored in the dark, where their growth stops.
You may be interested in: Light spectrum and its effect on plant growth: Outdoor vs. greenhouse vs. indoor
Choosing suitable lighting for microgreens
Unsuitable or insufficient lighting can easily ruin your plans for juicy and healthy sprouts. Insufficient light intensity will cause the plants to have elongated thin stems and stunted leaves. An unsuitable light spectrum will result in distorted growth, yellowing leaves or even poor flavour of the microgreens.
Light spectrum
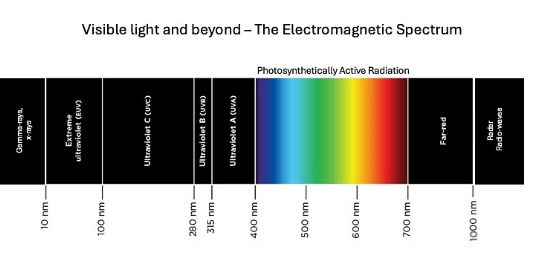 The light spectrum is the range of electromagnetic radiation visible to the human eye, and it consists of light of different wavelengths. The visible spectrum is made up of the colours that can be observed in a rainbow: red, orange, yellow, green, blue, indigo and violet. Light with different wavelengths has different energy, with red light having a longer wavelength and lower energy, while violet light has a shorter wavelength and higher energy. In addition to visible light, there is also an invisible part of the spectrum, such as infrared radiation (with longer wavelengths) and ultraviolet radiation (with shorter wavelengths).
The light spectrum emitted by modern grow lights generally corresponds approximately to PAR wavelengths, but the representation of individual colours in the spectrum will vary according to the colour temperature, which is measured in kelvins (K). According to the “temperature” of the light emitted by the grow light, we distinguish which type of plants and growth stage it is suitable for.
- 9000–11000 K (cool white) for germination and rooting cuttings.
- 5600–6500 K (blue) for growth and the vegetative stage.
- 2000-3000 K (red) for flowering, fruit formation and ripening
The ideal spectrum for microgreens is light with a predominance of blue corresponding to 5600-6500 K, which supports rapid growth and at the same time contains enough red light, which is also important for young plants.
Light intensity
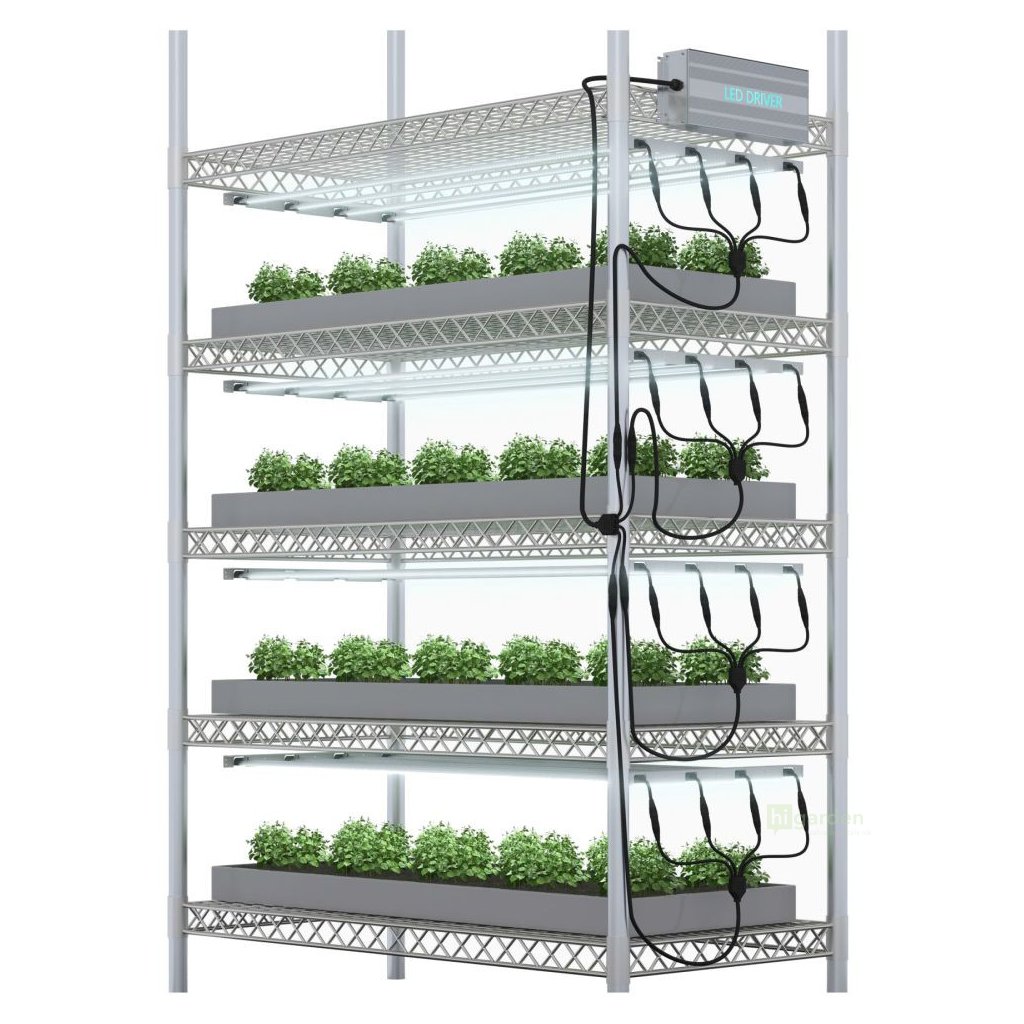 Another metric that will affect your choice of lighting for growing microgreens is light intensity. The PPFD (photosynthetic flux density) value indicates how many photosynthetically active photons (in the PAR spectrum) from the light reach the plants. Together with the length of lighting, intensity is a variable that allows us to estimate how much energy the plants receive from light. The optimal light intensity for growing microgreens ranges between 200 and 400 µmol/m²/s, with the recommended lighting period for microgreens being 12-16 hours per day.
In a study conducted by researchers from the University of Florida, microgreens grown under low light intensity (around 50 µmol/m²/s) had lower yield and lower antioxidant activity compared with microgreens grown under high light intensity (200 µmol/m²/s). At the same time, microgreens grown under blue light had higher antioxidant activity than those grown under light with a predominance of red.
Higarden tips for lights for growing microgreens
GENT G-LED grow lights are energy-efficient LED lights specially designed for indoor growing of microgreens. They offer a spectrum optimised for plant growth, especially in the vegetative stage. GENT G-LED lights emit a white-blue spectrum with a colour temperature of 6500 K, which is ideal for growing microgreens or other plants in the early stages of growth.
|
Light/model name |
Power |
Colour temperature |
PPF |
Dimensions (LxWxH) |
Description |
|
42 W |
6500 K |
135-210 µmol/s |
95x4x3 cm |
A light suitable for beginners or for growing a small amount of microgreens. |
|
|
42 W |
6500 K |
135-210 µmol/s |
95x4x3 cm |
A light for microgreens including a cable for connection to the mains. Multiple lights of this type can be connected into one circuit. |
|
|
GENT G-LED Microgreens Dimmer Rack Komplet |
100 W |
6500 K |
210 µmol/s |
120x60 cm |
A complete set with dimmer and cabling with 4 GENT LED segments and accessories for easy connection and installation. Ideal lighting for growing microgreens on one level. |
|
GENT G-LED Microgreens Dimmer Rack Komplet 400W na 4 patra
|
400 W |
6500 K |
210 µmol/s |
4x(120x60) |
The 400W LED complete set is especially suitable for home growing of microgreens on four levels. |
Would you like to learn more about indoor growing of microgreens and other modern gardening practices? Visit our Higarden blog!
How to Use Calibration Solutions and pH Metres?
Quality pH metre is a very useful and at the same time the most accurate available tool for testing pH values, which tell us whether a given solution reacts acidically or, conversely, alkalinely. To be able to rely on the accuracy of your pH metre, it needs to be calibrated often enough. For this purpose, calibration solutions are used, which not only help you ensure correct measurement results, but also extend the service life of metres.
Calibrate often
First of all, it should be emphasised that there is no universal answer to the question of how often to calibrate a pH metre. Every manufacturer has a slightly different device, and therefore also a different procedure. We therefore always recommend reading the manufacturer’s instructions for use carefully. That is the best start. It also depends on the required measurement accuracy, which determines the calibration frequency. The ideal situation is calibration every day, or before every measurement.
Preparing the pH metre for calibration
- Switch on the pH metre.
With the first point, we again return to the importance of the instructions for use for every instrument for measuring pH. Among other things, it tells you the exact time needed to warm the device up to the ideal operating temperature. After you switch on the pH metre, it usually needs half an hour to warm up. Only then can you begin calibration and subsequently start using it.
- Clean the electrode.
Remove the electrode from the storage solution and then rinse it with distilled water under an empty waste beaker. Sometimes the electrode is extra dirty. In these cases, the manufacturer’s manual should again provide you with a safe solution. After rinsing, dry the electrode carefully with a cleaning wipe. Try to avoid excessive rubbing of the electrode, which has a very sensitive membrane around it. Do not forget that you need separate containers for rinsing and calibrating the pH metre (i.e. waste and calibration).
- Prepare a pH calibration solution, also known as a buffer.
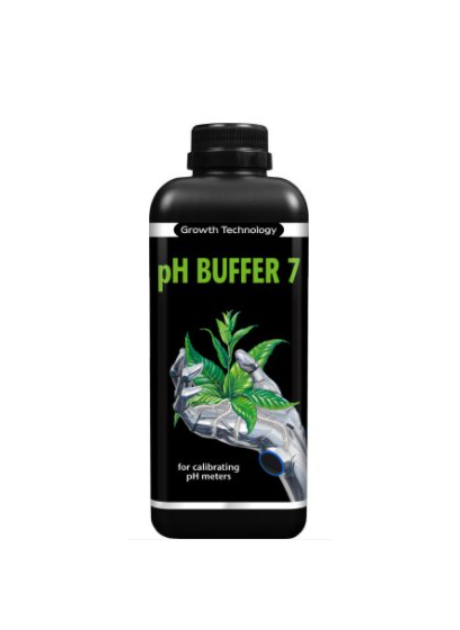
For calibrating a pH metre, you will usually need more than one buffer. To ensure proper operation of the pH metre, two buffers are usually used, because two different concentrations have different results. The first will be a “neutral” buffer with pH 7. The best-selling one is Growth Technology pH BUFFER 7. The pH value of the second calibration solution should be close to the expected pH of the sample. That means either pH 4 or pH 9.21. Buffers with a higher pH (9.21) are best for measuring alkaline solutions, while buffers with a low pH (4) are best for measuring acidic samples. Given that the correct pH of the substrate ranges between 6.5–7.0 and in hydroponic growing the optimal value is usually even lower (between 5.5 and 6.5), as a grower you will be interested only in the first of the two mentioned options, for example again the most popular one from Growth Technology. The procedure in which you use two calibration solutions for calibration at pH 7 and pH 4 is called two-point calibration, which is more accurate than one-point calibration (only at pH 7).
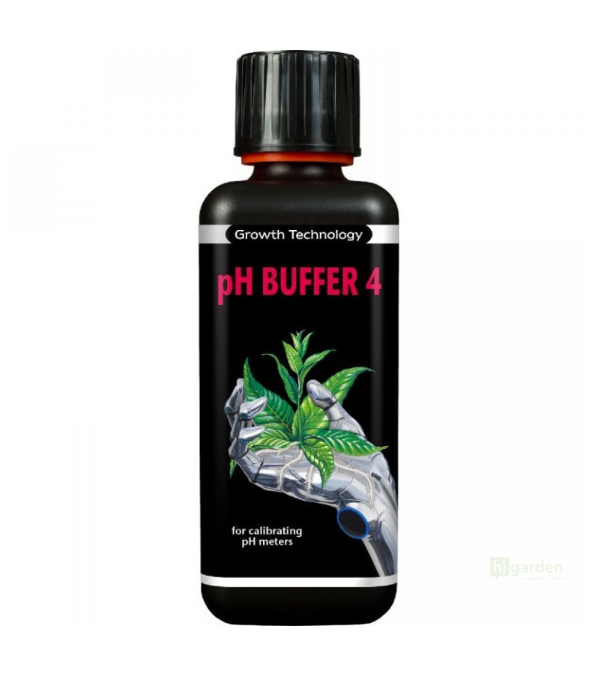
pH values depend on temperature. Make sure, therefore, that the buffers reach the same temperature as the pH metre. Then pour the buffers into the individual calibration beakers. The buffers should be kept in the calibration beaker for a maximum of two hours.
Calibrating the pH metre
- Place the electrode into the pH 7 buffer and start reading.
Press the “measure” or “calibrate” button and start reading the pH as soon as the electrode is immersed in the calibration solution. First wait until the pH value stabilises (1-2 minutes).
- Set the pH.
Once you have a stable reading, set the pH metre to the buffer’s pH value by pressing the measurement button a second time. Setting the pH metre after the reading has stabilised allows for more accurate and refined readings. Stirring the buffer before measuring is not necessary, but if you do, remember to stir all other buffers and samples in the same way.
- Rinse the electrode with distilled water and dry it.
Gentle drying of the electrode is again made easier by a lint-free cleaning wipe.
- Place the electrode into a suitable buffer for the sample and start reading.
As soon as the electrode is placed in the buffer, start “reading” the pH value by pressing the measurement button.
- Set the pH a second time.
Once the reading stabilises, set the pH metre to the same pH value as the calibration solution by pressing the measurement button.
- Rinse the electrode.
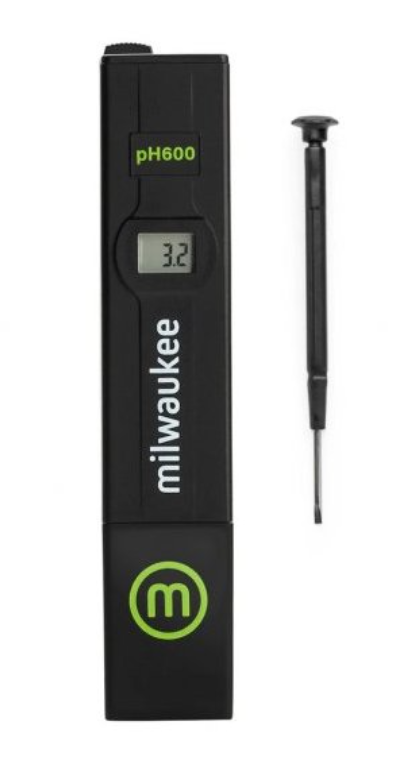
Correct use of the pH metre
- Place the electrode into the sample and start the measurement process.
As soon as the electrode is placed in the sample, press the measurement button and leave the electrode in the sample for approximately 1-2 minutes.
- Set the pH value.
Once the reading stabilises, press the measurement button. This is the pH value of your sample!
- Clean the electrode after use.
Rinse the electrode with distilled or deionised water. You can also carefully dry it with a lint-free cleaning wipe. In practice, however, it is recommended to only blot away excess water droplets with a cleaning wipe. Using a regular wipe could create a static charge that interferes with the electrode reading.
What are the other best practices when measuring pH?
- Regular electrode cleaning: Use high-quality cleaning solutions for pH electrodes to prevent incorrect calibration and measurement, as deposits gradually form on the electrode during pH measurement, covering the measuring glass.
- Check the electrode from time to time: Inspect whether it is damaged, as the sensitivity of the glass decreases over time. Even the slightest damage to the electrode results in incorrect measurement, so pay proper attention to its condition.
- Full electrolyte level: Electrolyte flows out through the ceramic bridges continuously. Inaccurate measurement can also be caused by a low electrolyte level, although this does not apply to non-refillable electrodes. It is recommended to ensure that the electrolyte level is at most 1 cm below the tip of the electrode.
- Correct immersion of the electrode: Always make sure that not only the sensing glass, but also the electrode’s reference bridge, is properly immersed in the electrolyte. If this is not the case, simply add an adequate amount of sample to the beaker so that the electrode is completely submerged.
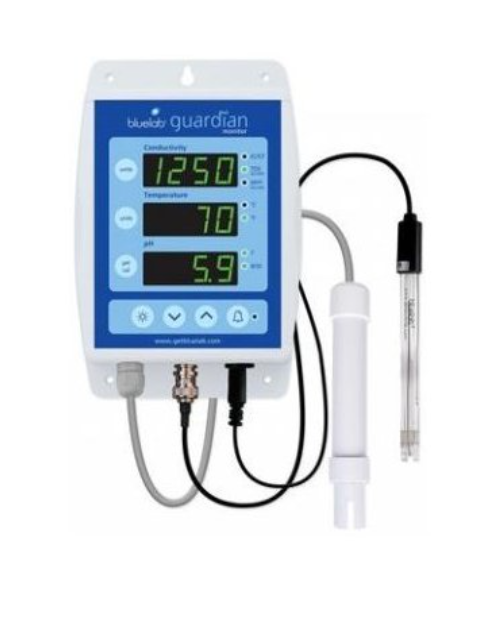
In most cases, the more sophisticated the pH measuring device you have, the more convenient and simpler its calibration is. One example is the combined pH/EC Bluelab Guardian Monitor, which has a practical button for pH calibration.
In addition to pH calibration solutions, EC calibration solutions are also used. Customers usually prefer EC calibration solutions CONDUCTIVITY STANDARD from the brand Growth technology or solutions from the traditional company Milwaukee. It should, however, be said that while some pH metres need to be calibrated practically every day, the consumption of EC calibration solutions is significantly lower, because EC metres last quite a long time without calibration, unlike pH metres, and some more advanced EC monitors do not need calibration at all.
If you need any further information regarding calibration solutions and pH metres, we will be happy to provide it, for example via the well-known e-mail address info@higarden.eu. We look forward to your questions!
We also recommend these products:
- Aqua Master Tools P110 PRO, pH and EC metre and thermometer
- Milwaukee KIT - Martini pH55 + EC60
- Torus Hydro perfectpH capsules
What to read next:
Where and How to Correctly Position Fans in a Grow Tent or Growing Room
Precise climate control is the foundation of success in indoor growing. Yet the correct placement of fans is often an overlooked detail that can significantly affect the microclimate in the growing space. Air circulation influences plant growth as well as their resistance to diseases and pests. In this guide, we will look at the importance of fans, their effective placement, and add tips for grow boxes and grow rooms.
When growing plants indoors, we use two basic types of fans, each for different purposes. Extract fans remove “stale” air from the growing space. Fresh air can be supplied passively, or a second fan can be used for this purpose, which is especially useful in larger grow rooms. Constant air exchange helps maintain a stable temperature and humidity in the growing space. A consistently optimal climate is important both for plant photosynthesis and as prevention against mould and the spread of pests.

Circulation fans placed inside the growing space are designed to imitate the natural wind that affects plants outdoors and stimulates them to form strong stems. Constant air movement also makes life more difficult for pests and discourages them from settling on plants. Correctly positioned circulation fans help prevent pockets of hot or cold air from forming, for example under lights or in the corners of the grow room.
Types of fans for indoor growing
- Clip-on circulation fans are the most commonly used type. They can be easily attached to the tent poles and are best suited to small or medium-sized grow boxes.
- Oscillating pedestal fans are suitable for moving air in medium-sized or large tents and grow rooms. They take up slightly more space than the clip-on version. They are usually larger and, thanks to oscillation, cover more of the growing area.
- Floor fans stand out for their high output and are most often used in large grow rooms, where they move air between the aisles with plants. They can also be used in large tents. Be careful with the strong air stream, which may damage plants.
- Extract fans of various types are an essential part of every indoor grow room. Older types with an AC motor are noisier and consume more energy than newer models driven by an EC motor. More modern versions of extract fans are easier to regulate and the purchase price is slightly higher.
Fan placement in small tents
In small grow tents with roughly up to 2 m² of growing area, you will usually manage with one extract fan and one circulation fan.
- Circulation fans should be placed in the corner of the tent 20-50 cm above the tops of the plants. The air stream should reach both the upper and middle parts of the plants. In a small space, the fan may be very close to the leaves, so set it to a lower output so that the air does not dry out the plants. For this purpose, small clip-on fans with or without oscillation are sufficient.
- Additional circulation fans are usually not needed in small grow tents. If you wish, you can place one small fan at the base of the tent so that the air is directed at the lower parts of the plants. In that case, the substrate will dry out slightly faster. Small clip-on fans are suitable for this purpose in small tents.
- Extract fan always belongs in the upper part of the tent so that it can efficiently remove warm air rising from the lights. An intake fan is not necessary in smaller tents.
Fan placement in medium-sized tents
Medium-sized grow tents with an area above 2 m² may require several circulation fans and one or two fans for extraction and possibly also air intake.
- Circulation fans should be installed in a similar way as in smaller tents, that is, in the corner 20-50 cm above the tops of the plants. If you want to ensure better air movement or are growing in a medium-sized tent, place a second circulation fan in the opposite corner. The air stream should be directed slightly above the tops of the plants towards the lights.
- Additional circulation fans can be used to move air near the floor of the tent or in the middle parts of the plants. This is especially useful if you are growing many plants close together, for example with the SoG method. For this purpose, you can use oscillating, floor or clip-on fans.
- Extract fans, just like in smaller tents, should be installed in the upper part of the grow box. In medium-sized tents, a second fan for air intake may also be needed.
Fan placement in large tents and grow rooms
Large grow boxes and grow rooms with tens of square metres of area require a more sophisticated ventilation arrangement to ensure sufficient air flow in all parts of the growing space.
- Circulation fans should be installed in every corner of the tent or grow room. Make sure the fans evenly cover the upper, middle and lower parts of the plants. For larger growing spaces, oscillating pedestal and floor fans are most suitable.
- Extract fans must have sufficient output in the case of large tents or grow rooms, and several units for air intake and extraction may also be needed. For successful climate control and optimisation in large spaces, growers usually use automatic climate control units.
Are you interested in the hottest tips for indoor growers and growers? Read the latest articles on our blog.
Do not underestimate air exchange and circulation inside the growing space
Tips for indoor growers are an inseparable part of our blog. This time we will focus on fresh air and its movement inside the growing space, where everything must be done to prevent the climate from getting out of control. So what kind of air are your plants breathing? To a large extent, that is also how well they do. And perhaps it is time to get things moving at last! Read on to find out how to ensure that the air in the grow box circulates properly.
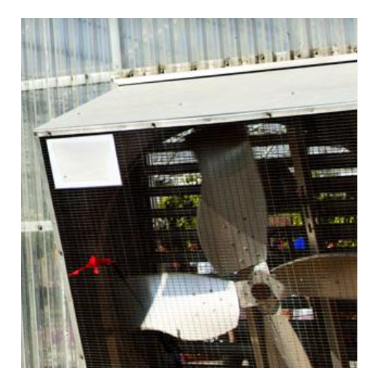
It is rather surprising that regular air exchange or proper air circulation is among the most underestimated aspects of indoor plant cultivation, despite the availability of information today. The clear aim of this article is therefore to explain and remind readers of the importance of these aspects. Plants growing freely in nature automatically have a constant supply of fresh air with enough oxygen and carbon dioxide, which flows freely through the vegetation, thereby also ensuring the removal of accumulated moisture.
Nature, of course, has it all under control. Why, however, so many growers still take these processes lightly is still something of a mystery in the world of indoor gardening. If we use a closed greenhouse or have at our disposal a grow tent, or even an entire room for indoor plant cultivation, we have no choice but to account for completely different conditions than those outdoors and to try to imitate nature using proven methods.
According to experienced growers, we should not be lulled into a false sense of security by the fact that the plants look fairly healthy at first glance and are growing reasonably well. Such an approach could cost you tens of per cent of your potential yields unnecessarily! It would certainly be a shame to miss out on higher yields, which is why we will divide the following advice, related to the perfect climate inside the growing space, into two parts:
- Air exchange
- Air circulation
You probably already know that plants capable of photosynthesis consume carbon dioxide (CO2), while at night it is mainly oxygen. Humidity inside a closed growing space increases as a result of their transpiration. Given that a closed growing environment, for example a medium-sized grow tent, requires an intensive source of artificial lighting, replacing sunlight for the plants present there (partly in the case of discharge lamps or completely in the case of full-spectrum lighting), but also emitting a considerable amount of heat into the surroundings together with the light, which tends to accumulate inside the grow tent or room. Rising temperature and humidity in a closed environment... You have probably quickly imagined, from these words, what scenario would occur inside the grow box without sufficient ventilation. The transpiration activity of the plants would gradually cease. They would therefore be unable to cool themselves naturally, which would lead to their death.
Our TIP: The new Resin+ LED AX 600W 2.8 µmol/J also belongs among full-spectrum LED grow lights, simulating natural sunlight for plants, while emitting less heat into the growing space than a classic discharge lamp.
 1. Air exchange
In terms of air exchange in the growing space, it is first necessary to distinguish between two types of environment, namely open or closed.
- If we mean a closed indoor growing room in the true sense of the word, we count on automatically controlled ventilation and CO2 supplementation (see separate article: Growing plants and carbon dioxide. How and why should it be used?). In practice, however, this usually concerns professionally equipped growing spaces for commercial growers.
- At the moment, we are more interested in home growing, and in this case we refer to the system as open, where a reliable extract fan removes air from the grow tent or room and fresh air flows into the growing space. These are the two options for achieving this effectively in the comfort of your home:
- Active air intake - this requires two fans. The one with the higher output serves to extract air (the so-called extract fan). As you will no doubt correctly suspect, the second fan in this setup serves to bring in air, and it is usually sufficient for it to have a lower output than the extract fan. Negative pressure controllers allow simple control of both fans at the same time and optimisation of their output.
- Passive air intake - fresh air is brought into the growing space thanks to the negative pressure created by the extract fan. If you opt for passive air intake, do not forget that the area of the intake opening for passive intake should be at least twice as large as the area of the extract ducting! Only then will negative pressure not prevail inside the grow box or indoor growing room, which would mean an insufficient supply of fresh air to the plants.
Our TIP: WHISPERBLOWER: professional fans with unrivalled efficiency (in the picture)

One of the most common questions from growers starting out indoors is which factors are most important when choosing air handling equipment for a grow box. Therefore, always consider the following first:
- What is the total volume of the growing space you will be using?
- What is the (average) air temperature and humidity of the air that will be brought into the growing space?
- What grow lighting will you use inside the grow tent or room?
- How many plants do you plan to grow inside the growing space? To what extent will it be filled?
- There is one more very important factor, without which this overview would not be complete, and that is duct resistance.
Returning to the first bullet point, it should be noted that the total volume of air in the growing space should be exchanged at least every 5 minutes and ideally every minute! There is never any shortage of examples, so for illustration let us imagine a grow tent with a volume of 2 m2. Although it might seem that a fan with a flow rate of 120 m3/h will be just right in this case, an experienced indoor grower will choose a fan that allows at least double the airflow, because they also take into account duct resistance (see the last point) and the odour filter. They will leave an even greater reserve if the pipes are long or bent. Simply put, the longer and more complex your ducting system is, the harder the fan has to work to extract air, and therefore it should have adequate output. It is always better to have a higher output available, which can also be easily reduced using controllers, than to have to buy a completely new, more powerful fan because you need more power.
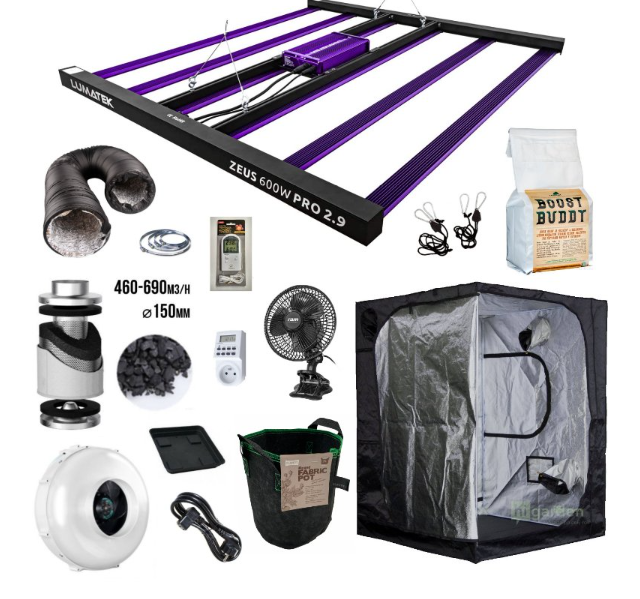
Our TIP: Do you not want to design your growing air handling system yourself? Use a complete tailor-made indoor solution in the form of our cost- effective grow box sets, assembled by our experts (example in the picture). You can leave the technical concerns to us and simply connect the whole system at home and start indoor growing.
 2. Air circulation
One thing is to ensure that plants grown in a closed environment breathe nothing but fresh air through their leaves. However, many growers forget that air exchange and air circulation are interconnected.
It is therefore also necessary to think about proper air circulation, which is absolutely crucial in a closed space of several cubic metres if we want to maximise the genetic potential of the plants being grown.
But beware! Everything in moderation. If you overdo the airflow provided by circulation fans, you will expose your plants to unwanted stress and may even damage their leaves. For this reason, it is important to place a circulation fan inside the grow tent or room so that the air always blows level with the tops of the plants. Truly even air circulation and the associated homogeneous climate in the growing space will be ensured by installing a larger number of circulation fans, about which you can learn everything you need in a separate article: How do you choose a circulation fan?
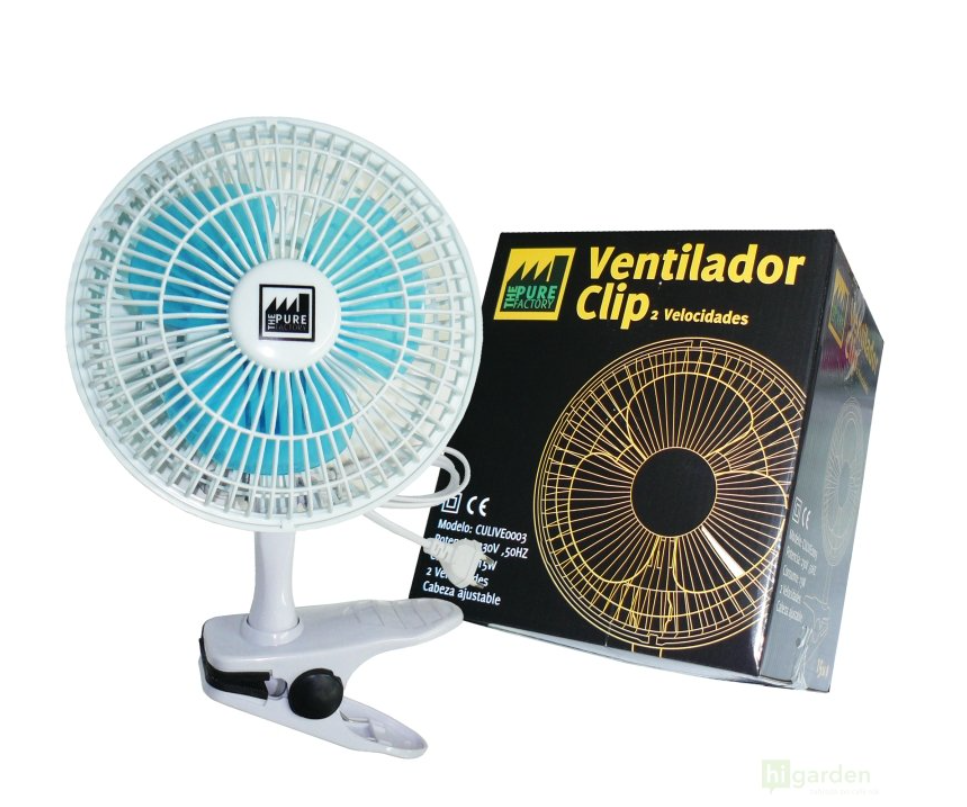
And these are the three reasons why we do not know anyone who does not use circulation fans in a grow tent:
- Photosynthesising plants consume carbon dioxide. They exhale oxygen and moisture. In the immediate vicinity of the leaves, a climate gradually accumulates that is so-called stale and no longer allows the leaves to function normally.
- Fresh air that has just been brought into the growing space is effectively mixed by circulation fans, thanks to which no areas with different temperatures arise in the grow tent or room and overheating of plant leaves is also prevented.
- What is second nature outdoors is once again provided indoors by a circulation fan, whose operation gently moves the plant stems through the airflow, forcing them to strengthen healthily. The leaves of the plants should be in slight motion at all times. This also clearly shows you whether the air in the growing space is circulating continuously. This is easiest to check with grow tents whose construction has viewing windows, such as the BudBox PRO XL (see separate article: BudBox - stable grow tents are number one in England).
After reading the above lines, you should have no doubt whatsoever that a constant and at the same time sufficient supply of fresh air to all leaves in a closed growing system is a basic prerequisite for effective photosynthesis, and thus for high yields indoors.
Would you like to ask us something? We are here for you at the well-known e-mail address info@higarden.eu. We will be happy to advise you, for example, on choosing the right air handling equipment.
We also recommend these products:
What to read next
- Prima Klima - fans for maximum output and minimum noise
- VIPARSPECTRA and growing under LED - definitely a good idea!
- Do you know what VPD is? Discover the key to perfect conditions for plant development
High Temperatures in Indoor Growing: How Can You Avoid Them?
Although summer is now irretrievably behind us, the heating season is already in full swing. That is why the topic of high temperatures remains highly relevant, as they can quite easily become the cause of restricted growth or flowering in your precious plants and, in the worst case, even permanently damage them. In this article, you will learn how and why to deal with high temperatures inside a grow tent or room. And it will not be only about air temperature. Among other things, we will also remind you why substrate temperature is important. You will also learn the difference between temperatures that suit the roots and the above-ground parts of plants.
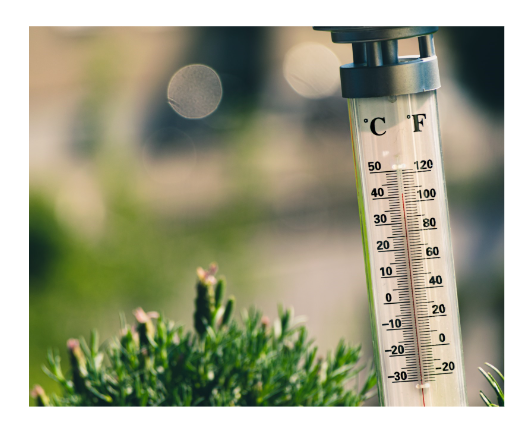
Are you wondering why plants every year tolerate extreme temperatures so poorly, not only outdoors during summer, but also in overheated rooms during the winter months? It is because if the environment in which they grow is too hot, the plants can no longer cool themselves sufficiently through the process called transpiration. Simply put, they cannot keep up with releasing water, and the hot air causes them to dry out relentlessly and gradually deteriorate. This is, of course, a problem that needs to be prevented or at least addressed in time. It is also worth noting that plants grown outdoors are partly adapted to summer heat, because they cannot escape it in nature. As an indoor grower, however, you can take the right steps so that your harvest never again suffers from high temperatures and hot air.
What can high temperatures in the tent cause?
Otherwise, nutritional deficiencies will sooner or later appear (see separate article: Symptoms of a deficiency of important nutrients), or the signs of their undesirable excess. In addition, plant growth usually slows down significantly, and the leaves may also die off. If the leaves do not die directly in such cases, they usually curl and dry out. Once your plants start to wilt, things are really serious. That is almost the end, when irreversible degenerative processes occur and the harvest is permanently devalued.
Dealing with high temperatures in indoor growing
Now let us focus on the most important factors related to temperatures in the growing space within indoor plant cultivation, which you can influence as a grower.
You may already know that especially powerful discharge lamps emit a considerable amount of heat into their surroundings in addition to light radiation. Although many growers still swear by classic discharge lamps, whether out of habit or for other reasons, modern LED lamps are gradually, but surely, overtaking them on the grow lighting market.
Our TIP: LED Set 720W Lumii Black
LED grow lighting can work with electrical energy more efficiently, converting it into light radiation. Thanks to this, increasingly popular LEDs do not raise the temperature inside the grow tent nearly as much as discharge lamps do. You can read about other differences between discharge lamps and LED fixtures, such as the composition of the light spectrum or electricity use, in a separate article: Growing under artificial lighting: HPS vs. LED.
The good news is that you can at least partly control the heat generated inside the grow tent when using powerful discharge lamps. On the one hand, you can temporarily reduce the light output, because plants suffering from excessively high temperatures will not be able to make use of high PPF values anyway, but above all, when using a discharge lamp, you can take advantage of air-cooled reflectors or COOLTUBE-type reflectors.
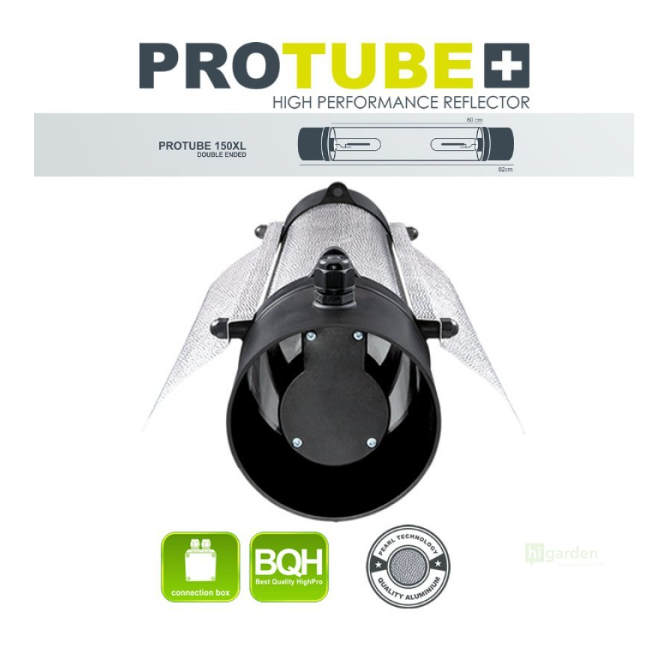
- VENTILATION AND AMBIENT TEMPERATURE
The temperature inside the growing space is, of course, primarily determined by the temperature of the surrounding air that is brought into it. Indoor growers are not some special species that likes freezing at home in winter, but in some cases it is still worth lowering the temperature in a comfortably heated room by at least a few degrees. In summer, there is nothing better than air conditioning, which is not among the cheapest equipment, but especially second-hand it can become a more accessible solution that will significantly make home growing of herbs, fruit or vegetables easier for you. Other proven tips include switching the grow lights on only at night, when temperatures are usually lower. And if the layout of your flat, or the placement of the grow box, allows it, bring fresh air into it directly from outside using an intake fan connected to ventilation ducting.
This brings us to the flow of fresh air around the plants, which is unnecessarily underestimated in indoor gardening, at least at hobby level and in the early stages. But remember that the more fresh air you “move” through the growing space, the better the plants grown inside are able to cope with higher temperatures. It is important that the air being extracted from the grow room does not mix with the fresh air that is still flowing into the growing space. It would affect both its temperature and humidity. The quality of a well-designed ventilation system is simply essential. On this topic, we also recommend the following separate articles:
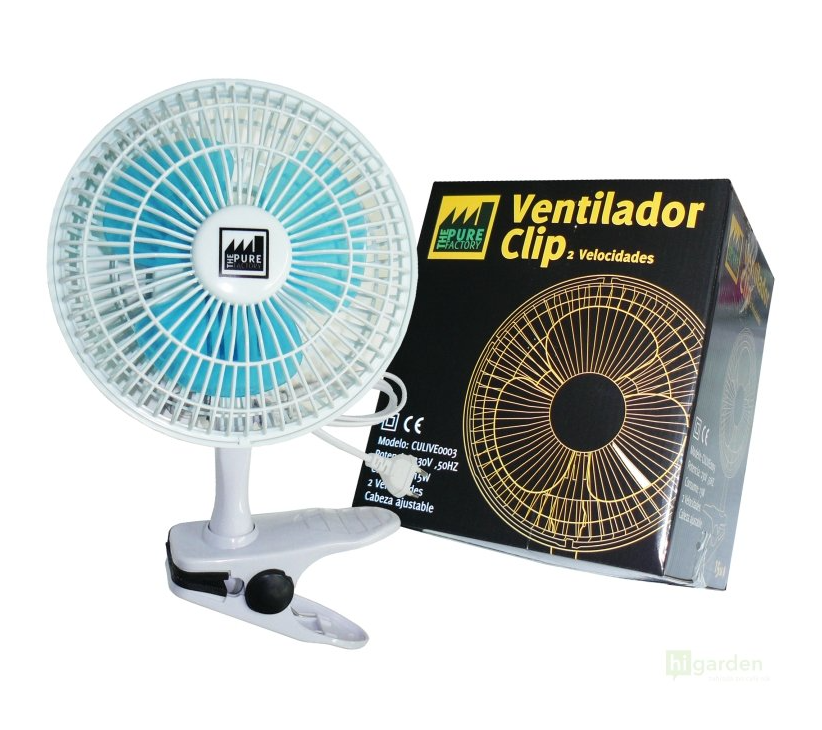
And how can you ensure that the hot air in the grow room does not stand still, but instead keeps flowing around the plants? Simple! That is exactly what circulation fans are for, as they are indispensable helpers for every indoor grower, and cheaper versions can be bought for literally a few pounds. You can learn everything important in a separate article: How to choose a circulation fan?
Our TIP: Clip fan PF 15 cm 15 W, 2 speeds
- HUMIDITY
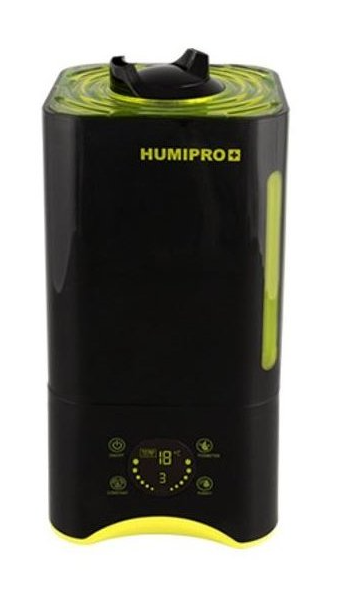
When growing plants indoors in a grow box, it is not so much about the fact that the relative humidity inside the tent directly lowers the temperature, but it can certainly be said that higher humidity inside the growing space helps plants cool themselves more effectively. And that is exactly what we need when temperatures are too high at a given moment. Temperatures approaching 30 °C require at least 70% humidity in the environment. A high-quality and powerful ultrasonic air humidifier is a great helper in these cases, except in the late flowering stage. For your plants grown in the grow box to achieve the optimal level of transpiration, it is good to understand the relationship between temperature and humidity, which a separate article will help you with: Do you know what VPD is? Discover the key to perfect conditions for plant development.
- TYPE OF GROWING MEDIUM AND ROOT SYSTEM
Are you used to the classic combination of a pot and soil substrate, or do you prefer hydroponic systems, in which you use inert hydroponic media, or perhaps coconut substrates? It is also important to realise that the chosen growing medium and the selected irrigation method will affect the plants’ ability to take up water. The easiest time of all is in hydroponic or aeroponic systems.
High temperatures then pose a threat especially to growers who cultivate plants in soil, which is not as airy as coconut coir, for example. And the combination of high soil temperature that is also waterlogged, which is one of the most common beginner mistakes, opens the door wide to root rot. So if you are dealing with high temperatures inside an indoor grow room, you will achieve better results if you opt for airy growing media and self-watering systems. In such a case, however, you must keep an eye on the temperature of the nutrient solution. (We also recommend the separate article: Why and how to maintain a stable nutrient solution temperature?) The above-ground parts of plants are prepared for temperatures around 30 °C, but the temperature in the root zone should be about ten degrees lower and should not deviate too much from the optimal 21 °C. This is because plant roots need as much oxygen dissolved in the water as possible, and its content decreases as temperatures rise.
The previous lines therefore show that in a grow tent and in indoor gardening in general, it is not only about air temperature, but also about the temperature in the root zone, which is often unnecessarily overlooked. Most fast-growing plants are comfortable at temperatures in the range of 20 - 30 °C, but remember that for the roots, unlike the above-ground parts, the lower limit will always apply.
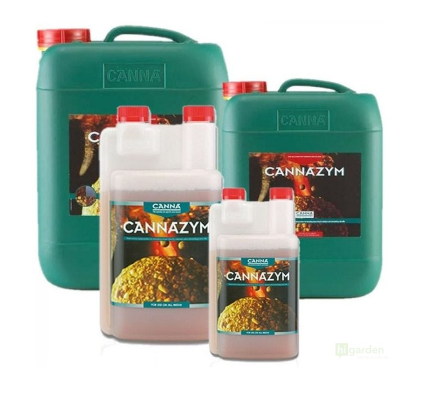
Our TIP: Time-tested prevention for plant health and resilience is Cannazym - a blend of more than 12 types of enzymes, enriched with vitamins, which intensively supports the breakdown of dead roots and their subsequent conversion into nutrients usable by the plant.
High temperatures should no longer hold you back when growing plants indoors. And if you want to ask us anything, we are here for you at the well-known e-mail address info@higarden.eu.
We also recommend these products:
What to read next:
How to Control Photoperiod to Increase Crop Yields
 Controlling photoperiod is a basic prerequisite for high yields when growing indoors and in greenhouses. We will show you how changes in the length of day and night affect plants and how to use this in indoor, outdoor or greenhouse cultivation. In addition, we will reveal several advanced techniques used by professional and commercial growers.
The alternation of day and night is an important factor for life on Earth. Plants and animals respond to changes in the length of daylight and darkness (photoperiod) with physiological or behavioural reactions. In animals, day length affects, for example, coat and feather colouration, migration, or the onset of mating season or hibernation. For many plant species, changes in photoperiod are a controlling factor that governs flowering.
Photoperiod
We use the term photoperiod to describe the number of hours of daylight and darkness during one day. The natural photoperiod changes throughout the year depending on geographical location. At the equator, photoperiod changes during the year are minimal and the day is divided year-round into approximately 12 hours of light and 12 hours of darkness. In the Northern Hemisphere, the longest day of the year (the summer solstice) occurs approximately on 21 June. After this date, the days become shorter (i.e. the nights longer) until 21 December (the winter solstice). In the Southern Hemisphere, this situation is reversed (i.e. the longest day is 21 December and the shortest day is 21 June).
How do plants know that the sun is setting?
Many flowering species (angiosperms) are equipped with photoreceptor proteins, such as phytochrome, thanks to which plants can perceive seasonal changes in photoperiod length. Phytochrome occurs in plants in two forms, the active Pfr form and the inactive Pr form. Red light emitted by the sun during the day converts inactive Pr into active Pfr. As sunset approaches, far-red light begins to increase, converting Pfr back to Pr. At the same time, Pfr can be converted to Pr in a process known as “dark reversion”, which occurs during a long period of darkness. The phytochrome conversion system allows plants to recognise whether it is night.
By manipulating the ratio of red and far-red light, it is possible to influence plant flowering. It has been found that plants flower later if they are exposed to more red light. Experiments have also shown that flowering can be inhibited by illuminating plants with red light in the middle of the night. In the case of short-day plants, this means that they will not flower if they are exposed to light for a few minutes during the night. Long-day plants, on the other hand, can flower even when illuminated with red light during the night.
Short-day and long-day plant species
Manipulating photoperiod is one of the basic tools growers use to control plant growth and maximise crop yields, especially in indoor growing (in tents or enclosed rooms), but also in greenhouses and outdoors. By using blackout or supplementary lighting, growers can speed up or delay flowering, extend the vegetative growth period, or keep plants in vegetative growth for a long time for cloning purposes.
We distinguish between short-day plants, which flower when days shorten and nights lengthen, and long-day plants, in which the onset of flowering is accelerated by longer days and shorter nights. The third category consists of neutral plants, whose flowering is not affected by photoperiod. Long-day and short-day plants are further divided into facultative and obligate types, according to their response to photoperiod.
- Obligate short-day plants flower only when nights are long (more than 12 hours) and days are short. These include hyacinth bean, hemp, poinsettia and chrysanthemum.
- Facultative short-day plants flower earlier if the photoperiod is short, but they will flower regardless of day length. These include mimulus or plantain.
- Obligate long-day plants flower only when days are long and nights are short (less than 12 hours). These include fuchsia, China aster and strawflower.
- Facultative long-day plants flower earlier during long days, but they will flower regardless of day length. These include sage or marigold.
Methods for controlling photoperiod
Blackout
The aim of blackout is to shorten the photoperiod to the required length, which is especially useful for short-day species grown outdoors or in a greenhouse. Blackout makes it possible for short-day plants to flower earlier than natural light would allow. It is also possible to cover entire plants (with some difficulty), but the most suitable method is to blackout plants in specially adapted greenhouses.
Supplementary lighting
The use of grow lights to supplement natural light is most commonly used by growers in greenhouses or outdoors. Artificial lighting can be used to extend the length of the day (the lighting period), which is useful both for short-day plants (delaying flowering) and for long-day plants (accelerating flowering). Supplementary lighting can also be used to interrupt the night, which causes plants not to flower.
Artificial lighting
When growing plants entirely under artificial lighting in a grow box or grow room, the photoperiod is entirely in the grower's hands. Most growers keep the lights on for 16-18 hours during the vegetative phase and for 12 hours during flowering. This, however, assumes that they are growing short-day or photoperiod-neutral plants. In the past, it was necessary when switching to flowering to replace the discharge lamp with blue light intended for growth with another wavelength for flowering; however, modern LED luminaires simulate daylight much better than outdated sodium technology.
Would you like to learn more about grow lighting and other tips for indoor growing? Do not hesitate to visit our blog.
BudBox - Stable Grow Tents Are Number One in England
Read why BudBox grow tents are so popular in the United Kingdom that this year they have already placed first for the sixth year in a row in the prestigious Garden Culture Magazine ranking. What do English growers, both professional and enthusiastic amateur, value most about them? And in which variants are they available so that everyone can choose the right one? If you are selecting a new grow box for indoor plant growing, you should definitely not miss this article!

The traditional English brand BudBox™ manufactures professional grow tents as well as grow tents for hobby growers. Since its founding in 2004, it has remained the most trusted name on the market for grow tents for indoor plant growing, as for many years it has supplied only grow boxes that are safe, of high quality, thoroughly tested, and proven in practice by thousands of satisfied growers, including the most demanding ones.
The long-term popularity of this manufacturer’s tents is certainly also due to the constant effort to innovate already high-quality models. The main advantages that will please anyone who wants to grow plants indoors include the following features:
- The strongest frames (see below).
- Opaque material.
- Innovative access solutions for plants.
- Above-standard ventilation openings (+ 20%). Here we must highlight that the ventilation and cable openings are cleverly designed, which you will certainly appreciate in practice.
- Durable construction with a corrosion-resistant finish.

The fact that BudBox is literally an icon among grow tents is also helped by the massive range of individual variants, from which everyone can choose according to their individual needs or current budget! The wide spectrum of different sizes within the PRO product range offers customers a choice of two types of tents, which differ in the type of reflective material. The BudBox range also includes unusual grow tents with a sloping roof, as you can see in the introductory photograph.
- BudBox White PRO are white grow tents, suitable for professionals and more demanding growers who are happy to pay extra for a perfect growing space for indoor plant growing with maximum reflectivity. So if your first priority is not the budget, but rather the question of which tent is best for you in terms of price-to-performance ratio or sufficiently robust and large, 28 grow box models from this product range will provide you with a sufficient answer. In the image below you can see, for comparison, the white BudBox PRO Intermediate 75x75x160cm. If you would like even more options, one alternative is also the tents we wrote about in a separate article: Design grow tents HOMEbox Ambient combine the pleasant with the useful.
- BudBox Silver PRO are silver grow tents, more than sufficient for growing herbs, fruit or vegetables in the comfort of your home. These 28 models with silver Mylar inner reflective material have slightly lower reflectivity, but an even more attractive price tag. In the image below you can see, for comparison, BudBox PRO Intermediate 75x75x160cm - silver.
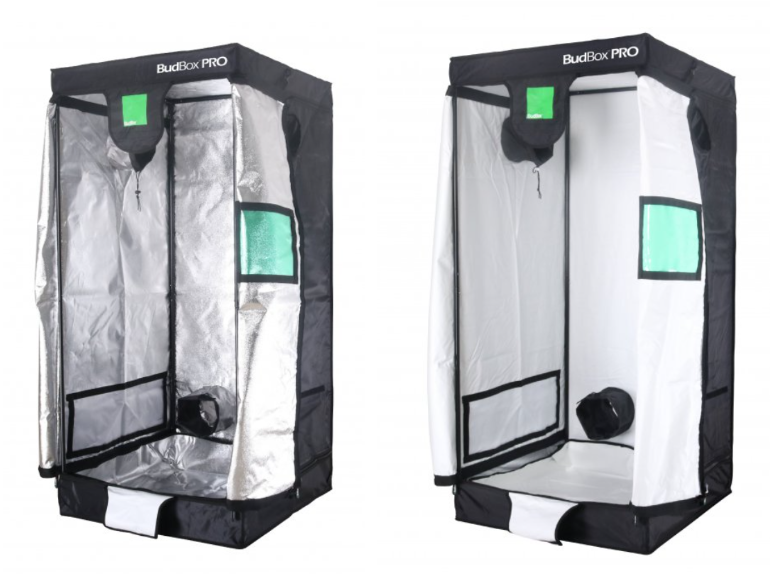
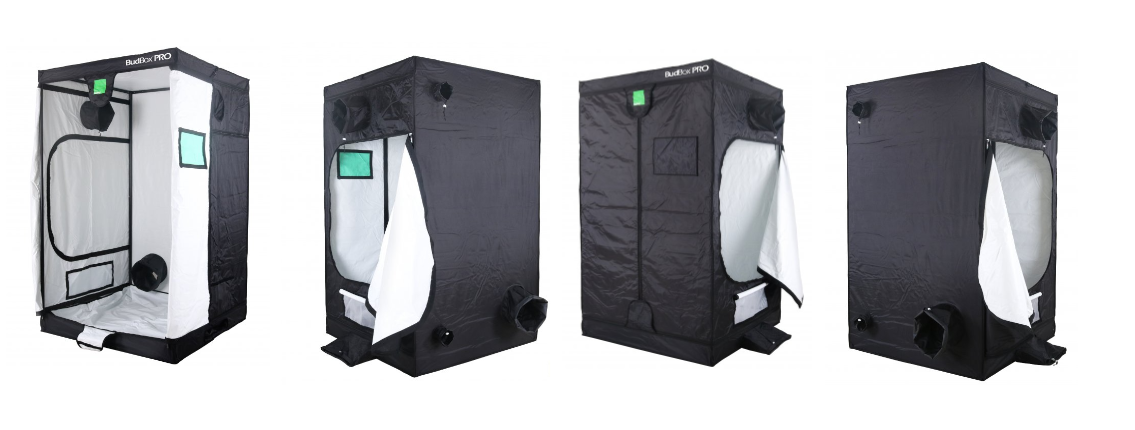
For both the white and silver BudBox tents, from the PRO XL variants (120x120) upwards, a green viewing window is included, so you can keep an eye on your crop at all times without having to physically enter the tent and unnecessarily disturb the optimal growing environment. The material used is 100% non-toxic even at higher temperatures. Other useful features are also worth mentioning:
- Double cuff ventilation openings.
- Shaded passive ventilation openings.
- Drip tray.
- Extra-strong, lightproof zips.
- Double, stitched seams.
- Practical access doors.
- The canvas can be fully unzipped for easier cleaning.
Smaller BudBox tents
Do you only need a small tent for growing a few plants? Then try the bestseller among BudBox grow boxes in silver, which is the BudBox PRO Small (75x75x100cm). The BudBox PRO Medium (75x75x200cm) has the same base, but is twice as tall and also comes in white. This means that you can already grow taller plants in it. And yet its price is by no means excessive.
Larger BudBox tents
BudBox grow tents are generally characterised by excellent stability, and we mentioned above that they can also boast the strongest frames. Their construction consists of tempered steel with high tensile strength, and the 25 mm-thick tubes are finished with a black powder coating. These parameters apply to all models from PRO XL (120x120) up to the massive tents marked PRO Titan. The entire BudBox PRO range of grow tents is equipped with steel, push & click fit corner and pole connectors. Whatever your heavy hydroponic equipment needs, you would be hard pressed to find a stronger contender on the grow tent market than BudBox PRO.
If you want to grow a large number of plants, your priority, in addition to dimensions, will be ensuring the necessary load-bearing capacity, which the English manufacturer has achieved in its larger grow boxes by using 25 mm tubes made of premium steel and almost indestructible joints.
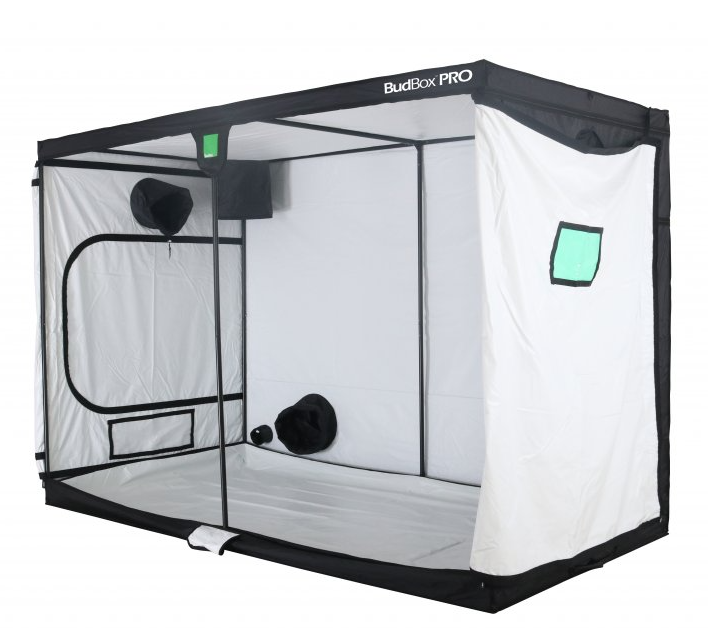
Among the white variants, our customers have most liked, for example, the BudBox PRO XXL+ (150x300x200cm), which brings them great comfort at home for harvesting fragrant herbs or juicy produce throughout the year. However, it is also sufficiently sophisticated and high quality to be used by experienced experts.
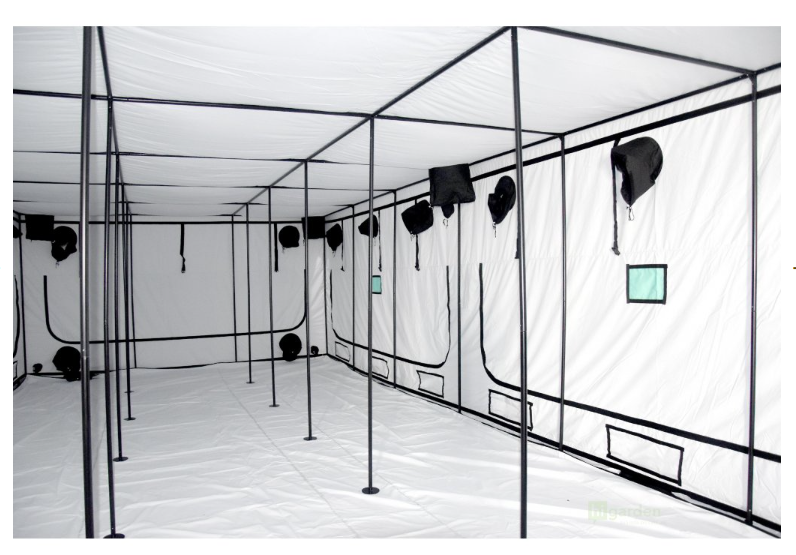
Your indoor garden can also be 9 metres long and over 2 metres high! The largest grow tents for professionals are marked Titan. If you have big plans (and budget), extra-large grow tents are also available to order, in which you will be pleasantly intoxicated by the beauty and fragrance of a large number of herbs or produce. Perhaps the most striking example is the 9-metre titan: BudBox PRO Titan IX (900x450x240cm).
When it comes to BudBox grow tents, the biggest challenge is choosing the right one from the incredibly wide range, because in terms of overall features they have not yet disappointed any grower. At least we do not know of anyone. All of them are also fully compatible with hydroponic systems or self-watering pots. Likewise with all growing methods. So that you can devote your time and energy to your plants as soon as possible, do not hesitate to ask us anything at the well-known e-mail address info@higarden.eu. We are here for you!
We also recommend these products:
What to read next: