
Step-by-step growing, Page 8
- Growth phase
- Flowering and Harvest
- Processing and storage
- Hydroponic growing
- Seedlings and propagation
- Speciality Crops
- Outdoor Growing
- Seeds and Germination
List of articles
How to Grow Leafy Greens and Lettuce?
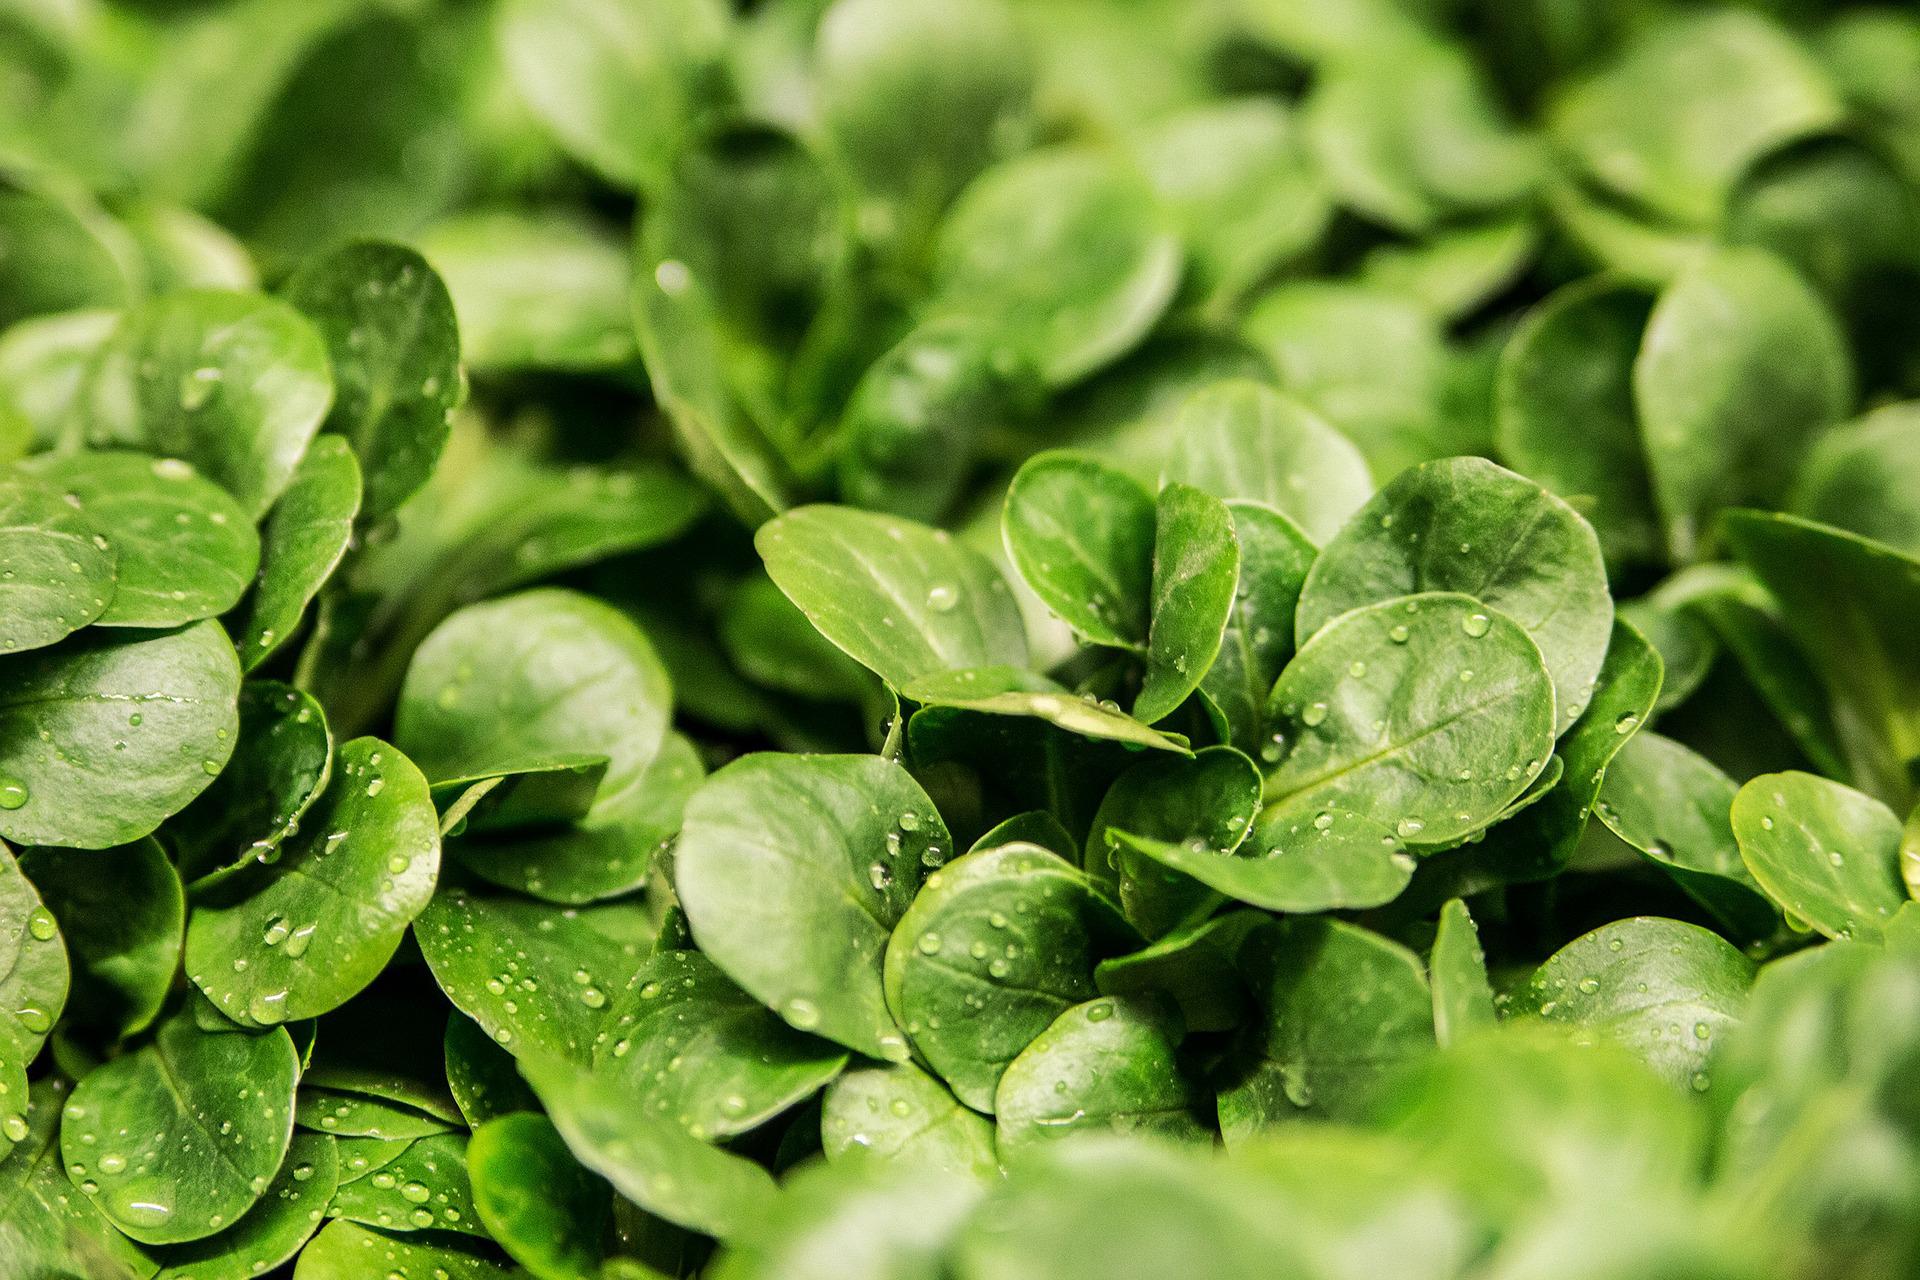
Growing your own honest leafy greens in the garden or in a growbox when summer arrives has plenty of advantages for every grower. Growing leafy greens is not at all difficult and takes less time than growing agricultural crops. It is therefore an ideal way to try uncomplicated gardening in practice for the first time and immediately benefit from it, whether on the plate, or rather in the salad bowl, or later in the form of health benefits. In short, it is high time to remind ourselves not only of the reasons, but also of the basic prerequisites for a successful harvest of leafy greens. Read on to find out how to easily grow a juicy vitamin bomb this year.
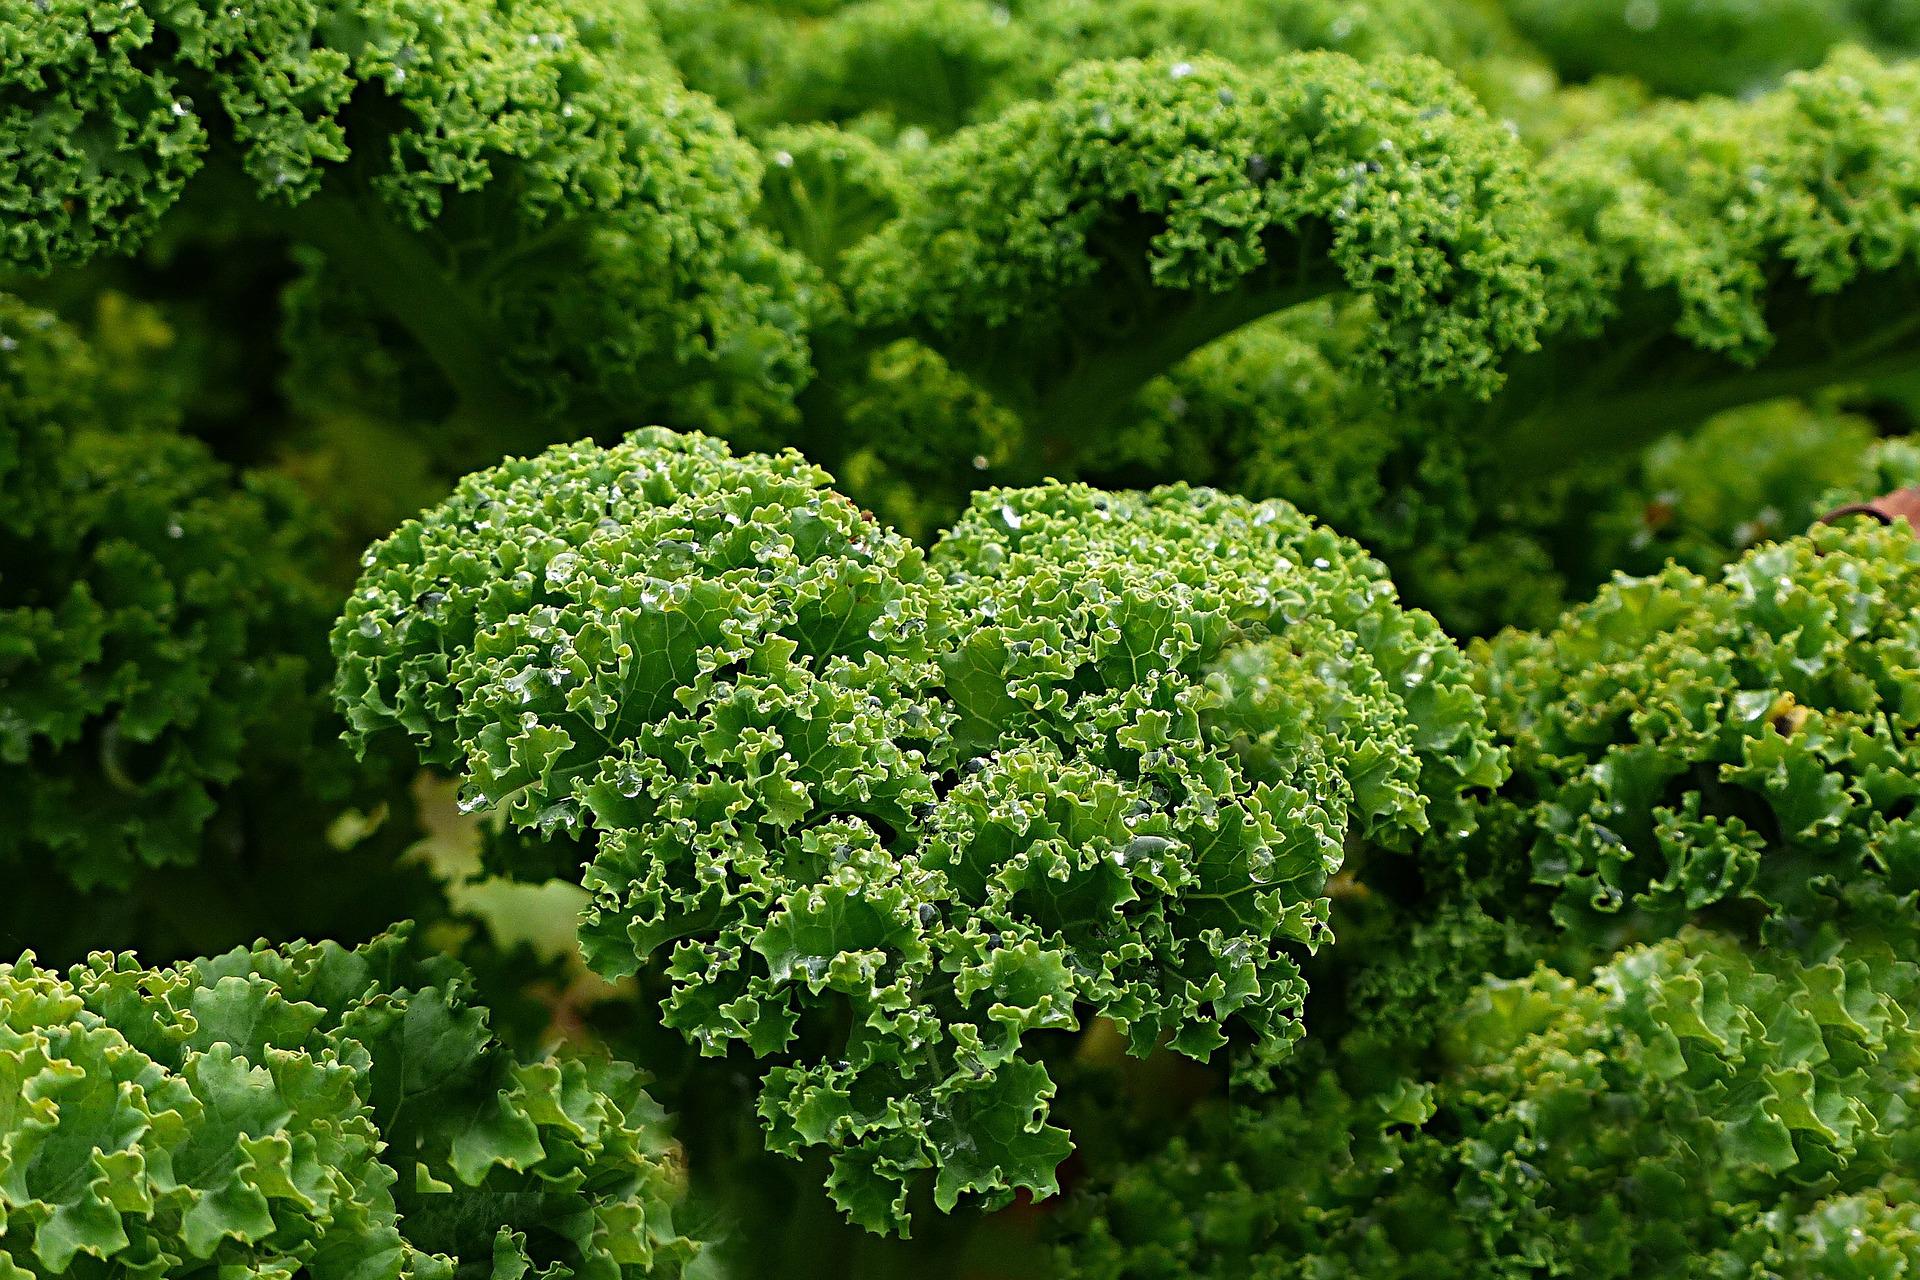
What are the specifics of growing leafy greens?
- Leafy greens in general, because this term covers a great many species, of which we will name at least the healthiest a little further below, represent a rich natural cocktail for the human body, packed with vitamins, minerals and antioxidants. It would therefore be a shame not to use quality organic fertilisers, which will help you achieve a fresh harvest in harmony with nature and with regard for the environment. The result is a purely natural composition without a trace of chemicals and an intense, authentic flavour. Are you interested in the best biological fertilisers? Try, for example, the 100% natural fertilisers from BIOCANNA. There is no single definitive answer to this question, but the following articles will certainly give you a good starting point:
Our TIP: Value sets for the first harvest are the best way to get to know plant nutrition from a specific manufacturer during one growing cycle. Here are a few examples:
- BioCanna Starter Kit
- BioNova Hobby pack Veganics
- Organics Nutrients Starter Kit
- BioBizz Starters Pack
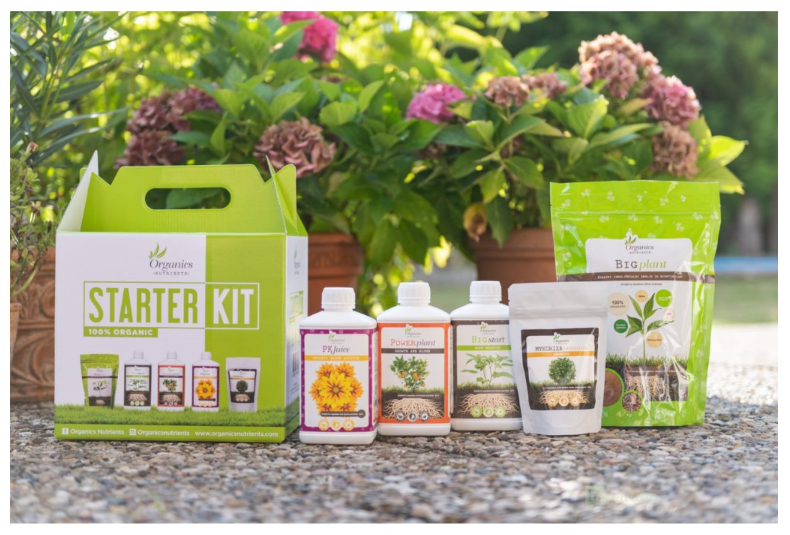
- Given that in the vast majority of cases only the leaves are harvested, you will save a great deal of time as a grower, because unlike other types, leafy greens do not require you to wait for the fruits to ripen.
- Leafy greens need regular, nourishing watering, directed away from the leaves themselves and the hearts. A generous watering means water in which quality fertilisers have been dissolved in sufficient concentration. Not too much water. Water leafy greens more often, but with smaller amounts of water. In addition to regular watering and sufficiently fertilised soil, leafy greens place no other special demands on the grower, which is why we indicated right at the beginning of this article that it is a great opportunity to start growing. Leafy greens are made for beginners!
- Thanks to the short growing cycle, you do not even need a greenhouse. Leafy greens prefer cooler air. Some species can even be grown year-round. If possible, plant leafy greens in partial shade and avoid soil that is too acidic. If you want to be sure, you can use tools for measuring pH.
- The edible part of leafy greens is the leaves, or sometimes the stems, which are most often eaten raw. In this form they contain the most beneficial substances, which brings us back again to the importance of a harvest in BIO quality.
- All types of leafy greens are characterised by a very low calorie content, which is why they are often the basis of a weight-loss diet, for example in the form of fresh salads.
- To avoid making it sound too rosy for beginner growers, leafy greens grown outdoor, that is, outside under the open sky, often face invasions of all kinds of pests. To stop slugs, for example, from nibbling the leaves before you do, we recommend the proven natural pest spray Canna CURE. You can also read a separate article: How do you deal with pests?
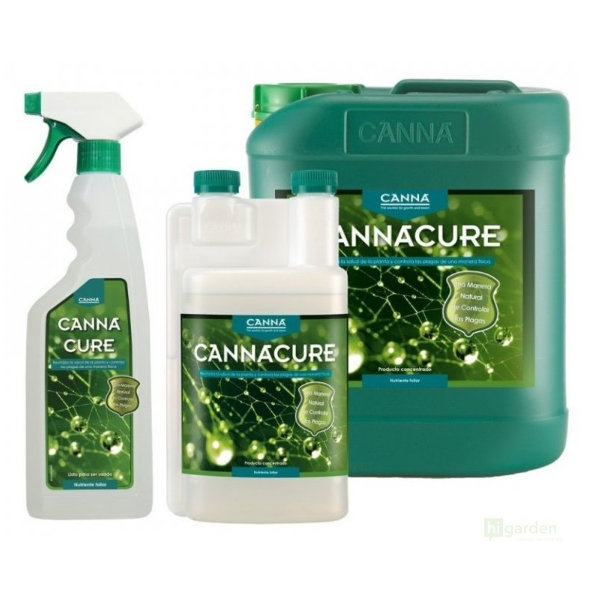
- Effective bio protection against pests and diseases is certainly in order. It is not only about pests. It will also help you prevent fungal diseases, which most often attack plant leaves. As part of prevention, in addition to suitable preparations, sufficient spacing between individual plants in the bed is also important.
- As we have already explained, leafy greens have the advantage that you do not have to wait for the fruits to ripen. Therefore, it is not too late to plant them even in summer. Seedling germination and cutting rooting will be made easier by propagators, a plastic greenhouse and also a propagation substrate, designed directly for successful sowing and cutting propagation. When planting leafy greens, the most important thing is that the hearts of the plants are above soil level.
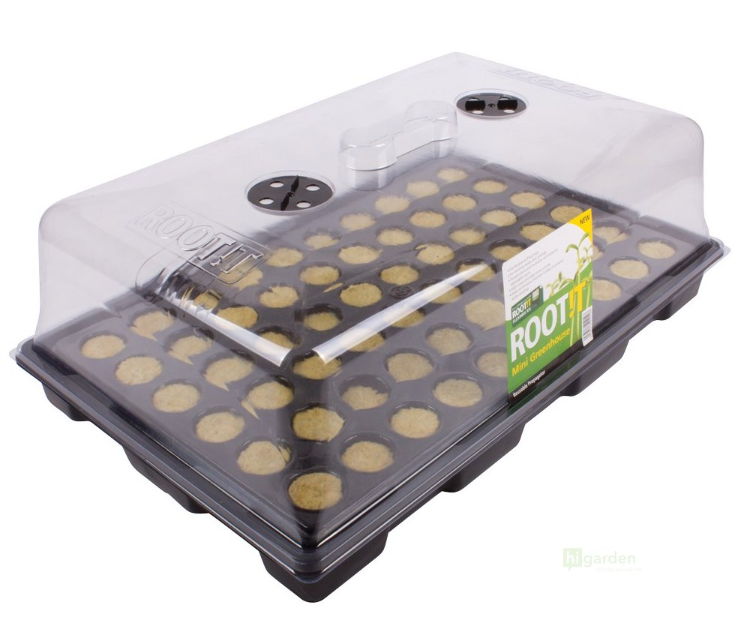
- If you do not yet have any experience with growing leafy greens, do not forget that they ripen quickly and are difficult to store. Therefore, plan your planting of leafy greens sensibly.
Now let us summarise the specifics of growing leafy greens once more, briefly:
- A significantly shorter growing period, which can be up to half as long as with other types of vegetables.
- The need for plants to take in enough nutrients through regular watering, i.e. rather more often, but in smaller doses. Unlike growing tomatoes, peppers or cucumbers, we must take into account a weaker root system, as a result of which leafy greens are unable to obtain all the necessary nutrients from their surroundings. The root system can also be strengthened by a 100% organic root stimulator such as BioBizz Root Juice.

Are you interested in the healthiest types of leafy greens suitable for growing in the garden? There are many of them. For inspiration, we have selected at least a few of the most popular:
- Spinach: Contains vitamins K and A. It also contains folate - the natural form of vitamin B9, important for proper blood clotting. Its high potassium content and low sodium content help regulate blood pressure. Spinach is also a popular vegan and vegetarian source of calcium.
- Kale: It contains vitamins, minerals and antioxidants to such an extent that it is considered one of the most nutritionally valuable plants on the planet.
- Garden parsley, leaf type (parsley): A plant related to root parsley, with leaves full of vitamins A, B, C and E, iron, magnesium and potassium. The essential oils contained in its leaves are characterised by strong detoxifying effects.
- Head lettuce: An annual or biennial plant forming typical heads consisting of green, reddish or dark red leaves. Much depends on the specific variety here. This superfood appreciates a sunny spot. In return, it rewards you with a high content of antioxidants, vitamins (C, E, B1, B2) and carotene. The nutritional profile of head lettuce also includes important minerals such as calcium, magnesium or iron. Head lettuce reduces fatigue, supports digestion and is considered part of the natural prevention of cardiovascular diseases.
- Iceberg lettuces: You will also be able to enjoy this delicacy thanks to your own harvest in BIO quality and you will not have to rely on supermarket shelves. The variety “Zeus” can be grown without any problem even in summer, and in addition to high yields it will also pleasantly surprise you with its fresh flavour! The variety “Pražan” is also very current and is also commonly grown especially in summer. Despite the name, in Bohemia and Moravia. Its distinguishing feature is large heads.
- Leaf lettuces: This type of lettuce is also nicknamed cut-and-come-again. That is because harvesting takes place continuously. Mature leaves are broken off and more grow in the meantime. For example, the variety “Dubáček” can be grown without any problem even in summer, practically from spring to autumn.
There is no doubt that regular consumption of leafy greens supports physical and mental health. It is advisable to alternate the individual types, as each offers a slightly different composition in terms of nutritional value. However, all of them contain folic acid. The folates we mentioned in connection with spinach also have a positive effect on brain function.
If you have any questions about growing leafy greens, please do not hesitate to direct them to the well-known address info@higarden.eu.
We also recommend these products:
- Airtight TightVac containers
- PLAGRON Seedbooster
- Agro Perlite
What to read next:
- How do you grow microgreens?
- How do you grow outdoor?
- How do you grow cacti and succulents?
Cloning / taking cuttings
Cloning, or taking cuttings, is a method that allows convenient propagation of plants within your indoor garden. You can do it yourself at home. Read on to find out how to proceed and what will help you care for the seedlings perfectly, so that you make full use of the potential of your home growing space.
How does it work? The cutting process consists of removing a part of the plant, which you then replant, creating a clone. This clone has identical characteristics to the mother plant. If you grow herbs at home, so much the better. Herb cuttings are characterised by significantly faster rooting than is the case with cloning woody plants. Clones are already small plants. Compared with growing from seed, you gain several weeks’ head start.
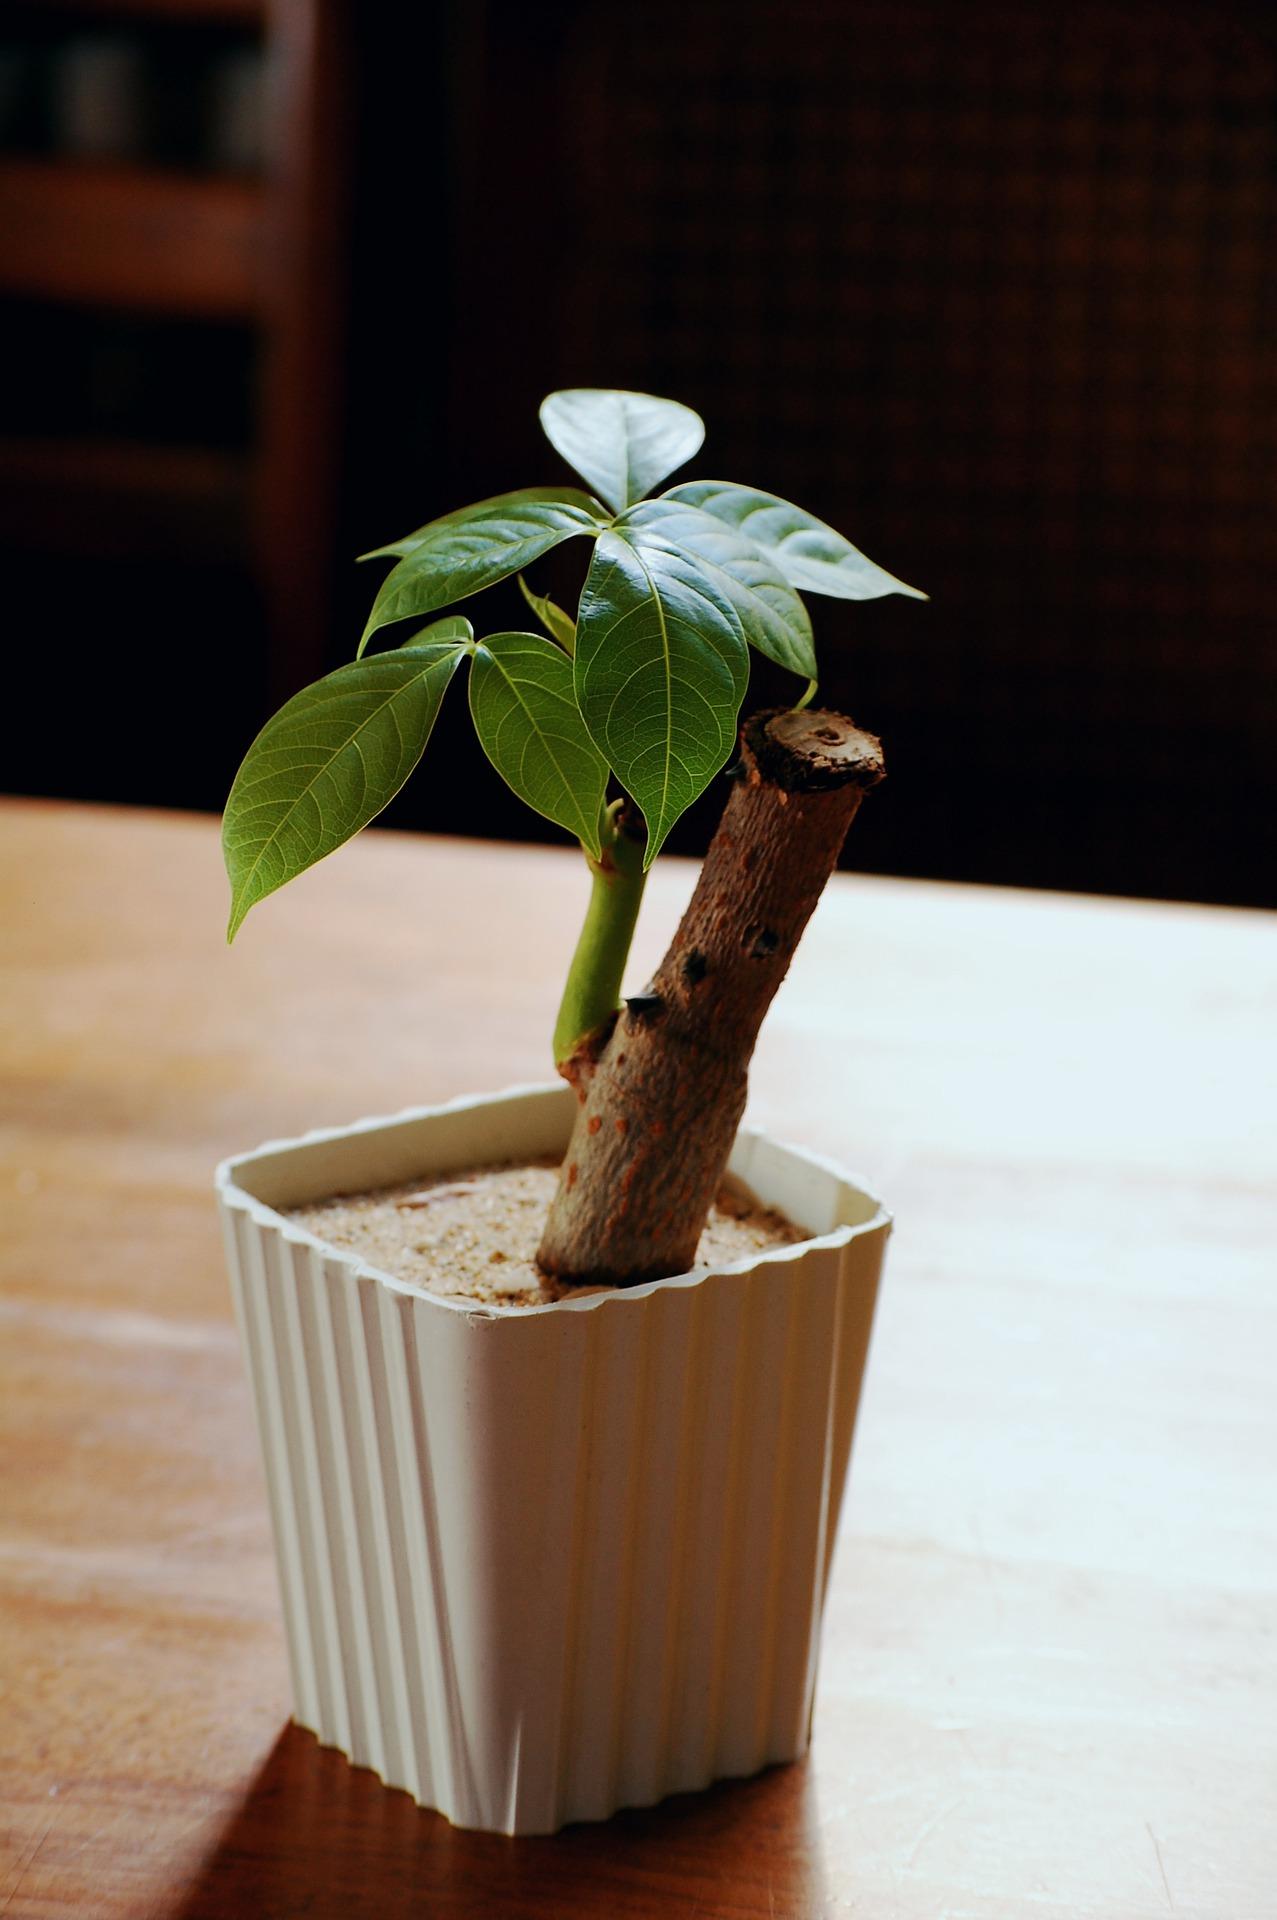
In practice, cuttings are taken from various parts of plants, from roots through shoots to leaves. Based on the degree of maturity of the shoot or a particular part of the plant, we distinguish woody, semi-woody and herbaceous cuttings. It is the last-mentioned that you should take from your herbs as fresh as possible, as soon as you see that the mother plant is already sufficiently vigorous. When growing various herbs and medicinal plants, mother plants are commonly kept in a vegetative state for the gradual cutting of cuttings, which then grow faster than herbs grown from seed. Experienced growers apply a special cloning spray to the mother plant two to three days before cloning itself, which significantly increases the success rate of your clones and, conversely, reduces any losses in the first days after cloning.
The art of the correct cut
If you cut the cutting gently and diagonally at an angle of approximately 45°, you will make subsequent rooting and growth easier for it. For surgical precision, use a scalpel, please. Do not forget the lower leaves, which should always be cut off to prevent them from rotting. We then strongly recommend dipping the lower part of the clone into a quality stimulator, and that is it! The rooting stimulator can be powder or gel. Plant the cutting about 2 cm deep into a growing medium suitable for rapid rooting.
Ideal conditions for your clones
First of all, you need a suitable growing medium.
Growing plants from cuttings is also made possible by various propagation cubes made of basalt wool (Rockwool) or the popular Jiffy pellets. Are you an advocate of ecological growing and would you welcome 100% natural propagation cubes made of earth wool (Earthwool) for rooting cuttings, which do not need to be buffered? Then the range from the brand Agra-Wool is the most suitable solution for you.
For successful and convenient pre-growing of cuttings, growers have access to smaller greenhouses and propagators. A key factor when choosing one is the ability to maintain the important high humidity for seedlings, which ranges between 70–80%. For most plants, temperatures of 20 to 25 °C are beneficial for cuttings inside a propagator.
The exceptionally practical ROOT!T mini propagators can be purchased in a value set containing everything you need, including propagation plugs!
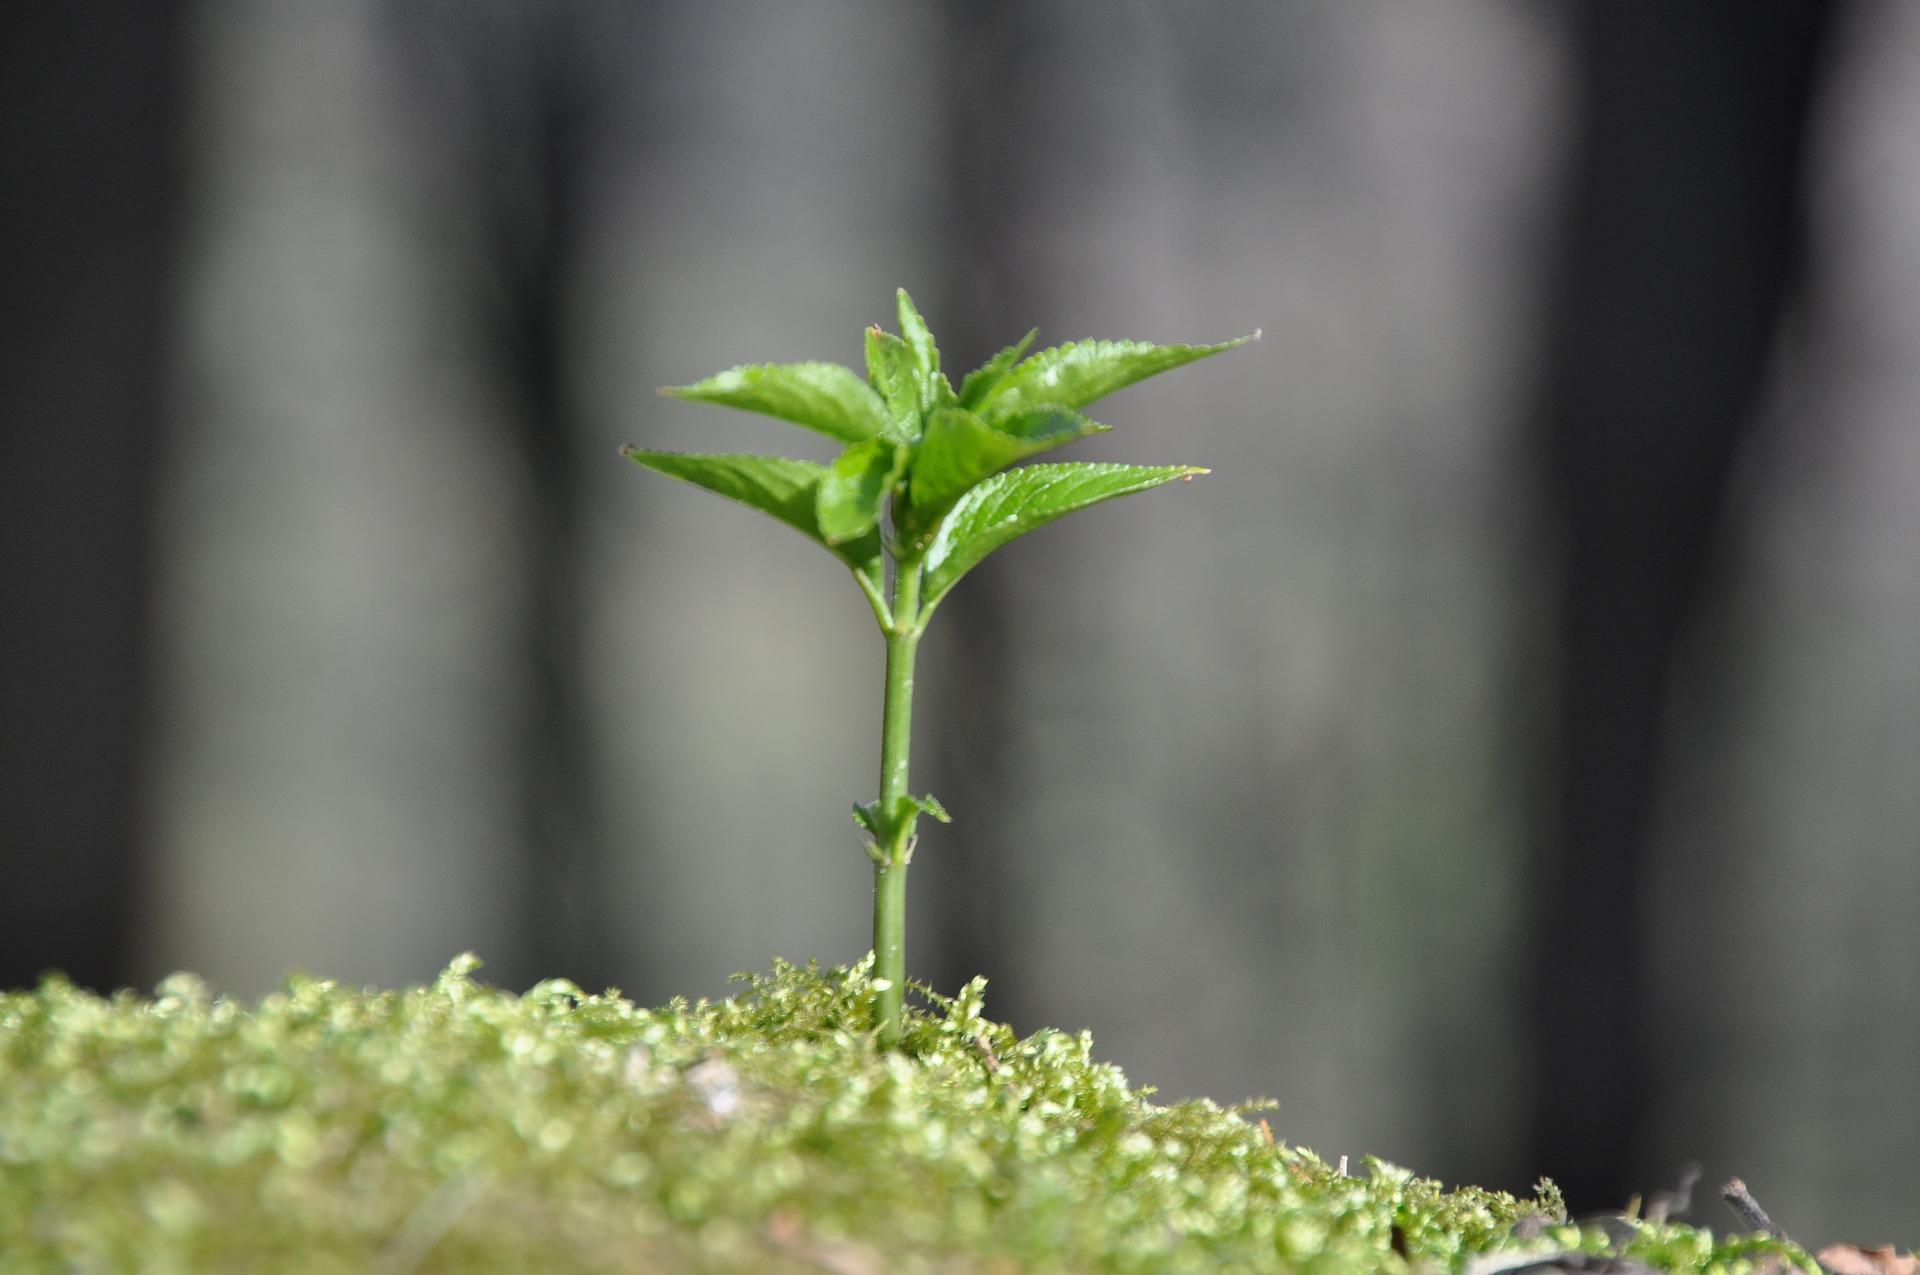
We hope this article has helped you orientate yourself in the basic questions of cloning, and we believe that you will master this activity with ease. Propagating plants is fun. At the same time, it is necessary to proceed correctly and accommodate the needs of different varieties.
We wish you every success in caring for cuttings and mother plants. If you would like to ask anything or need advice on choosing equipment, we are here for you at the well-known address info@higarden.eu.
- ROOT!T cloning spray
- ROOT!T Rooting Gel rooting stimulator
- ROOT!T mini propagators
- Propagation growing medium
- Earth wool propagation cubes
Hydroponics Made Easy: NFT
NFT (Nutrient Film Technique) is generally considered the simplest and cleanest hydroponic method. So whether you are planning to start with hydroponics, or you have so far tried other hydroponic methods of plant cultivation indoor, you should definitely read more about NFT systems and their practical use.
Despite the fact that NFT irrigation systems are renowned among growers for their simplicity, they represent one of the “hydroponic keys” to fast-growing plants and attractive yields. And if we were to choose a hydroponic method for complete beginners at the same time, the answer would be precisely these three letters - NFT:
- NFT hydroponic systems work on the principle of a shallow stream (film) of water with dissolved nutrients, which constantly circulates and is in continuous contact with the plant roots.
- Nutrient solution is supplied in them by means of a pump from the reservoir to the start of the growing channel and, on the principle of circulation, flows back to the tank after being evenly distributed around the roots.
- It is precisely the constant access to nutrients and oxygen that, in practice, results in yields many times higher than those we are used to, for example, in soil substrates.
Healthy seedlings are the basis of success
When it comes to the actual preparation and use of an NFT hydroponic system, the first thing to consider is the choice of growing medium for raising seedlings. To make full use of the potential of NFT systems, you will need really healthy seedlings with a sufficiently developed root system for transplanting into the NFT system. When growing plants from seeds, it is first necessary to make sure that we have a suitable growing environment for the specific species. If the answer to this question is not a clear YES, it is better to let the seeds germinate in a propagator.
- So-called artificial substrates, in this case especially products made from rockwool (GRODAN), are the most commonly used growing medium for raising young plants for NFT systems. In addition to cubes, you can also use growing mats. For raising plant seedlings, rockwool is ideal as a growing medium, as it absorbs the necessary moisture excellently without at the same time retaining an excessive amount of nutrients. Even at 100% saturation with water, rockwool can still count on 20% aeration. You can read more about preparing rockwool in a separate article HERE.
- Coconut substrates have ideal properties for hydroponics similar to those we can observe in inorganic growing media (rockwool, etc.), and therefore you can use them without concern even when combined with NFT. Coconut retains even more water than rockwool. When used in NFT systems, part of the coconut fibres is gradually washed out and the organic matter tends to decompose. If you decide to combine NFT with a coconut substrate, we recommend a compressed coconut substrate (coconut bricks and mats), for which the same procedure applies as for the “artificial substrate” (see above).
Working with an NFT system
You can now move on further in preparing the NFT system. However, first of all, do not forget to check the temperature and pH of the nutrient solution.
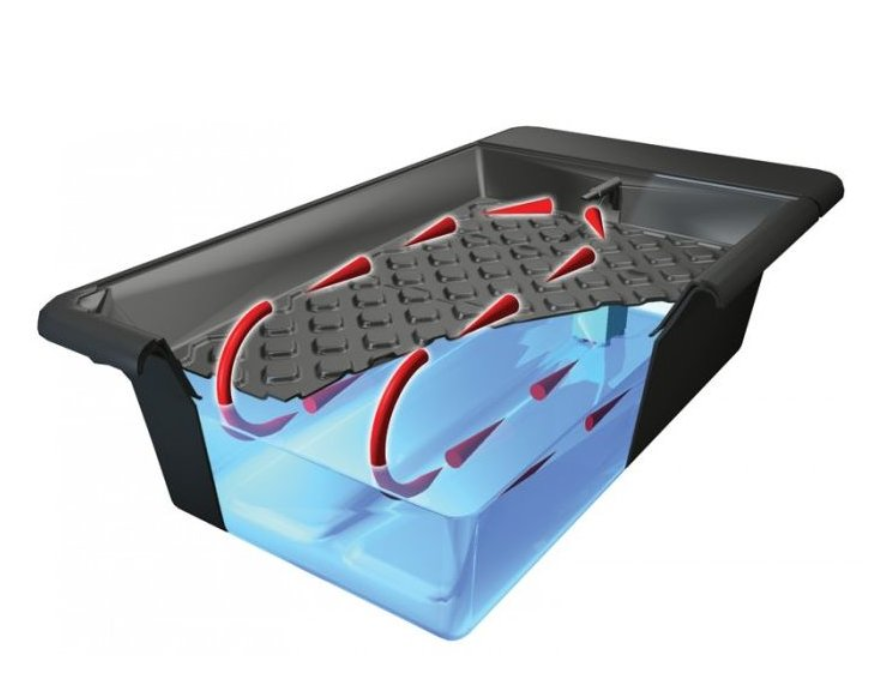
- Make sure the NFT growing setup is precisely sealed in all places. Water must not leak out of the system anywhere under any circumstances.
- Place a high-quality non-woven NFT fabric at the bottom of the growing channel, which helps to distribute nutrients evenly. We recommend letting this fabric slightly overlap at the point where the irrigation flows back into the reservoir.
- The ideal speed at which the nutrient solution should flow through the growing channel is between 400 and 1,500 ml per minute.
- The slope of the growing channel is also important so that so-called puddles do not form on the sheet.
- To eliminate the risk of algae, keep the growing channel covered. Another reason for covering the growing channel is to prevent access to light, which is not good for root development.
- If you want to check the root system, never do so in direct light and always try to keep this time to the absolute minimum necessary.
- If we use an artificial or compressed coconut substrate (see above), the cube should be thoroughly colonised by the plant root system.
- The distance between individual plants depends on the specific species. Do not hesitate to consult us.
- If the roots of the plant are vigorously growing from the growing medium into the growing channel, you have practically won, and after an average of two days you can consider the herbs successfully transplanted. Only after these two days do we also begin applying hydroponic fertiliser.
- NFT is a very effective method, so do not be surprised if you notice root growth of several centimetres in a single day.
- Indoor cultivation of plants using NFT systems requires avoiding fluctuations in pH values outside the range of 5.8–6.5. Especially if you are using a larger NFT system, we recommend an automatic device for maintaining a constant pH value.
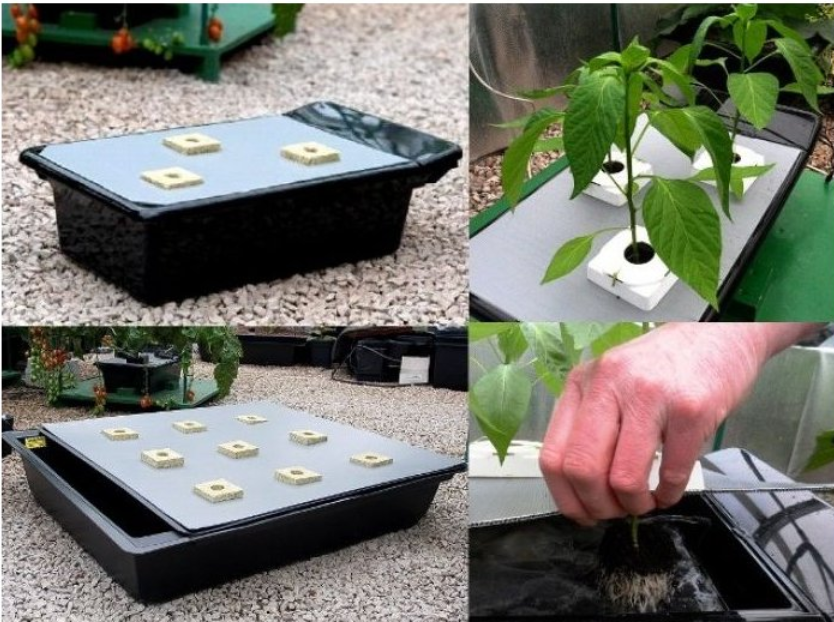
Finally, we offer you a brief summary of the advantages that characterise NFT-type hydroponic systems:
- You can be sure that plants absorb the optimal amount of nutrients and their roots have unlimited access to oxygen.
- You do not have to fight weeds and you also minimise the risk of plant diseases, including root rot.
- Constant circulation of the nutrient solution also helps prevent common beginner mistakes in the form of overwatering or, conversely, drying out.
- The operation of NFT systems, such as NFT Gro Tank GN 901, involves only minimal costs and energy efficiency. They are assembled in a short time and their use is just as intuitive.
To be completely objective, it is also necessary to mention the negative consequences resulting from a possible power outage. You should therefore try by all available means to prevent a power failure.
If you are interested in the possibilities offered by this hydroponic method even to complete beginners, do not hesitate to ask us anything via the well-known address info@higarden.eu. We will also be happy to advise you on choosing a specific NFT system or growing accessories.
We also recommend these products:
- NFT Gro Tank 205 (1,599 Kč)
- NFT Gro Tank GN 901 (4,399 Kč)
- PLANT!T Non-woven fabric for NFT systems (390 Kč)
What to read next?
Does Removing Leaves Make Sense for a Better Harvest?
The topic of leaf removal, defoliation, or, in technical terms, defoliation has been the subject of passionate debate among growers for many years. Among growers around the world, we can find both staunch opponents and supporters. There is therefore no generally accepted verdict on whether it is better to leave plant leaves alone or whether it is worth devoting attention to this technique. The fact remains, however, that professional growers also repeatedly use it on various plant species and achieve impressive results, so this technique probably does have something to it. All the more so because today, even in home conditions, an increasing number of experienced indoor growers consider defoliation a normal part of their cultivation routine, which significantly contributes to their high and regular yields.
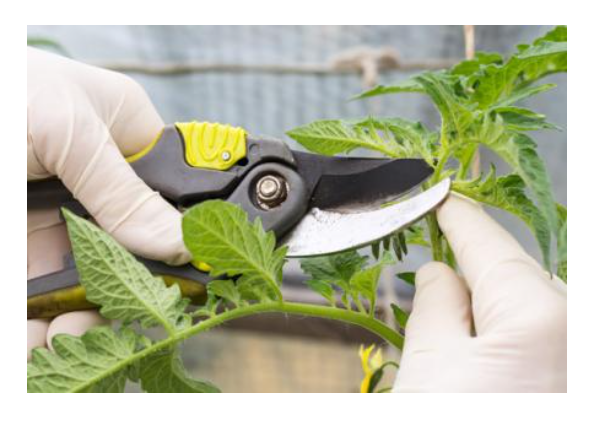
We also know the natural process of defoliation from nature. Just think of leaves falling. Let us now explain why the targeted removal of plant leaves makes sense not only in outdoor growing, but also in the case of indoor cultivation of plants under artificial lighting such as usually LED lamps or discharge lamps.
Improving air circulation and reducing humidity inside the growing space
In indoor growing rooms and inside grow tents, practically any vegetation is often very dense to impenetrable, because every grower naturally tries to use the growing space with artificial lighting to the maximum in order to grow as many healthy plants as possible in the given area. The number of plants does not have to be the only priority. Some growers let the plants grow considerably before changing the photoperiod so that they fill the entire growing area as much as possible.
However, far from all of these growers realise in practice that the denser the vegetation inside the growing space, the more it ultimately hinders the flow of fresh air between individual plants, which is very important for their healthy and vigorous development.
Our TIP: Circulation fans help increase the flow of fresh air around plants precisely where it is most needed. If you do not yet have one in your grow box or room, even at the start of summer, be sure to read the separate article: How do you choose a circulation fan?
Another problem arising from the fact that plants carrying lots of leaves are crowded together inside the growing space is increased humidity. Humidity itself is not such a big problem, but in combination with the above-mentioned lack of fresh air supply, exhaled air from the plants accumulates around their lower leaves. This air is no longer sufficiently saturated with carbon dioxide (CO2). The significance of CO2 for plants is also covered in a separate article: Plant growing and carbon dioxide. How and why should it be used?
Our TIP: Give plants in the grow box an extra dose of carbon dioxide thanks to the natural CO2 generator!
If we have dense vegetation in the growing space, insufficient fresh air circulation around individual plants together with increased humidity creates an ideal environment for dangerous moulds, which thrive in such stagnant air. Where plant leaves touch, the highest concentration of moisture also occurs, and therefore the leaves are often wet and stuck together at the points of contact. And that is exactly the phenomenon you want to prevent.
Improving light access to plants
For plants to develop, their green parts, by which we mean primarily the leaf area, must receive enough light radiation. Moreover, it must be of sufficient intensity for most leaves to receive their daily portion of photons. In nature, this is arranged by the sun, which is not only a source of light with extremely high radiation intensity, but also moves across the sky during the day, gradually changing the direction and angle at which the sun’s rays fall on plant leaves. In indoor gardening, even the most powerful light source remains fixed in one position all the time. The above-mentioned density of vegetation therefore also becomes an important variable. It is common for less light to penetrate into the lower levels, so that leaves in the darker parts of the growing space do not achieve the optimal level of photosynthesis. Therefore, if we set aside the effect of defoliation for a moment, TLED lamps for supplementary lighting of shady areas are used in grow tents or other indoor growing spaces.TLED lamps for supplementary lighting of shady spots.
Our TIP: 100W full-spectrum supplementary luminaire Lumatek BAR 2.9

It probably will not surprise you that a plant does not decide that it will stop supplying these insufficiently lit leaves in the lower levels with water and nutrients, because the grower usually cares mainly about the flowers or fruits. And that is precisely why these leaves become a non-negligible burden for the plant. This is where we get to the heart of the matter.
Experience with defoliation - leaf removal - speaks quite clearly. It is enough to let more light reach the flowers by removing unwanted leaves in order to notice a visible improvement in their development. On the other hand, leaves can be compared to solar panels as a reservoir of energy used by the plant, which is needed, among other things, for the formation and ripening of flowers. Therefore, defoliation must be approached very sensibly if it is to be beneficial and not harmful... Let us therefore explain the four basic rules that you should definitely respect before you put this gardening method into practice.
- Plant health
Whether it is mainly thanks to your growing experience and skills, or thanks to premium products from our range, which we mention in more than one other article here on the blog, your plants must be in perfect condition. Otherwise, do not start targeted leaf removal at all. There is no point in doing so. If your plants are dealing with pests, or if it is clear that their growth is not yet optimal, defoliation will bring no benefit and will more likely harm your crop. Healthy plants naturally have everything to do with optimal growing conditions in indoor plant cultivation. Therefore, before you begin leaf removal, first make sure that your plants have enough light and the ideal climate (see above), and that you are able to provide them with the correct dosage of important nutrients as part of regular watering. If everything is in order, you can begin to experiment.
- Genetics
Opinions on defoliation in the international growing community differ considerably, possibly also because not every variety is suited to leaf removal. Genetics certainly plays a role here. If it is a variety that forms dense vegetation with a large number of side branches and leaves, it is likely that defoliation will indeed benefit it. However, there are also many varieties of different plants with a more open plant structure, for which it is natural to produce only a smaller number of leaves. Here we already lean towards caution and minimalism. This means that, provided rule number one is met, you can first try defoliation on a very small scale and observe how your plants react compared with places where no leaves were removed. If the effect is positive, you can carefully continue with the targeted leaf removal process. And then there are exceptions, which makes the situation a little more complicated. Morphology is not everything, and therefore some varieties may ultimately respond better to leaf removal than others, regardless of their structure or total number of leaves.
- When less is more...
Some growers do not make a fuss about it and remove almost all large leaves in one go, leaving only smaller leaflets near the flowers and leaflets attached to the stem that do not yet have a fully developed petiole. Only a grower who knows exactly what they are doing, namely which variety they are growing and how that variety reacts based on repeated experience, would dare to do something like that. Or, on the contrary, someone who knows absolutely nothing about defoliation, but that is pure gambling. So if you decide to try leaf removal in practice, we recommend following the well-known rule “less is sometimes more” and starting defoliation very cautiously. First remove only a few large mature leaves. Then wait several days and observe how the plants react. Based on that, you can more easily consider further defoliation.
- Correct timing
Think about the point at which the proverbial back door is closing. During the vegetative phase, plants are still growing new leaves, usually before the photoperiod changes to 12/12. At this time, plants devote all their energy only to the formation of stems and leaves. Plants then continue to produce new leaves for approximately three more weeks after the photoperiod changes to the so-called flowering mode, while they rapidly grow taller. Once they stop growing taller, no new leaves will grow either, apart from the fine leaflets in the immediate vicinity of the flowers.
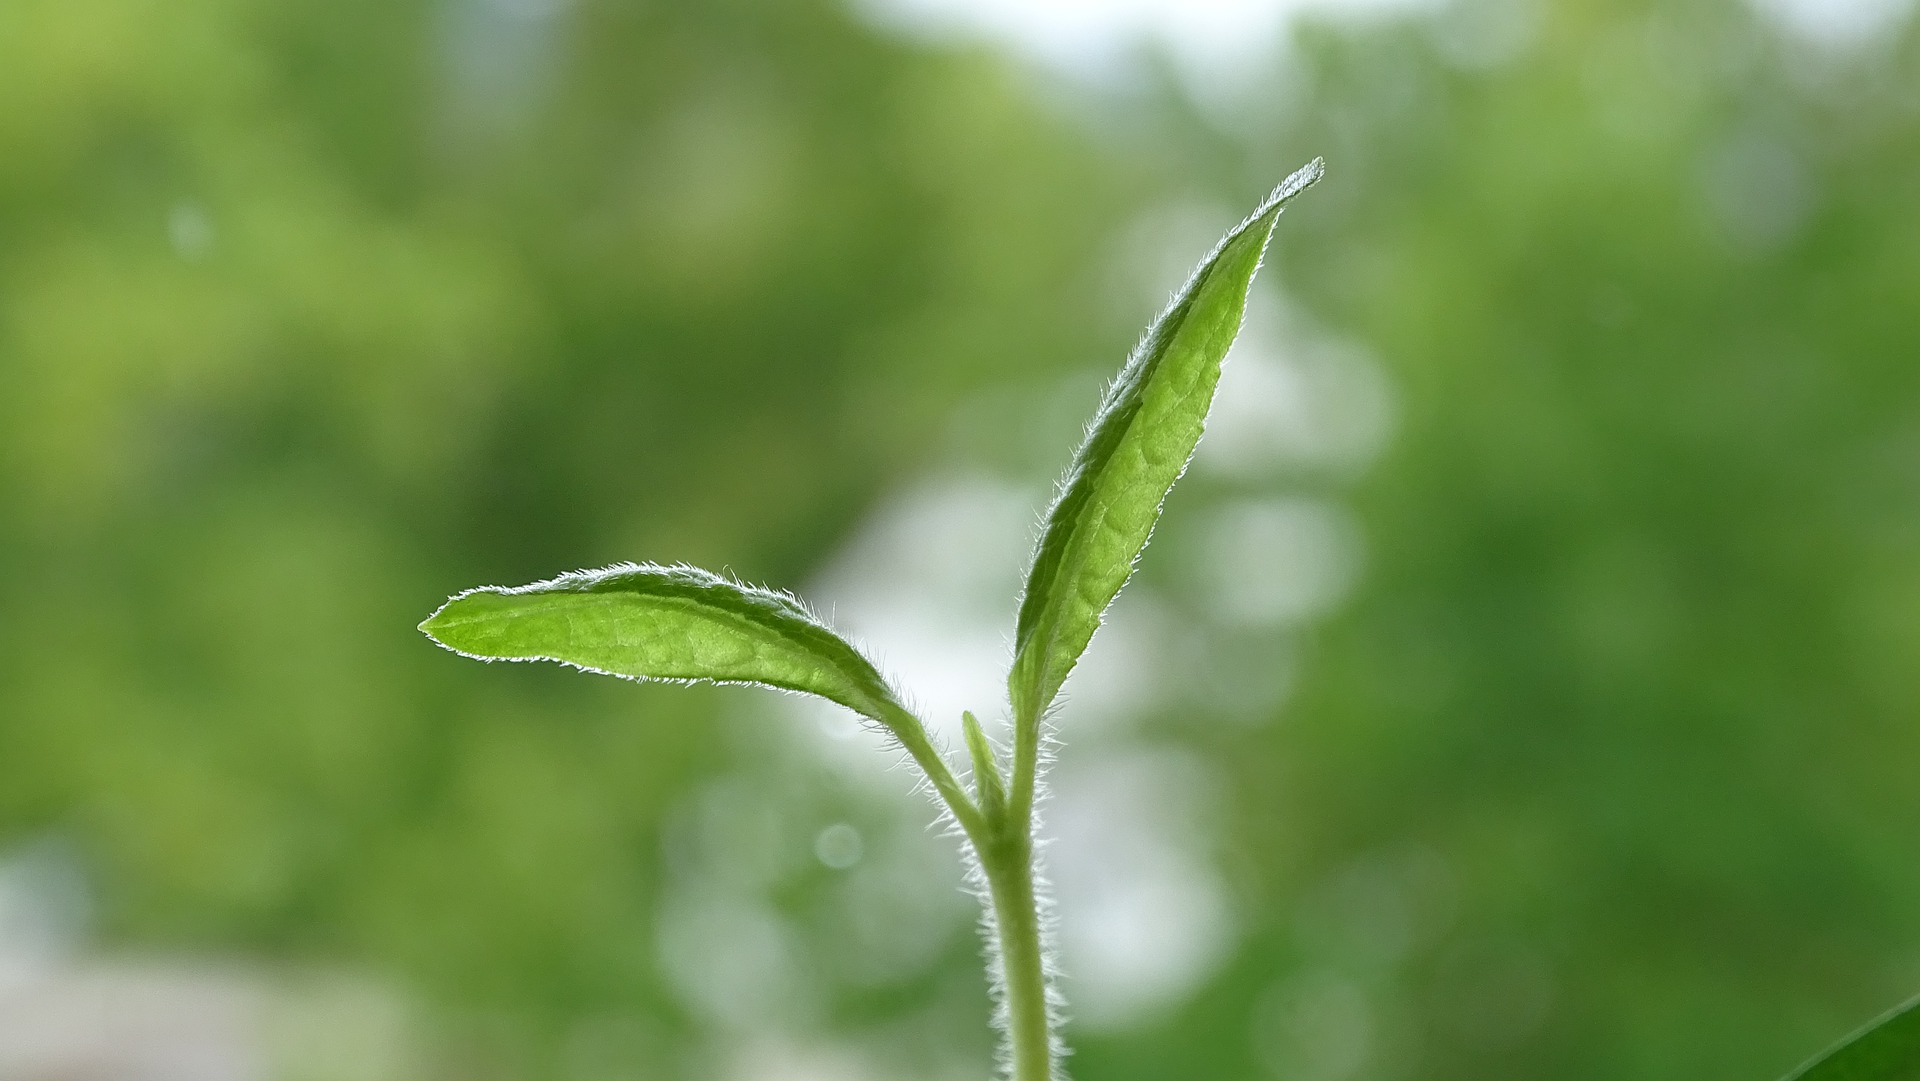
Further useful tips for leaf removal can be summarised in the following points:
- Removing leaves from seedlings or young plants in the early stages of development makes no sense. They need to devote as much energy as possible to development, and they are also usually spaced sufficiently apart. As a result, light of sufficient intensity falls on all levels of the young plant, which supports the growth of side shoots.
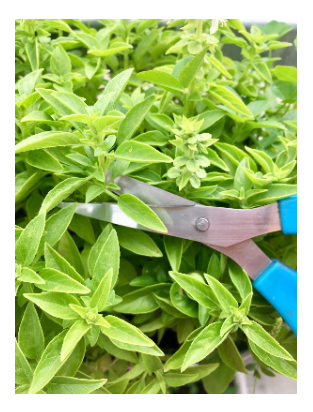
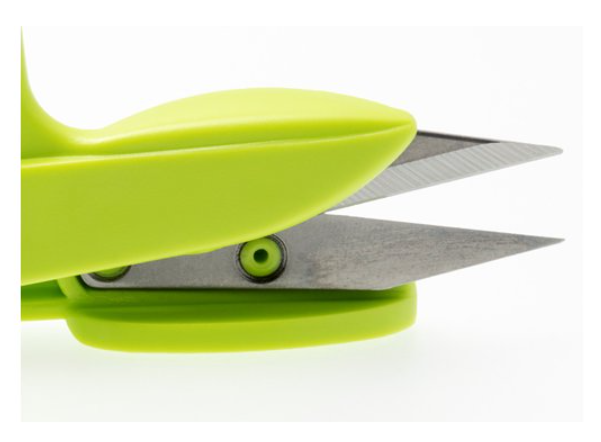
- For precise, safe, but also more comfortable and faster leaf removal, you will find quality, modern garden scissors useful.
- Growers in practice often also deal with the dilemma of whether to pinch off leaves with the petiole or leave the petiole in place. Leaving the petiole will do no harm, because the petiole does not block the penetration of light and, after it has provided the plant with its contained nutrients, it naturally dries out and then falls off on its own.
- Sometimes it is not necessary to remove whole leaves and it is enough to cut off only part of the leaf blade. This method of defoliation can be advantageous if there are not many leaves, but at the same time they take up a lot of space because of their size and prevent light from passing through.
So now you know the basic rules for leaf removal, and we can now focus on specific recommended procedures for defoliation of plants grown in an indoor environment.
- In the growth phase (or during the growth photoperiod in indoor plant growing), we have several options for using leaf removal:
- If you need to achieve an even height of the green growth, removing leaves from selected branches, which will slow growth as a result of defoliation, will help you.
- When you remove large leaves that tend to shade, more light reaches the shoots and branches even in the lower levels. This supports their development and at the same time leads to more efficient use of the total growing space available to you.
- We now return again to the phenomenon described above. You should definitely remove leaves that touch each other and where moisture condenses on their surface at the point of contact, which favours mould or powdery mildew. If, at this stage, you notice old leaves in the lower part of the stem that no longer receive enough light, remove them as well straight away.
- Once you change the photoperiod to initiate flowering, the plants will undergo intense upward growth for the next approximately 3 weeks, and flowers will also form. There is an established English term for this phase: “stretch”. You may also have come across plants that flower regardless of photoperiod. We refer to these varieties as autoflowering. They usually also require special nutrition, such as BioNova Autoflower Supermix. With autoflowering plants, the individual phases of the cycle simply have to be determined by eye - according to how they look and whether they are already visibly forming flowers. In any case, remember that the aim of defoliation in the flowering phase is to get as much light as possible to the flowers, while at the same time trying to leave the plant with a sufficient number of leaves. Yes, it is a certain art of balancing on the edge, but the more experience you have with leaf removal, the easier it will be for you to achieve the desired balance in the process of defoliation.
Our TIP: A new range of premium hand tools that will last you for years will make defoliation easier once and for all. Stainless steel blades, such as those on the small PRO CUT garden scissors with eye, stay sharp for longer.
When and how should you defoliate? The strategy is in your hands
- Before changing the photoperiod
An increasing number of growers practise radical leaf removal just before changing the photoperiod. After the photoperiod changes, the so-called stretch phase begins (see above), which doubles the final effect of defoliation. To a certain extent, this should help you limit the stretching of branches upwards, but the main significance lies in the greater amount of light falling on the lower internodes. A sufficient supply of intense light in these places will then significantly support flower development, which would not do so well in the shade of leaves.
- Ongoing defoliation
We will now present a much more conservative approach to leaf removal. It consists of the ongoing removal of leaves during the growing cycle, right up to the final flowering stage. You can set certain intervals for regular leaf removal, say every other day, for example. However, it is similar to watering - better more often, but in smaller amounts. Therefore, always remove only a few selected leaves that are shading the flowers the most at that moment. Or leaves that are touching each other. This conservative approach helps prevent unexpected shocks that plants may experience after the one-off removal of a larger number of leaves. At the same time, you have room to test how the given variety reacts to leaf removal without causing more harm than good.
- Comparative test
The real potential, or rather the possible benefit, of defoliation for the development of the variety you are currently growing in a controlled environment can be revealed by a classic comparative test. It is up to you how large an area of vegetation you compare. Let us say you split it fifty-fifty. That means you subject one half of the growing area to defoliation and let the other half grow freely. However, the comparative method also works for comparing different approaches to defoliation. So we again return to the fact that the best thing is to observe the plants carefully, and the differences between the two halves or other proportions of the growing area you choose will help you clearly determine which path to take in order to achieve a plentiful harvest. Do not forget that the basic condition for this comparison is that all the plants being compared are the same variety and that all the plants being compared have the same conditions for development available in the growing space.
If you have any questions, do not hesitate to contact us via the well-known e-mail address info@higarden.eu.
We also recommend these products:
- PRO CUT garden scissors - large straight
- PRO CUT garden scissors - large curved
- Easy Snip curved scissors
What to read next:
Torus Hydro perfectpH: a revolutionary pH stabiliser
Make growing in hydroponic systems easier with a product that ensures the nutrient solution continuously maintains optimal pH values, enabling the plant to absorb nutrients with maximum efficiency.
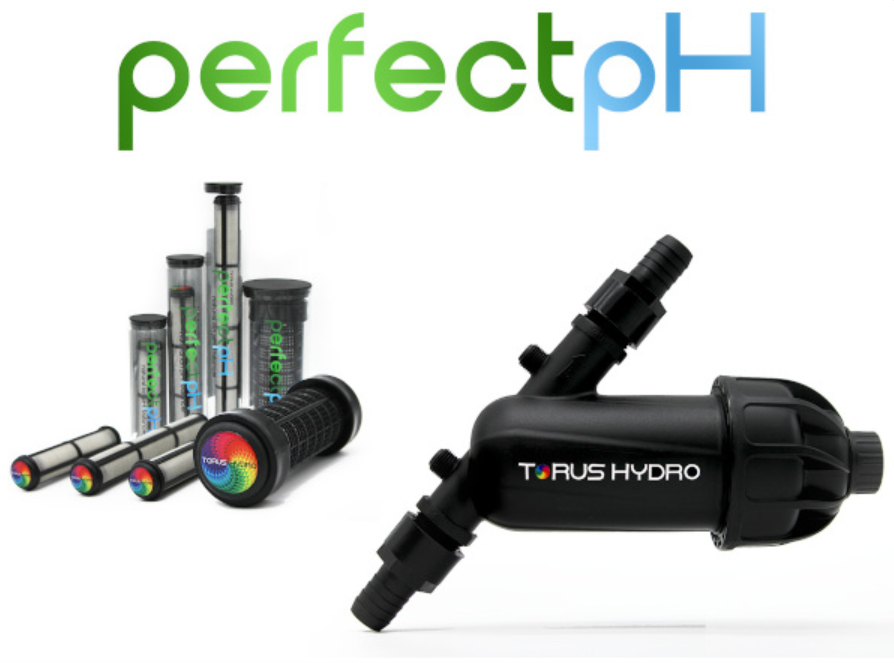
When science, art and innovation come together, pH adjustmentpH could not be easier. No more measuringpH or using acids.
Not only do the innovative Torus Hydro perfectpH products, launched in 2017, eliminate the risks associated with pH fluctuations, but thanks to better fertiliser management, your investment in this technology will pay for itself quickly!
- Torus Hydro perfectpH stabilisers work on the principle of modern ion technology.
- This technology prevents fluctuations in the pH values of the nutrient solution, which brings the following benefits:
- More vigorous plant growth
- Greater vitality / stronger plant immunity
- Another advantage is that you can say goodbye to chemical buffering for good.
- Nutrient solution does not need to be changed as often as usual when using Torus Hydro perfectpH technology. This automatically reduces both water consumption and fertiliser consumption. Of course, this also applies to conventional products commonly used precisely for pH balancingpH.
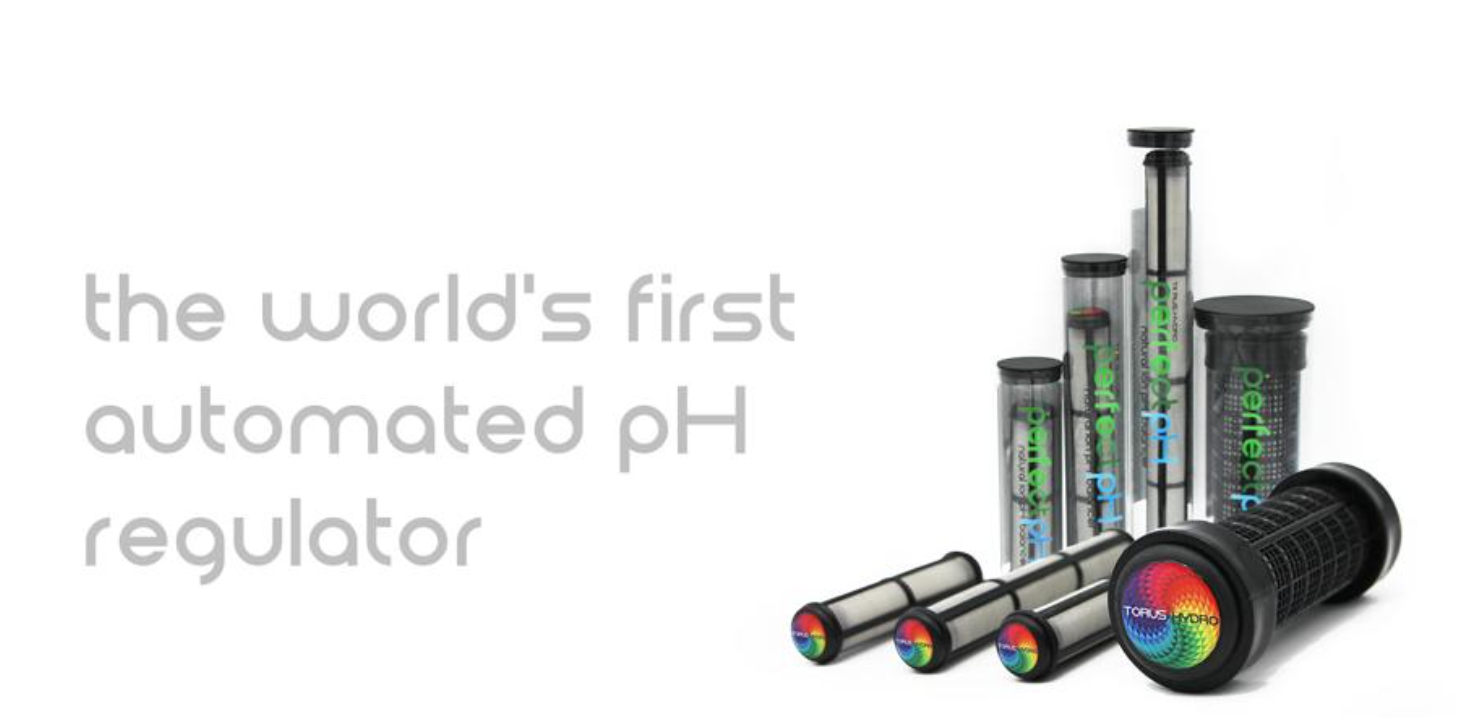
In hydroponics, the correct pH level is a crucial factor that determines success or failure. What makes Torus Hydro perfectpH such a revolutionary solution, and how does it actually work?
- Because in hydroponic systems plants do not root directly into the substrate, as is the case when growing in soil or coco, excess ions (H+ and OH-), which are produced by the plants, accumulate in the irrigation water, or nutrient solution. This process is undesirable, because it slowly but surely creates a highly toxic environment, the opposite of favourable conditions for healthy plant development.
- Torus Hydro perfectpH is able to perfectly bind the mentioned excess ions, ensuring a stable and suitable environment for healthy, vigorous plant development.
- As shown in the following diagram from the manufacturer’s website (see below), on the right-hand side, illustrating the operation of the stabiliser based on ion technology, there is reliable capture and subsequent elimination not only of excess ions (H+ and OH-), but also of toxins.
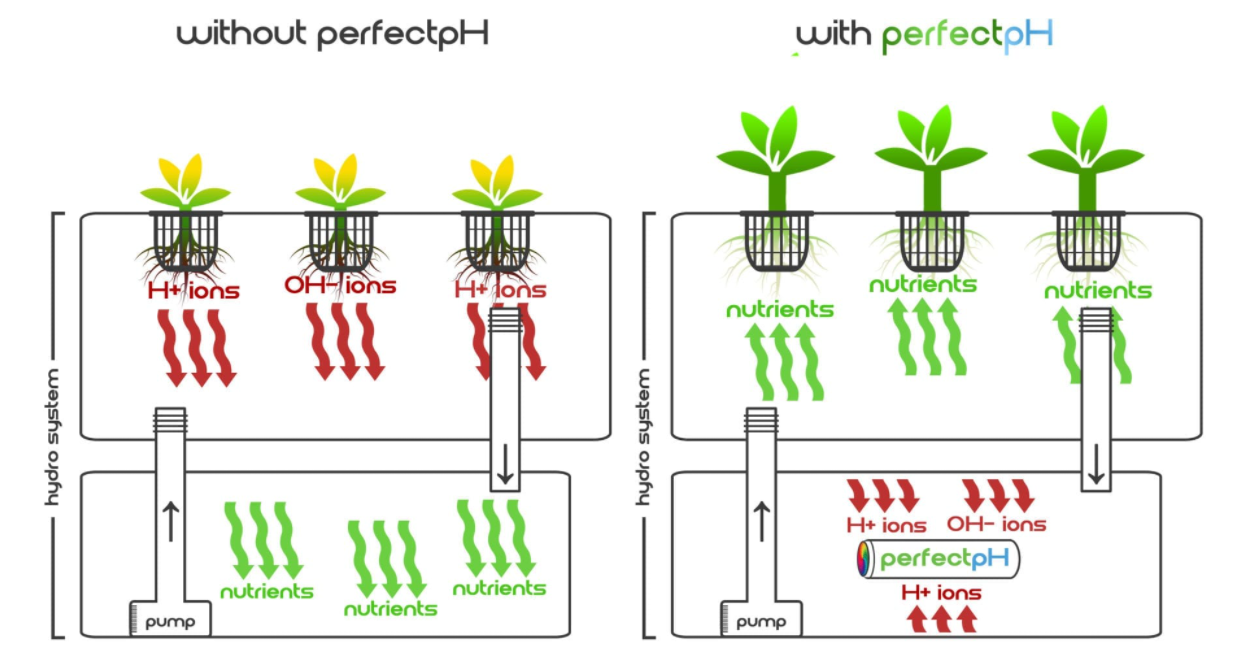
- The result? Stable pH, a vigorous plant and significantly higher yields!
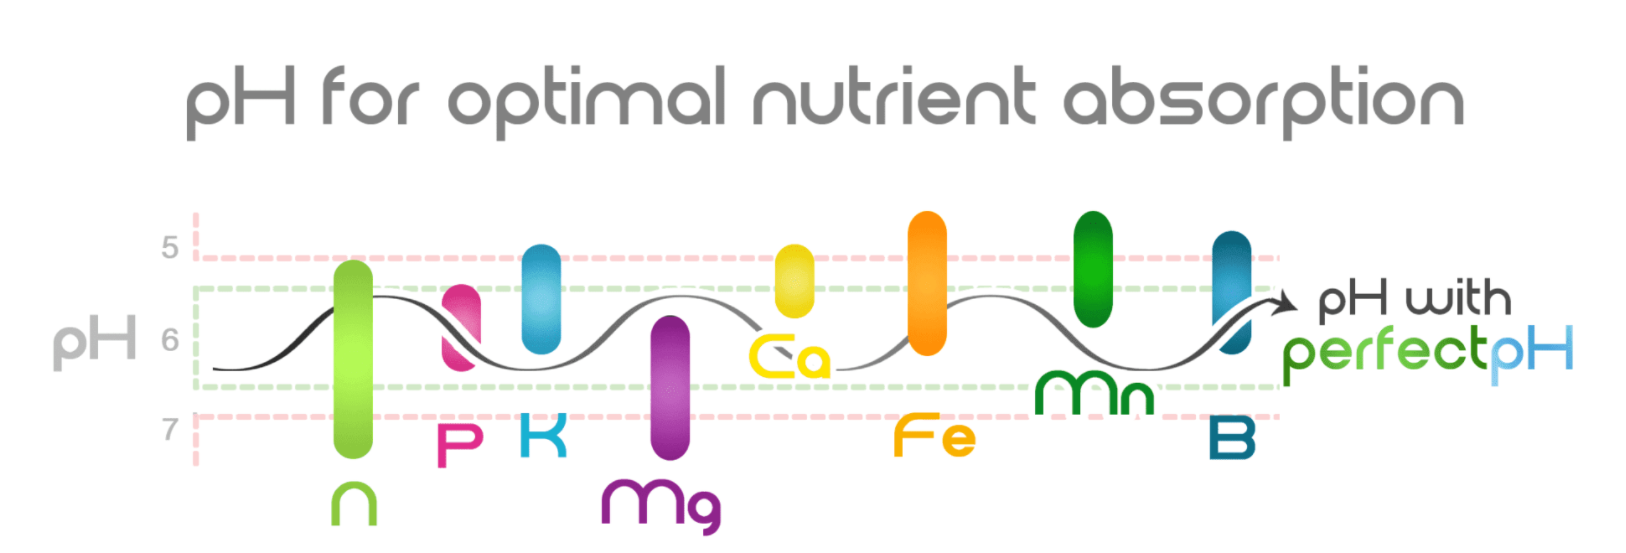
- If you have been involved in hydroponics for some time, then you know very well that pH regulation is not easy. Plants prefer slightly acidic pH. Once the pH value deviates from the optimal range, i.e. usually 5.5 – 6.6, vital micro- and macro-elements are not absorbed sufficiently. As a result, the natural defence of the plants is disrupted and growth slows down or even stops.
- The plant absorbs different elements and nutrients at slightly different pH levels, as the manufacturer’s graph below nicely illustrates. Therefore, if your pH fluctuates even when using Torus Hydro perfectpH, but within the range of 5.7 – 6.5, everything is absolutely fine.
- So far, we have explained the ion technology of TORUS HYDRO perfectpH capsules.
- TORUS HYDRO also produces INLINE stabilisers, which work on the principle of forced flow that improves the ion exchange process in a range of hydroponic systems and methods, from DRIP drip irrigation systems through NFT to Flood and Drain and others, including aeroponics.
- For long-term and flawless functionality, Torus Hydro perfectpH Recharge Solution is used. After roughly a quarter of a year of use, simply remove the capsule from the tank and immerse it in this product. This preserves the same ion exchange efficiency and makes it last much longer. This product can also restore the function of Torus Hydro perfectpH Inline filters.
The Torus Hydro products we have introduced in more detail in this article have changed the face of modern hydroponics once and for all. So why should your path to fantastic results in hydroponics not also become much easier, more elegant and more efficient once and for all? If you have any questions, please do not hesitate to send them to the well-known e-mail address info@higarden.eu.
We also recommend these products:
- Shogun fertilisers (from 199 Kč)
- LUMii Black Digital Complete 600W KIT (2,990 Kč)
- Vertical hydroponic systems NFT (VAKPLAST) (from 9,990 Kč)
What to read next?
- What are the best fertilisers for hydroponics and how should they be used correctly?
- What can be grown using hydroponics?
- Introducing vertical hydroponic systems NFT
How to Grow Orchids?
Orchid (Orchidaceae) is undoubtedly an ornamental plant and one of the most popular among home growers. That is why today’s article focuses more closely on how to care for these flowering beauties.
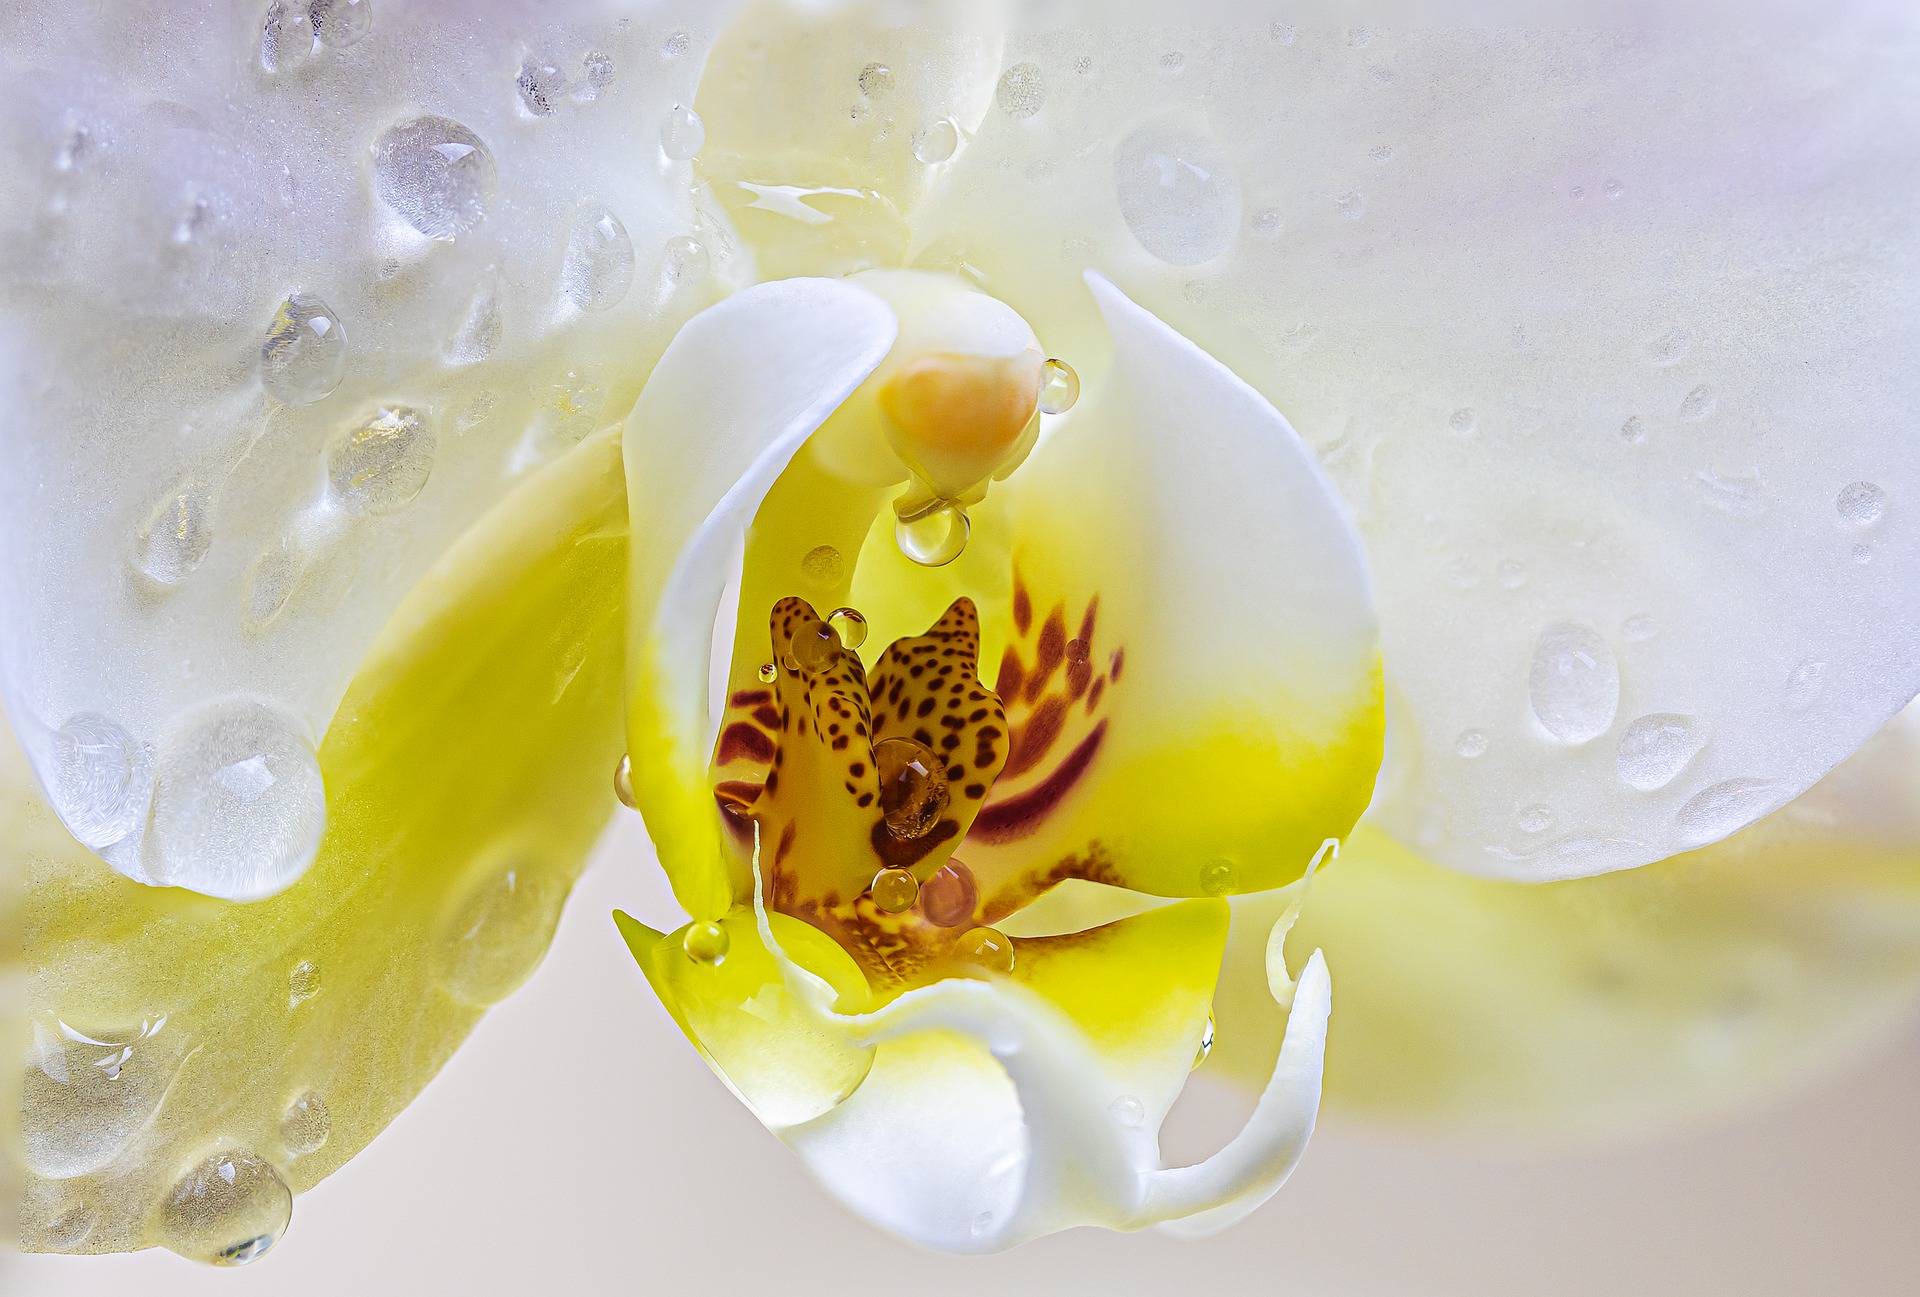
Caring for orchids, houseplants with a tradition dating back to the 18th century, is mainly about choosing and using a suitable growing medium, or substrate.
- Do not use exhausted substrates that have already seen better days or have been left in one place for a long time, as there is a risk that pests or perhaps some bacteria have got inside.
- Use quality substrates with a natural composition and, ideally, substrates intended directly for orchids. For this purpose, mixes of crushed bark and coconut fibres are most commonly produced.
- Substrate, which will suit your orchids, must above all be well aerated and light. Effective aeration can be ensured, for example, by adding perlite.
- At the same time, substrates that are too heavily pre-fertilised are not suitable for orchids. If the growing medium is 100% natural, it does not matter if such a substrate is slightly enriched with nutrients. The presence of any chemical components in the substrate is completely undesirable for growing orchids.
- Another key property of the substrate when growing orchids is its ability to absorb water, so that the root system of plants from the orchid family can absorb nutrients evenly throughout the entire pot, which is reflected in the final appearance of the above-ground parts of the plants, which we ultimately admire and also smell above the level of the substrate.
- The ideal substrate will provide orchids with an optimal balance of moisture and air in the root zone.
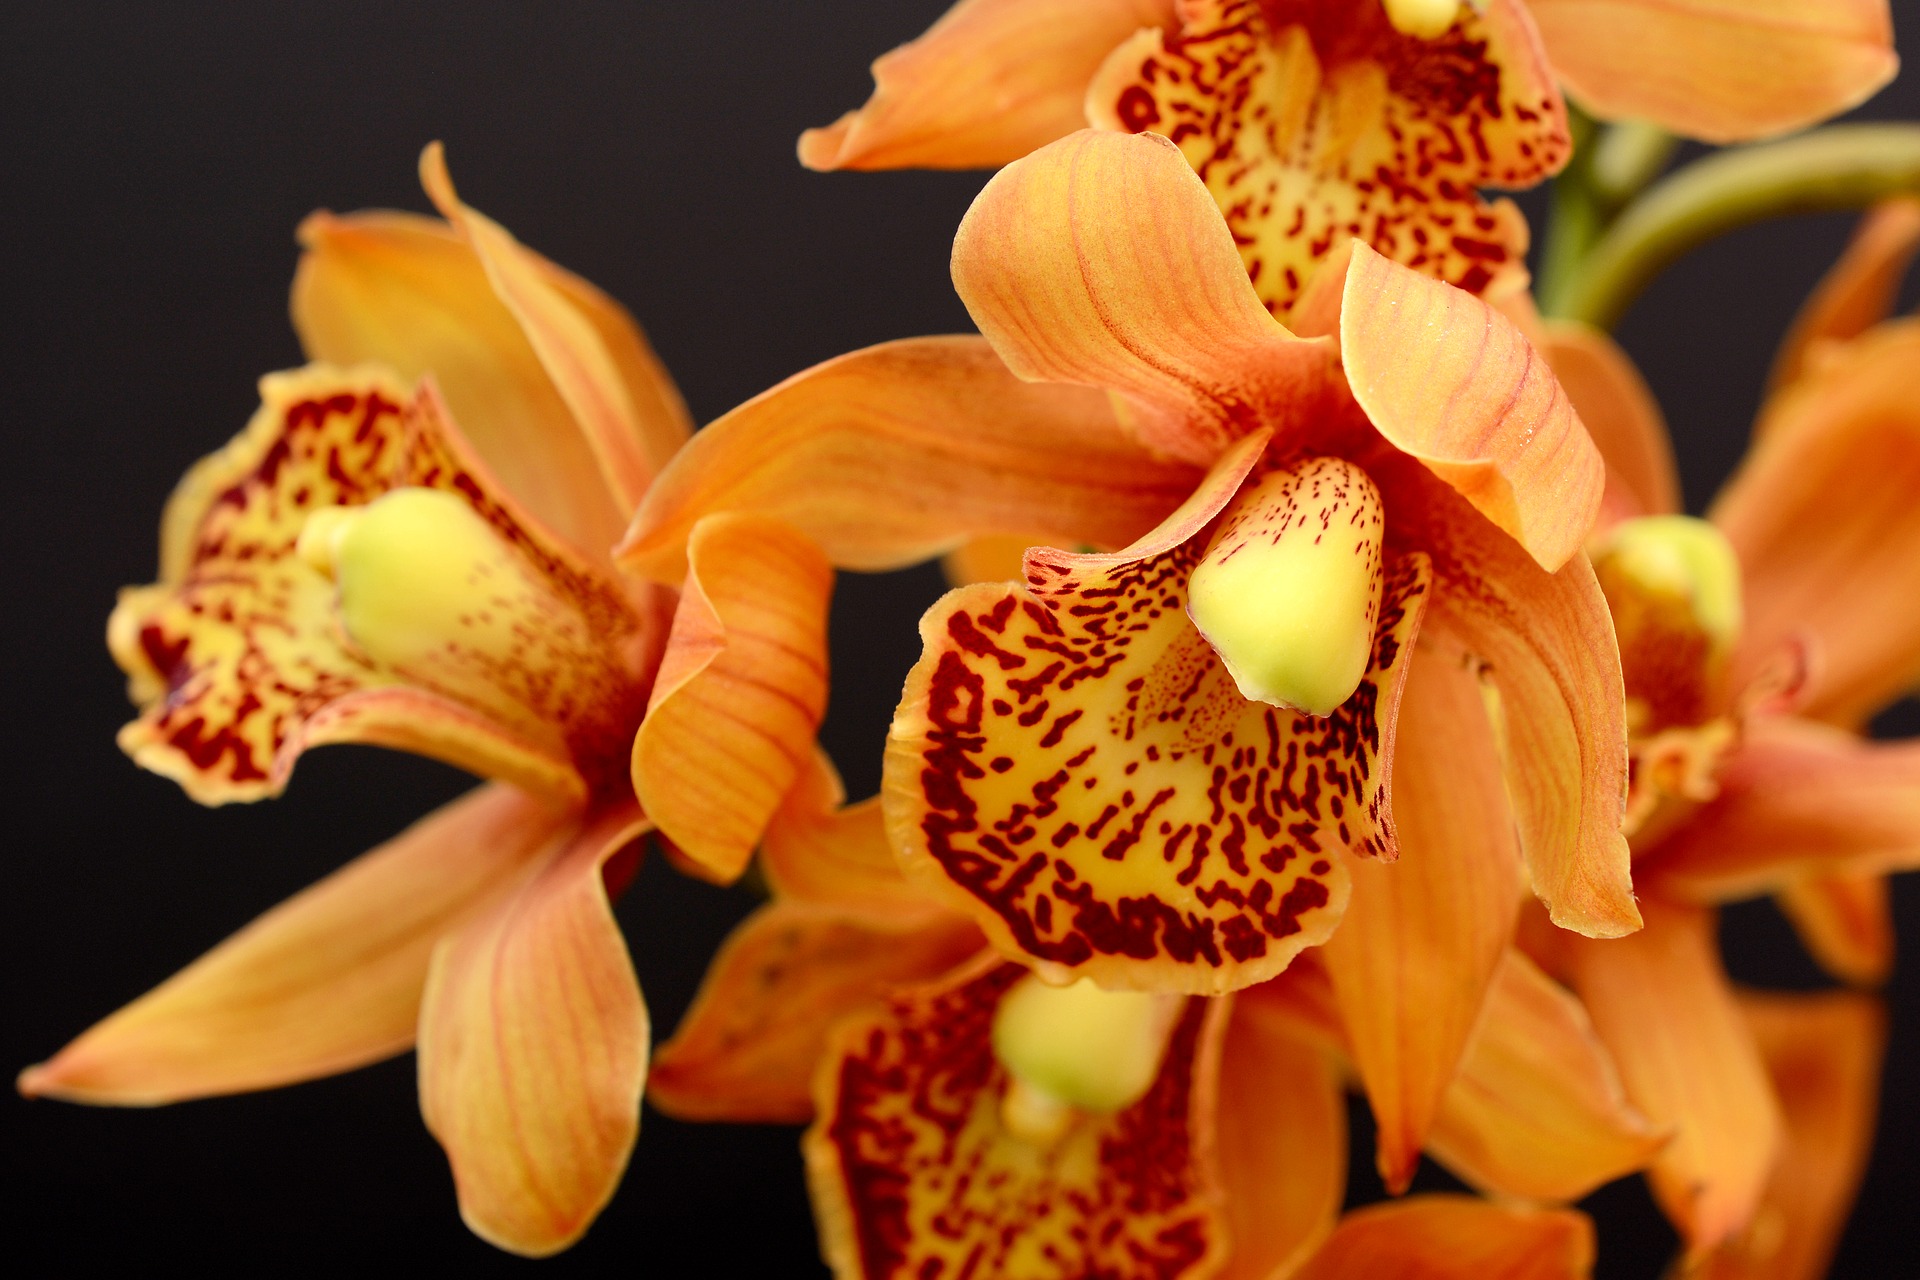
It is now necessary to mention which conditions suit orchids best.
- We already know that orchids welcome humid air. That means at least 50%, but quite easily up to 80%. Such air humidity is, of course, not present in the home. This is where sprayers come in, or you can place the orchid pot on a tray of pebbles, to which you regularly add water just below the tops of the pebbles. To keep it as air humidity, do not forget to regularly exchange the air in the room and ventilate properly, which is also a prevention against mould.
- They also generally belong among heat-loving plants, so ideal daytime temperatures range between 22–27 °C and night temperatures should oscillate around 18 °C. In summer, try not to expose orchids unnecessarily to hot midday sun, as direct sunlight represents considerable stress for them.
- Otherwise, they will welcome light. If you grow them as houseplants, they will thrive by windows on the east or west side. As soon as winter arrives, move them to the south side.
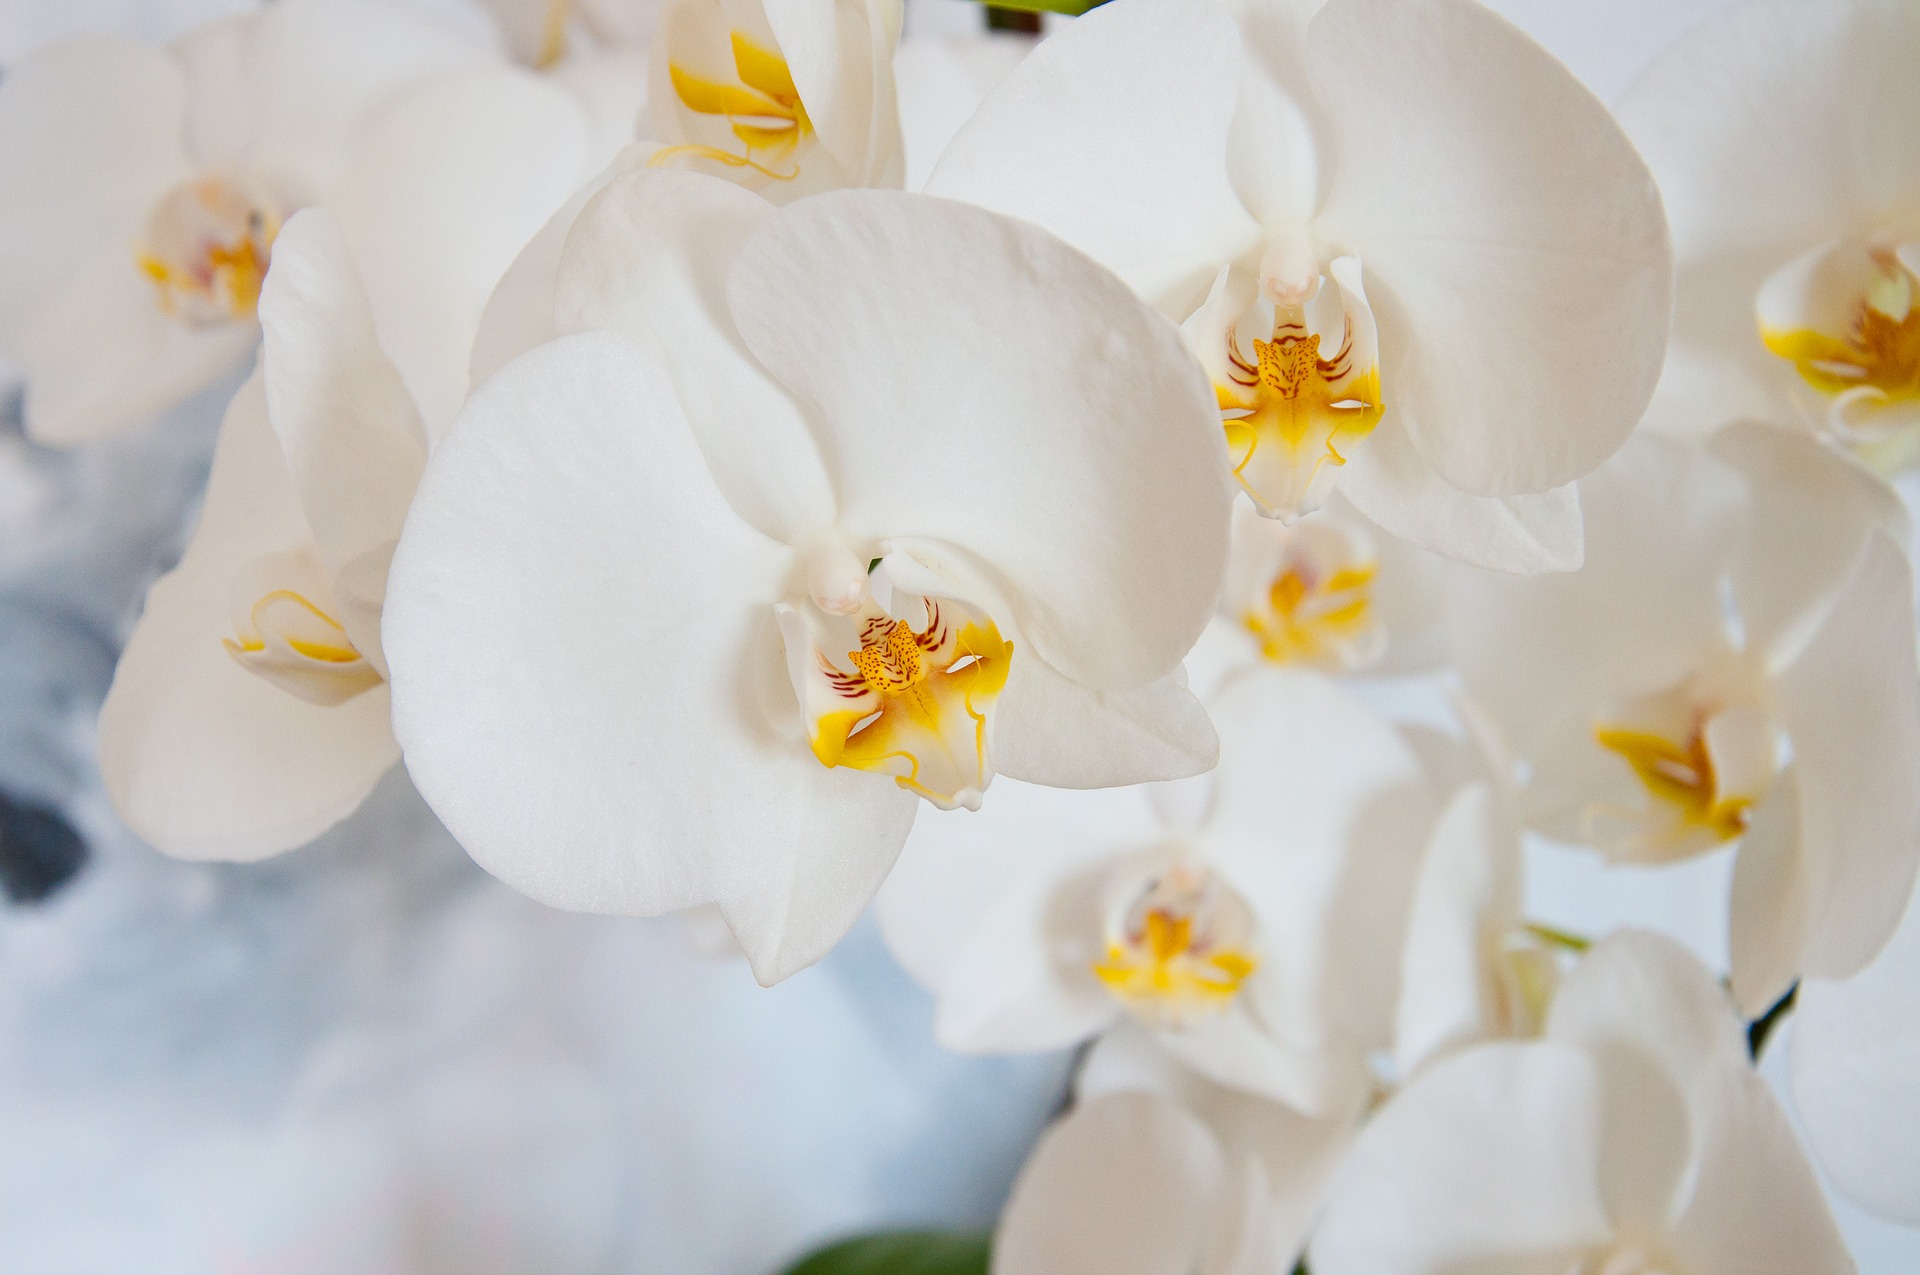
Overall, we can say that orchids are a little more demanding when it comes to watering. Here are a few tried-and-tested tips.
- Orchids also like dryness, so it is really important not to overwater the substrate. While they can last quite a long time in dry substrate, a thoroughly waterlogged substrate can even mean their death.
- Be extremely careful with fertilising orchids. It is more than enough to supply nutrients once a month, and only during active growth.
- In winter or, for example, after repotting, but also during active flowering, let orchids rest and do not fertilise them unnecessarily.
Orchids are simply fascinating, but they do require a certain amount of care. Phalaenopsis is probably the most commonly grown species in households, and it benefits from morning sunlight. However, there are many other interesting and fairly readily available species (Paphiopedilum, Cattleya, heat-loving hybrids Dendrobium phalaenopsis and cool-loving hybrids Dendrobium nobile, Oncidium, etc.) worth exploring, and thanks to the advice in this article, growing them should be a little easier. In any case, do not hesitate to ask us anything at the well-known e-mail address info@higarden.eu. We look forward to your questions!
We also recommend these products:
- AgroBio FANTAZIE - orchids 250 ml (89 Kč)
- Grotek Vitamax Pro (from 559 Kč)
- AgroBio INPORO PS against aphids and spider mites (from 159 Kč)
What to read next?
- What can be grown using hydroponics?
- The effect of silicon on plant health
- ONA Block: solid odour absorber
Hydroponics Made Easy: Drip Irrigation (Drip)
Drip irrigation, micro-irrigation, or simply DRIP – these are all well-established terms among growers for the classic method of watering plants, based on economical water dosing. Read on to find out how it works and what benefits it brings to growers!
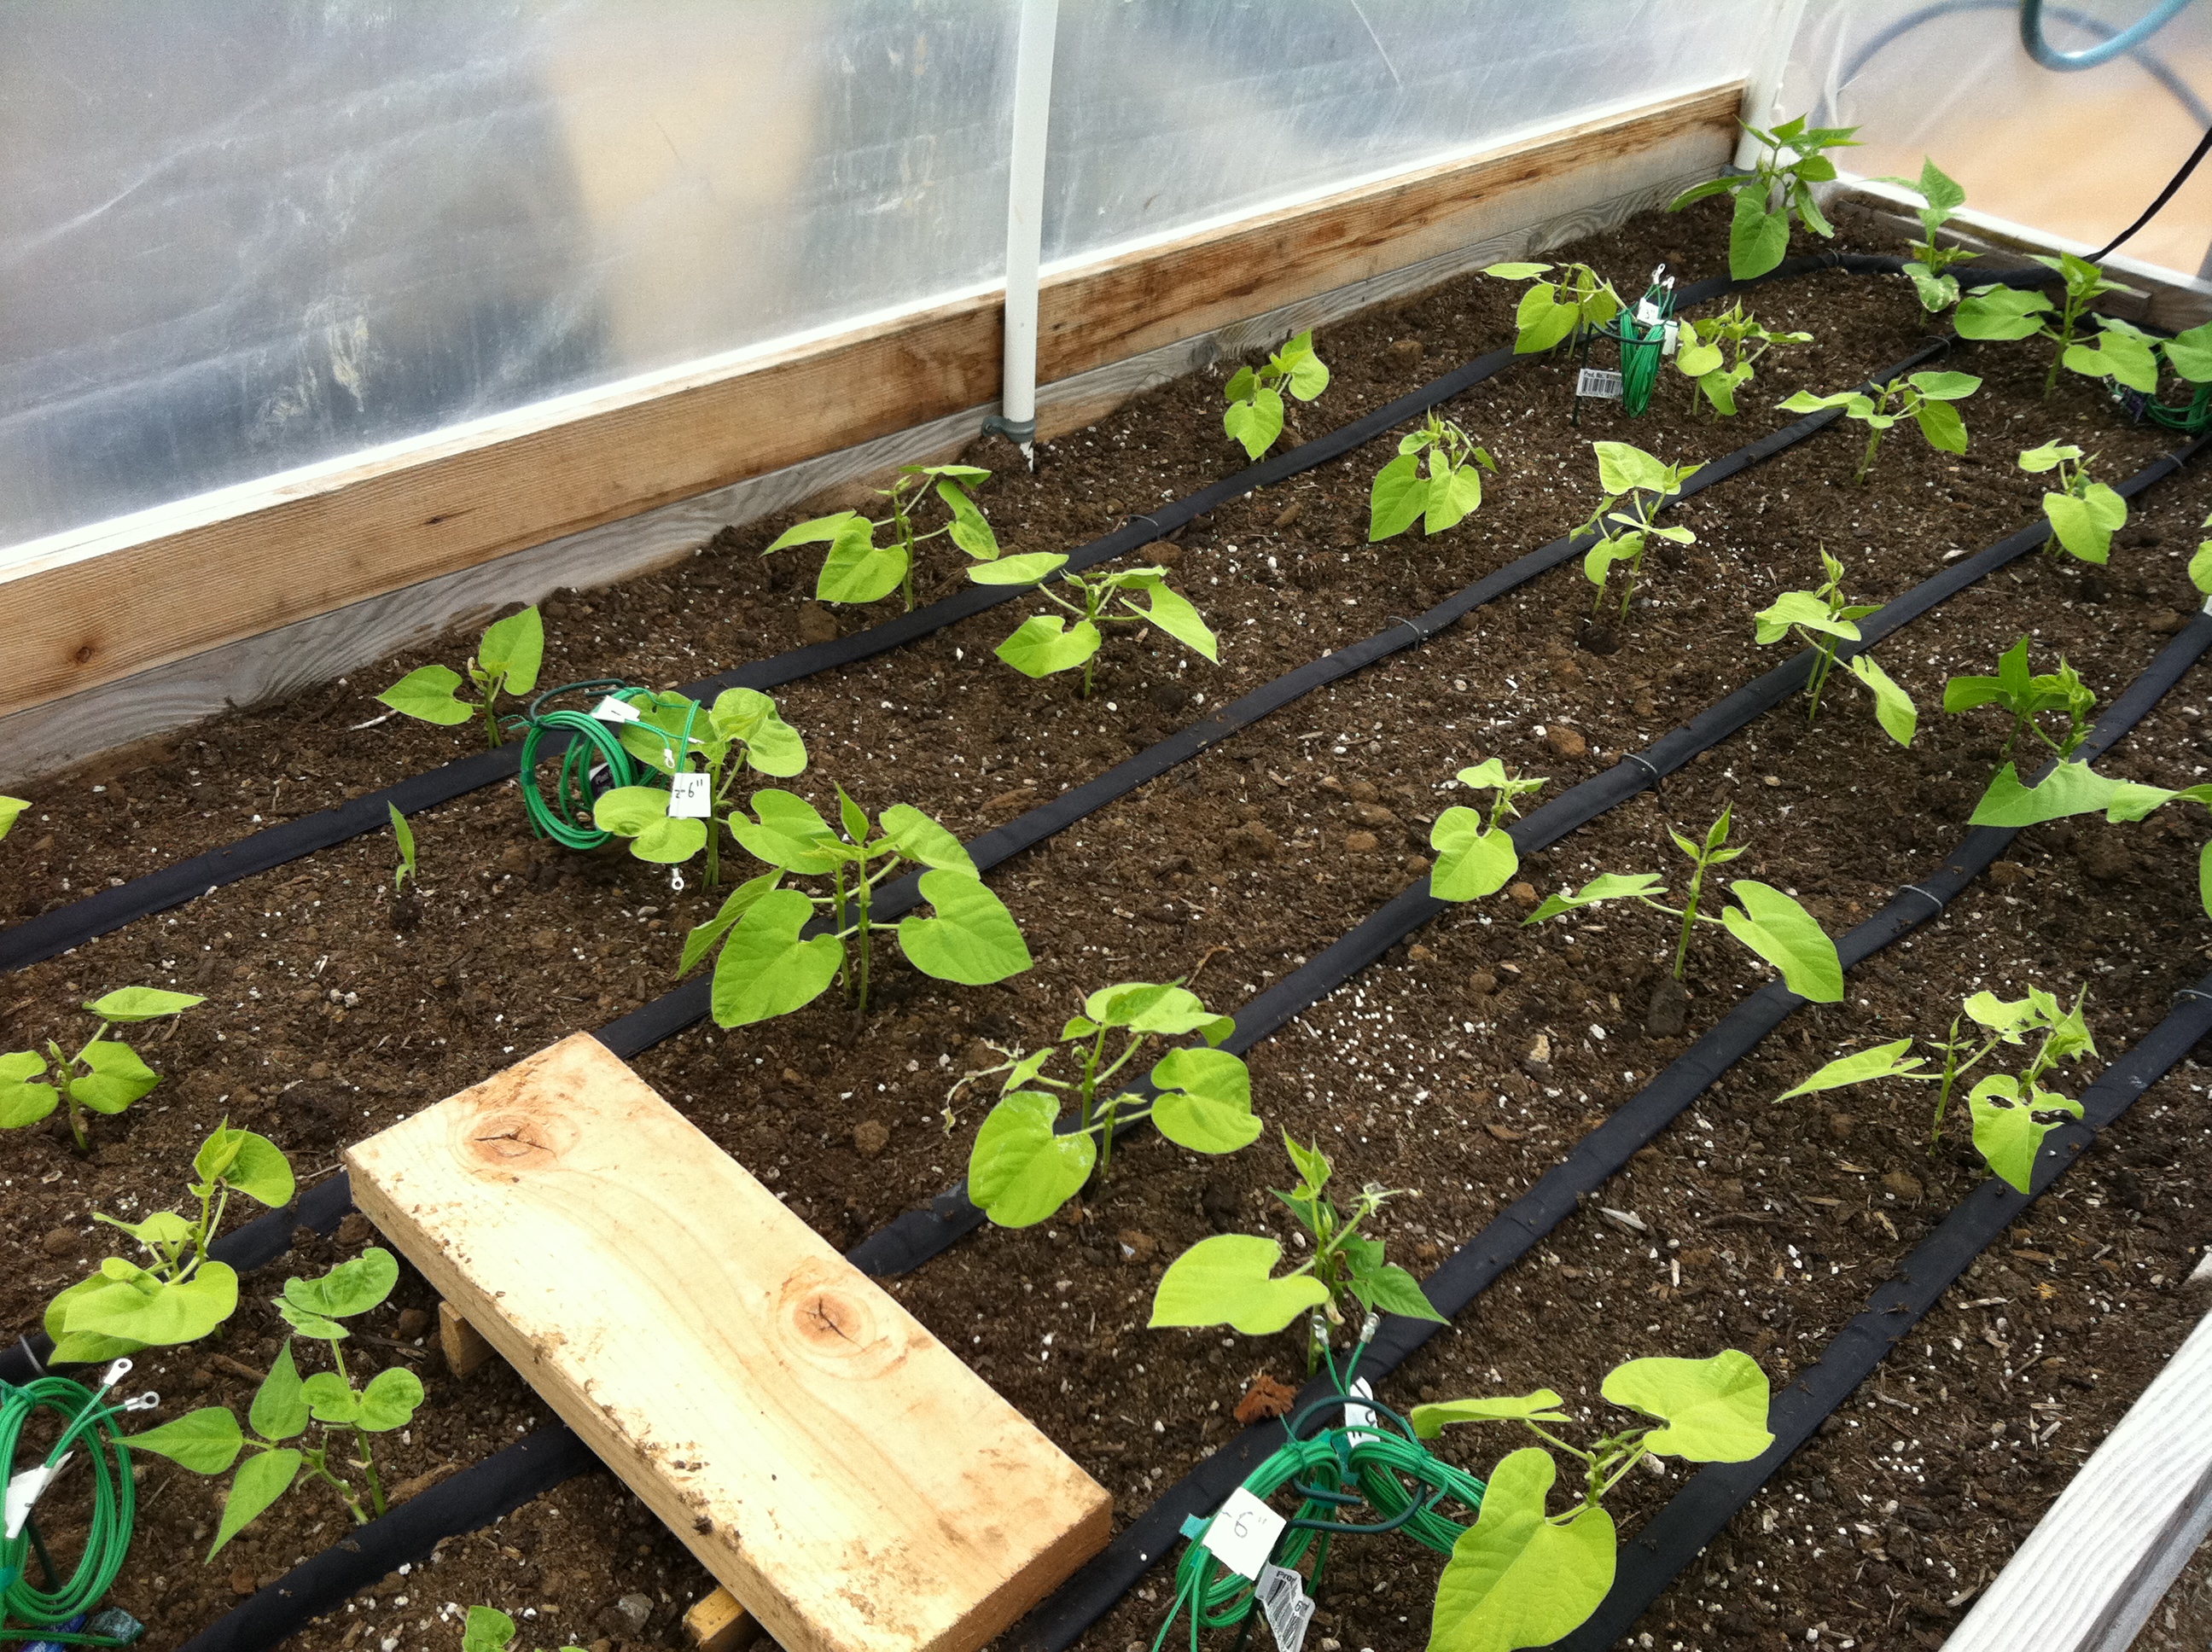
In addition to achieving minimal water consumption, drip irrigation makes the watering process significantly more efficient. This is especially true if you grow a larger number of plants.
If you expect a proper harvest in your garden or perhaps in a greenhouse, manual watering is a thing of the past! However, the drip method also finds use when growing herbs in the comfort of home or, conversely, in agriculture on a large scale.
The larger the scale, the greater the water savings. And over the long term, water savings always show. Besides the economic aspect, there is of course also the environmental one. With a drip irrigation system, you certainly will not waste water. At the end of the article, we will also discuss how important the properties of the water you use to water your plants are, as well as the quality of the water source.
What is drip, or how does drip irrigation work in practice?
Drip can sometimes seem unnecessarily complicated to beginner growers, yet the opposite is true. So let us take it step by step. What does a drip irrigation system consist of?
- Water source (tank, well, mains water supply).
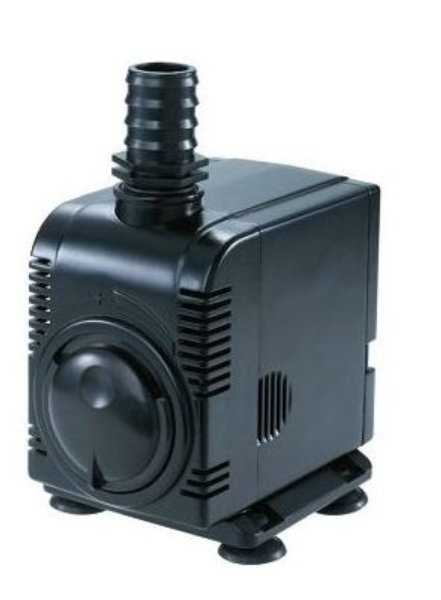
- Pump (see image, except when using a tap)
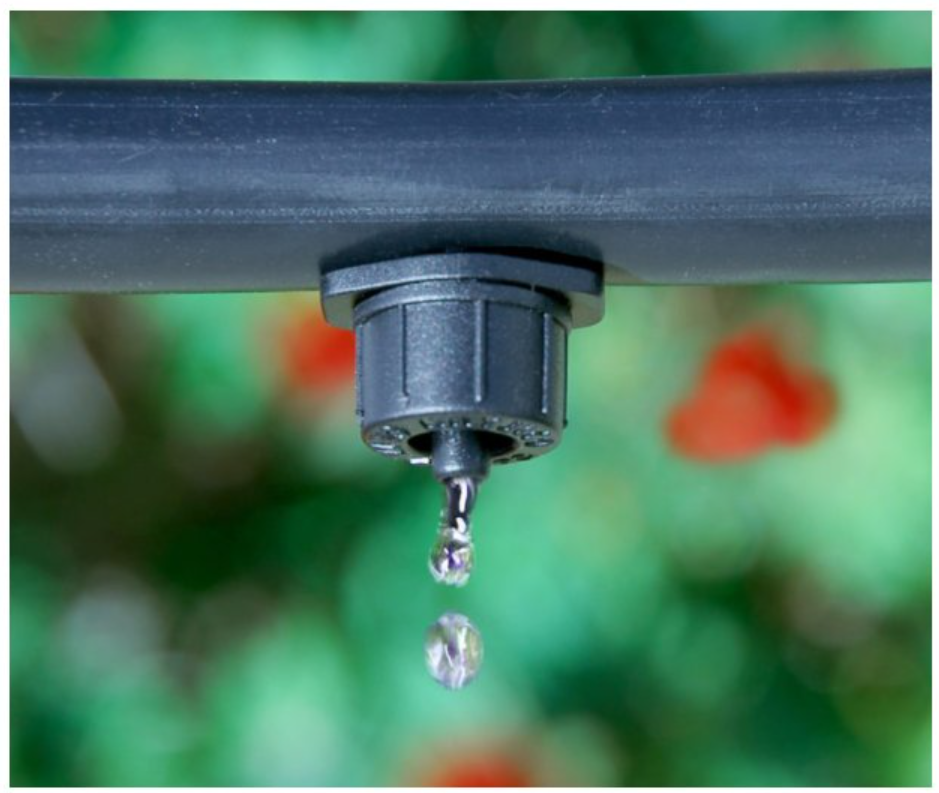
 Water distribution, or rather the distribution of tubing (capillaries and hoses), which are connected to the water source. At the end of the capillaries are connected irrigation needles, which are inserted into the soil.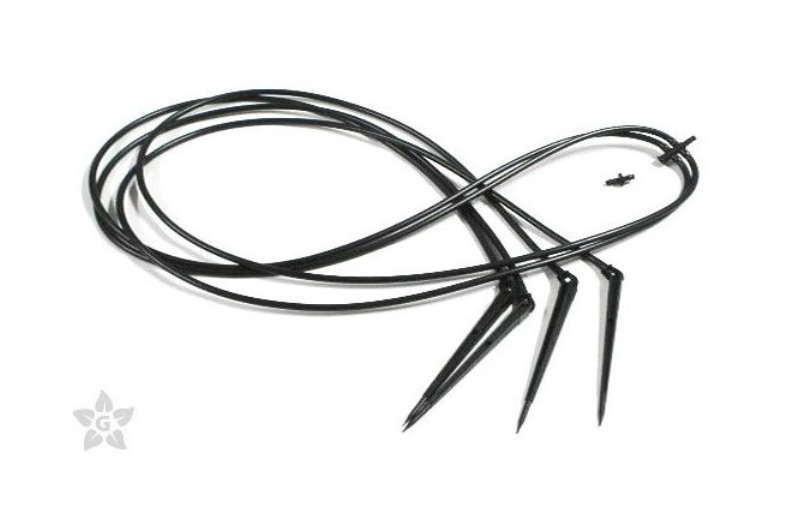
- Reducers, connectors, end caps, valves and various shaping components (connectors, connectors).
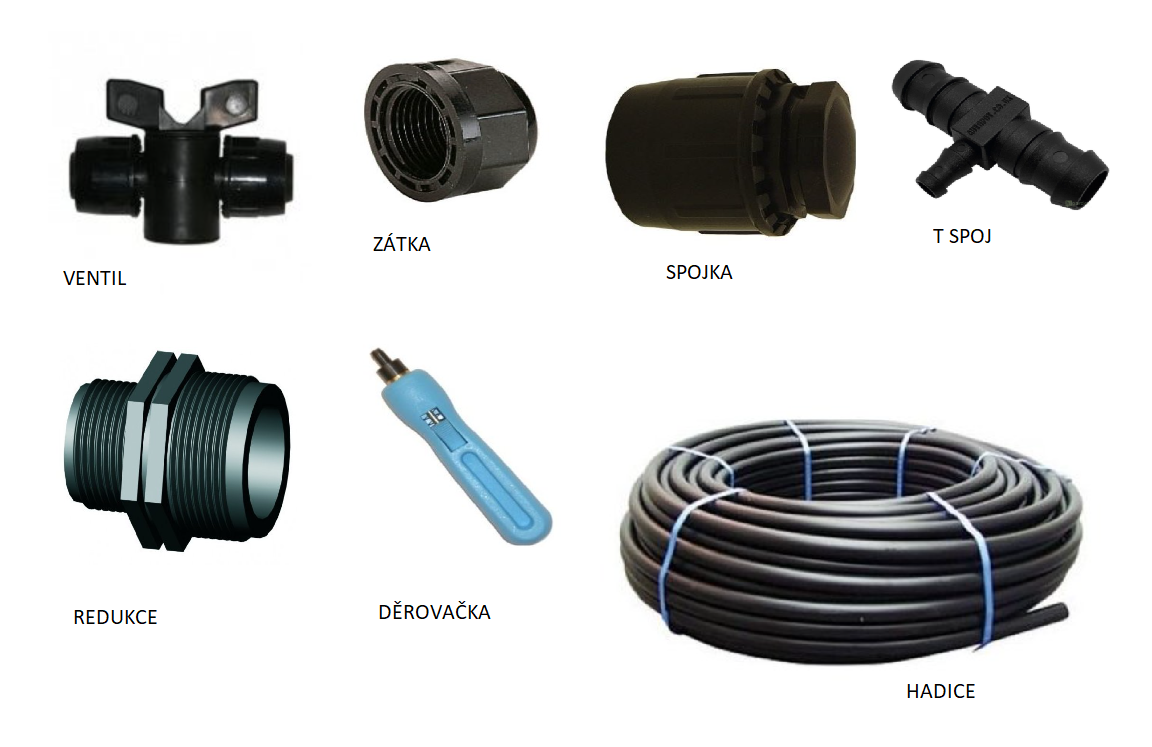 Assembling drip irrigation - how do you do it?
- When assembling drip irrigation, the grower’s first task is to lay out the hose around the plants so that it does not cross over itself anywhere, let alone become tangled, and so that water and nutrients, driven from the tank or well by a pump with sufficient flow rate and head, can flow evenly through the irrigation system.
- Next comes the hole punch, with which you make holes in the hose in places that are ideal for irrigation. In addition to ordinary hole punches, you can also make the work easier by using the lever hole punch. For the smallest drip systems with thin-walled distribution piping, in which there are only a few holes, a 3 mm hole punch will suffice.
- A cutter is used to cut the drip tubing.
- Even when making the holes, bear in mind that water and nutrients need to be brought as close as possible to the plant roots. This is made possible by the end capillaries. “Basic” end capillaries are available in the form of capillary needles. However, many growers swear by multi-part capillary distributors with end needles (Topspin). Correct system connection is also essential, as you can see in the image. This will prevent leaks of water with precious nutrients. When connecting, pay particular attention to the correct placement of the seals.
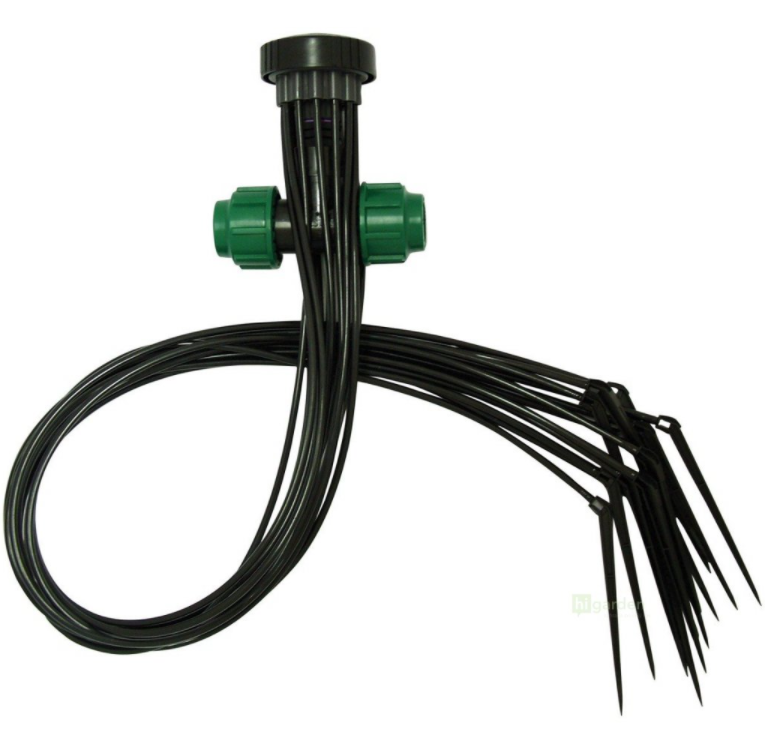
- Thanks to the fact that through capillary needles the watering gets below the surface directly into the substrate, the nutrient solution no longer evaporates into the air afterwards. It is precisely the high rate of water evaporation that is typical of long-outdated manual watering, because with each growing cycle you would use a disproportionately larger amount of water than when you assemble your own drip system.
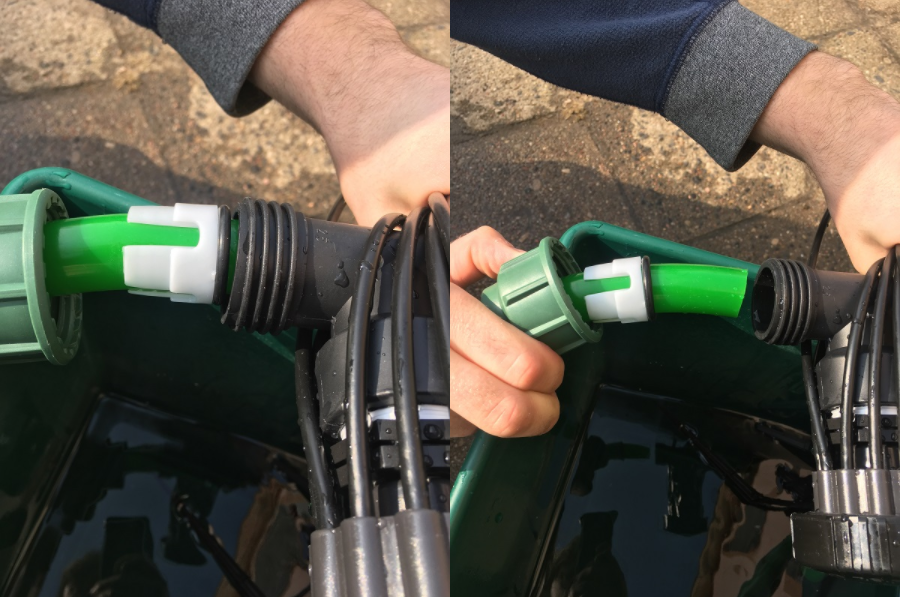
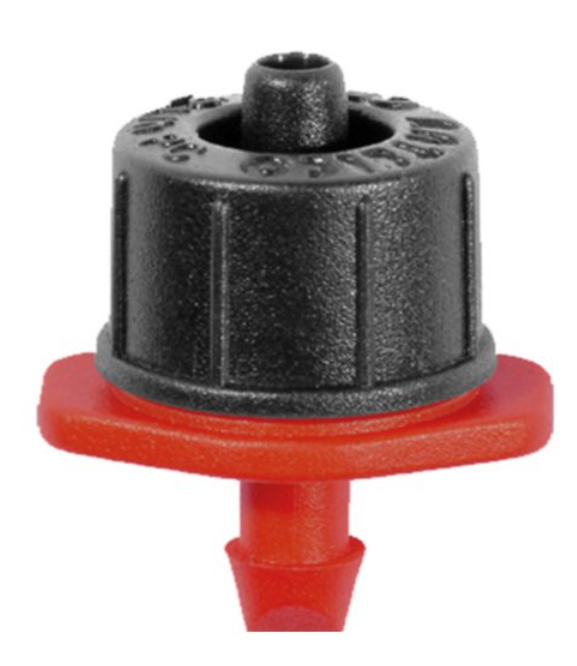
We must not forget what capillary pressure irrigation means. It is drip irrigation that works with higher water pressure, more precisely from 0.5 bar upwards. This is also associated with a greater water column height, with the equivalent of 0.5 bar being a 5 m water column. It is worthwhile for short water runs of approximately 2 metres and when irrigating only a few plants. The downside of pressure drip irrigation, however, is the uneven distribution of nutrient solution to individual plants. In drip systems of this type, growers therefore use pressure valves (see image), which for a few pounds will ensure that all the plants in the system receive regular watering of the same intensity, regardless of the distance from the water source and regardless of how high the water column leading from the pump is. Different variants of drippers with a pressure valve differ from one another in the amount of watering released per hour. If you decide on pressure drip irrigation, do not forget that you need to choose a pump with a greater head than the starting pressure. If the starting pressure is 0.5 bar, choose a pump whose head is at least 0.6 bar after subtracting the height difference within the whole system.
Our TIP: When working with a drip system, practical waterproof tape can be useful in many situations.
Automatic drip irrigation
Having a DRIP system is an advantage. But automating it will save you even more time and energy. And we dare say that automatic irrigation timing is absolutely essential, especially in summer. At the same time, you will achieve precise watering intervals and frequency according to the current need or, for example, based on the plant variety grown.
You can therefore normally supplement your drip irrigation system with timer switches, or even more advanced irrigation timers. This category is clearly led by the reliable products from TechGrow:
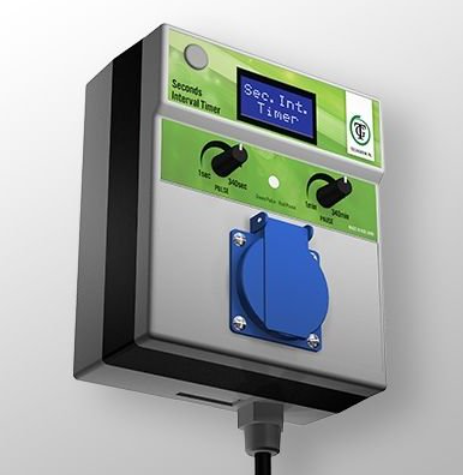
Interval and second timers from the TechGrow brand enable precise irrigation not only in drip systems, but they also serve perfectly in flood-and-drain systems or Aero systems.
Gardeners and growers who care for their plants in a greenhouse have also found automatic solar irrigation to be effective.
For home growers using a grow tent to cultivate herbs, drip hydroponics may be useful, which is perfectly handled on a smaller scale by the hydroponic systems Atami Wilma.
Experienced growers and professionals will find it worthwhile to explore the options offered by GroLab when it comes to automating growing processes.
When automating hydroponic systems, a float switch with gland is also used.
Quality water and its source – that is the absolute basis of drip irrigation!
Not only in the case of drip irrigation, but also in terms of hydroponics in general, whether you are growing plants indoor or outdoor, it is certainly worth considering the following question, which is so important that it has become the subject of a separate article: What water do you use to water your plants? The quality properties of water have a huge influence on crop quality and growing results. Beautifully clean water free of all sediment is a basic prerequisite for achieving a beautiful harvest. Sediment contained in the water will probably cause the tubing to clog and create other problems, because of which your hydroponic efforts in the garden, greenhouse or even inside a grow box will not be effective. Likewise, if the water source you use for irrigation is somehow contaminated, water treatment and filtration come into play.
Water treatment in growing practice takes place on several levels:
- Adjustment of pH.
- Reverse osmosis (RO) is the most effective solution for dealing with practically all impurities of organic and inorganic origin. On this topic, we again recommend a separate article. More advanced reverse osmosis units can also handle total deionisation of water, which is of course the ideal state.
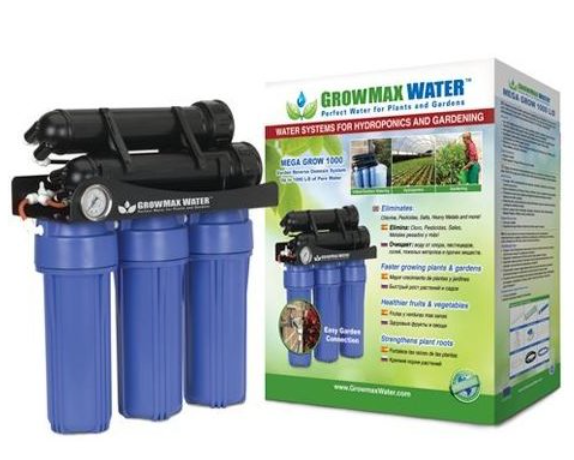
- Water filters. If the basis of your watering is tap water from a municipal source, which often contains chlorine in amounts that are very harmful to plants, a carbon water filter will also help. A mechanical filter captures larger sediments. Irritec inline water filter is suitable for every water system. For drip irrigation systems, the safety filter with push-fit connectors is intended, and both components are often at the same time an important part of the water distribution (see above). Where there are large height differences between the tank and the pots, it is advisable to use a check valve or non-return valve.
What should you watch out for when it comes to drip?
Although drip irrigation has no outright disadvantages, the experience of countless growers should be reason enough to keep the practical observations below in mind:
- If you have a drip system outdoors in the garden, it is often exposed to “attacks” by rodents or various other pests, or it commonly becomes the object of unwanted attention from pets. Therefore, and not only for that reason, be sure to check your drip system from time to time along its entire length to make sure everything is as it should be and that no damage has occurred anywhere, which you can avoid, among other things, by ensuring there are no sharp objects near the hoses and that the hoses do not run over sharp edges.
- Watering in the true sense of the word means water and fertilisers dissolved in it. And it is precisely these that are the reason why regular maintenance of your drip system is important before the start of each growing cycle. It is enough to thoroughly flush the water distribution using products such as OxyPlus or T.A. FlashClean (formerly G.H. FloraKleen).
If you would like to ask us anything about drip irrigation, we are here for you at the well-known e-mail address info@higarden.eu and we look forward to your questions. We will also be happy to help you choose specific products for an effective and reliable drip system.
We also recommend these products:
What to read next?
How to Recognise a Quality Clone?
Did you know that growing from so-called clones is significantly more common in indoor plant cultivation than growing from seeds? Is that the case for you as well? Today we will discuss what signs every healthy clone, destined for an excellent yield, should show.
Assessing the quality of a young plant is significantly easier in the case of a clone, and compared with growing from seed, you also save some time, including the usual worries about germination. Clones only need to be planted. That makes their quality all the more important. How can you estimate their genetic potential?
- ROOTS: the root system of a clone probably has the greatest indicative value; just as with more mature plants, vitality can be determined by observing the roots. You should look for fine hairs and the brightest possible white colour. As soon as you notice yellow tips, edges turning brown, or hair-like roots, these clues will tell you that this is a clone whose quality is not very good and more intensive care will not bring you much joy. On the other hand, if the clone is not outright poor, even less vigorous young plants can be effectively encouraged at the start during transplanting. For this purpose, a good root booster and other nutritional supplements for plants will help, for example highly concentrated enzymatic preparations or organic soil improvers. These products complement one another, and it is up to you how comprehensively it pays to care for your clones.
- SIZE: clones from the same batch should also be very similar in size. It does not have to be down to the millimetre, but this clearly shows their common origin.
- COLOUR: more precisely, the shades of green by which individual varieties may differ from one another. Plants of the same variety should be identical, with the same colour. Here we again find a parallel with humans: a “healthy complexion” is simply fresh and easy to recognise. Put simply, the clone must have strong and white roots.
- NODES: a clone ready for further development should not have only one or two nodes. Three is the minimum, but ideally a clone destined for a successful harvest should have even more nodes. New shoots form at the point where leaves connect to the stem of the young plant. Each shoot counts as one node. You have certainly already noticed, whether at home or in nature, the phenomenon where two leaves emerge from the same place on opposite sides. These are mirror shoots, and in their case we count two shoots as one node.
- LEAVES: observe whether the connection to the stem is noticeably weak, as that would be a bad sign. A good sign in the case of every clone, on the other hand, is a strong and healthy leaf that holds firmly. Such leaves should be distributed practically evenly along the entire length of the clone. As far as leaves are concerned, the best thing you can do for the health of a clone is a spray as prevention against mould and rot. You can also prepare it in BIO form. You will find everything for the protection of your clones here.
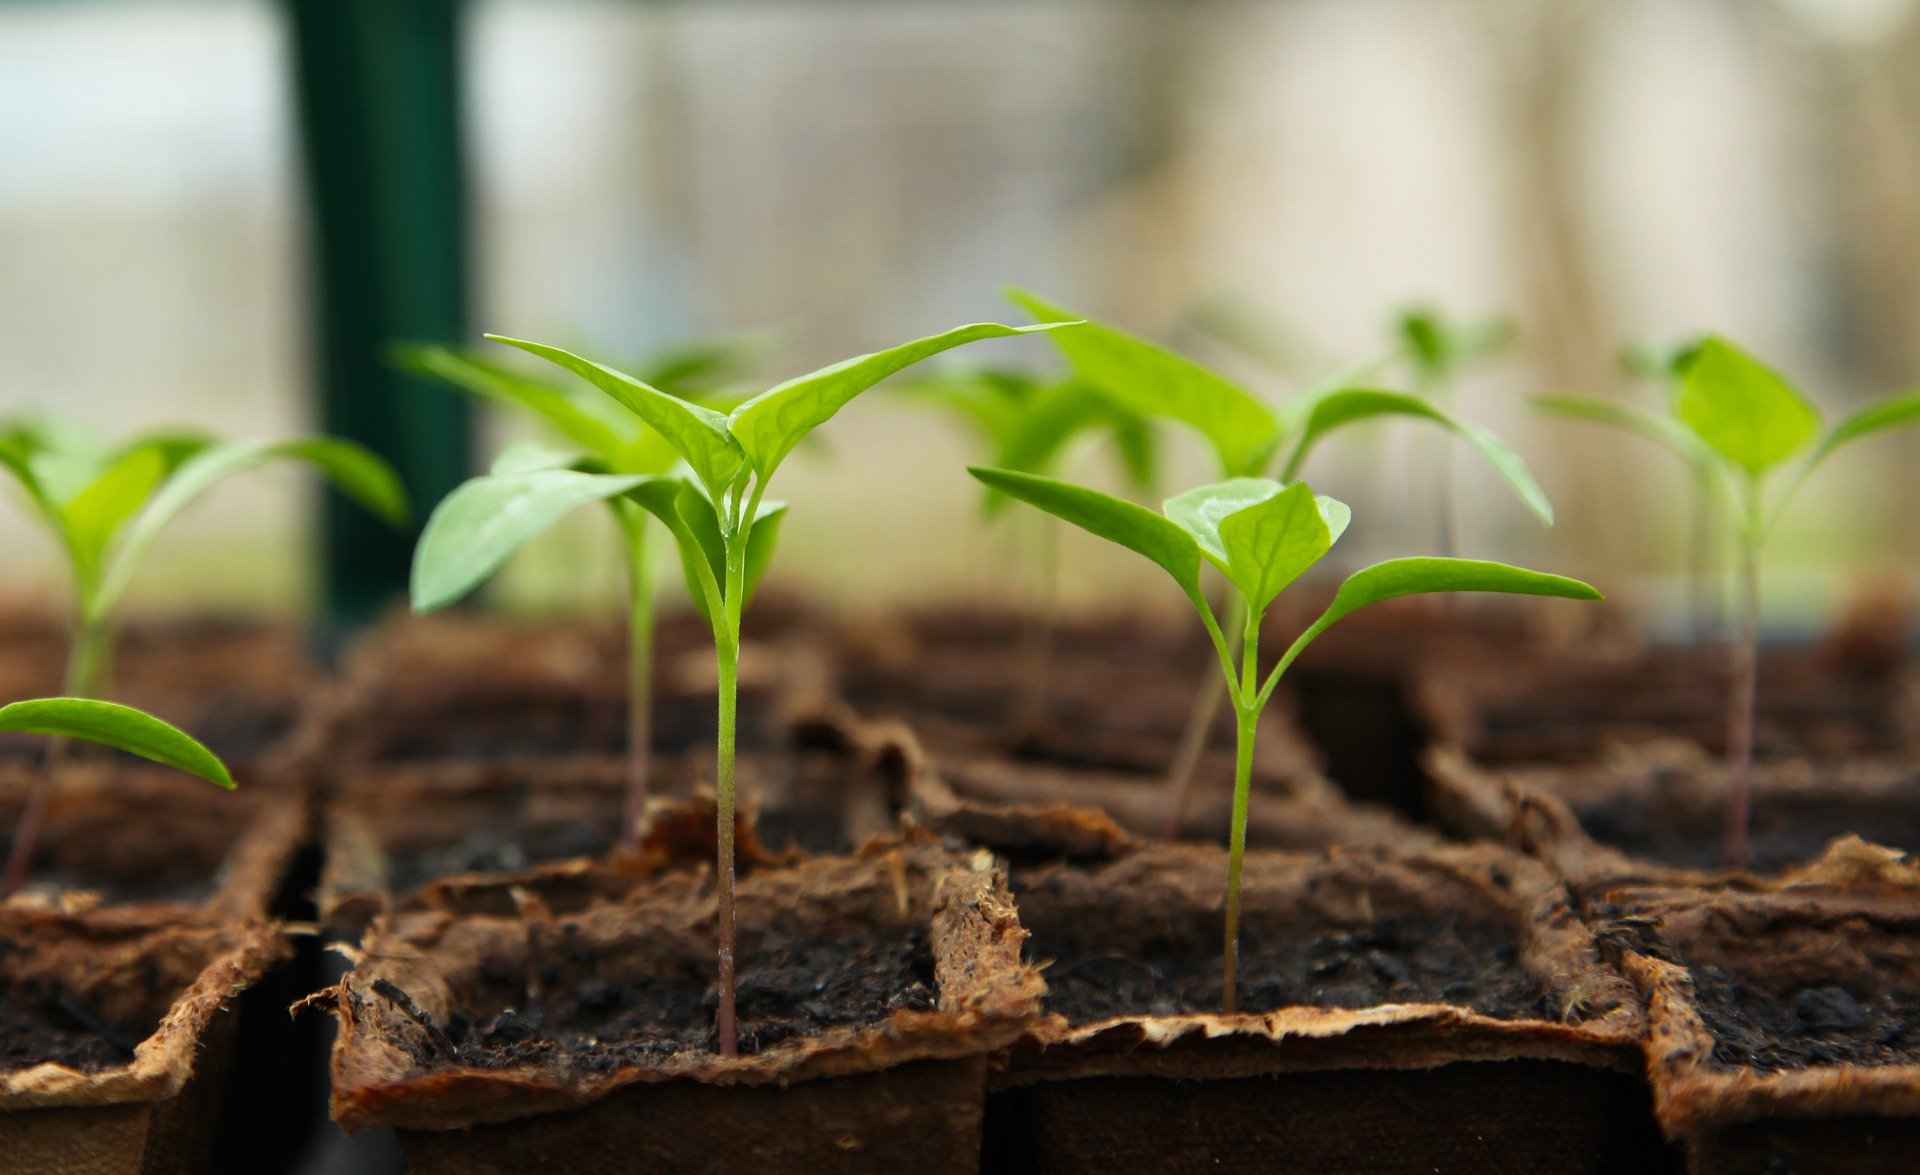
We recommend these products:
- ROOT!T cloning spray 100 ml - increases clone success rate
- Cloning systems
- Protection of clones against pests and diseases
- BioNova fertiliser sets - comprehensive nutrition for the entire growing cycle from the popular Dutch brand. Support planted clones right from the start and look forward to a fantastic harvest.
- BioNova Veganics - everything needed for the growth phase and the flowering phase, if you want your harvest to be 100% BIO.
- HERCULES - modern plastic pots will make your journey from planting the clone to beautiful flowers and fruits easier.
- LED sets – a finely tuned grow box complete set with everything included for more than one growing cycle represents a fully equipped growing space for your clones.
In cultivation practice, the quality of clones is often underestimated, especially at the beginning when experience is lacking. That is why we believe that after reading this article, this will no longer be the case for you, and if you have any further questions on the topic of clones, do not hesitate to contact us at the well-known address info@higarden.eu.
What to read next:
How to Grow Potatoes and Sweet Potatoes from the Comfort of Home?
To grow luxurious potatoes or sweet potatoes in indoor conditions, for example in a block of flats, you do not need any special experience. Ensure a supply of these foods all year round, ideally in BIO quality!

What you will need for indoor growing of potatoes or sweet potatoes:
- A sufficiently large growing container.
- A quality substrate that will be sufficiently airy while also retaining moisture well. We recommend, for example, the purely natural soil BioNova SoilMix.
- A small amount of fertiliser. If you want to enjoy potatoes or sweet potatoes that are truly 100% BIO, make use of the fact that, as a home grower, you have the whole process under control and choose proven organic nutrition, such as BioNova Veganics. For potato cultivation, the organic soil improver Bat Guano from the traditional brand Plagron, which is characterised by its bat droppings content, has also proven effective.
- A source of artificial lighting or a sunny spot, which in urban conditions is provided mainly by south-facing balconies and terraces. In extreme cases, a sunlit part of an inner courtyard may also be sufficient.
- After that, you only need warmth, which is not a problem in urban conditions and in flats, even in winter.
- And we must not forget water, without which it would of course not be possible.

Let us mention some further specifics of home potato growing:
- Different potato varieties differ from one another in the length of the growing cycle. For example, early or even very early potatoes usually have a growing cycle lasting about a quarter of a year. Late varieties then take approximately a month longer to grow.
- The advantage of growing potatoes in the comfort of your home is undoubtedly the fact that you do not have to start planting as early as in a field or garden.
- Potatoes form so-called mother tubers upwards, and a single tuber often yields up to several kilogrammes of potatoes. For every 50 litres of growing container volume, you will need at least 3 tubers.
- If you decide to plant shop-bought table potatoes, wait until they have formed sprouts. Seed potatoes are the most suitable.
- Did you know that a potato harvest is made up of up to 80% water? Nevertheless, there is no reason to water potatoes daily during the growing cycle. Watering a few times a week is more than enough. The important thing is that it is truly generous!
How should potatoes be planted?
- Layer substrate to a height of approximately 20 cm from the bottom of the growing container.
- Place the seed tubers (potatoes) on the base layer of substrate and cover them with another, this time only half, layer of substrate.
- Water the seed potatoes regularly and monitor the moisture of the substrate. Make sure that the soil is not waterlogged and that sufficient drainage is ensured.
- At the same time, keep adding further layers of substrate, because as we have explained, potatoes form mother tubers upwards.
- Do not add substrate all the way to the edge of the growing container.
A suitable and sufficiently large growing container is essential
Let us return for a moment to the first point on the list of things without which you cannot do when cultivating potatoes indoors. If you are thinking of trying to grow delicious potatoes first on a small scale, and by that you mean a small growing container, it makes no sense. Do not go below 55 litres in volume, whether you choose a deep planter, a large substrate bag, or other “DIY gardening” gadgets that you may encounter not only in urban conditions and among which old barrels or even stacked tyres commonly belong. Here, however, it is good to remember that you can keep higher-quality containers cleaner, and therefore without an increased risk of pests or diseases. Airtight growing containers need to be perforated at the bottom so that sufficient drainage of excess water is ensured. The best solution is certainly large fabric pots, such as the non-degrading, 56-litre Rootpouch with handle, which you can buy for just under two hundred, and after washing you can use it repeatedly. Fabric pots ensure optimal drainage of the substrate and are made for ecological crop growing in the comfort of your home.
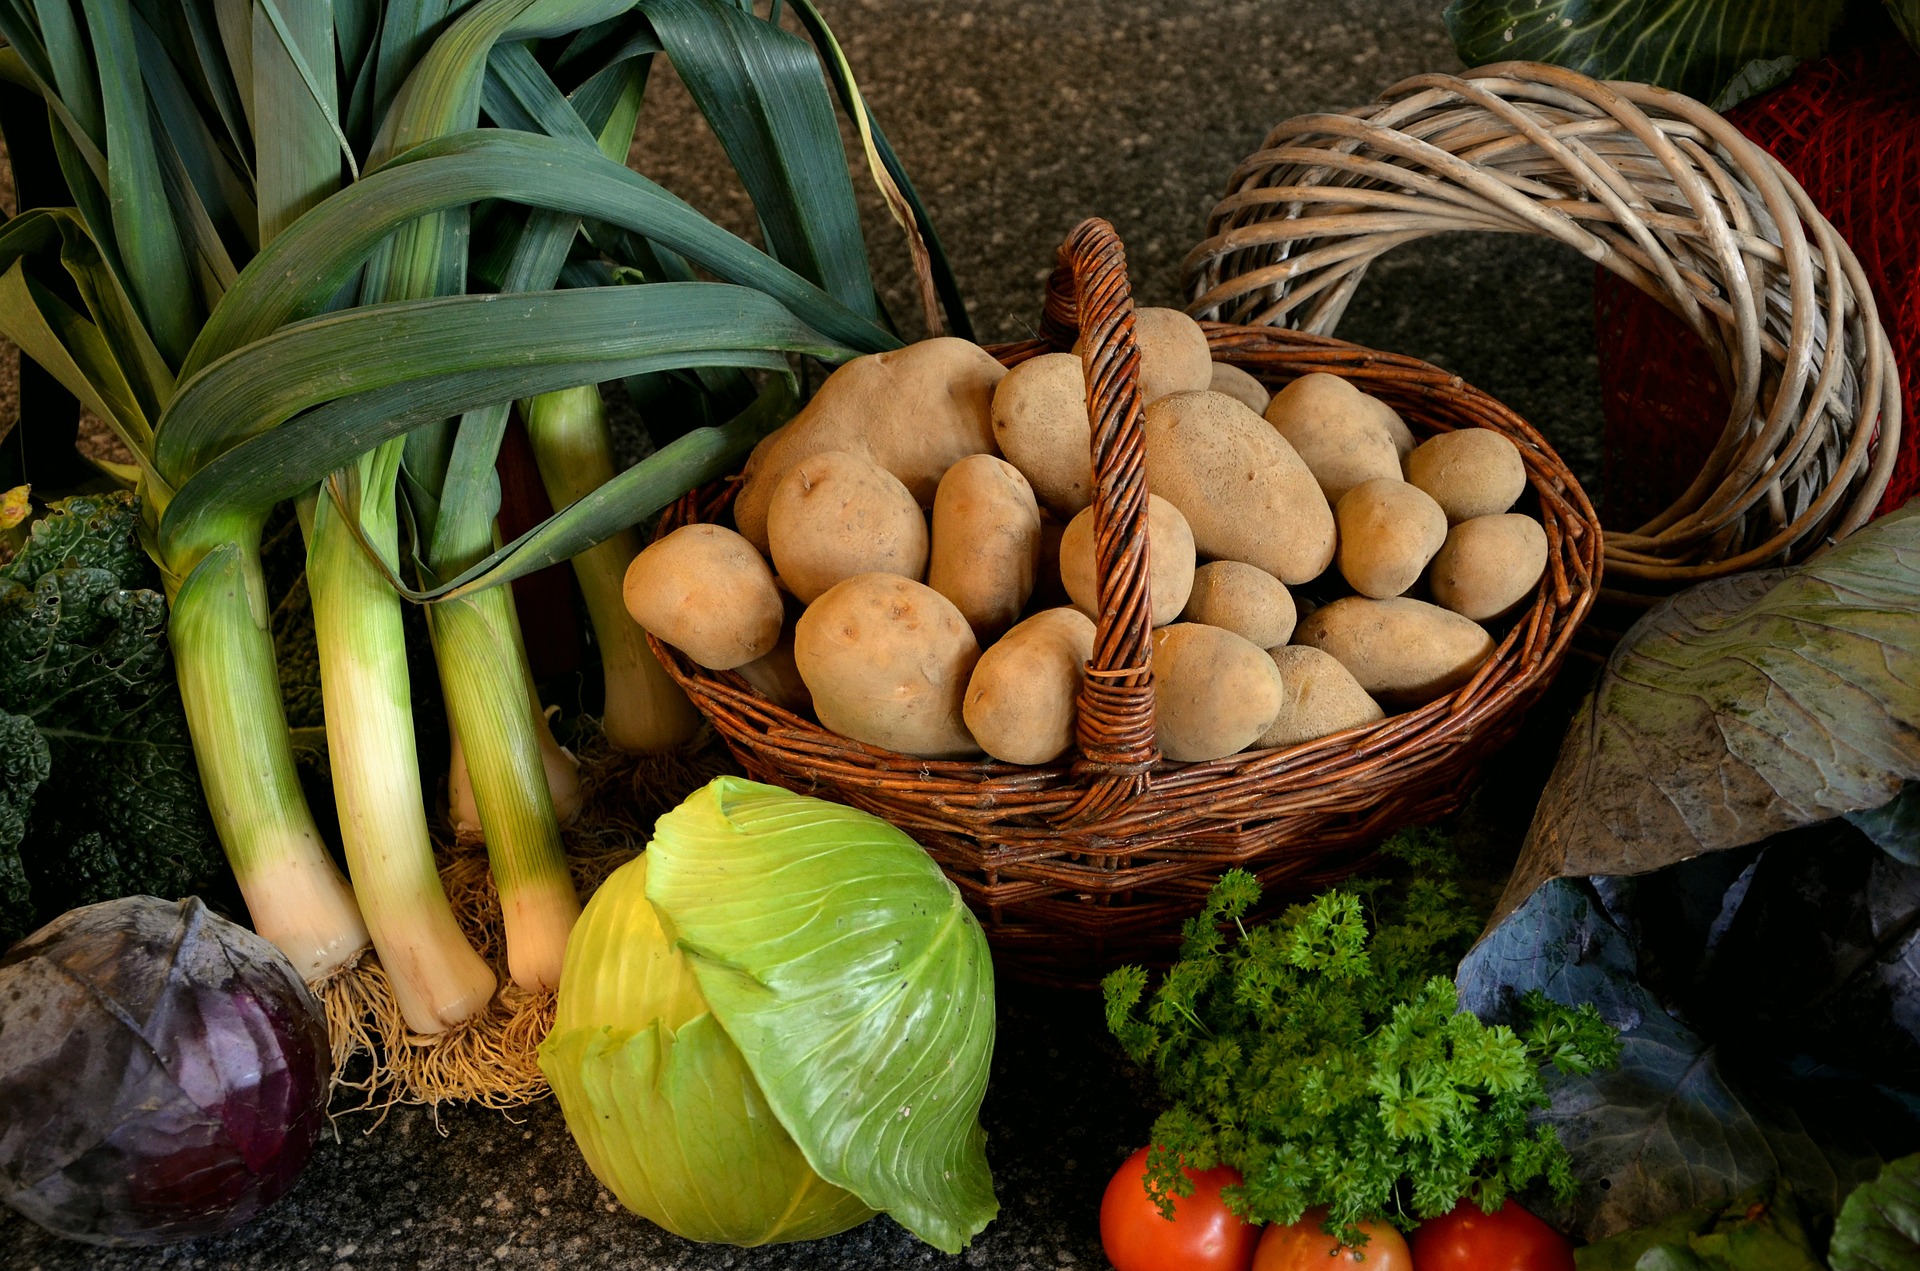
Which pests or diseases should you watch out for most when growing potatoes?
- Colorado potato beetle. It will probably not surprise you that the well-known pest is listed first. Regularly observe the developing crop and as soon as you spot even a single beetle, it must be removed immediately. Otherwise, your efforts could soon come to nothing.
Our TIP: Try an insecticidal product with a natural active ingredient against the beetle – AgroBio Sprintor.
- You can more easily detect the presence of flying insects with practical sticky arrows, which you can simply place around the non-edible above-ground parts of the plant.
- You may encounter rot or mould if you do not ensure sufficient drainage of the substrate, either through holes in the growing container or by using breathable fabric pots, as mentioned above.
Growing sweet potatoes
We have not forgotten sweet potatoes either. We have just left them until the end, because their cultivation at home is very similar to growing potatoes. In what ways do the specifics of the two crops differ, after all?
- Unlike potatoes, the sweet potato (Ipomoea batatas, edible morning glory) is a climbing plant.
- So bear in mind that sweet potato stems can grow up to 5 metres long.
- Sweet potatoes need even more warmth than potatoes for healthy development.
- In addition to vitamin C, they also contain other health-beneficial vitamins (A, B, E), minerals (iron) and fibre.
As you can see, home growing of potatoes, and also sweet potatoes, is nothing complicated! We will also be happy to advise you on the selection of specific products at the well-known e-mail address info@higarden.eu.
We also recommend these products:
- Shogun fertilisers (from 199 CZK)
- BioNova Bio Soilmix 50L (from 279 CZK)
- Gronest fabric pot 75 l - YBP (169 CZK)
What to read next?
- Prima Klima CARBOCONE: innovative activated carbon filters
- WHISPERBLOWER: professional fans with unrivalled efficiency
- What can be grown using hydroponics?
Spring Work in the Garden
It is a joy to watch nature in bloom. Did you know that it is in April that the changes in the garden are most visible? At this time, the spring garden really changes practically every day and calls for the intensive attention of gardeners, who are kept busy, whether it concerns beds or the lawn. That is why, during this period, we have focused on practical advice for effective spring gardening.
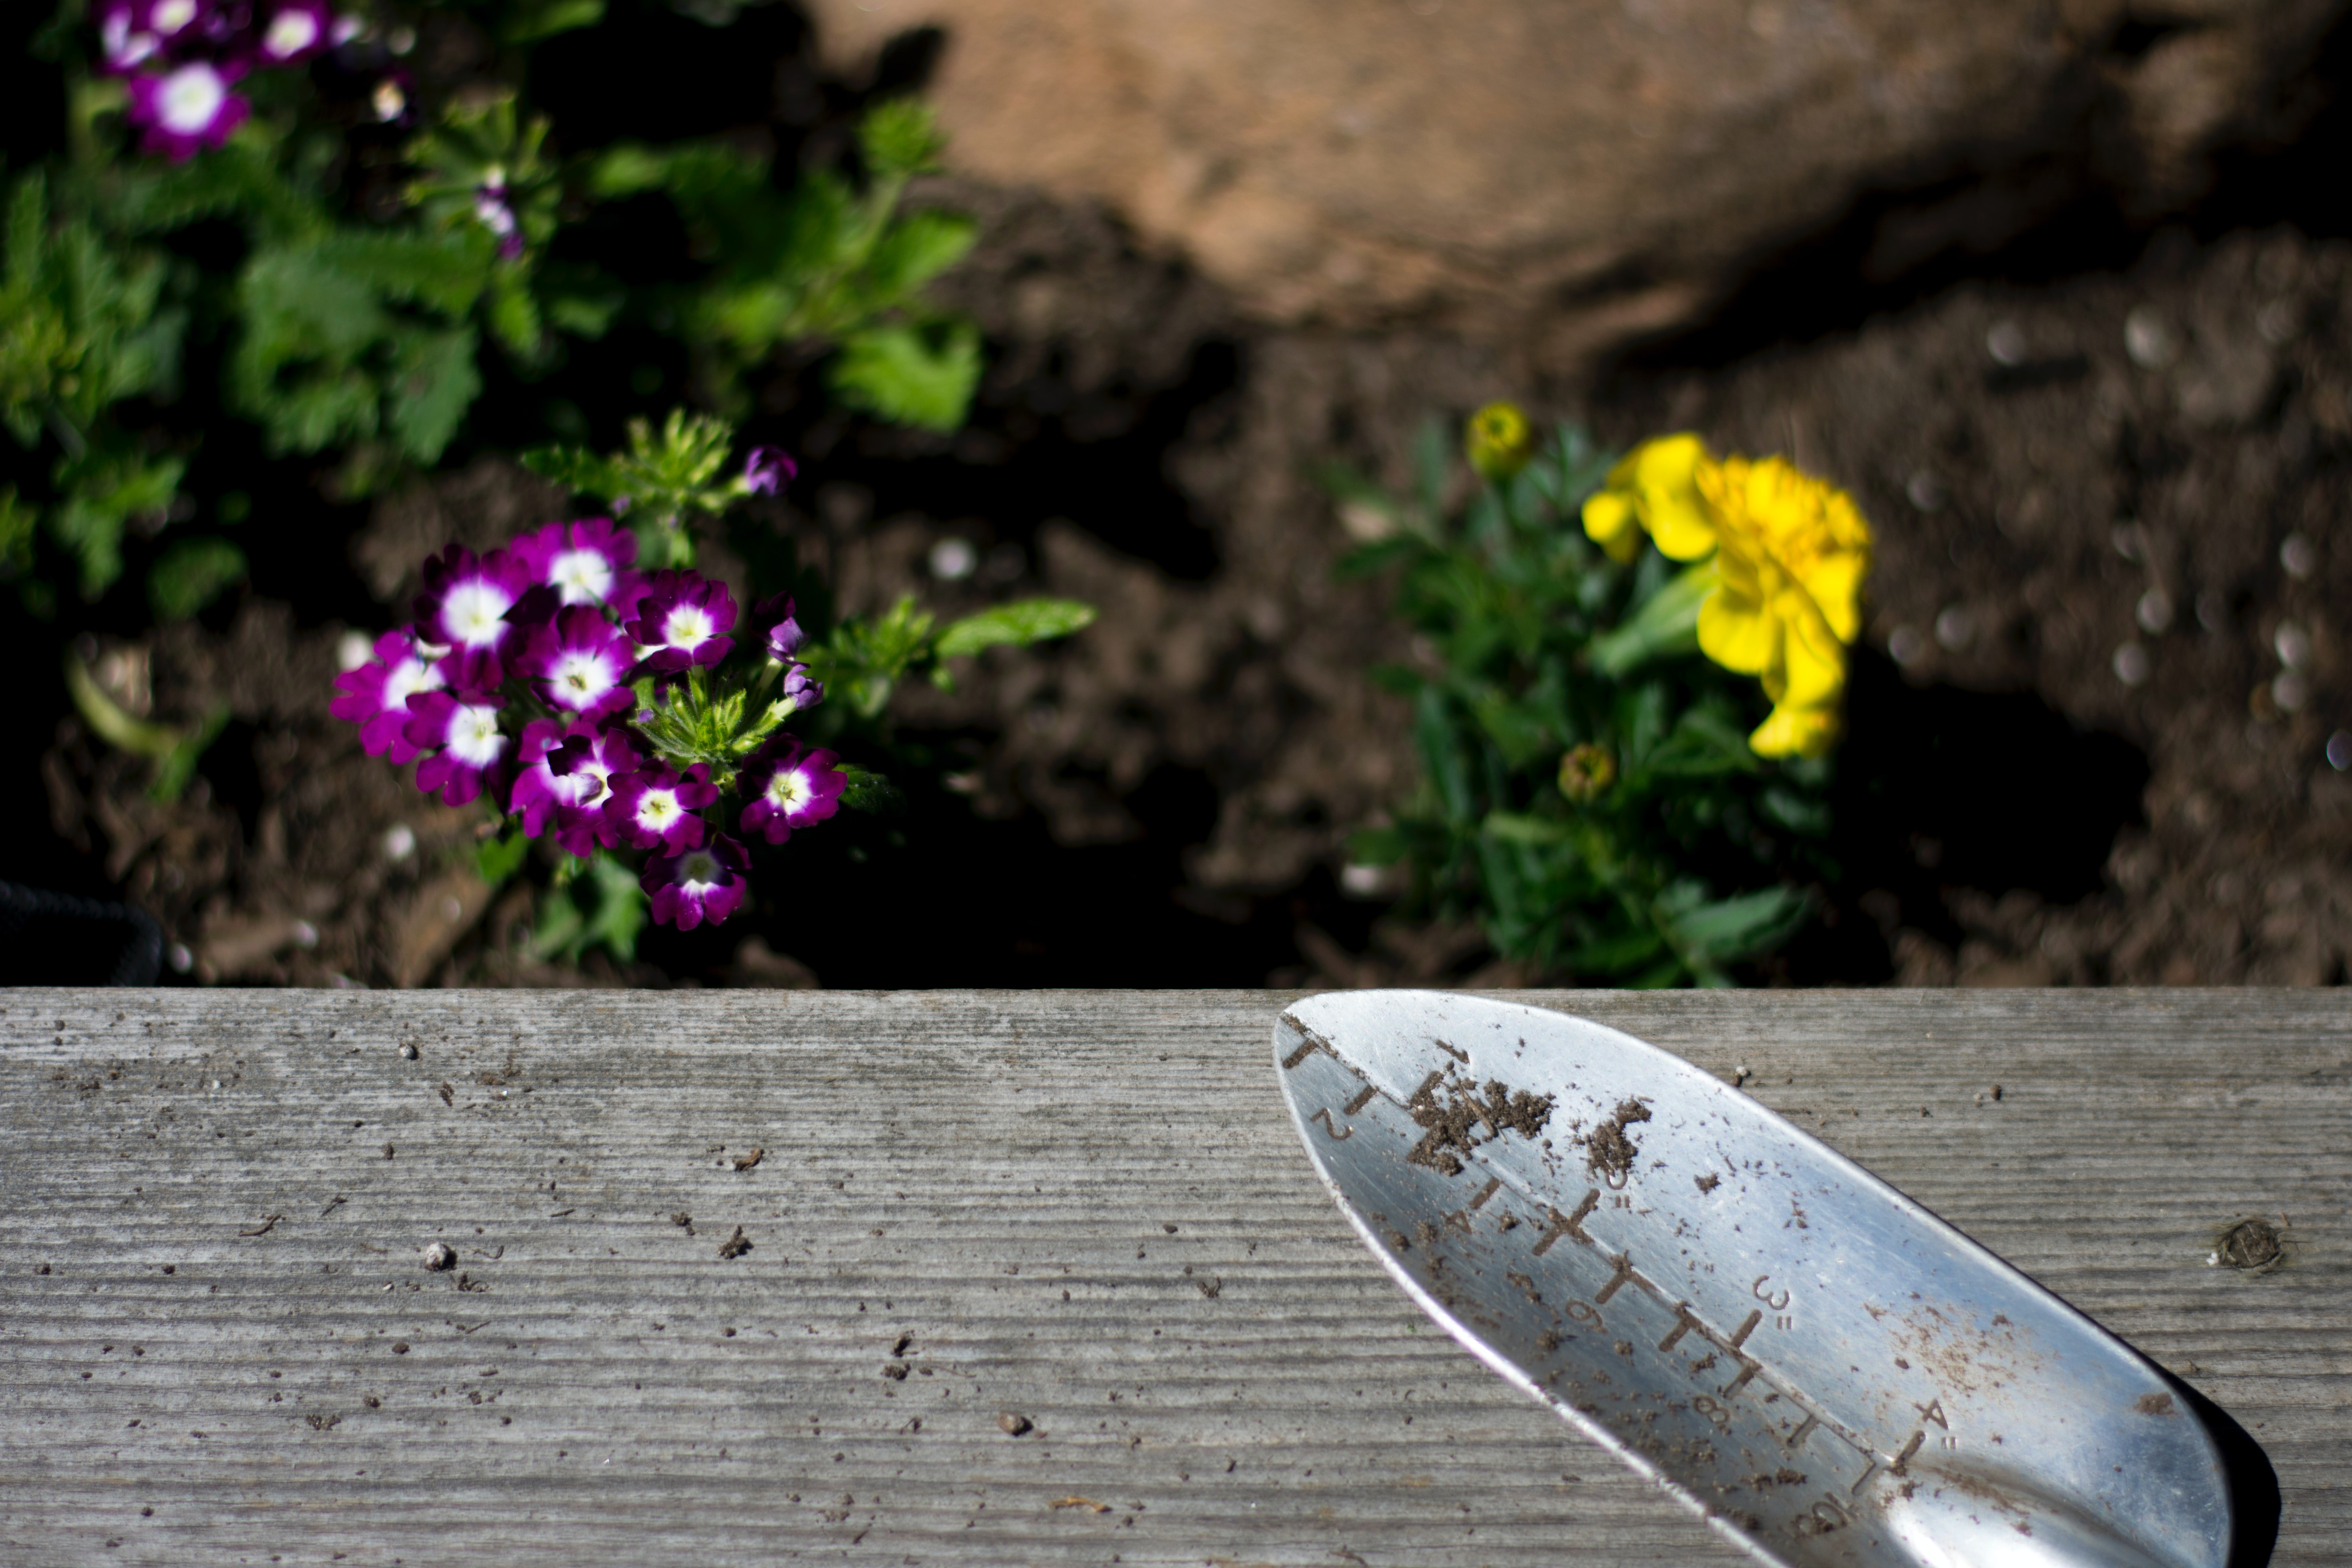
Preparing the garden after winter
Most gardeners plan the garden clean-up for the turn of February and March, but if you have not yet found time for it in this hectic period, better late than never. After all, it is your garden, so no stress. You can still catch up without any problem. For example, rake up fallen leaves and branches, as well as other plant waste that is left over in the garden after the long winter. If you have a compost heap or vermicompost in the garden, then you know where and why to put all this bio-waste. If you have not started composting yet, we recommend our Guide to composting.
An equally important part of preparation is checking your gardening arsenal. Working in the garden should above all be a pleasure, so there is no point in struggling, for example, with old garden shears or pliers.
Quality garden tools and comfortable gloves with a non-slip finish will make your preparations and later also other work in the garden much easier and faster. So what tasks should you continue with once your spring clean-up is done?
Care for beds and lawn
A straight spade will help you renew and straighten the edges between the beds and the lawn.
Weeds thrive in spring. Remove them together with moss using a spade or a sturdy trowel, because April is exactly the month when thorough and repeated weeding pays off most in the garden. This is because frequent hoeing of weeds during the period when they are going through the first two growth stages will significantly weaken them. Before you know it, summer will be here and the reward will be a clean garden, where you will only encounter weeds sporadically. This will be the first step in preventing pest infestations, which weeds in beds naturally suit very well.
With moss, it is necessary to take into account the possibility of spreading to other corners of the garden, so remove all its patches uncompromisingly not only from the beds, but also from walls, stones or surrounding paths. These actions will also save you money on products against moss and weeds (see below).
Mow the old grass at least once a week, either by hand with a well-sharpened scythe or with a mower, which will help it thicken. Keep in mind that sharp blades not only make the work easier, but also prevent unwanted pulling out of the grass with the roots.
Around the middle of April is also the ideal time for sowing grass seed. If there are bare patches on your lawn, also known as thin spots, overseed them with grass seed. For this purpose, a grass mixture designed directly for overseeding lawns or other grassy areas will serve you well.
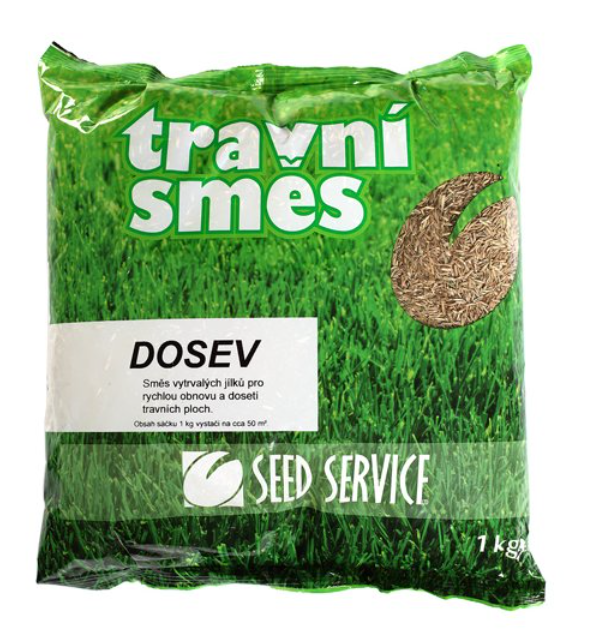
In general, lawns do less well in the sunniest parts of gardens. It is practical to dig up such areas and turn them into a flowering spring meadow sown with a bee-friendly grass mixture. In addition to the aesthetic aspect and greater diversity in your garden, you will attract pollinators and other beneficial insects.
You can use these proven products to care for a beautifully green and dense lawn:
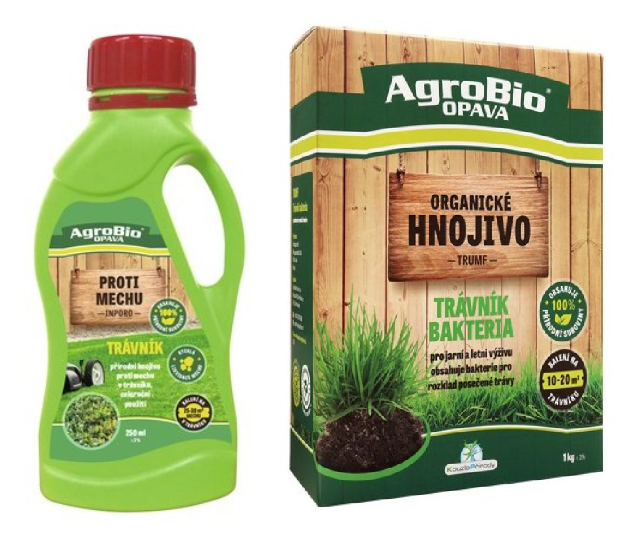
- The Czech product AgroBio INPORO against moss in lawns is a purely natural fertiliser for lawns that visibly suppresses moss within one or two days.
- AgroBio Healthy Lawn - for a beautiful lawn without weeds
- AgroBio TRUMF is also a popular organic fertiliser intended for lawn nutrition.
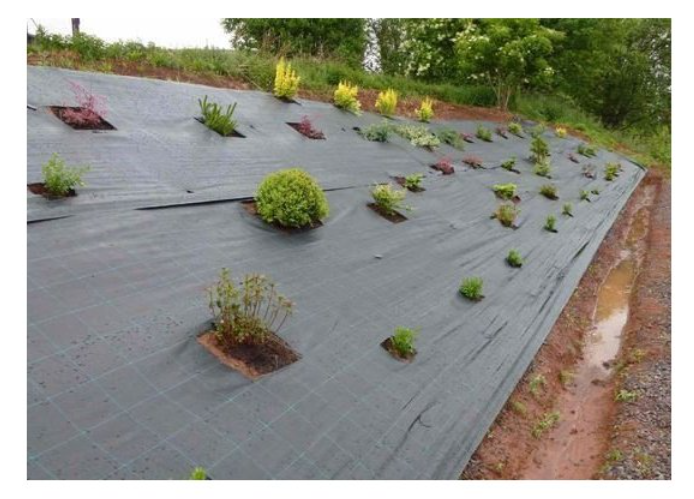
Among gardeners and farmers alike, mulching the lawn is often mentioned as the cheapest method of lawn maintenance. However, you can also mulch vegetable beds or, for example, shrubs and trees. Rainy spring weather favours this activity, as the soil is sufficiently moist. Conversely, never mulch dry soil. Mulch means a covering of the soil surface with organic material, typically finely cut grass, straw or mulch bark. As you can see in the picture, mulching also uses a sturdy woven mulching fabric, which will last you for several years and whose use also brings other benefits:
- Suppression of weed growth in beds.
- Reduction of soil drying out.
- The black colour reflects sunlight, thereby supporting fruit ripening.
Spring planting and fertilising in beds
Although nature sometimes helps us water the garden in the spring months, do not rely on rain alone, because especially freshly sown seeds or newly planted seedlings require sufficient irrigation. Therefore, water thoroughly loosened soil generously not only after sowing, but also before it. The fact that seedlings have taken root does not mean that they are no longer very sensitive to drought. Therefore, never allow the soil to dry out.
Our TIPS for irrigation:
- If you are already tired of physically and time-consuming hand watering, put aside the watering can for plants and replace it with drip irrigation, or DRIP.
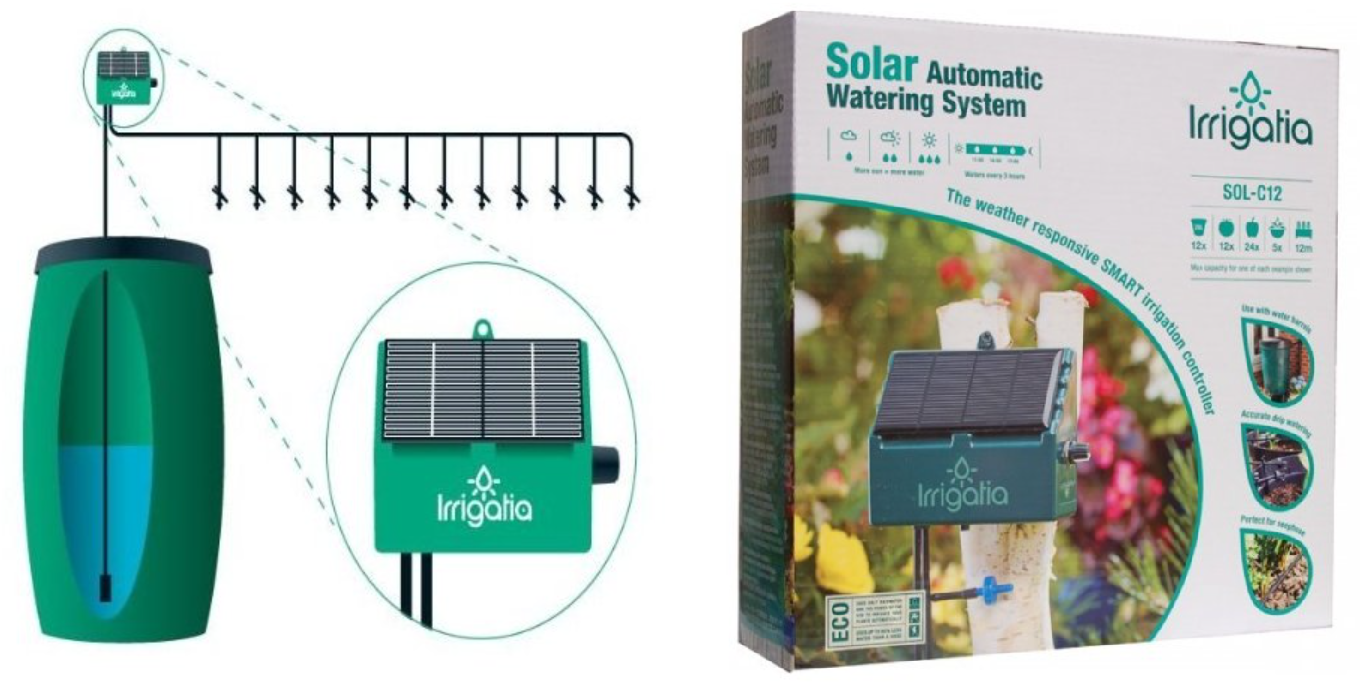
- The automatic solar irrigation system Irrigatia is a great investment that will give you the freedom to travel not only later in spring, but also during the summer, while providing your plants in the garden or lawn with regular watering without using electrical energy. Solar irrigation systems are becoming increasingly popular among outdoor growers and gardeners. In addition to better economy in the use of self-watering systems, they also support much-needed sustainability.
Provide beds with enough nutrients in spring
Moist spring soil absorbs fertilisers well down to the roots of plants, and so naturally invites their application.
These days, it is necessary to provide plenty of nutrients, among other things, to beds with small fruit. A typical example is strawberry beds. At this time, however, abundant nutrition is also extremely important for fruit shrubs and trees.
In Czech gardens, we usually find shrubs such as raspberry, gooseberry or currant, which need to be carefully shortened in spring to a length of approximately 130 cm. Raspberry is characterised by short shoots that are removed right at ground level.
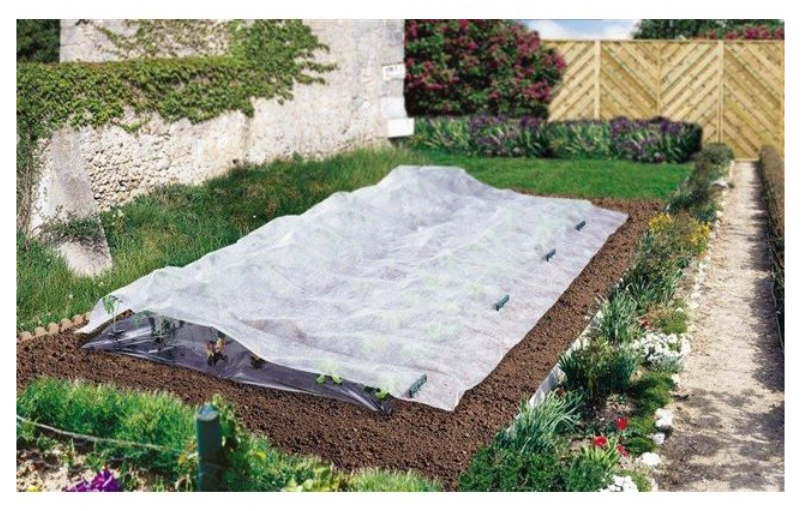
Whether it is sowing or planting, April nights can still bring frosts, against which protection in the form of non-woven fabric is suitable, as illustrated in the picture below.
When should spring vegetable planting begin?
- Pre-grown or purchased seedlings should wait for their time in optimal indoor conditions until the soil outside is sufficiently warmed to at least 6 or 7 °C. After that, you can safely begin planting the following vegetable species:
- Lettuces
- Beetroot
- Radishes
- Spring onions
- Spinach
- Leeks
- And more...
- By keeping approximately 10 cm gaps when planting vegetables, you will avoid having to thin them later.
- From the early growth stages, you can strengthen young plants and give them a successful start in life, for which they will soon repay you with stable growth, exceptional vitality and the overall quality of flowers or fruit. During the growth phase of cuttings and seedlings, try, for example, the British number one Shogun Start.

Our TIP: Try the comfortable NICE planting trowel with a light but exceptionally durable plastic construction reinforced with fibreglass.
Further practical tips for the spring garden:
- Turn the chirping birds in your garden into helpers who will assist you with insect pests. Thoroughly cleaning and clearing the feeders will encourage them to find food on their own.
- Spring provides enough rainfall for you to obtain a suitable container as a reservoir for rainwater. Rainwater is free and has been used for watering gardens since time immemorial. If you do not have one at home or in the shed, use the practical foldable textile rainwater tanks FlexiTank.
- More useful advice awaits you in a separate article: How to grow outdoor?

We hope that this article has brought you inspiration and that this year’s spring in the garden will be the most successful for you. All it takes is to make use of April weather in combination with quality nutrition, represented by basic and supplementary fertilisers. We will be happy to advise you on their selection. Do not hesitate to ask us anything via the well-known e-mail address info@higarden.eu. We are here for you!
We also recommend these products:
- Shogun fertilisers
- Vermiculite - substrate additive
- HERCULES aerated pots
What to read next:
- SHOGUN: the best British fertilisers with an emphasis on research
- BioNova Boost Pack for luxurious flowers and fruit
- Organics Nutrients: a natural way to big yields