
Step-by-step growing
- Growth phase
- Flowering and Harvest
- Processing and storage
- Hydroponic growing
- Seedlings and propagation
- Speciality Crops
- Outdoor Growing
- Seeds and Germination
List of articles
Chilli Peppers: How to Germinate and Pre-grow Them
There are hundreds of different chilli pepper varieties in the world, differing in heat, shape, colour and size. What all chilli types have in common, however, is that they are heat-demanding plants with a relatively long growing cycle. If we want to grow them outdoors in our conditions, it is therefore important to start early and pre-grow them indoors. We will advise you how to do it!
Many of us have taken a liking to chilli peppers because of their heat. This is measured on the so-called Scoville scale, named after the American chemist Wilbur L. Scoville. While mildly hot Jalapeño have somewhere between 2,500-8,000 SHU, the recently bred record-holder “Pepper X” reaches a staggering 3,180,000 SHU, which is enough for its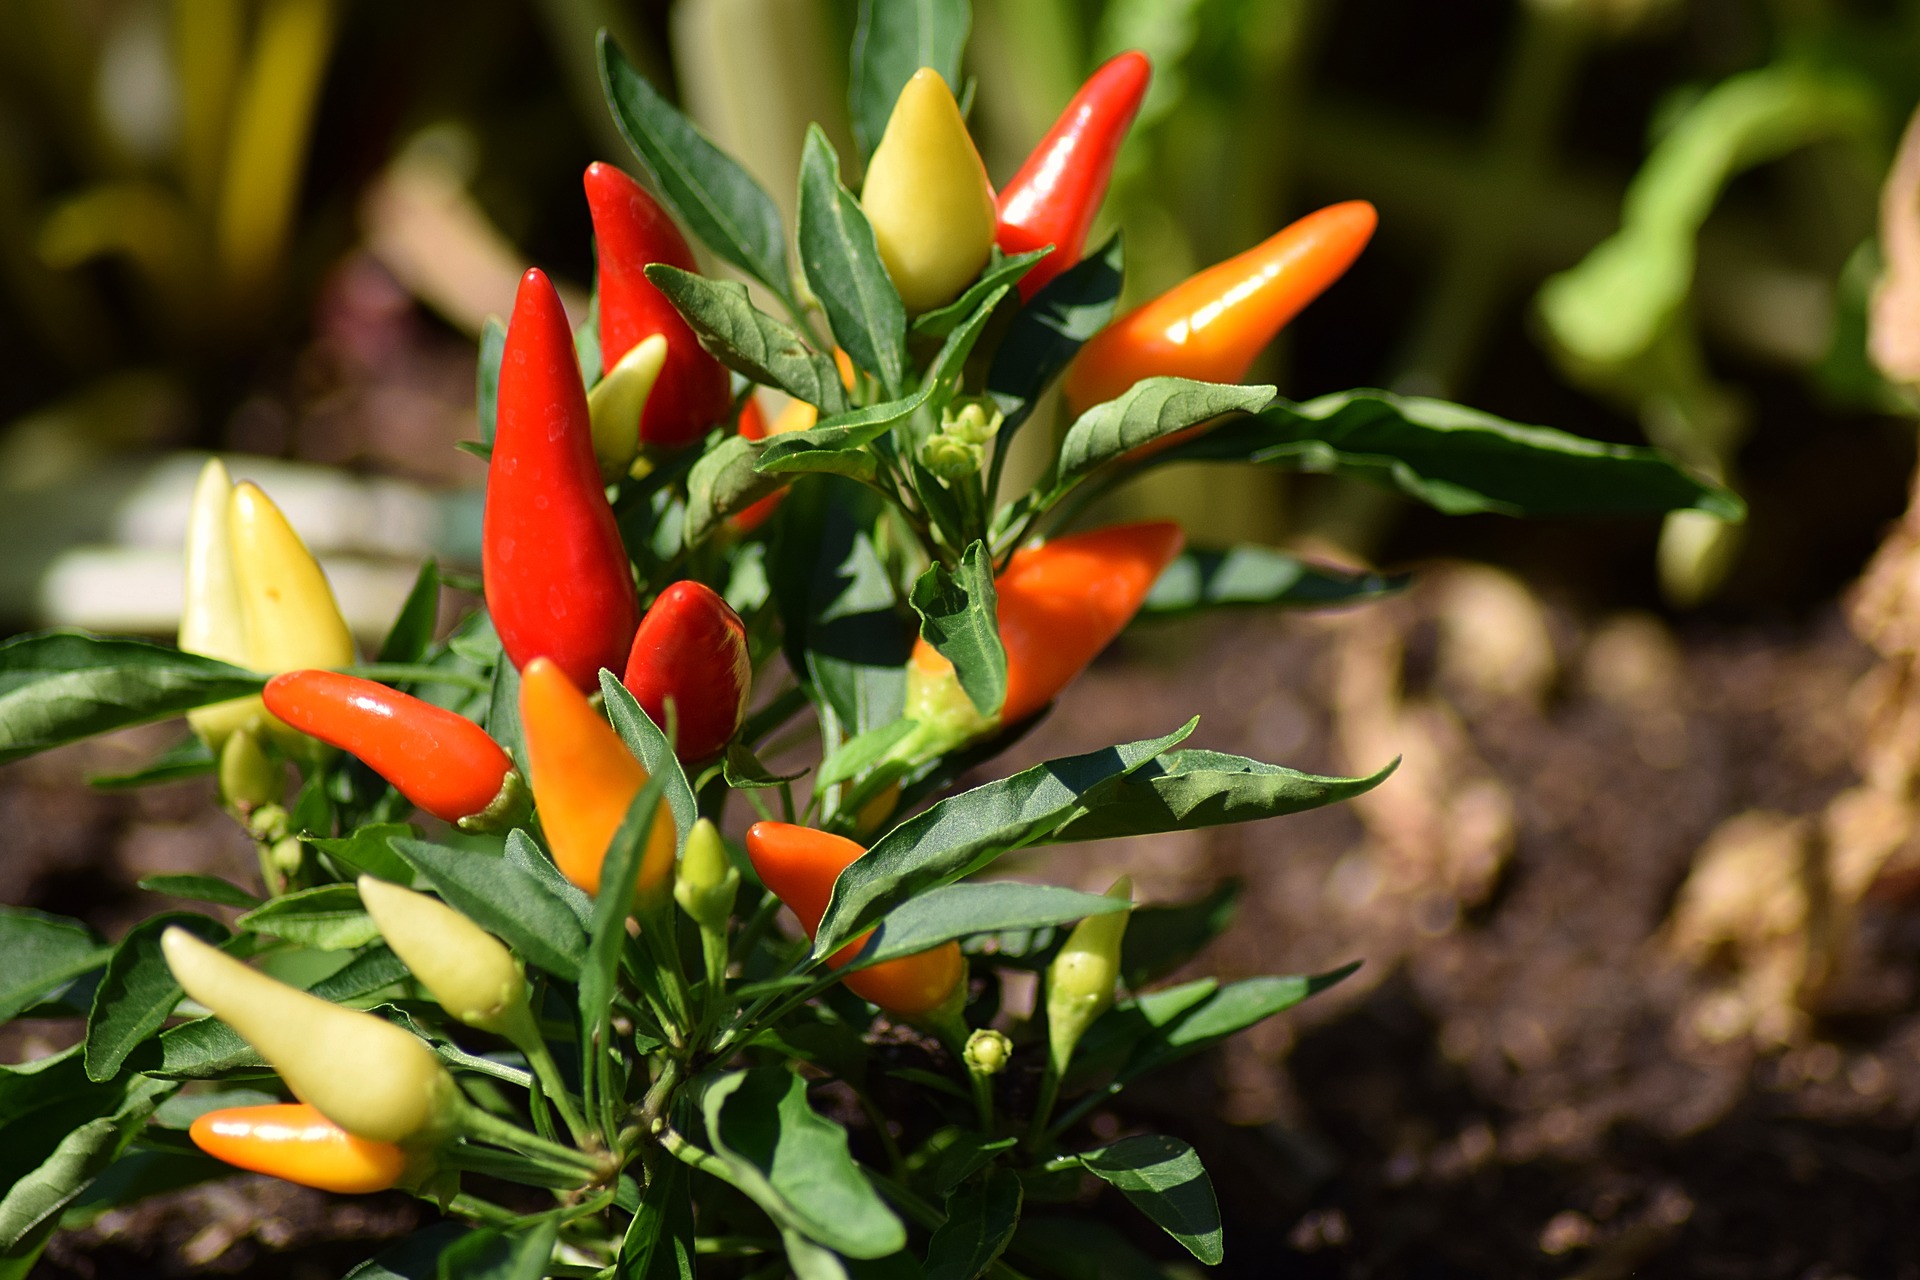 consumption to cause anaphylactic shock in some individuals. The burning sensation is caused by a chemical called capsaicin, which stimulates nerve endings in the mouth and, according to some, may have medicinal effects. The capsaicin content depends mainly on the cultivar (a bred variety), but also on the age of the plant or growing conditions.
How to choose the right chilli variety for growing
Chilli can be grown in many ways, outdoors in a pot or in a bed, in a greenhouse or also indoors under artificial lighting or hydroponically. It is precisely the chosen growing technique that most influences the selection of the right chilli variety for your garden. Different chilli varieties differ from one another not only in taste, appearance and heat, but also in the length of the growing cycle. Some types (often the hottest ones) flower and ripen for so long that they would not have a chance to ripen outdoors here. Varieties with a long flowering period are therefore better grown indoors under artificial lighting. As an example, we present several popular chilli types with regard to flowering time and suitable growing method.
- Jalapeño is a chilli variety originally from Mexico that will not take your breath away with its heat, but it is easy to grow and is excellent in the kitchen as an ingredient in sauces, salads, nachos, or it can be pickled in a sweet-and-sour brine or smoked (chipotle). The plants grow to a height of 1 metre and thrive in direct sunlight as well as in a greenhouse. Jalapeño has a relatively short flowering and ripening period (80-125 days) and is suitable for outdoor growing.
- Bhut Jolokia, also known as Ghost Pepper or Naga Jolokia, is one of the hottest peppers in the world. The heat, which can persist for hours after consumption, is accompanied by a distinct apricot and apple flavour. As they ripen, the peppers change colour from bright green to dark red, but some varieties may have white, orange or chocolate-coloured fruits. Bhut Jolokia is somewhat more demanding to grow and requires a constant temperature of around 24-28 °C during germination. The plants grow to a height of 1.2 metres and have a longer ripening time. This variety is suitable for outdoor growing, in a greenhouse and indoors.
- Trinidad Moruga Scorpion is a super-hot type of pepper originally from Trinidad. It occurs in two cultivars, one with bright red fruits and the other with yellow fruits. Both varieties have the typical shape with a tip resembling a scorpion’s sting and a very thin skin, beneath which lies an enormous dose of capsaicin reaching up to 2 million SHU. This chilli cultivar is more suitable for experienced growers. Seed germination can be demanding and you will probably not do without a heating mat. You will need patience during ripening, which can take more than 160 days. Trinidad Scorpion is suitable only for indoor growing under artificial lighting.
OUR TIP: Do you want to start growing chilli but lack the equipment? We have prepared discounted chilli pre-growing sets for you, where you will find everything you need to get started, including seeds of selected varieties and a special fertiliser for chilli peppers.
How to germinate chilli peppers
The right time for germinating chilli seeds for outdoor growing is from January to March. The earlier you start, the better. Your plants will gain a head start before the sun really starts shining outside. Before you begin, make sure you have all the necessary equipment ready.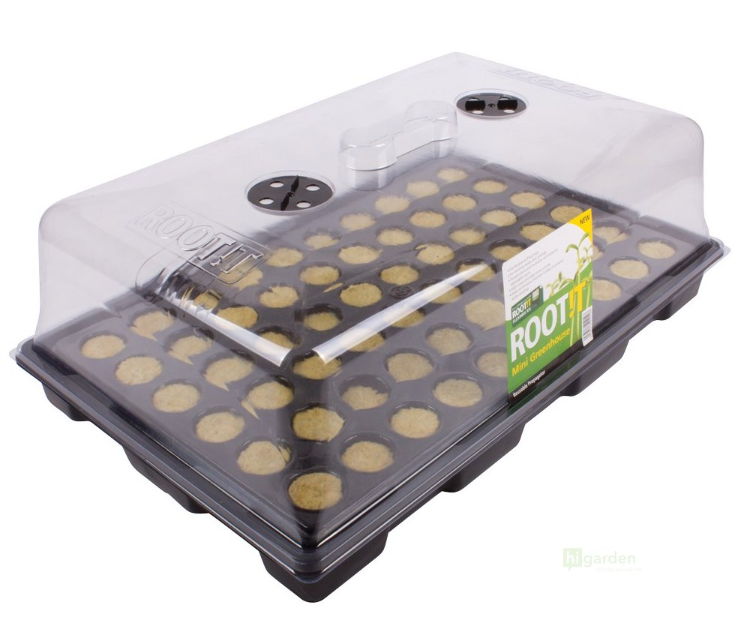
- Chilli seeds
- Seed tray or sowing pots
- Sowing substrate (or propagation tablets, propagation cubes, rockwool)
- Propagator (plastic propagator)
- Sprayer
- Additional equipment (heating mat, LED grow light, grow tent)
Germinate chilli peppers always indoors; they need plenty of warmth. You can place the germinating seeds on a windowsill where they receive sunlight, or use a heating mat that will provide them with a constant temperature. This is especially important for more demanding exotic varieties.
- Fill a tray or germination container to the brim with sowing substrate.
- Moisten the substrate using a sprayer.
- Sprinkle several seeds onto the surface of the substrate and cover them with a layer of substrate or vermiculite. If you are using jiffy pellets or propagation cubes, place the seeds into the prepared hole.
- Place the germination container into a plastic mini greenhouse (propagator) and put it in a warm place with plenty of light.
- Maintain a constant temperature. For chinense varieties 24-32 °C, for annum varieties 10-24 °C.
- The seeds should germinate within 3-10 days depending on the variety and the age of the seeds.
- Keep the substrate moist throughout, but not waterlogged.
OUR TIP: Do you want to grow chilli indoors like a true professional? Take a look at our complete indoor growing sets.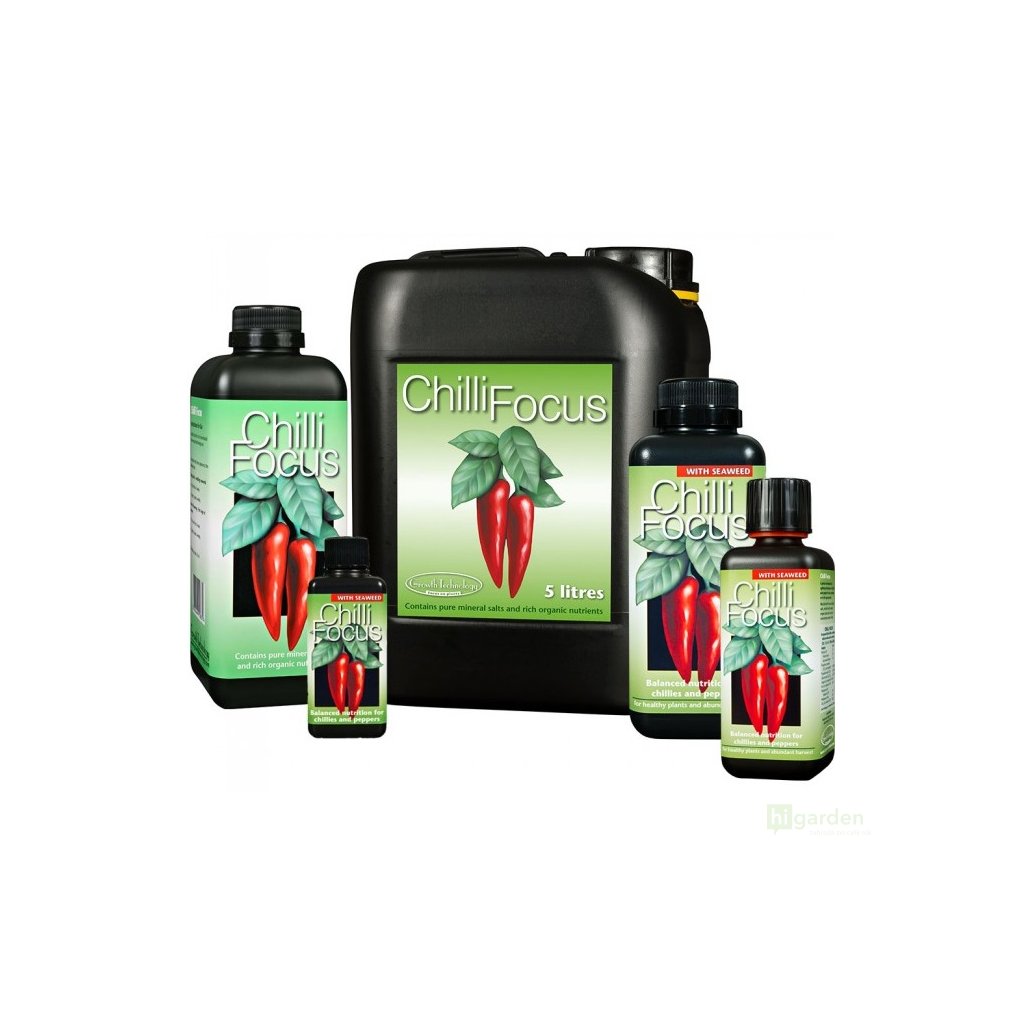
How to plant and pre-grow chilli peppers
You can transplant the germinated seeds once they have grown a little and the first two small leaves have appeared. For pre-growing purposes, it is better to plant the germinated plants first into a small pot and only when the seedlings have grown larger, transplant them into a bed or a larger growing container. This will help the development of a rich root system.
Water the plants regularly during pre-growing, but be careful not to overwater the substrate and not to let the roots stand in water. From the second week onwards, you can start fertilising the plants with a weak growth fertiliser or a fertiliser intended for chilli peppers.
Pre-grow the seedlings either on a windowsill where there is plenty of sunlight or under artificial lighting in a grow box. Whichever method you choose, make sure the plants have at least 12 hours of light. A lack of light or too little intensity will slow plant development. Under the right conditions, within a month the chilli seedlings should grow enough to be transplanted into a larger pot and moved outside or under stronger grow lighting.
If the idea of your own garden full of chilli appeals to you and you would like to learn more about growing it, read our article on growing chilli.
Outdoor season is just around the corner: What will you need?
Winter is ending, plants are waking up, and your garden is waiting for a proper spring boost! Whether you grow tomatoes, herbs or something special, you will not do without the right substrate, fertilisers and pots. We will advise you on everything you should not forget when buying equipment for the outdoor season in spring.
The right substrate is the basis of success
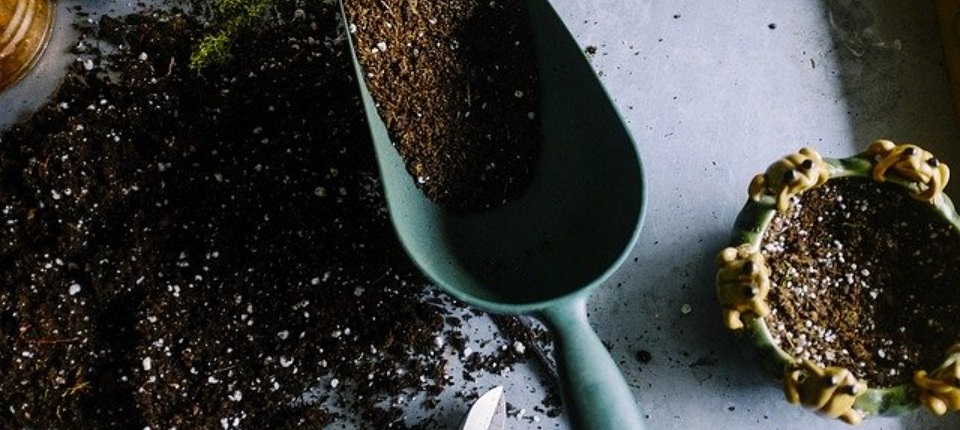 Whether you grow outdoors in pots, beds or in a greenhouse, your plants need suitable soil. The purpose and use of different types of substrate vary according to their composition and nutrient content. In general, seedlings need a lighter and less fertilised substrate than plants in the peak stage of growth or flowering. When growing outdoors in open soil, we recommend using soil-based growing substrates and coconut substrates if you are growing in pots. Soil mixes for outdoor growing may contain organic or mineral fertilisers that nourish plants for several weeks to months. Additives for substrates in outdoor growing usually serve to improve depleted soil.
You may also be interested in: How to choose a horticultural substrate
Sowing substrates – If you are planning to grow from seed in spring or to raise your own seedlings in advance, you will not do without a sowing substrate. Propagation substrate must be light and airy and should contain only a small amount of nutrients. We do not recommend germinating seeds in pre-fertilised substrates.
Substrates for growing in pots - The choice of growing substrate for growing in pots depends mainly on the feeding programme you choose. If you decide on organic fertilisers, choose soil substrates intended for organic farming, such as Canna Bio Terra Plus or BioNova Bio Soilmix. If you will feed plants with mineral fertilisers, you can choose from a wide range of soil mixes or coconut substrates. For growing in pots, we recommend using lighter mixes with perlite, which helps prevent soil compaction.
Additives for improving soil – When growing in beds, the soil is often depleted in spring and plants would not do very well in it after planting. Before spring planting, we recommend adding compost or worm humus to the soil, or products with mycorrhiza and beneficial bacteria.
Root stimulators and growth fertilisers
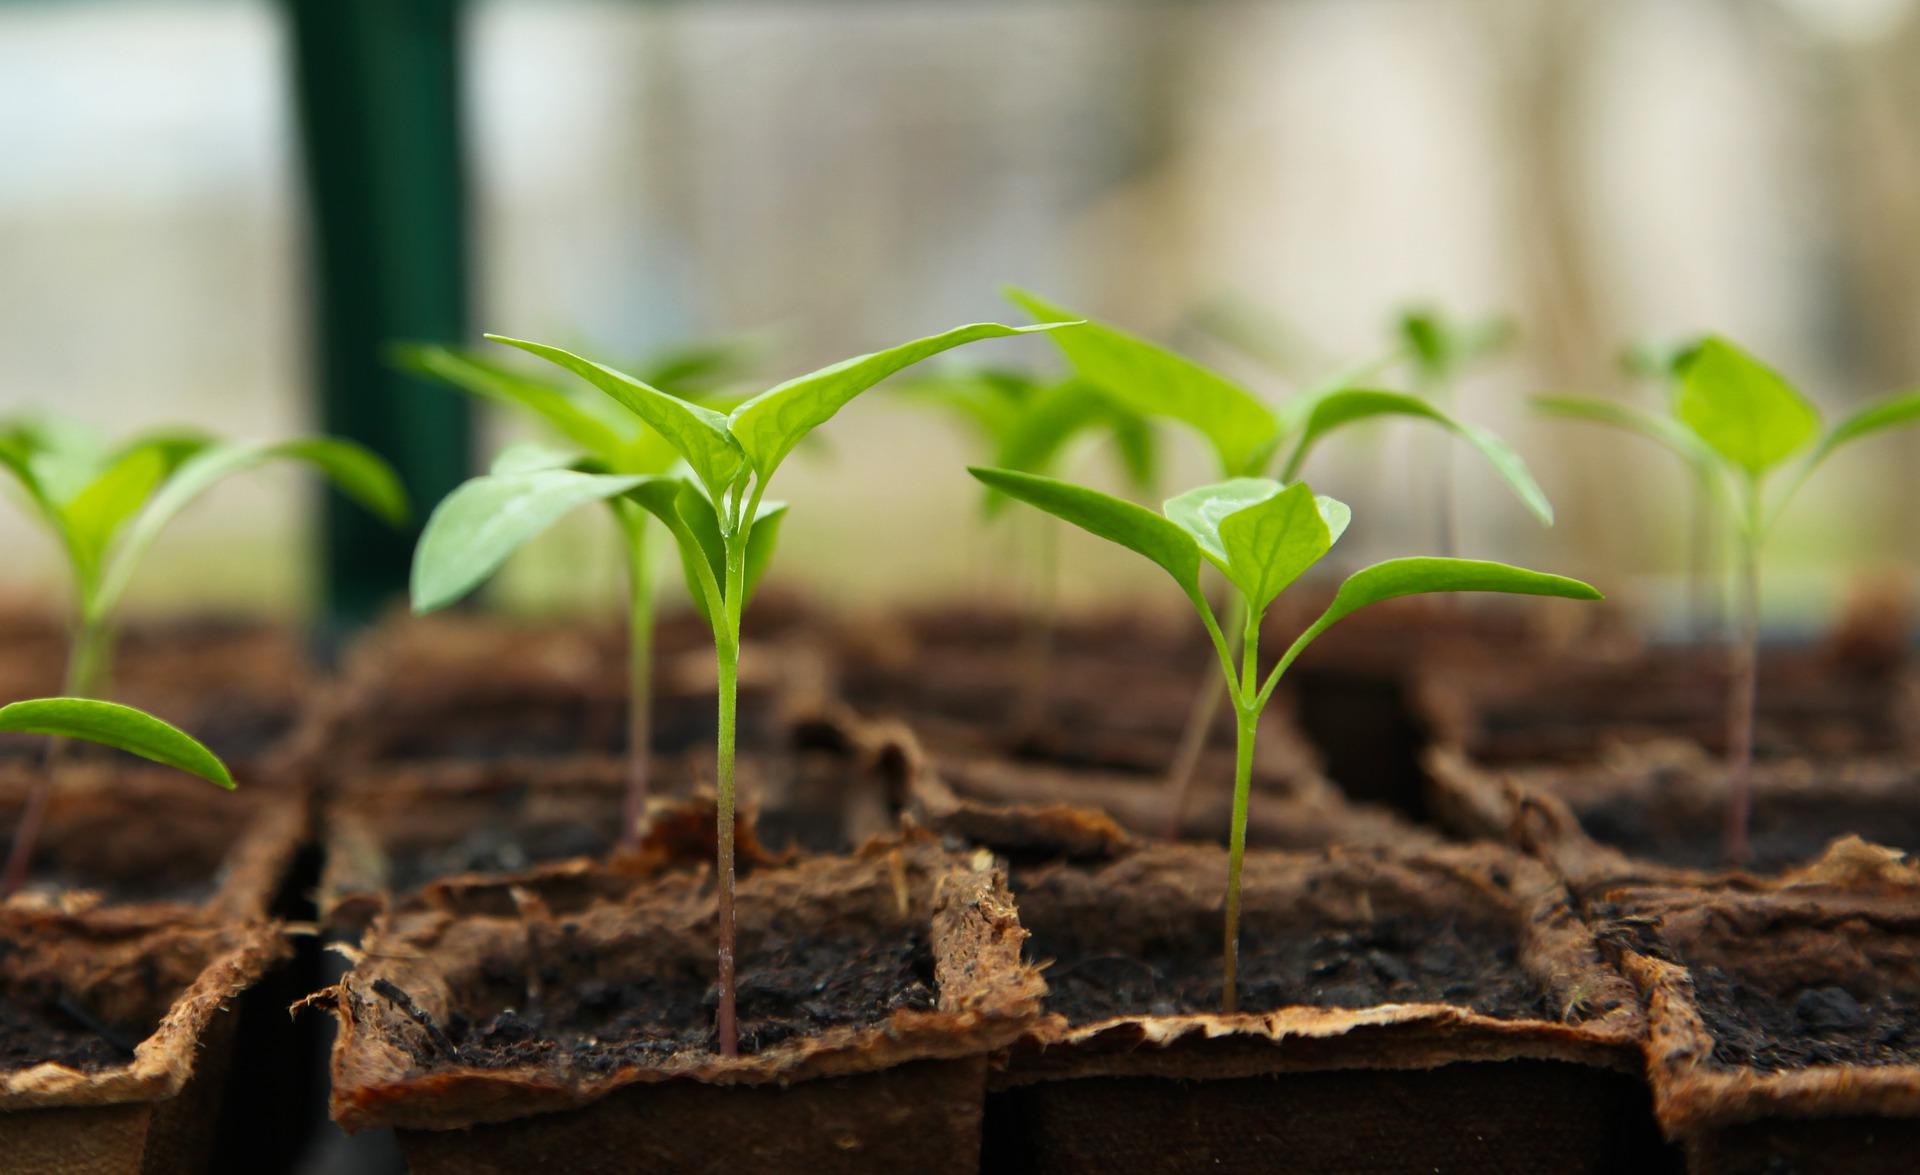 Germination and the first weeks of life are the most critical period in a plant’s life, and it does not hurt to give them a little help. If you grow from seed, we recommend trying germination stimulators, which increase germination success and help you achieve a greater number of healthy seedlings. Root stimulators for growth are especially useful when caring for seedlings and transplanting them, but they are beneficial throughout the entire growing cycle, so there is no need to be afraid of buying a larger pack. If you are growing in pots, the substrate is quickly depleted, so do not forget a suitable growth fertiliser.
You may also be interested in: Organic or synthetic fertilisers: Which are better for your plants?
Germination stimulators for outdoor growing – Germination stimulators are most effective if you apply them directly to the seeds. These products contain plant hormones, mycorrhiza or beneficial bacteria that help seed germination. If you grow with organic fertilisers, try root stimulators with mycorrhiza, such as Orca Liqiuid Mycorrhizae or Ugro Rhiza 1200. If you will use mineral fertilisers, choose products that do not contain mycorrhizal fungi or other beneficial microorganisms, for example Plagron Start Up or Canna Start.
Root stimulators for seedlings and planting – You may have experienced that after transplanting, your little plants had wilted leaves and it took some time before they recovered. This phenomenon is known as transplant shock and can even lead to plant death. Using a root stimulator is a great way to prevent this. Apply the root stimulator to seedlings both before planting, directly around the roots of the plants, and into the soil immediately after planting.
Fertilisers for seedlings and young plants – Plants grown in pots may require more frequent fertilising than those grown in open soil. This is because the substrate in the growing container contains only a limited amount of nutrients, which plants gradually deplete. During the spring months, plants mainly need a high amount of nitrogen for the formation of new leaves, but also phosphorus, potassium and other nutrients. Choose a growth fertiliser according to the type of substrate (soil/coconut) and the growing method (organic/mineral).
You may also be interested in: What growth fertilisers are for and how to use them
Pots for every occasion
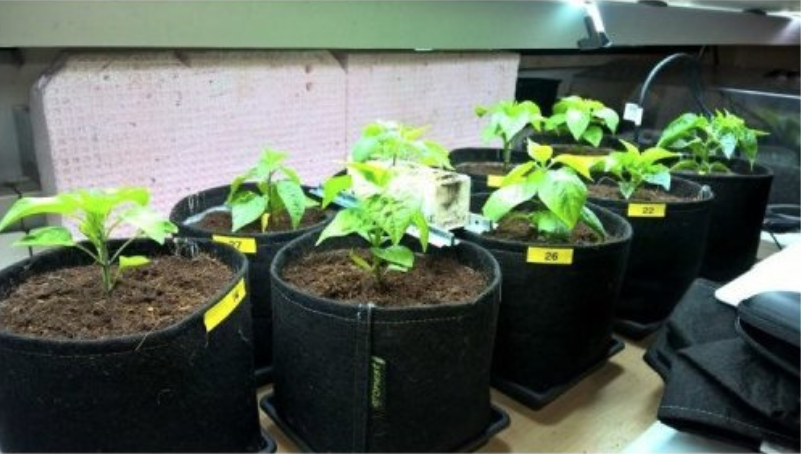 Few growers can do without pots, whether for germination and raising seedlings or for growing on balconies, in gardens or in greenhouses. When choosing a pot, size is not the only factor; the material from which the growing container is made is also important. Plastic pots in various sizes are suitable for almost every occasion, fabric pots dry out faster and support root development, and pots made from biodegradable materials are suitable for raising seedlings.
Pots for raising seedlings – As a rule, it is not worth germinating and growing seedlings in a large pot. With the exception of species that do not tolerate transplanting, it is at least impractical and often more demanding. For germinating seeds, we recommend using propagation cubes or jiffies. For raising seedlings, choose small plastic pots or seedling pots made from biodegradable materials.
Fabric pots – The advantage of a breathable pot is faster drying of the substrate, so plants grown in fabric pots need watering more often. More frequent alternation of wet and dry conditions supports root formation in plants and is especially beneficial for nutrient-demanding species, such as tomatoes or peppers. Fabric is also a great material for raised beds.
Self-watering pots – Although progress has not yet reached the point where pots do all the work for us, there is no reason not to make growing easier. If you grow herbs, try smart planters. If you want to start growing peppers, tomatoes or medicinal plants, choose the modular AutoPot systems.
You may also be interested in: Everything about AutoPot growing systems
Gardening tools and equipment for spring work
Last but not least, we will also add a few tips on garden accessories specific to the spring season. So what else should you not forget? If you are planning to sow vegetables directly into beds in spring, it is important to protect germinating seeds from frost and pests using breathable geotextile. Do not forget planting aids such as labelling tags, planting stick and trowel, sprayer and other garden tools.
Are you looking for news and useful tips for gardeners and growers? Visit our Higarden blog, where you will find news and guides from the field of indoor and outdoor growing, as well as other expert advice for lovers of greenery.
Hydroponic Growing Media or a Pure Nutrient Solution: Which Is Better for Hydroponics?
Hydroponics takes many forms: while some techniques require the use of special substrates, others allow plants to be grown solely in a nutrient solution. Are you interested in which of these methods is more advantageous for your plants? In the following article, we compare the advantages and disadvantages of both methods so that you can better decide which is best for your hydroponic cultivation.
Hydroponics is an innovative soilless growing method in which plants are fed with a nutrient-rich solution. In hydroponic cultivation, plants can grow either in an inert (chemically inactive) substrate or be placed in special hydroponic systems with roots freely immersed in a nutrient solution. Compared with growing in soil, hydroponics is somewhat more demanding for beginners to master, but it allows faster and more efficient plant cultivation.
 Hydroponic growing media
Just like soil, hydroponic growing substrates serve as support for root anchorage and retain water (nutrient solution), which plants absorb. Unlike soil, however, most hydroponic media are made from inorganic materials and do not contain plant nutrients. The most common substrates for hydroponics include:
- Rockwool
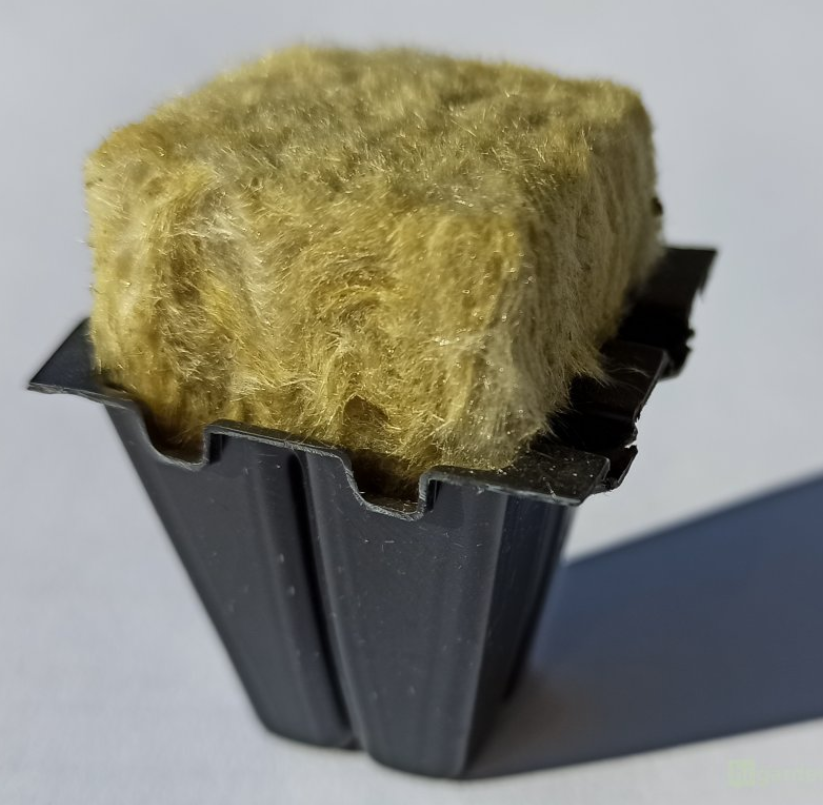
Mineral wool made from basalt rock is one of the most widely used hydroponic media. Rockwool can be easily shaped into cubes or mats, which makes it a versatile growing medium for a wide range of hydroponic systems, and you can use it not only for growing itself, but also for germination or propagation. Mineral wool has excellent retention properties and dries evenly, which makes rockwool easy to use with automatic irrigation systems (drip, run-to-waste, spinners, flood trays). Rockwool is not suitable for growing in pots or for hand watering.
- Coconut fibres
Hydroponic media made from coconut fibres and husks combine the advantages of inert substrates (rockwool, expanded clay, perlite) and soil mixes containing earth. They have better retention properties than soil while not being completely inorganic, and they allow beneficial microorganisms to grow. Coconut substrates are suitable for beginners and growers who want to use organic fertilisers in hydroponics. Coco can be used for growing in pots (plastic, fabric and Auto-Pot) with hand watering as well as in self-watering systems.
- Expanded clay
Expanded clay, also known as LECA, is a porous material made from clay heated to a high temperature. It takes the form of small pebbles, most often used in hydroponic systems (run-to-waste, DWC, NFT, ebb-and-flow) and in aeroponics as a medium for anchoring plants. Expanded clay dries out quickly and is therefore not suitable for growing in pots with hand watering.
- Perlite
Perlite is a growing substrate made by heating rock to a high temperature, which looks like a light white granulate. Like expanded clay, perlite retains a small amount of water and allows good access of air to the roots. Due to its fine structure, perlite easily clogs irrigation systems, and as a standalone hydroponic medium it can only be used when growing in flood trays (Dutch bucket).
Would you like to learn more about growing substrates? Read our Guide to Growing Substrates.
Advantages of growing in hydroponic substrates
- Support for the root system: Hydroponic media provide plants with sufficient support and are more suitable for large plants than NFT, DWC and other hydroponic systems.
- Water retention: Growing substrates maintain a stable level of moisture even with occasional watering and do not require a constant supply of nutrient solution.
- Aeration: Compared with soil, hydroponic media ensure better access of oxygen to the roots and reduce the risk of plants being affected by mould.
- Ease of use: Compared with fully hydroponic systems, substrate methods are less prone to faults and grower errors.
 Soilless hydroponic systems
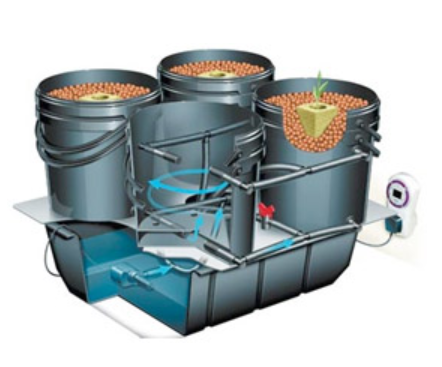
Some hydroponic systems do not require plants to be placed in a substrate, but allow the roots to be immersed directly in a nutrient solution. The main advantages of this method are that the roots have a constant supply of water, nutrients and oxygen. Plants therefore grow faster and the risk of soil pests multiplying is eliminated. On the other hand, “clean” hydroponics requires constant monitoring of nutrient content and pH of the nutrient solution and does not allow even the slightest mistake on the grower’s part. Commonly used soilless hydroponic systems include:
- NFT (Nutrient Film Technique)
In NFT hydroponic systems, the roots of the plant are placed in a slightly inclined channel or tray where a thin stream of water flows over them. Plants are usually placed in perforated hydroponic baskets in openings along the entire length of the channel. The nutrient solution flows into a reservoir from where it is pumped back to the top of the channel, creating a recirculation system. NFT systems are very efficient. They do not waste water or fertilisers and offer sufficient oxygenation of the nutrient solution, which prevents root rot. NFT is suitable for smaller plants with a shorter vegetative cycle, but perennials can also be grown in them.
- DWC (Deep Water Culture)
The older hydroponic technique abbreviated as DWC consists of immersing plants in a tank or bucket with an oxygenated solution. As with NFT, the plants are placed in perforated pots in an opening in the lid of the growing tank. Aeration of the nutrient solution in DWC is provided by a pump and an air stone. Compared with other fully hydroponic systems, DWC is a relatively simple and inexpensive option. On the other hand, this method carries a greater risk of poor oxygenation and root rot. DWC can be used both for growing plants with a short vegetative cycle and for perennials and shrubs.
- Kratky method
At first glance, this simple hydroponic technique developed by Bernard Kratky is characterised by growing plants in separate closed containers, where they are suspended in a nutrient solution while part of the roots remains exposed to air. As the plants grow and gradually draw down the nutrient solution, the level in the container drops, which stimulates the development of new roots in the plants. Although this is a very inexpensive hydroponic solution, the Kratky method is relatively demanding to master and not very efficient.
- Aeroponics
Aeroponic systems deserve their own category, but in a broader sense they can be included among other hydroponic techniques. In aeroponics, plant roots are suspended in the air and regularly misted with a fine nutrient solution spray. The advantage of aeroponics is the huge amount of oxygen the plants receive, which supports rapid development of the root system. On the other hand, aeroponics requires specialised equipment, and if it breaks down, plants have only a minimal chance of survival. A great use for aeroponics is in propagation units, where this method speeds up the formation of new roots by up to a week.
Advantages of growing in nutrient solution
- Rapid nutrient uptake: Plants with roots immersed in a nutrient solution have a constant supply of nutrients, resulting in faster growth and higher yields.
- Lower risk of pathogens: When growing in purely hydroponic systems, soil pests do not occur and the risk of root rot is minimal in a well-oxygenated nutrient solution.
- Efficiency: Hydroponics is highly economical in terms of the use of water, fertilisers and other resources, especially when recirculation systems are used.
- Easy monitoring of pH and EC: Measuring acidity (pH) and nutrient content (EC) in the nutrient solution is easier in purely hydroponic systems than in substrate techniques.
Which method is suitable for you?
If you are choosing between hydroponic growing using substrates and soilless systems, your experience is the main factor. For beginners, it may be easier to work with hydroponic media that are more forgiving of mistakes in feeding, irrigation and plant care. Experienced growers who want to get the most out of their efforts may prefer fully hydroponic systems.
Would you like to learn more about indoor and outdoor growing and get to know the latest trends in the world of growing? Do not hesitate to visit our blog.
3 Principles of Safe Drying: What to Do So Your Harvest Does Not Mould After Harvesting
After harvest, you are not done yet. It is during drying that it is decided whether your crop will turn into fragrant, high-quality dried material – or end up in the bin because of mould. It can appear quickly and ruin the entire harvest within a few days. How can you recognise mould, why does it develop, and how can you prevent it? Follow these three principles.
Mould is among the most common and at the same time most dangerous threats during drying herbs. At first glance, it may appear as a subtle white coating or small grey spots, but in reality it is microscopic fungi that spread quickly and can ruin the entire harvest. It most often appears inside dense flowers, where moisture accumulates and there is not enough air movement. Its development is mainly encouraged by high humidity, insufficient ventilation, and poor hygiene when handling harvested plants.
Choose a suitable drying method
 If you want your herbs to retain as many aromatic terpenes as possible and not lose active compounds, make sure they dry slowly. Fast drying does reduce the risk of mould, but at the expense of the quality of the dried material. Herbs dried too quickly have an unpleasant odour and taste bitter.
The optimal drying time is roughly 7 to 21 days and will depend on the temperature, humidity, and movement of the surrounding air, as well as the size of the plants and their flowers. If you dry plants whole (hung upside down by the crown), they will dry the slowest. Drying will be slightly faster if you divide the plants into individual branches. The fastest method is then drying on drying nets, where you can dry individual flowers divided into smaller parts. A newer method is drying in drying bags made of breathable plastic. These protect the flowers from mould spores while also sealing in valuable terpenes.
The drying speed is also affected by how you clean the plants before drying. If you remove only the large leaves and trim the small “petal” leaves on the flowers only after drying (dry trim), they will dry slightly more slowly. If you clean the flowers thoroughly before drying (wet trim), they will dry faster.
You may also be interested in: Guide to perfect drying
Do not underestimate the right climate
Mould thrives best in a humid environment. During the drying process, relative humidity should not exceed 65%. Ideally, you should keep the humidity between 50% and 55%. You can easily reduce the air humidity in the drying area with a dehumidifier, but be careful that the warm air from the device does not blow directly onto the flowers. They would dry out too quickly.
The ideal temperature for drying medicinal herbs is roughly 18 °C - 20 °C. At higher temperatures, valuable monoterpenes evaporate quickly. If you want to slow the drying down a little, you can lower the temperature to 16 °C. Remember, however, that slower drying increases the risk of the crop being affected by mould.
To prevent moisture condensation, it is necessary to ensure constant air circulation in the drying room. If you are drying in a grow tent, leave the extract fan running at least at low power – it will help remove humid air and bring fresh air in. In the room where the tent is located, open a window or at least the door to the next room so that the air can move freely and does not build up in a closed space. If conditions allow, you can also use a small fan to gently move the air between the drying flowers. However, be careful that the airflow does not point directly at them.
Care pays off
 Be as careful as possible during harvesting, drying, and subsequent processing. It would be a shame to throw away months of hard work in the final stage. When harvesting, inspect the plants thoroughly for signs of mould. Pay particular attention to the largest flowers, which may look healthy on the outside but already be mouldy inside. If you come across a mouldy part of the plant, separate it from the rest of the crop immediately and be even more cautious during drying. In such cases, it is often better to divide large flowers into smaller parts and dry them on drying nets.
Also pay attention to hygiene. Disinfect scissors and other tools before use and wear disposable gloves. This will protect not only the plants, but also your hands from resin, which can be irritating. If you have come across parts affected by mould, disinfect the tools again after removing them and replace the gloves with new ones.
Monitor the humidity and temperature in the drying area with a thermometer with hygrometer and check every day that everything is proceeding without problems. Mould can appear on the flowers even during the drying process. In such a case, remove the affected parts immediately, lower the humidity, and increase the temperature in the drying room.
You may also be interested in: Drying without worries with DRYFERMBAG
Would you like to learn how to grow like professionals, or are you interested in news from the growing industry and legislation? You will find all this and much more on the Higarden growing blog!
How to Buy Seeds for Indoor Growing
Are you already looking forward to planting three plants in the tent after the New Year, but cannot make sense of the vast range of seeds on the market? In our article, we explain in detail the most common terms you will come across when buying and give you several tips on which seeds are best for indoor growing.
With seeds it is similar to wine. The name may reveal quite a lot, but it often does not tell you whether you are buying quality or whether you will like it. Behind an interesting name, however, there may be a cultivar that is not suitable for indoor growing or will be difficult to cultivate. When buying, therefore, think practically. The most important criteria when choosing seeds for indoor growing are the structure and sex of the plants, the length of maturation and the content of active substances.
Sativa vs. indica
Among growers, it is common to distinguish between sativas and indicas. Although experts have certain doubts about the correctness of such a distinction, seed sellers use this division to distinguish varieties with a long maturation period (sativas) from varieties that ripen more quickly and have smaller growth (indicas). The longest-flowering sativas can take more than 12 weeks to mature and can grow to enormous sizes. This does not make pure sativas the best candidates for indoor growing in a grow box, where space is limited. In addition, a long maturation period also means higher costs for the growing cycle. That is why most growers choose either pure indicas or hybrids, that is, crosses between sativas and indicas.
- Sativa varieties: Narrow-leaved varieties with a long flowering period of approximately 10 to 12 weeks, originally from equatorial regions.
- Indica varieties: Broad-leaved varieties originating from mountainous regions with a short flowering period of approximately 8 to 10 weeks.
- Hybrid varieties: Crosses between sativas and indicas that are selectively bred to obtain a certain type of plant. The flowering time and plant structure depend on the combination of the parents’ genes.
Photoperiodic vs. autoflowering varieties
Most plants are short-day plants and begin to flower only when the length of the day drops below a certain threshold. In indoor growing, this means that we divide the growing cycle into two phases – the vegetative phase, when the day length is 16-18 hours, and the flowering phase, when the day length is reduced to 12 hours. The exception is autoflowering cultivars, which have been crossed so that they flower independently of the length of day and night.
- Photoperiodic varieties: Short-day cultivars whose flowering depends on the photoperiod. In indoor conditions, they begin to flower only after switching to the 12/12 regime.
- Autoflowering varieties: Varieties independent of the photoperiod, which begin to flower regardless of the length of day and night, usually about 21 days after germination.
- Fast or early varieties: Cultivars with a rapid onset of flowering and a short flowering period are referred to as early or fast. However, they are not autoflowering .
Feminised vs. regular seeds
Plants are dioecious, and in the population we find both male and female plants. Most growers focus only on cultivating female plants for seedless flowers. These contain the highest amount of active substances. To achieve this, it is necessary to remove the male plants from the garden in time, which can be a challenge for inexperienced growers. Most growers therefore now use feminised seed, from which only female plants grow . Regular seed also has its place, however, as it is used in breeding new cultivars and is important for preserving the species.
- Regular seed: Seeds originating from plants pollinated in the usual way, from which both female and male plants grow after germination.
- Feminised seed: Seeds originating from feminised plants , from which only female plants grow.
Content of active substances and terpenes
The main attraction is the content of active substances, especially cannabinoids, but also terpenes and flavonoids. The best-known cannabinoid in is THC (tetrahydrocannabinol), which is responsible for many of the effects of this herb. No less important is CBD (cannabidiol), which, unlike THC, does not have a psychoactive effect. Based on the THC and CBD content, we divide into three chemotypes, with specific legal regulations applying to the cultivation of with a THC content above 1%. The same also applies to large-scale cultivation of with a THC content below 1%.
You may be interested in: How to grow legally
- Type 1: Varieties with a high THC content and a low proportion of CBD. Modern cultivars can contain up to 30% THC with trace amounts of CBD.
- Type 2: Varieties with a balanced proportion of THC and CBD.
- Type 3: Varieties with a minimal THC content and a high proportion of CBD. Registered type 3 cultivars with a THC content below 0.3% are sometimes also referred to as technical.
For more useful tips and guides for beginner and experienced growers, follow our Higarden growing blog.
How to Harvest the Most Fragrant Outdoor Plants
With the arrival of cooler days and shorter evenings comes the time to harvest the fruits of a year’s work. Every grower knows that now is the moment when it becomes clear whether their care has brought not only beautiful buds, but also a rich aroma. However, the scent of the harvest does not arise on its own – correct timing, gentle drying and patient curing are the key to an unmistakable flavour.
Before you start harvesting, let us first clarify what affects the flavour and aroma of your crop. First and foremost, it is the plant’s genetic make-up. Every cultivar (bred variety) has a specific genetic profile. This affects not only the appearance and growth characteristics of the plant, but also the content of secondary metabolites, such as various active compounds, flavonoids, and especially terpenes. Terpenes are aromatic compounds responsible for the scent and aroma of plants and are part of plant essential oils. It is precisely the high amount of terpenes that turns your harvest into a fragrant delicacy. The choice of variety is up to you, but the quality of the dried material is also influenced by how you care for the plants throughout the entire growing cycle and how you harvest, dry and store them.
You may be interested in: What do I need for the autumn harvest?
Fertilising before harvest
 If you planted in time in spring, you should start to see the first signs of ripening on the plants in the second half of August. The buds will gain volume and the previously white hairs on the flowers (pistils) will gradually begin to turn brown. The speed of ripening depends on the weather and also on nutrition during the last two to three weeks before harvest. Many growers adjust plant nutrition during this period so that the plants ripen better.
In general, there are two ways to fertilise in the period before harvest. You can either water the plants with clean water (possibly with adjusted pH) or use one of the ripening products. These can be divided into two categories according to whether they flush nutrients from the substrate or, conversely, “lock” them and stop their uptake. Whichever method you choose, a reduced supply of nutrients will force the plants to focus all their energy on ripening instead of forming new flowers.
Your goal is to time the reduction of nutrients in the substrate with the plant’s natural life cycle. If you cut it off from nutrition too early or too quickly, ripening will slow down instead. When growing in substrates rich in organic nutrients (for example in beds), it is usually enough to water the plants with only clean water for roughly two to three weeks before harvest. Fertile soil contains enough microbes to break down organic matter into plant nutrients. When growing in sandy soils or inert substrates that do not retain many nutrients, it is better to continue fertilising the plants until the last week before harvest.
You may be interested in: How to choose a fertiliser: A complete guide to buying nutrition for your plants
How to time the harvest
To make your harvest as fragrant as possible, you must harvest the plants at the moment when the buds contain the highest amount of terpenes. The ripeness of the flowers is best identified by the colour of the trichomes, which look like shiny fuzz on the surface of the plant. In fact, these are miniature glands that cover the entire plant, especially the flowers. The trichomes on the flowers (specifically glandular trichomes with a head and stalk) contain the highest amount of secondary metabolites, including terpenes.
To observe trichomes, get a handheld microscope or a camera with macro resolution and at least thirtyfold magnification. Select a representative resin-covered part of the bud and observe the colour of the trichome heads. Glandular trichomes on flowers look like small mushrooms with a long stalk and a round head. At the beginning of trichome development, this head is transparent, and as harvest approaches it becomes cloudy. Milky-cloudy heads in most trichomes indicate that the plant is ripe. Overripe trichomes are amber in colour, contain fewer secondary metabolites and have a less pronounced terpene profile.
You may be interested in: Legal cultivation from 1.1.2026: An overview of laws and rules
Harvesting and drying
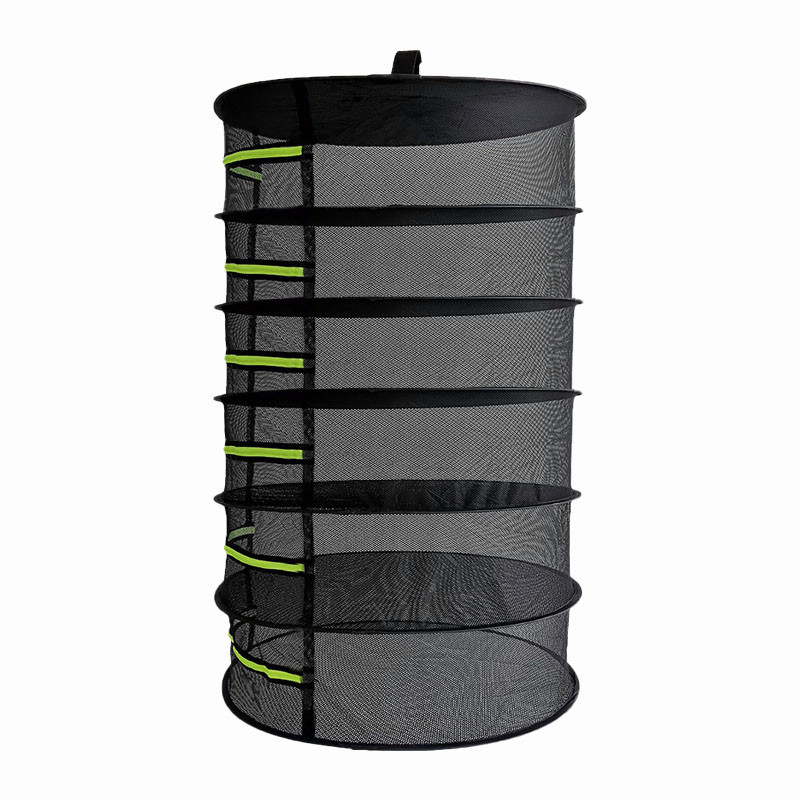 Timing the harvest does not mean your search for fragrant buds is over. You must now harvest and dry the plants properly. Bear in mind that different cultivars may ripen in different ways. Some plants ripen evenly, others from top to bottom. It also applies that buds exposed to light all day ripen faster than those growing hidden in the shade. Especially with large outdoor plants, it may therefore be better to harvest them gradually. Start with the ripe buds and, if the weather allows, leave the unripe flowers to ripen for a few more days.
The harvesting method will also affect the next part of the process, which is drying. The larger the harvested pieces of plant material, the longer it will take for them to dry. The drying time is very important. If the buds dry too quickly, the dried material will lose most of its terpenes and the dried material will taste bitter. On the other hand, drying too slowly increases the risk that mould will ruin your crop. You can harvest the plants whole, divide them into segments, or harvest only the flowers and dry them on drying nets.
Under ideal conditions, the drying process should take roughly two weeks. It is usually recommended to dry medicinal plants in a well-ventilated room or grow box without access to light and at temperatures in the range of 16 to 20 °C. Proper humidity is also important, and it should be between 50–60%. Dehumidifiers are excellent for this purpose, but make sure that warm air does not blow directly onto the drying flowers. You can recognise properly dried flowers by the fact that they break off the main stem easily, yet they still feel slightly springy to the touch and do not crumble between your fingers.
You may be interested in: Essential equipment for the autumn harvest
Curing and storage
The final step towards a perfectly fragrant harvest is curing, that is, maturing the dried material under controlled conditions. As with tobacco, curing balances the residual moisture in the plant material and enhances the plant’s terpene profile.
For curing and storing dried material, the best option is glass or metal jars, but you can also use resealable plastic bags or containers. Place the cleaned buds into the containers or bags and leave some space for air. It is usually recommended to fill the container to about three quarters. Place the maturing dried material in a dark place with a stable temperature in the range of 15-18 °C.
During the first week, open the containers every day and let the dried material air out. Before closing, gently mix the buds in the container so that fresh air reaches all of them. In the second week of curing, it is enough to open the containers two to three times a week. In the following weeks and months, open and air the containers at least once a week. If you want your harvest to retain its freshness, we recommend placing humidity control packs in the containers.
For more tips and guides on legal cultivation, visit our Higarden blog for beginners and advanced growers.
Prepare Your Garden for Spring: What Should You Do Before Spring Sowing?
Careful preparation for spring pays off. The more thoroughly you look after the garden before the season begins, the better your plants will thrive once the weather outdoors is right for planting. We have prepared a brief guide so that you do not overlook anything during your spring preparations.
Successful cultivation does not begin only when the first seeds are sown – the key to a rich harvest is careful preparation right at the start of the season. Tidy the garden, prepare the soil, plan the sowing and ensure enough nutrients – all of this needs to be done before spring fully arrives. Let us look at how to do it step by step.
Thorough cleaning: Before the soil warms up in spring, you have time for a proper clean-up. First clear the garden of fallen leaves and remove all twigs and dead plant remains from the beds. If possible, add everything to the compost.
Preparing the soil in the beds: After a thorough clean-up of the whole garden, it is time to get to the beds. Start by raking away the mulch from the previous season and pulling out weeds so that you expose the bare soil. Decomposed remains of old mulch can be worked into the soil, but it is better to add “fresh” mulch to the compost. Weed remains should either be burned or thrown away. Do not compost pulled weeds, because the seeds could later germinate in the beds or in pots.
Loosening and adjusting soil pH: It is a good idea to loosen exposed soil after winter. Dig over the top layer of the substrate with a sharp spade to a depth of 10 to 15 centimetres. If the soil in your garden is heavy or clayey, enrich it with compost or humus. If you find that the existing substrate is particularly poor or stony, the easiest option is to build a raised bed in the given place. During loosening, you can also lime the soil, which will help neutralise acidity. Soil pH is measured with analogue or digital pH metres.
 Spring fertilising: For your plants to get a good start in life, the soil must contain all the necessary nutrients. In spring and during the beginning of summer, plants mainly require nitrogen, which they need for the formation of new leaves and stems. Compost, humus, well-rotted manure, guano or fertilisers with a higher nitrogen content contain plenty of nitrogen. For root formation, plants also need phosphorus in spring, which you can add to the soil in the form of wood ash, bone meal or phosphate fertilisers.
You may also be interested in: Organic or synthetic fertilisers: Which is better for your plants?
Preparing the bed and planning the sowing: Before the weather outdoors is suitable for sowing, it is time to think about where and which plants you will plant in the garden. Crop rotation is important for soil health and for preventing pests. Bear in mind that some plants help enrich the soil with nitrogen (legumes), while other nutrient-demanding species deplete the soil (kale, kohlrabi).
Care for fruit trees and shrubs: Spring is the ideal time to prune fruit trees and shrubs. Remove dry, diseased or crossing branches and give the plants the necessary fertiliser. If needed, you can spray fruit trees against overwintering pests using suitable sprays.
Pre-growing seedlings: Many types of vegetables, herbs and flowers can be pre-grown at home before the frosts have passed. This gives you a head start, and after planting outdoors your plants will grow and ripen faster than when sown directly into the bed. Tomatoes, peppers or lettuces are most commonly pre-grown. You can pre-grow seedlings by the window in a cold frame or under artificial lighting in a propagator.
You may also be interested in: How to pre-grow seedlings correctly? A guide to equipment for the spring season
Would you like to grow like professionals and learn about new products for growers? Visit our gardening blog, where you will find useful tips and guides on cultivation.
Slow Germination? Possible Reasons and What to Do About It
Almost every grower has experienced this: you sow seeds and wait eagerly for the first leaves. After a few days, however, it seems that the seeds are not coming to life. Where did the mistake happen? There may be several reasons, so let us take a closer look at them. In today’s article, we will focus on the causes of slow germination and how to prevent it.
Before we answer the question of what may be behind slow germination, let us first ask how quickly seeds should actually germinate. Germination speed depends on several factors – for example temperature, humidity, the amount of light, and also the species. While some seeds may germinate as early as the second day after sowing, others may take several weeks. Therefore, be patient and find out what germination time is typical for the given species.
You may also be interested in: Germination from A to Z
Low or fluctuating temperature
Temperature has a huge influence on germination and most seeds germinate best at temperatures in the range of 22-26 °C. In nature, rising temperatures are a signal for seeds to wake up. If it is too cold, the germination process may take significantly longer or stop altogether. Fluctuating temperature is also a problem, which is especially common when germinating on a windowsill.
How to do it:
- Place the sowing tray in a warm place with a stable temperature – for example on a radiator-heated windowsill or, even better, in a heated propagator.
- Use a heating mat, which will keep the seeds warm and ensure a stable temperature.
- If you are sowing seeds outdoors directly into the soil, first check the temperature with a soil thermometer.
Incorrect humidity
Everyone knows that seeds need water and will not germinate in dry substrate. However, many growers make the mistake of germinating in waterlogged substrate, which increases the risk of rot, mould and damping off. Seeds need a uniformly moist yet airy substrate.
How to do it:
- When germinating, use propagators – miniature greenhouses that maintain a stable microclimate.
- Use a seed-starting substrate or sowing cubes (rolls) made of rockwool, peat, coco or Easy Plugs.
- If the substrate dries out too quickly, moisten it with a pressure sprayer so that you do not wash the seeds away.
Seed quality and age
Sometimes slow germination is not your fault, but the fault of the seed stock. Old seeds have lower germination rates, especially if they have not been stored properly, for example in light, heat or damp conditions. In such a case, your chances of success are low, but not completely lost.
How to do it:
- If you still have some seed stock left, carry out a germination test. Take several seeds and let them germinate on cotton wool or a paper towel.
- Try supporting the seeds with a germination growth stimulator.
- Buy seeds from reputable and reliable sellers. At Higarden.cz, you will find chilli, herb and microgreens seeds with a clear origin.
Incorrect sowing depth and heavy substrate
It often happens that ungerminated seeds remain trapped in a layer of substrate that is too deep and cannot push through to the surface. The sprout either breaks or runs out of energy before it reaches the light. The reason may be unsuitable substrate or sowing too deep.
How to do it:
- As a general rule, sowing depth should be 2 to 3 times the length of the seed.
- For sowing, choose a light soil substrate or use sowing rolls and cubes.
Unsuitable light conditions
Most plants germinate in the dark, but as soon as the first leaves appear above the surface, they need light immediately. It is often best to germinate under grow light. The lighting should reach an intensity of 50 to 150 µmol/m²/s with a photoperiod of 16-18 hours per day. A lack of light will cause seedlings to grow more slowly, become pale and start to stretch.
How to do it:
- When germinating and growing seedlings, use grow light. TLED panels with a growth spectrum are excellent for this purpose.
- Hang grow light with an output of up to 120 W 10-40 centimetres above the tops of the plants.
Mould and damping off
A moist and warm environment is ideal not only for germination, but unfortunately also for mould and pathogens, for which seedlings are easy prey. The consequence of infection may be both slow germination and stem rot, which will kill the plants.
How to do it:
- Use sterile substrate and clean growing containers, which should be washed before use with boiling water or a disinfectant solution for growers.
- Treat the seeds and substrate with a product with trichoderma – a beneficial fungus that protects the roots.
Slow germination is not a reason to panic. Often, a few small adjustments are enough and success will follow. When germinating, monitor temperature, humidity and light, and use a quality substrate. Proper care for seeds will certainly pay off. And if you are unsure about anything, take a look at the Higarden growing blog, where you will find many useful tips and advice for beginners, or contact our experienced sales staff.
Save Your Winter Vitality with Microgreens: A Powerful Health Boost from Nature
Winter is approaching, and with it the flu and cold season. How can we prepare for these discomforts and maintain strong health? One of the best answers is microgreens – small plants that have a huge impact on our health. In this article, we will look at what microgreens are, which types you can grow, and what effect they have on your health. We will also give you practical advice on how to grow them best and care for them.
What Are Microgreens?
Microgreens are young plants that are harvested shortly after germination, usually within two to three weeks of sowing the seeds. They are small but nutritious plants that are full of vitamins, minerals and antioxidants. These mini green treasures have many benefits for our health and are a great way to strengthen the immune system and supply the body with the nutrients it needs.
There are many different types of microgreens that you can grow. The most common include:
Spinach microgreens: They contain large amounts of iron and vitamin C, which helps with energy and immunity.
Broccoli microgreens: They are rich in vitamins A, C and K, and are known for their antioxidant properties.
Rocket microgreens: They have a sharp flavour and are full of vitamin K, which is important for healthy bones.
Onion microgreens: They contain sulphur and antioxidants that support heart health and reduce inflammation.
Effects of Microgreens on the Body
Adding microgreens to your diet can have many positive effects on your health. Thanks to their concentrated nutrition, they can:
Strengthen the immune system: The vitamins and antioxidants in microgreens help the body fight infections.
Improve digestion: The fibre in microgreens supports healthy digestion and blood sugar regulation.
Increase energy: Thanks to their iron and vitamin C content, microgreens can increase your energy and reduce fatigue.
Support healthy skin: The antioxidants in microgreens help protect the skin from damage caused by free radicals.
Practical Advice for Growing Microgreens
If you decide to grow microgreens, here are some useful tips:
Seed selection: Buy high-quality seeds specifically intended for growing microgreens.
Growing medium: Choose a suitable growing medium, such as peat or coconut substrate.
Light: Microgreens need plenty of light. If you do not have access to natural sunlight, you can use LED light sources.
Water: Keep the substrate moist, but not soaked. Misting is often better than watering from above.
Temperature: Make sure the temperature is suitable for the specific type of microgreens you are growing.
Conclusion
Microgreens are a small secret for maintaining health and vitality, especially during the winter months. Growing and consuming these small green crops can significantly improve your health and strengthen your immunity. Remember the quality of the seeds, proper care, and enjoy the rich benefits that microgreens offer.
7 Most Common Mistakes When Germinating Seeds and How to Avoid Them
Not only beginner growers, but also experienced growers have problems with seed germination. Often this is because, through lack of knowledge, they make some of the basic mistakes in seed germination. Are you among them too? Read on to find out how to avoid them and germinate like a professional.
In the following lines, we will also focus on minor mistakes that can nevertheless drastically affect germination success. If you would like to master the basics, read the article Indoor germination from A to Z.
1. Old or poor-quality seeds
Seeds that are too old or improperly stored have a much lower chance of successful germination. Although some seeds can remain viable for many years, storage conditions play a crucial role. If they are exposed to moisture, heat or light, their germination rate decreases quickly. In addition, cheap or poorly bred seeds may have genetic defects or be contaminated with pathogens.
How can this be prevented? Choose seeds only from verified suppliers and store them in a dry, cool and dark place. An airtight container stored in the fridge with a moisture absorber is ideal.
2. Unsuitable temperature and excessive moisture
Seeds need the right temperature to germinate. If the temperature is too low, germination slows down or stops completely. Conversely, high temperatures can damage the seeds and prevent them from growing. Excess moisture can also ruin germination. Seeds do need enough water to germinate, but not so much that they start to rot.
How can this be prevented? The ideal temperature for germinating most plants is between 22-26 °C. If you are growing in a cooler environment, a heating mat or heated propagator will help. Correct humidity is also important – an environment that is too dry will cause the seeds to dry out, while a waterlogged growing medium can lead to rotting. Therefore, regularly vent excess moisture from the propagator.
3. Unsuitable growing medium
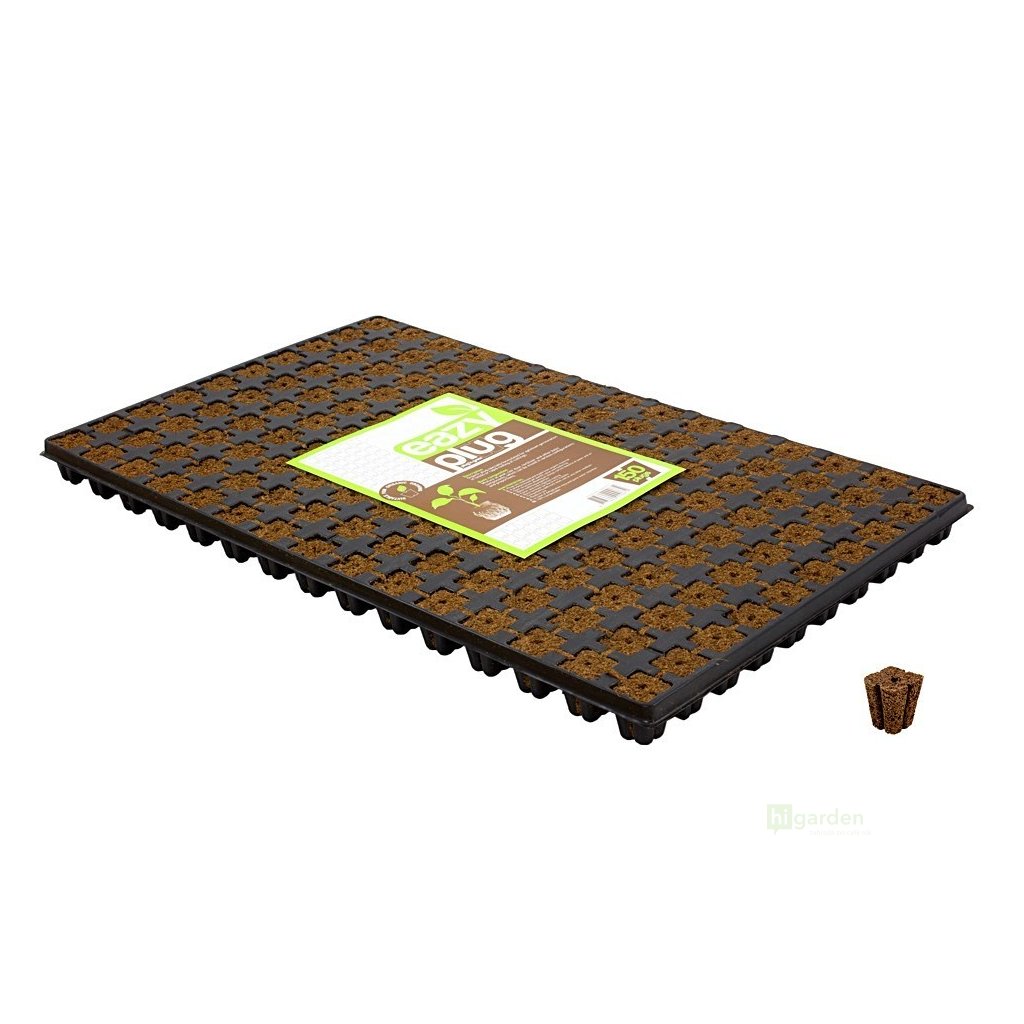 Many growers make the mistake of germinating seeds in a standard horticultural growing medium, which is often too heavy or contains an excessive amount of nutrients. An unsuitable growing medium prevents root growth and can retain too much water, which leads to seed rot or wilting seedlings.
How can this be prevented? Use light and airy growing media or propagation cubes that are designed specifically for germination. Rockwool cubes or their organic alternatives (Eazy Plug) are a good choice. Avoid growing media containing large amounts of fertiliser – young plants are sensitive to excess nutrients and may die.
4. Lack of oxygen around the seeds
Many growers do not realise that seeds need sufficient oxygen as well as moisture. If they are submerged in water for too long or are in a very wet and dense growing medium, they may start to rot even before germination.
How can this be prevented? If you germinate seeds in water, never leave them soaked for longer than 12-24 hours. Then move them into a moist growing medium that allows sufficient aeration. When choosing a growing medium, make sure it is not too dense and maintains an optimal balance between airiness and moisture. You can also treat the seeds before germination with a 3% solution of hydrogen peroxide, which will remove any pathogens. You can also use germination stimulants or products with mycorrhizal fungi, but do not combine them with peroxide.
5. Incorrect planting depth for seeds
Planting seeds at the wrong depth can significantly affect germination. If seeds are planted too deeply, they may struggle to break through to the surface. Conversely, if they are planted too shallowly, they may dry out quickly or be washed away by watering.
How can this be prevented? Follow the rule that seeds should be planted at a depth of approximately twice their size. Small seeds, such as lettuce, only need to be lightly covered with a thin layer of growing medium or vermiculite. Larger seeds can be planted a little deeper, but always so that they have enough energy to grow through to the surface.
6. Insufficient or too strong light
 Light plays a crucial role in germination, but not all seeds require it. Some germinate in light, others need darkness. If young seedlings receive too much light, they can become weakened and more prone to growth deformities.
How can this be prevented? Find out whether your seeds need light or darkness to germinate. For example, lettuce germinates better in light, while tomatoes and peppers germinate in darkness. Once the seeds have germinated, provide them with gentle and even lighting. TLED lights with a growth spectrum are excellent for germination purposes. Set the light so that the germinating seeds receive at least 18 hours of daylight.
7. Over-fertilisation
Young plants are very sensitive to excess nutrients, and if they are fertilised too early or at a high concentration, root damage occurs, which is manifested by burnt leaf tips and drying out.
How can this be prevented? Delay the first fertilisation of the plants until the second week after the seeds have germinated. If you use mineral fertilisers, start with a very weak concentration (approximately 1/4 of the recommended dose). Monitor the plants’ response and gradually increase the doses.
Would you like to learn more about indoor growing and master modern gardening techniques? Do not hesitate to visit our growing blog, where you will find advice, tips and guides for beginner and experienced growers alike.