
Seedlings and propagation
List of articles
How to Properly Pre-Grow Seedlings? A Guide to Equipment for the Spring Season
Spring is approaching, and it is time to start preparing for the upcoming growing season. If you want to get ahead of the weather, raise seedlings at home and your plants will reward you with rapid growth, strong health and an early harvest. What will you need, and how do you do it? We have prepared a clear guide to raising seedlings for you.
Why raise seedlings?
Raising seedlings indoors in the comfort of your home is an excellent way to get ahead of the start of the season. Avoid the risks associated with unpredictable spring weather, and your plants will quickly adapt to outdoor conditions after transplanting. Another advantage is that, thanks to raising seedlings, you can also grow plant species that would otherwise not thrive in our climatic conditions.
- Ideal conditions: Germination and raising seedlings indoors allows you to create an optimal environment for plants.
- Faster growth and earlier harvest: Plants spend the first weeks of their lives in a protected environment, where they can strengthen and develop a rich root system. Once planted outdoors, they then grow faster and ripen earlier than with direct outdoor sowing.
- Ability to grow different species: Many plants take too long to grow and ripen to mature in our geographical conditions. However, if you raise these species before the start of spring, you can shorten this period.
Which plants are suitable for raising?
Not all plant species need to be raised first, and some, such as radishes, peas or carrots, are sown directly into the bed because they do not tolerate transplanting or they grow quickly and ripen very early. The most common crops that are raised include:
- Fruit vegetables: tomatoes, peppers, aubergines, chilli
- Medicinal and exotic species: hemp
- Cucurbit vegetables: cucumbers, courgettes, pumpkins
- Leafy vegetables and brassicas: lettuces, broccoli, cauliflower, cabbage
- Aromatic herbs: basil, marjoram, thyme, rosemary
- Ornamental flowers: marigold, petunia, snapdragon, lobelia
What will you need to raise seedlings at home?
Although it is possible to raise seedlings on a windowsill or in a conservatory, you will achieve the best results in a grow tent (growbox), where you can create a protected and stable environment for the plants. Inside a grow tent, you can easily control temperature, humidity and the amount of light, and the plants can germinate and grow without the influence of weather fluctuations. Seedlings in a stable environment grow faster and are more resistant to pests, mould and disease. In addition to a growbox, for raising seedlings you will also need:
- Propagator: Miniature greenhouses will help you create the ideal climate for germinating seeds and young plants. For growing some species, propagators with heating are suitable.
- Seedling tablets, cubes or cylinders: Seedling cubes make germination and handling seedlings easier. They can be made from various materials, such as rockwool, coco or peat. Remember that seedling cubes are intended for germination, and after a few days it will be necessary to transplant the plants into a suitable growing medium.
- Growing medium: The choice of growing medium for seedlings depends on the species and the growing method. It is important that the medium is airy and does not contain a high amount of fertilisers that could burn young plants. You can read about the advantages and disadvantages of different growing media here.
- Grow lighting: For rapid growth, plants need enough light. For raising seedlings, the most suitable option is energy-efficient LED grow panels with a growth spectrum.
- Heating mat: Some species germinate and grow better at higher temperatures. Heating mats are especially suitable when growing heat-loving species, such as tomatoes or chilli.
- Sprayer: Watering young plants by hand can easily wash them out of the medium, so we recommend adding a hand sprayer to your basket.
Unsure which equipment to choose for raising seedlings? We have prepared complete seedling-raising sets for you, containing everything you need to get the outdoor season started.
How to raise seedlings – step-by-step instructions
- Seed selection and preparation
- Use only quality seeds with high germination rates.
- It is advisable to soak the seeds of some species (tomatoes, peppers) in lukewarm water for several hours before sowing.
- To increase the success rate of germination for rare or old seeds, use a germination stimulant.
- Sowing and first watering
- Sow the seeds into seed-starting medium or into a seedling tablet, cube or cylinder.
- Cover them with a thin layer of medium and gently moisten with a sprayer.
- Place the seeds in a warm, well-lit place (20–25 °C).
- Ideal conditions
- Temperature: Seeds of most plants germinate best at a temperature of 20–25 °C.
- Light: Provide at least 12–16 hours of light per day.
- Humidity: Keep the medium moist, but not waterlogged.
- Ventilation: Ventilate the propagator regularly to prevent mould growth.
- Transplanting and hardening off
- As soon as the seedlings produce their first true leaves, transplant them into larger pots.
- Water the seedlings regularly and you can use a weak growth fertiliser.
- Before planting them out in their final outdoor position, harden the plants off. First leave them outside for a few hours a day, then for the whole day later on.
Looking for more growing tips and expert gardening advice? Take a look at our Higarden blog, where you will find recommendations and guides for beginners and advanced growers alike.
Tissue Culture Propagation: The Future of Plant Propagation
Did you know that there is a way to grow hundreds of identical plants from a single cell? Micropropagation is a revolutionary technique that allows commercial and hobby growers to propagate plants from small samples of plant tissue in a sterile environment, giving them new and unprecedented possibilities. Let us take a look at how this method works and how you can try it at home.
What is propagation through tissue cultures?
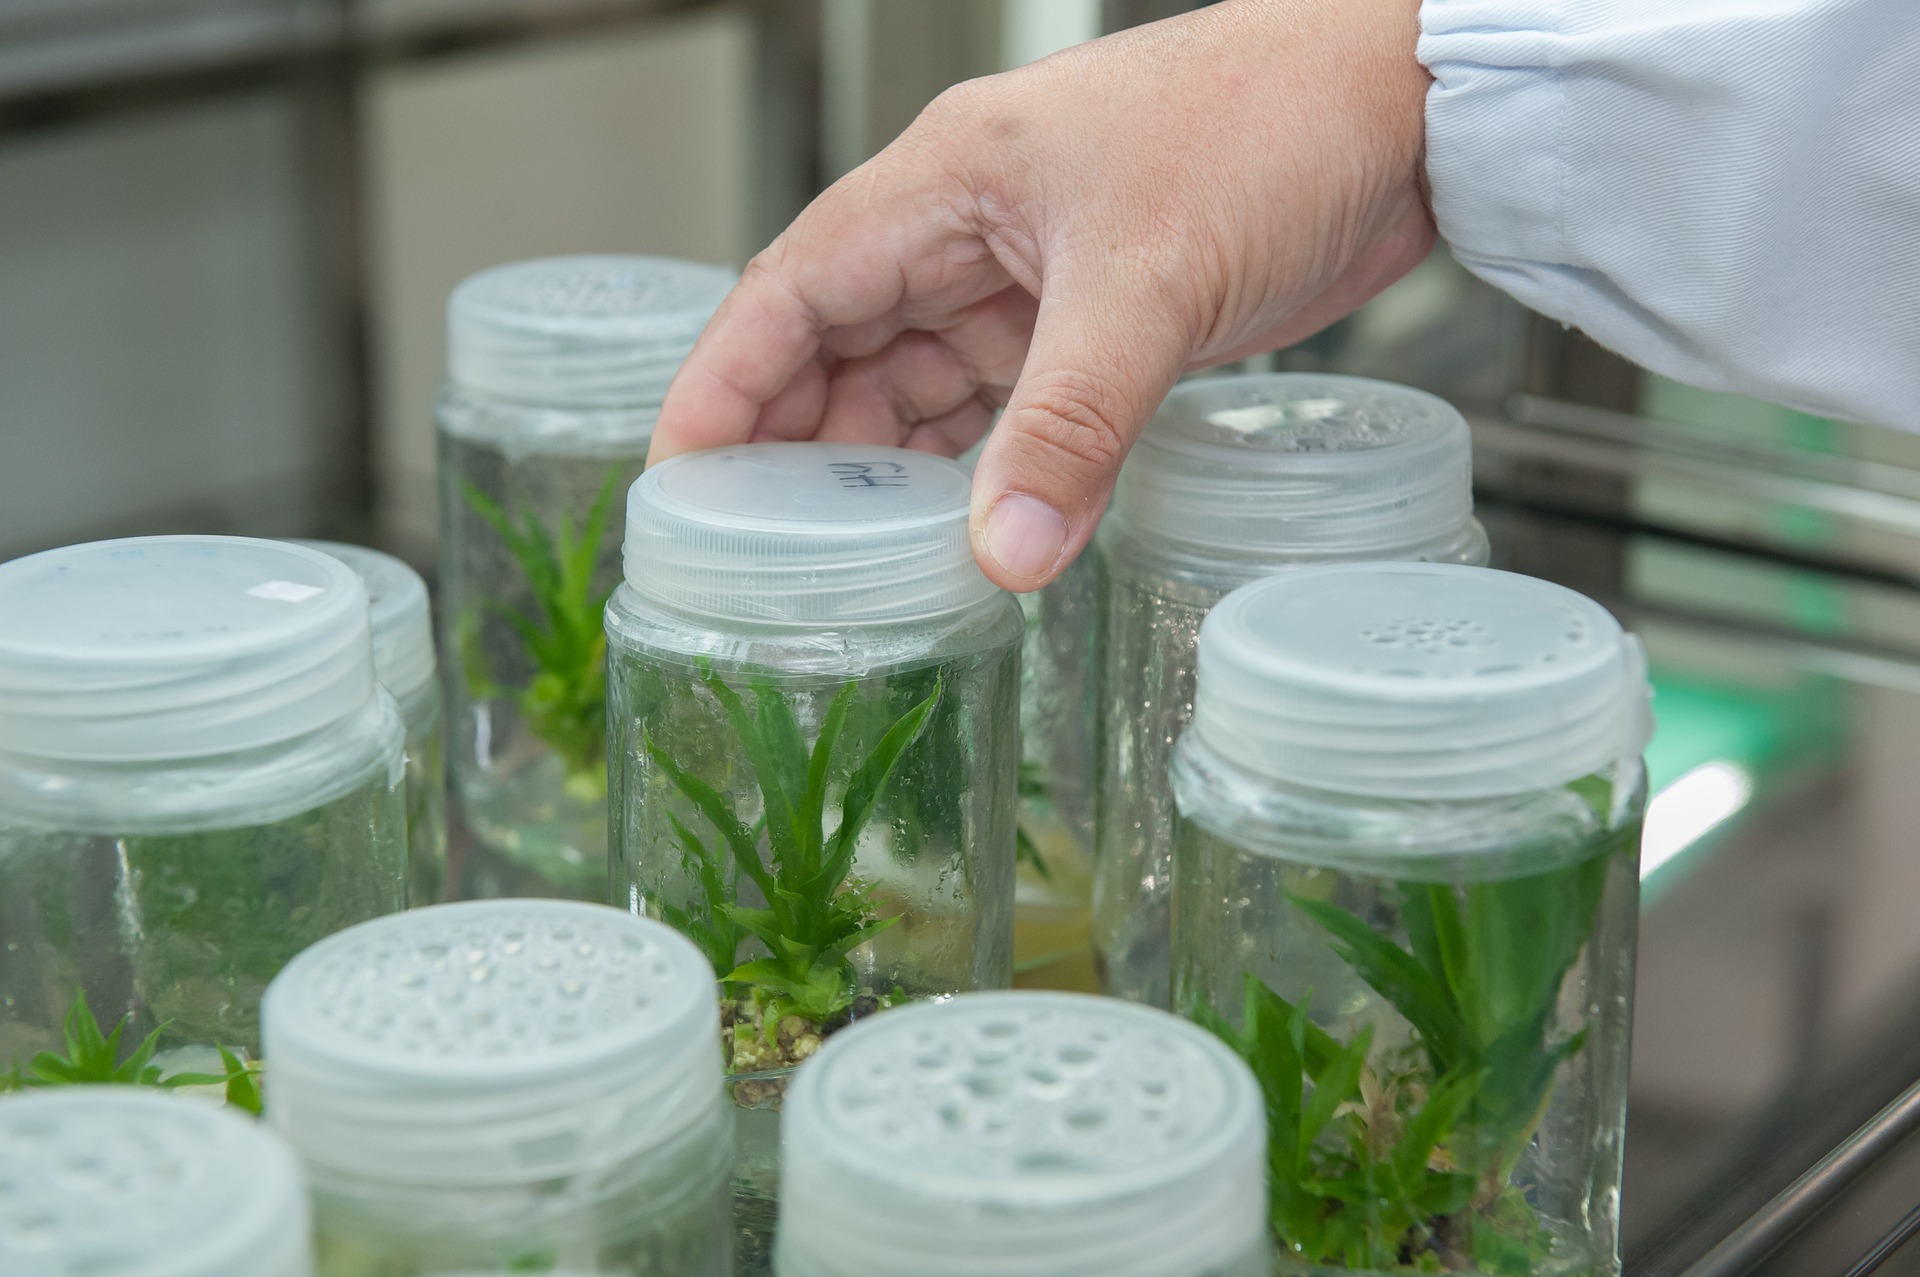
Propagation using tissue cultures involves growing plants from small samples of their tissue in a sterile environment. The process begins with an explant, a small piece of plant tissue taken from the mother plant. The explant is placed in a sterile container filled with a gel-based nutrient medium enriched with vitamins and hormones that support plant growth. Once the plant tissues are preserved in this way, they can be divided into hundreds or even thousands of genetically identical clones.
This process is remarkable for its flexibility. The tissue can remain in a sterile environment for a long time until it is activated by specific hormones to develop roots and shoots, which allows long-term archiving of plant genes. Thanks to sterilisation, the tissue sample can be freed from all pathogens, pests and diseases, and in some cases it may be the only way to rid plants of viral diseases such as hop latent viroid (HpLVd).
How do tissue cultures differ from seeds and cuttings?
Growers traditionally rely on seeds or cuttings for plant propagation. These methods are effective, but they have their limitations:
Seeds: The main disadvantage of growing from seeds is the unpredictable results. Seeds do not always have 100% germination, and some plants may suffer from unwanted genetic mutations. In the case of growing dioecious plant species, unwanted male plants can be a problem. Last but not least, crop uniformity is not guaranteed with seeds, and plants from the same parents will show greater or smaller differences in appearance and growth.
Cuttings: Propagation by cuttings is faster, and cloned plants are identical to the mother plant. The disadvantage of cuttings is the relatively high risk of transferring diseases and pests from the parent plant to the clones. Cloning also requires consistent maintenance of mother plants, which is demanding in terms of both labour and space.
For more about cuttings, see the article on our blog Cuttings: Plant cloning step by step.
Micropropagation of tissue cultures solves most of the problems associated with growing plants from seeds or cuttings. The sterile environment eliminates pests and diseases, and in some cases even genetic disorders. The plants are genetically identical, and tissue cultures can be stored in small containers that take up significantly less space and require less care than mother plants. Tissue cultures allow growers to produce thousands of plants from a single explant in a short time, which is invaluable especially for commercial large-scale growers. Last but not least, micropropagation can be used to “reset” the plant’s biological clock and rejuvenate old or rare specimens. This method can also be used to germinate seeds that are decades old and restore lost genetic material.
Equipment for tissue cultures for commercial and home growers
For growers who want to try micropropagation of tissue cultures, we offer the revolutionary Athena Tissue Culture Kit. This set contains all the equipment and procedure instructions you will need, whether you are a hobby grower or a professional. Athena Tissue Culture Kit is a unique system that allows you to preserve rare varieties, propagate plants more quickly, and rid them of pests and diseases.
What the Athena Culture Tissue Kit contains
- Flow Hood: The mobile laboratory provides a large space (0.7 m³) with sterile airflow (average speed 0.5–0.9 m/s) and powerful H13 HEPA filters.
- Autoclave: Simplified sterilisation process with one-time setup.
- Pre-prepared culture media: Contains the “Roots” formula for callus formation and “Shoots” for tissue growth.
- Toolbox: A complete set of tools, including a detailed step-by-step procedure.
Would you like to learn more about modern trends in growing and cultivate like professionals? Visit our Higarden blog, where you will find plenty of useful information on indoor and outdoor growing and urban growing.
Cuttings: Plant Cloning Step by Step
Thanks to cuttings, you can easily create genetic copies of your favourite plants. This method offers growers the opportunity to achieve consistent results, optimise growing conditions, and preserve exceptional plants. In this article, we will guide you through the cloning process from A to Z – from preparing the equipment to rooting the cuttings and transplanting them.
It will probably come as no surprise that sowing and germinating seeds are an inseparable part of gardening. However, this is not the only way plants reproduce. In addition to generative propagation (by seeds), plants can also reproduce vegetatively (from part of the plant). This is because plant cells have the ability of totipotency, which means that any of them can develop into an entirely new plant. In today's article, we will focus on a specific case of vegetative propagation, namely cuttings. For completeness, however, let us add that gardeners and growers also propagate plants vegetatively by dividing clumps, layering blackberries or grapevines, separating strawberries, grafting, and propagation by means of tubers.
Plant cuttings
As we hinted in the introduction, vegetative propagation of plants differs from sowing seeds. In the case of cuttings, we take a suitable part from the donor (mother) plant, usually the tip of a healthy branch with several healthy leaves and internodes. We then move the clones into a suitable growing medium, which is usually cubes made of mineral wool or a suitable growing substrate. For freshly cut cuttings to root successfully, they need suitable conditions, above all high air humidity, warmth, and plenty of light.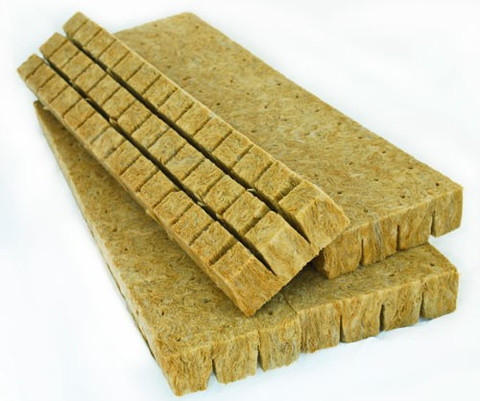
So how do cloned plants differ from those grown from seed? The main difference is that the newly formed offspring is a genetic copy of the donor plant. Clones therefore always have the same sex as the mother plant. One advantage is that, when growing dioecious species, growers do not have to worry about selecting males from females. Another benefit of cuttings is the genetic uniformity of clones. Because the plants come from one mother, they will show identical growth characteristics. Large-scale growers in particular can use cloning to optimise the growing process and achieve consistently reliable results over the long term. Last but not least, cuttings give growers the opportunity to preserve exceptional phenotypes in the form of clones over the long term.
It should be added that cloning also has some disadvantages. The main problem is the risk of transferring genetic disorders, pathogens, and diseases. If the mother plant is infected with one of the plant viruses (e.g. HLVd) or suffers from a genetic mutation, the offspring will be affected in the same way. The same applies to mould and many insect pests, but in these cases it is possible under certain circumstances to treat the clones with pesticides or fungicides. Unlike plants grown from seed, cuttings do not have a main root that grows deep into the ground. Cloned plants are therefore somewhat less suitable for outdoor growing, especially in places where they may face strong gusts of wind and prolonged drought.
Advantages of cuttings
- same sex and genetic uniformity
- uniformity of the crop
- preservation of exceptional plants
Disadvantages of cuttings
- transfer of genetic mutations and viruses
- spread of pathogens and pests
- less suitable for outdoor growing
How to take cuttings step by step
Before you start taking cuttings, first make sure that you have all the necessary equipment. You will need a growing medium, preferably cubes made of mineral wool or a suitable propagation substrate. Cuttings need constant air humidity of around 75-85%, which is easiest to achieve in a small plastic greenhouse (propagator). Clones root fastest at temperatures in the range of 24-27 °C. Lower temperatures slow the process and increase the risk of mould. In the first few days, medium-intensity light (100-200 µmol) with a blue-white spectrum is suitable. After the first roots appear, you can increase the light intensity to double, which will speed up the development of the root system. At this point, it is also suitable to start using root stimulant. You can find grow lighting for growing cuttings and seedlings HERE.
Other necessary equipment
- scalpel
- disposable gloves
- disinfectant (alcohol, Purolyt, hydrogen peroxide solution)
- rooting gel
- thermometer with humidity metre
- container for placing fresh clones
- paper towels
Detailed guide to cloning
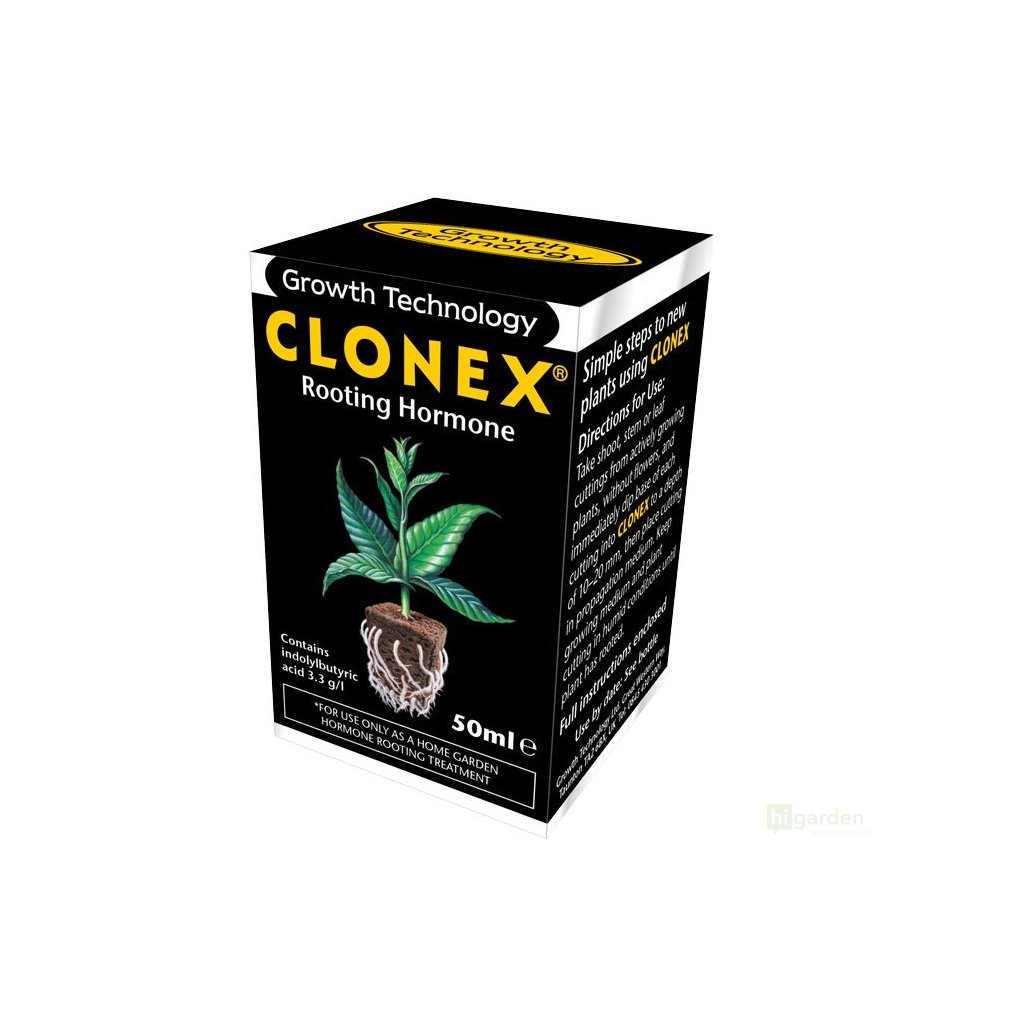
To give yourself the best chance of success when taking cuttings, take clones from recently grown branches from plants at the peak of vegetative growth. Before taking cuttings, you can treat the donor plant with one of the special products (e.g. Clonex Mist) that support root formation and strengthen the cuttings' resilience. Always work with clean tools, wear rubber gloves, and do not smoke while working.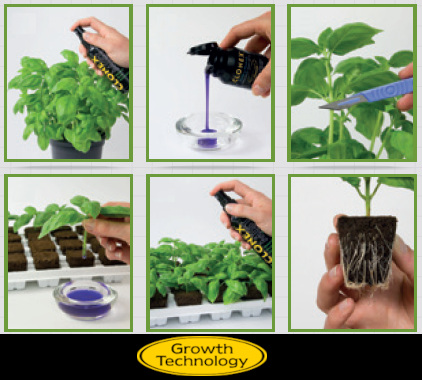
- First remove excess leaves from the branches and leave only a few young leaves at the top. Trim their tips so that 2.5 to 5 cm of the blade remains. The lower part of the future stem should remain bare.
- Cut branches 10-15 centimetres long and immediately place them cut-end first into a prepared container of water.
- Finally, cut the ends of the stems to the same length at a 45° angle. Immediately dip the clones prepared in this way into rooting gel and insert them into the growing medium.
- Place the cuttings under the greenhouse lid or into a propagator and put them under a light source.
- Depending on the plant species and conditions, it will take approximately 7-14 days for the clones to root and be ready for transplanting.
- Throughout the process, check that the growing medium is moist. It should not, however, be waterlogged.
- Towards the end of the process, gradually open the vents on the greenhouse to reduce air humidity and prepare the plants for transplanting.
Aeroponic propagators
Aeroponic propagators are based on a simple principle, in which the ends of the stems are exposed to a mist of oxygenated water. Thanks to the high oxygenation, clones root up to twice as fast as in another growing medium. Another advantage of aeroponic cuttings is that the clones can also tolerate lower air humidity in the range of 50-60%. This makes the subsequent acclimatisation of new seedlings easier.
Finally, for completeness, let us add that in recent years a new modern method of cloning using tissue cultures has also been gaining popularity. We will devote this modern plant propagation technique to one of our future articles, but if you know how to do it and want to try tissue cultures in your grow room, you will find cloning systems for tissue culture on our website.
Would you like to learn more about indoor growing and modern gardening trends? Do not hesitate to visit our Higraden blog.
6 Most Common Mistakes When Taking Cuttings and How to Avoid Them
Cuttings are a great way to propagate your favourite plants quickly and efficiently. Although it is a common cultivation method, many growers make mistakes that reduce the success rate of rooting clones. Do you want healthy and strong plants? Take a look at the six most common mistakes when taking cuttings and find out how to avoid them.
Successful propagation by cuttings requires not only the right technique, but also suitable conditions and careful handling. An unsuitable choice of mother plant, poor hygiene habits, poor acclimatisation or unsuitable humidity or lighting will reliably lead to failure. In this article, we will show you the most common mistakes made by growers and advise you on how to increase the chance of successful rooting of your clones.
You may also be interested in: Cuttings: Plant cloning step by step
1. Unsuitable choice of mother plant
It is important that mother plants intended for taking clones are in perfect health. Cuttings from plants that are affected by pests, mould or nutrient deficiencies will have a low chance of rooting. There is also a high risk of transferring infection and pests from the mother plant to the offspring.
How can you avoid the mistake? For cloning purposes, always choose healthy mother plants with no signs of pest infestation, disease or mould. Plants in the peak stage of vegetative growth are ideal.
2. Poor cutting technique
 When taking cuttings, make sure you follow the correct procedure and use sharp tools. An improperly made cut reduces the cutting’s ability to form roots. If the cut is made with a blunt tool, the stem may be crushed, which prevents it from absorbing water. When cloning, it is important to work quickly so that air bubbles do not begin to form at the ends of the stems.
How can you avoid the mistake? When taking cuttings from plants, first cut branches 10-15 cm long and immediately place them in water. Then trim the ends of the stems to the same length at a 45° angle. Immediately dip the clones prepared in this way into rooting gel and insert them into the growing medium.
3. Insufficient hygiene
Mould, pests or viruses are easily transferred from one plant to another during propagation and can destroy your entire future crop. Therefore, follow basic hygiene rules and always work with clean and sterile tools. Do not smoke while taking cuttings and wear disposable gloves.
How can you avoid the mistake? Work in a clean environment, use gloves and disposable scalpels, and sterilise them again before each cut on a new plant. Suitable sterilising agents are ethyl alcohol or Purolyt.
4. Unsuitable humidity and temperature
 Fresh clones need humid air so that they do not wilt, but excessively high humidity slows rooting and increases the risk of mould spreading. A sufficiently high temperature is also important.
How can you avoid the mistake? Monitor temperature and humidity using a thermometer with a hygrometer. Root cuttings in a plastic greenhouse (propagator), where you should maintain humidity between 75-85% and a temperature in the range of 24-27 °C.
5. Incorrect light conditions
Cuttings need light for proper development, but lighting that is too intense or an unsuitable light spectrum can slow rooting and stress the plants. Direct and overly strong light increases water evaporation from the leaves, which then wilt. Conversely, if there is too little light, the stems of the young plants will stretch upwards.
How can you avoid the mistake? For rooting cuttings, use medium-intensity light (100–200 µmol/m²/s) with a blue-white spectrum. Special LED panels or low-energy fluorescent lamps are ideal. Once the first roots appear, you can increase the light intensity so that the clones acclimatise more quickly to stronger lighting.
6. Mistakes during acclimatisation
One common mistake is transplanting cuttings too early and not acclimatising them sufficiently to the new environment. If you plant cuttings with an underdeveloped root system into the growing medium, they will probably wilt. Likewise, a sudden change in conditions, especially a drop in air humidity, can stress the plants.
How can you avoid the mistake? Before transplanting the cuttings, wait until the roots have grown through the plug or cylinder. This should take one to two weeks. During rooting, gradually open the ventilation openings in the propagator so that the plants get used to lower air humidity.
Would you like to learn more about indoor growing and modern gardening trends? Do not hesitate to visit our Higraden blog.
How to Grow Mother Plants and How to Care for Them?
Mother plant, or simply a mother. In this post, you will find out what this term means, and we will also focus on the practical side of the matter.
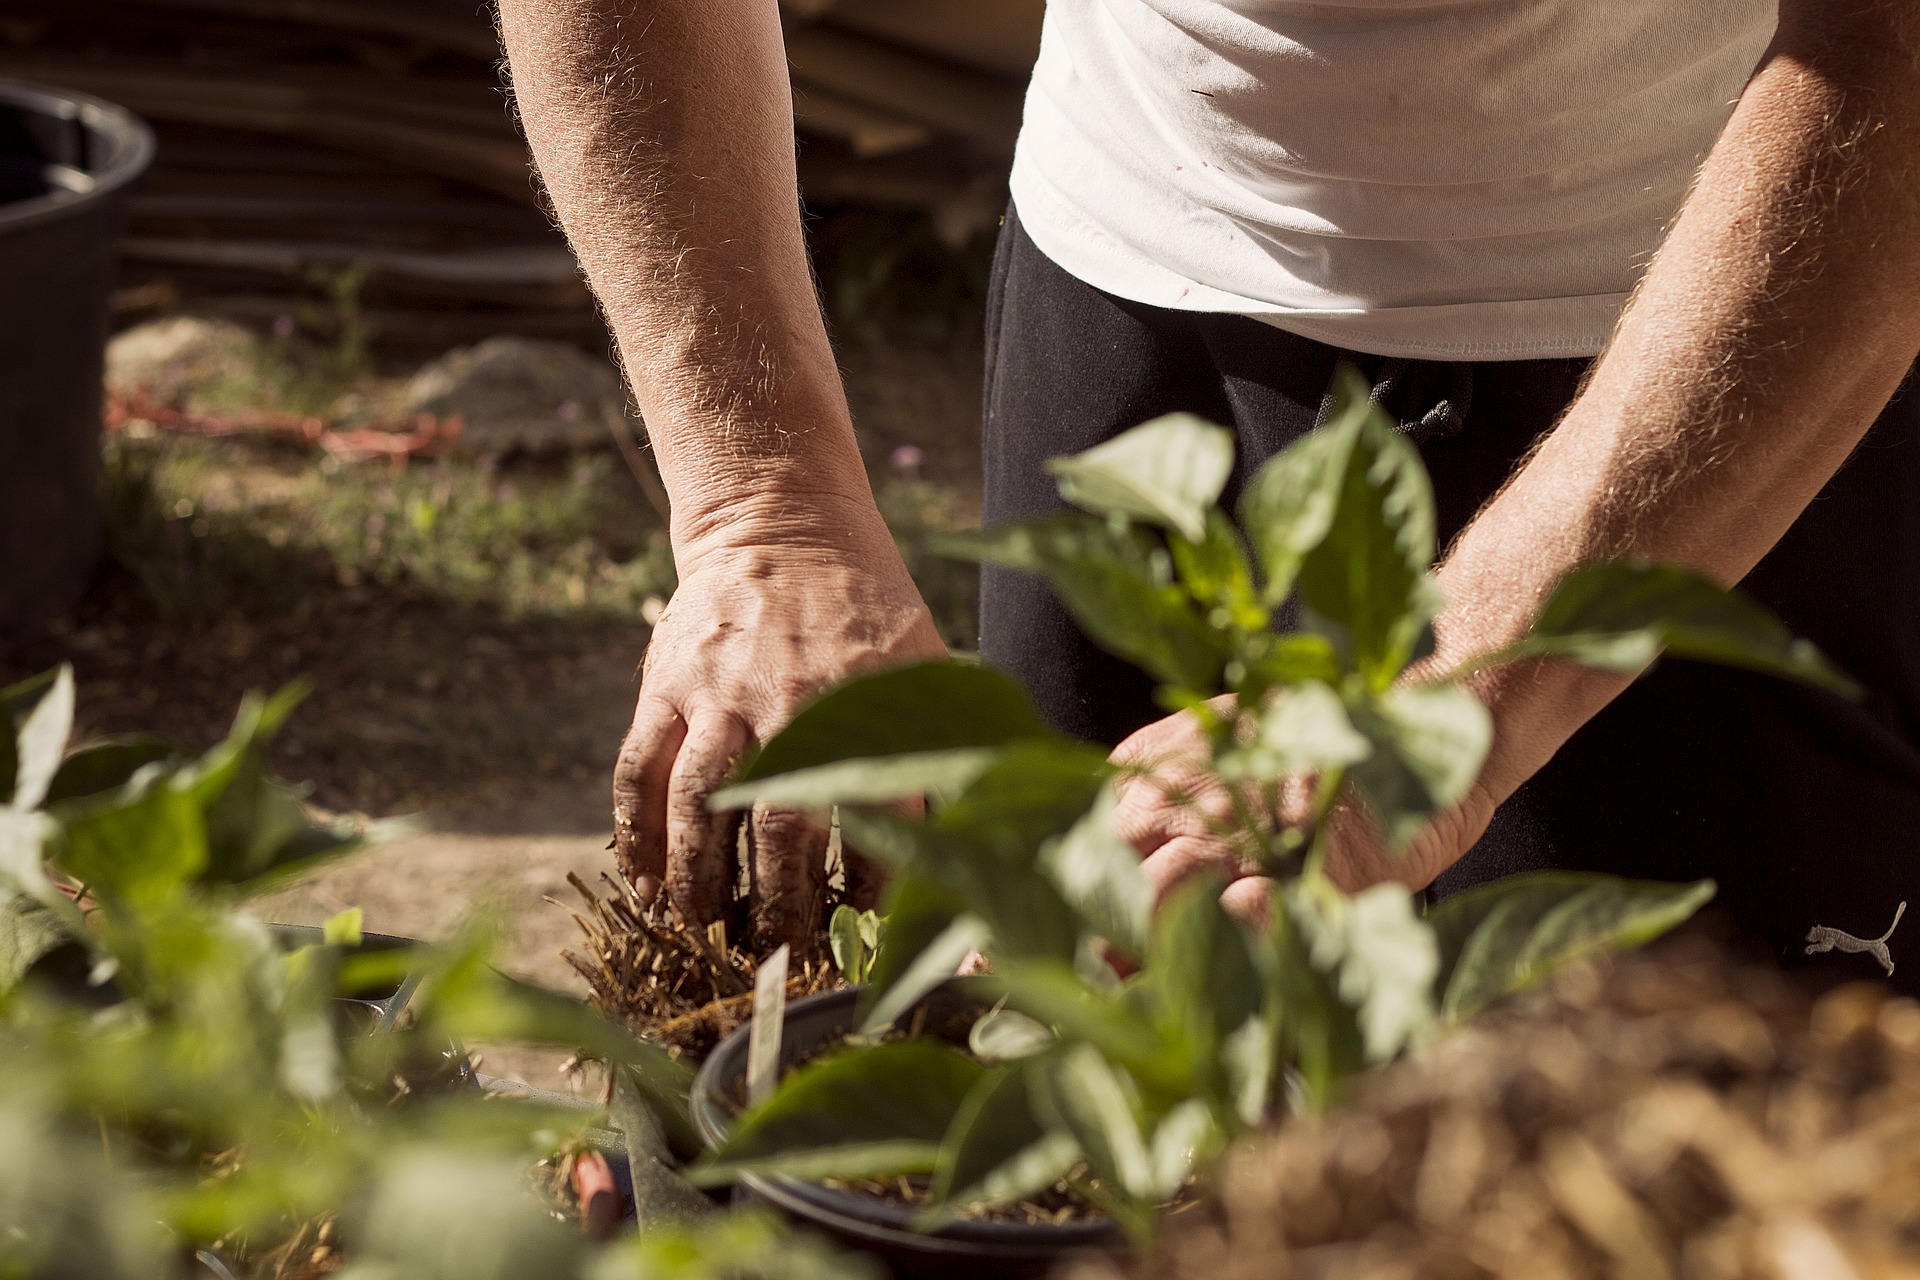
- A strong, vital plant of the preferred variety is carefully selected and then used as a mother plant. It is then kept in the vegetative stage for a long time in order to provide cuttings (clones).
- The proven “functional” period for using a mother plant for successful propagation by cuttings is approximately one year, although an average mother plant lasts longer and the most resilient ones can easily survive for several years.
- We care for a mother plant practically the same way as for plants in the growth stage, whether it concerns fertilisers, prevention, or lighting, where we choose discharge lamps with grow light, or, in the better case, full-spectrum LED lamps, which perfectly imitate sunlight for the mother plant. High-quality TLED grow lighting can also be used for a single mother plant.
- Mother plants need only a lower light intensity. What is important is the growth light cycle, that is, 18 hours of light and 6 hours of darkness.
- For the cultivation of mother plants, we recommend hydroponic systems, with which you no longer have to repeatedly deal with complications associated with exhausted substrate or soil.
- For growing mother plants, choose larger round pots.
- Mother plants do not form flowers, so you do not need to worry about mould infestation.
- The ideal growing environment for mother plants is characterised by slightly increased air humidity.
- The dosing of irrigation should be just as precise as in the case of watering classic plants in the growth stage.
- Moderation is required when fertilising, as mother plants will remain in the growing medium for a very long time, and therefore careful dosing of growth fertilisers is suitable to eliminate the risk of soil salinisation.
- At least once every quarter, it is advisable to replace the substrate by carefully removing the mother plant from the pot, while carefully removing the outer layer of exhausted substrate (1-2 cm) from each side around the root ball with a sterilised knife. Fill the remaining space in the pot with fresh substrate. If the mother plant was not sufficiently vital, careful repotting should give it new energy. If even replacing the substrate is not enough, it is time to let one of the cuttings grow into a new mother plant, which you will again maintain with a suitable light source, light cycle and nutrition in the vegetative phase.
- It is necessary to make sure that you do not overwater mother plants. If automatic growing systems are not taking care of irrigation for you, we recommend watering mothers only when the substrate is practically dry, but the plants have not yet started to wilt, which would of course not be desirable at all.
- Hydroponic systems offer growers a clear advantage during the cultivation of mother plants in that, unlike hand watering, which in practice requires, for example, when leaving for a few days, someone with a sense for precision and regularity, they allow long-term and independent growing with optimal irrigation without the risks associated with a deficiency of water and nutrients or, conversely, overwatering.
That is all regarding the care of mother plants themselves, about which you have been asking us frequently lately. We discuss taking and rooting cuttings in a separate article. If you would like to ask us anything, we look forward to your questions at the well-known address info@higarden.eu.
We recommend these products:
- BioNova Bio Soilmix 50L (279 Kč)
- BioNova Veganics Grow (from 269 Kč)
- HERCULES aerated pot - round 20L (89 Kč)
- Hydroponic systems (from 2 599 Kč)
What to read next?
Tissue Cultures and Micropropagation: The Future of Plant Propagation?
In today’s article, you can broaden your horticultural horizons and discover a new global trend in the field of cloning plants through tissue cultures. This is still a less well-known method of plant propagation than the well-known cultivation (propagation) from seeds or cuttings, which for many years was also the only way to propagate plants.
What is tissue culture micropropagation?
To answer this question, it is first necessary to define certain boundaries between the terms micropropagation and tissue culture. So what is the difference between them, and what is the connection?
The micropropagation process requires tissue culture for the propagation of seedlings. These two terms are often confused. The main difference between micropropagation and tissue culture lies in the fact that micropropagation means, in practice, the controlled production of a large number of plants from a small amount of plant material, whereas tissue culture can also be described, for the purposes of plant propagation, as the initial step of micropropagation. Hence tissue culture micropropagation.
Micropropagation:
- Plant propagation by growing seedlings in tissue culture and then planting them out
- The two steps are tissue cultivation and introducing new plants into the soil.
- It is used to produce a large number of clones.
Tissue cultures:
- A technique for maintaining and growing plant cells, tissues or organs, especially on an artificial medium in suitable containers in a controlled environment.
- The three steps are introducing the explant into the tissue culture medium, propagation and the initiation of root formation.
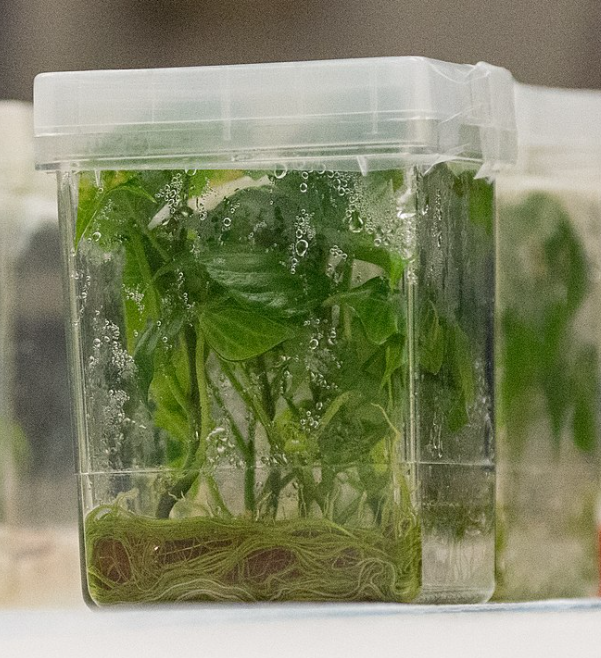
This cloning technique uses plant cell cultures. These are grown in sterile Petri dishes. At the beginning of this process, as with conventional cuttings, there is also a mother plant. However, only the so-called explant, or plant sample, is taken from it, which is then placed in a sterile environment, usually a nutrient-rich gelling medium containing vital nutrients including vitamins and hormones that stimulate the development of shoots and roots in the young plant.
The controlled cloning environment allows the tissue culture to be preserved for practically unlimited periods until the grower decides to use the sample. Whether the plant sample is at that moment in the growth, rooting or propagation phase, these processes can be initiated at any time by adding further solutions with a high content of nutrients and hormones. Then, once the plant has developed sufficiently in all respects and is ready for propagation, exceptionally identical clones are produced in high numbers.
The attentive reader will already have realised that the almost laboratory-like work with tissue cultures goes beyond indoor gardening itself and moves towards microbiology, and therefore requires an exceptionally clean environment. If, however, you enjoy experimenting, go ahead. All you need is a home micropropagation kit. A sterile starting environment is essential for future seedlings so that pests or plant diseases do not occur.
When genetics takes the lead
An undeniable advantage of tissue cultures is that the clones remain genetically perfectly identical to the mother plant.
Here too, cloning through tissue cultures excels over conventional methods, because it is more precise, cleaner, and therefore allows the grower to secure plant genetics exactly as needed. Traditionally grown clones are also usually more susceptible to disease and may suffer from genetic mutations from the original mother plant.
That is why tissue cultures are increasingly used to achieve a particular genetics of high value.
Genetic stability is often a priority in the world of cultivation, and tissue culture micropropagation meets this perfectly.
By contrast, compared with clones, growing new plants from seeds cannot be strongly recommended in terms of genetic stability. In addition, the whole process is more time-consuming and financially demanding, especially if you are aiming to grow herbs with medicinal effects, which usually root relatively easily and quickly.
A solution for commercial and smaller growers
Without doubt, this is not only the future, but in many cases already the present for commercial growers. Tissue cultures are already commonly used, for example, by large-scale banana growers. This method of cloning plants, where new individuals are produced from stored cell cultures within a short period in the thousands, shows exceptional efficiency on a large scale. Producing ordinary clones in the way we have known until now requires constant care and attention for the “mothers”. If we focus on the popular and often discussed autoflowering varieties, long-term maintenance of mother plants essentially becomes “mission impossible”, because so-called autoflowering plants do not respond to changes in photoperiod in the same way as conventional varieties.
With tissue cultures, there is not only far less trouble, but they also take up nowhere near as much space, not to mention the fact already mentioned, namely the almost unlimited storage time.
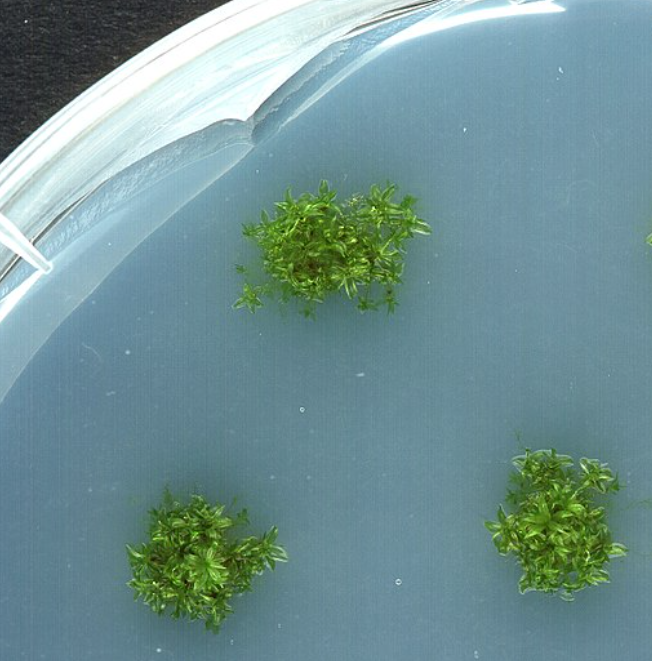
The advantages of tissue cultures naturally also apply to everyone who gardens on a normal scale. Thanks to this revolutionary method, every grower has the opportunity to influence the genetic disposition of their crops.
What are the other undeniable advantages of using tissue cultures?
- When tissue cultures are used, the plant genetic material is sterilised several times over. During the actual collection and later during propagation. It is literally impossible to find traces of pathogens on the resulting clones, so even the mature plants later stand out for their exceptional vitality and yield.
- Sometimes it is desirable to revive very rare seeds that are already several years old. This is possible through micropropagation in a test tube.
- Have you ever fallen in love with one of your mother plants, and then felt heartbroken that the cuttings taken from it were losing quality over time to the point that they had less and less in common with the donor plant? If so, you may know that, apart from senescence, the most likely cause was the gradual accumulation of bacterial, fungal or viral diseases throughout the entire line of clones. And as you already know, in tissue cultures based on a 100% sterile environment, you would look in vain for traces of pathogens.
Although tissue cultures are already successfully used by many commercial growers, for ordinary growers this method of plant propagation is still uncharted territory. If you enjoy challenges and innovative procedures, we definitely recommend finding out more about micropropagation. If you would like to ask us anything, we look forward to your questions at the well-known e-mail address info@higarden.eu.
We also recommend these products:
What to read next?
- ROOT!T for taking and propagating cuttings
- Organics Nutrients: a natural way to achieve high yields
- Czech electric Sunflower Trimmer is achieving success all over the world
How to Make Plant Propagation Easier?
Although spring is ideal for sowing and propagation, it is not too late in summer either. Would you like to grow radishes, lettuce or perhaps spinach now as well? Or do you need to propagate one of your houseplants? We will show you how you can use growth stimulators, a suitable substrate or a propagator to ensure success at any time of year.
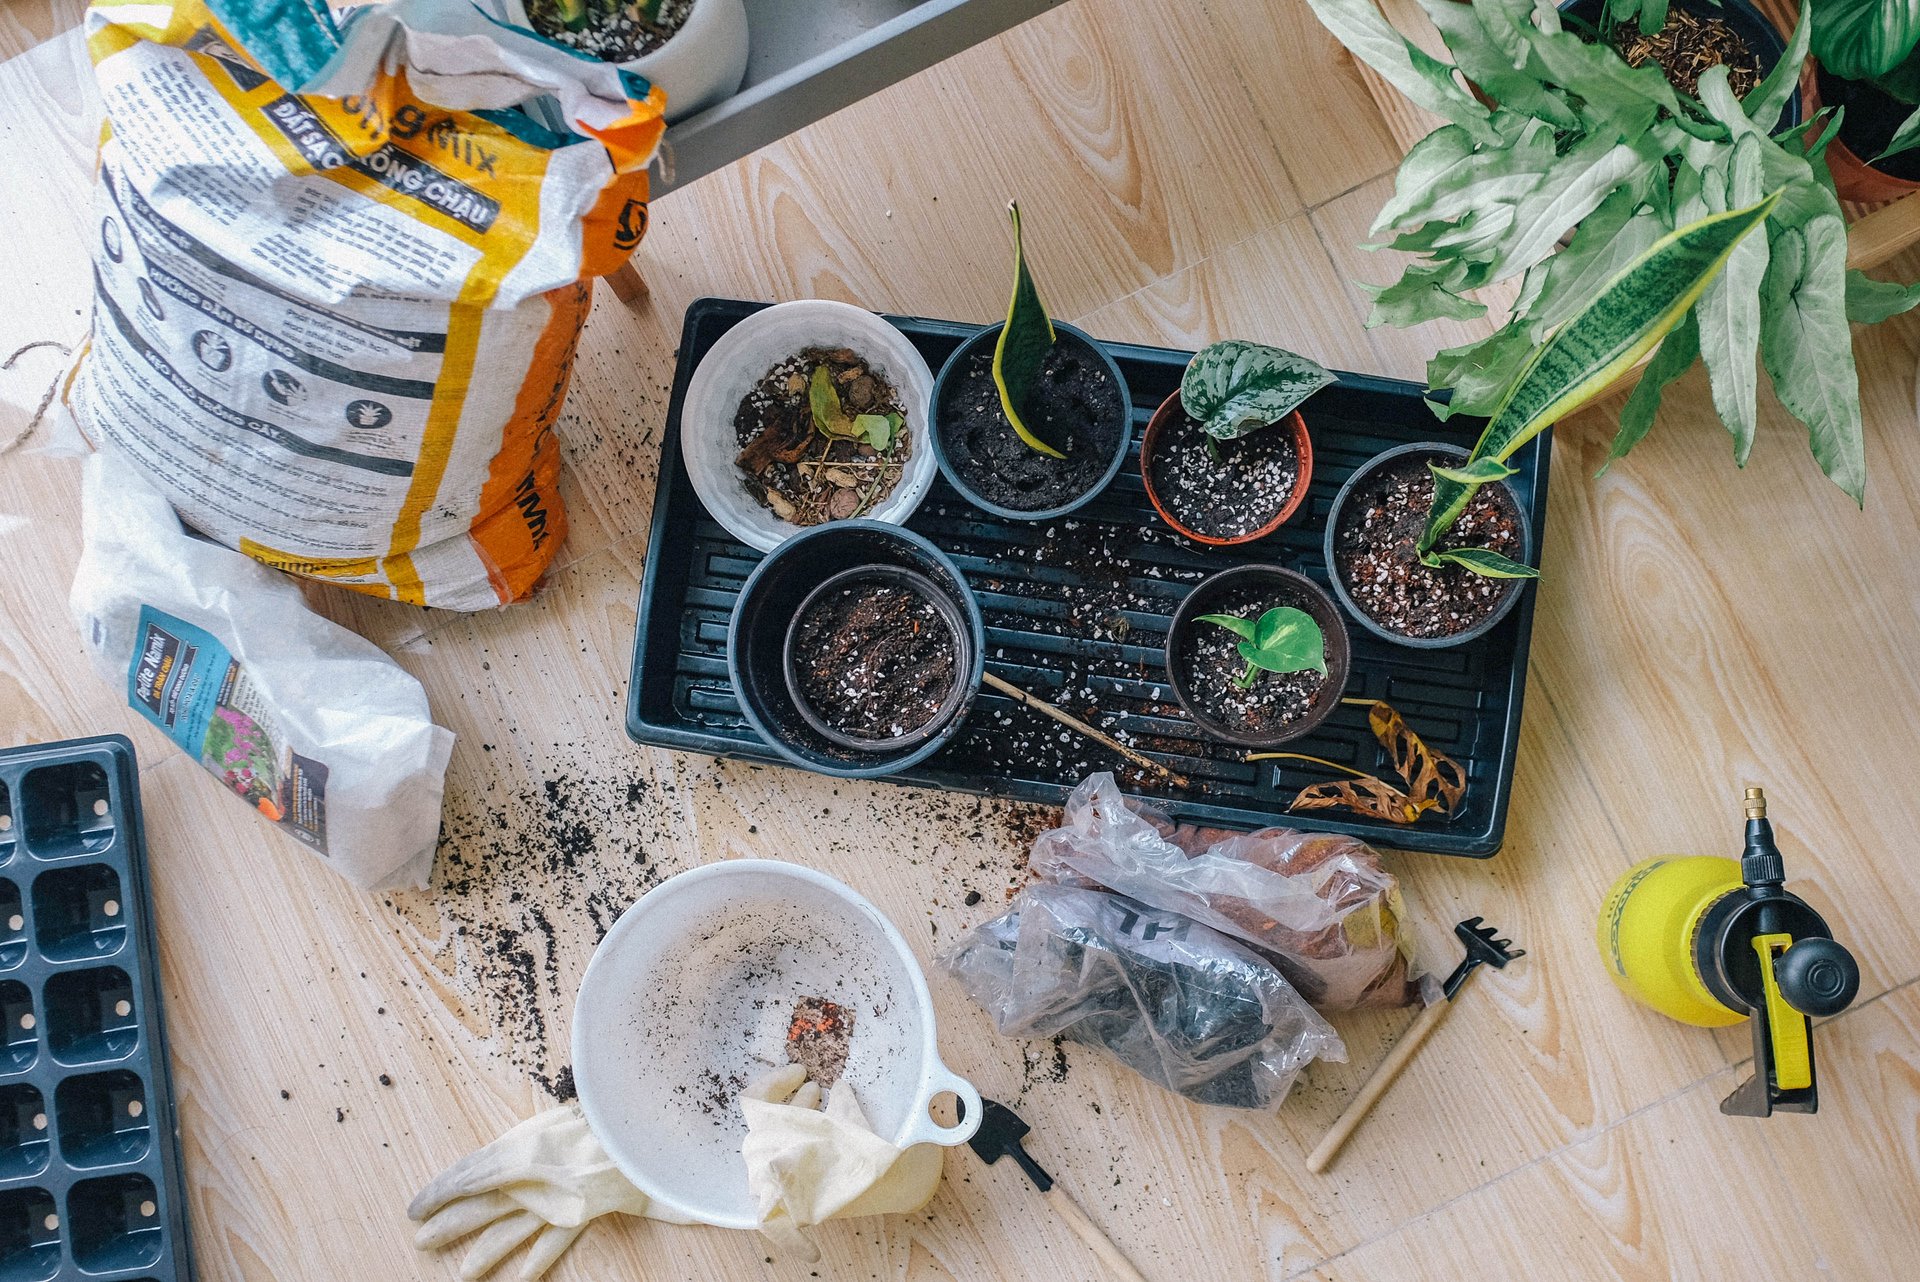
One of the simplest ways to propagate a plant is by taking cuttings. It is enough to remove a section of the apical shoot from the mother plant. This does not harm the plant in any way, and the cutting usually roots within a few weeks. For more effective rooting of cuttings, you can use a root stimulator. Remove the leaves from the lower part of the cutting (approx. 2-4 cm), dip it into the stimulator and carefully place it into the prepared substrate so that you do not wipe the stimulator off. The plant will then root much more easily and in a shorter time. Another option is to use a special fertiliser for young plants and cuttings. It has a specific composition so that the plant does not get burnt, and it supports the development of the root system and growth.
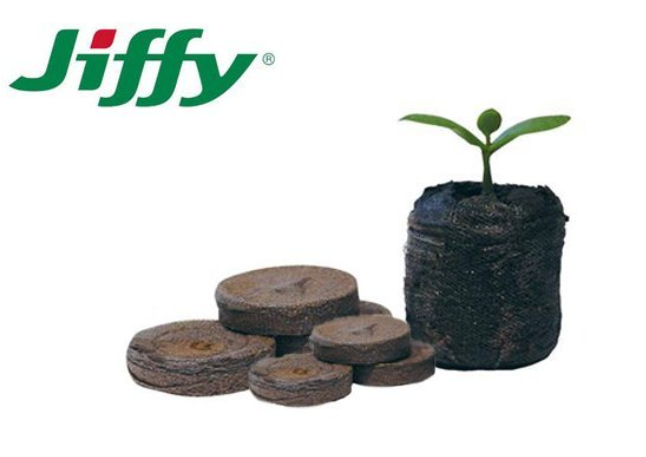
Another aspect of successful propagation is the substrate. Suitable options are lightly pre-fertilised mixes aerated with perlite. The nutrient content here is minimal, and after about the first week we fertilise according to the plants' needs, for example with the aforementioned fertiliser for cuttings. Another option for propagation or sowing is growing cubes or Jiffy tablets. Their advantage is easy use, a balanced ratio of air in the substrate and good water absorption. Peat tablets are also very compact, contain a mixture of peat and coconut fibres, and only gain their volume after being watered and swelling. After germination or rooting, the plants are transplanted into the substrate together with the tablet, and the roots simply grow through it over time.
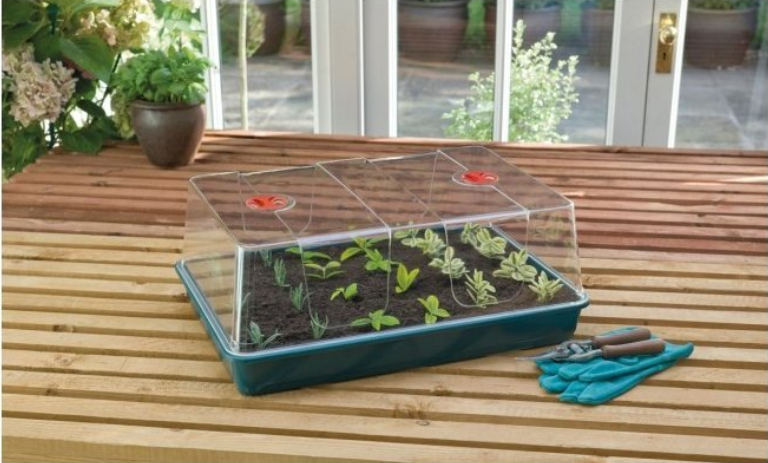
The final tip for supporting seed germination or the establishment of cuttings is to use home propagators and greenhouses. In addition to the ordinary ones, there are also heated models with a thermostat for creating specific temperature conditions. The ideal place is a windowsill where direct sunlight does not fall, so that burning or overheating cannot occur.
If you enjoy growing plants at home, you will find all equipment for indoor growing at Higarden.cz.
Eazy Plug for Easy Rooting and Sustainable Growth
HGA Garden Eazy Plug Propagation Media stand out for the highest possible level of seed germination, and for environmentally minded growers they are the answer to how to increase yields without compromising sustainability. Better success with cloning, cuttings or seed germination will, however, be clearly appreciated by every grower. In addition to the benefits of Eazy Plug propagation cubes, in this article you will find out how to use them correctly in cultivation practice.
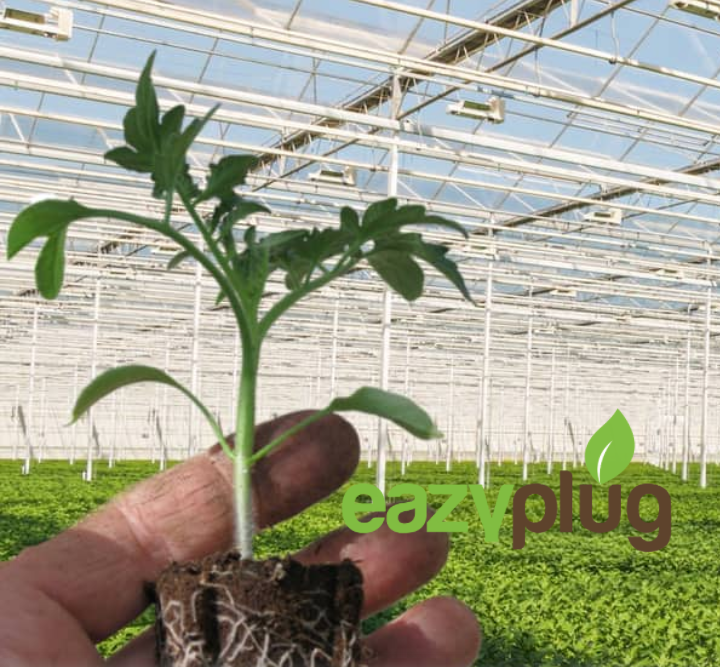
Eazy Plug cubes, which, like Eazy Block and Eazy Pyramid, represent an innovative propagation medium with an emphasis on the ecological aspect of growing, were created in the Dutch centre of cultivation technologies.
All HGA Garden Eazy Plug propagation media are purely organic and 100% compostable. So much for sustainability. And what else makes them unique?
- They come pre-fertilised and also with predetermined levels of EC 1.0 and pH 5.8.
- They excel in their ability to self-regulate to achieve the optimum air-to-water ratio in the propagation medium, or rather in its pores. Because the medium regulates the amount of water itself, it is simply impossible to overwater it, which will be appreciated not only by enthusiastic beginners.
- The strong binding of organic components is the reason why no additional growing containers are needed, and HGA Garden propagation products hold their shape perfectly on their own even without the use of a pot. If propagation medium is placed in a rigid growing container, the plant cannot effectively use the volume of the medium itself, nor do the roots receive as much oxygen. Thanks to the absence of a pot, given by the firm organic structure of this medium, the young plant, on the other hand, has enough air and space to form a strong structure of fine roots in line with the effect of “air pruning”, known among growers rather as the so-called air-pruning effect, when the plant roots grow through the propagation cubes and are exposed to relatively dry air, whereupon they dry out and the root tip dies. The plant naturally responds to this process by forming new, healthy and above all branching rootlets, instead of continuously extending the primary root. In this way, secondary rootlets develop and branch along the entire length of the primary roots until the whole process repeats again and again, and the fine root hairs gradually grow through the entire propagation cube. The result of a highly branched root system with a wide network of root hairs and root tips is better absorption of water and nutrients, and thus more vigorous growth and greater overall plant vitality. Moisture is distributed evenly throughout the medium and, thanks to this, the propagation medium in the form of Eazy Plug products can also be supplied to the market in a dehydrated state for truly unlimited shelf life, which also allows growers to store it for long periods.
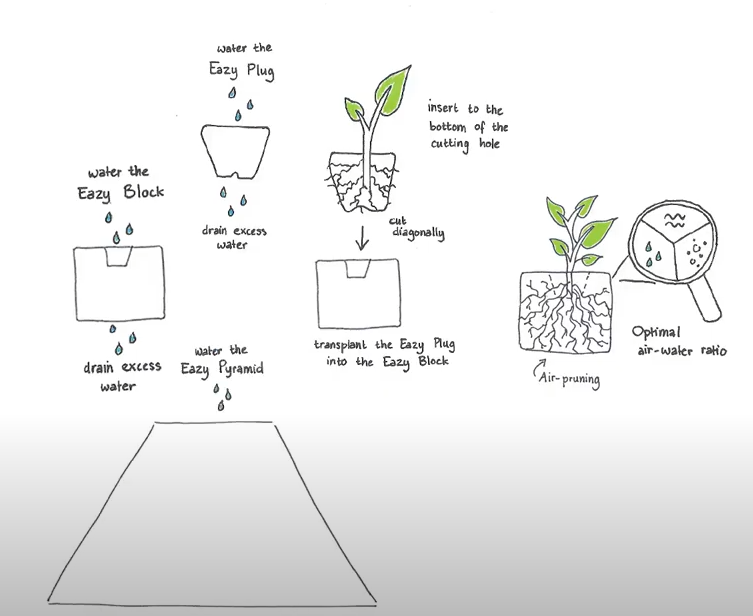
- As you can see in the pictures, the manufacturer has come up with a comprehensive concept of interlocking propagation cubes and pyramids.
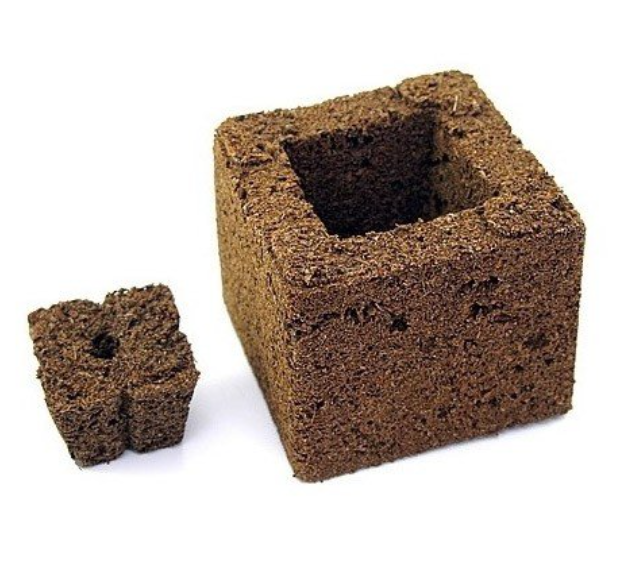
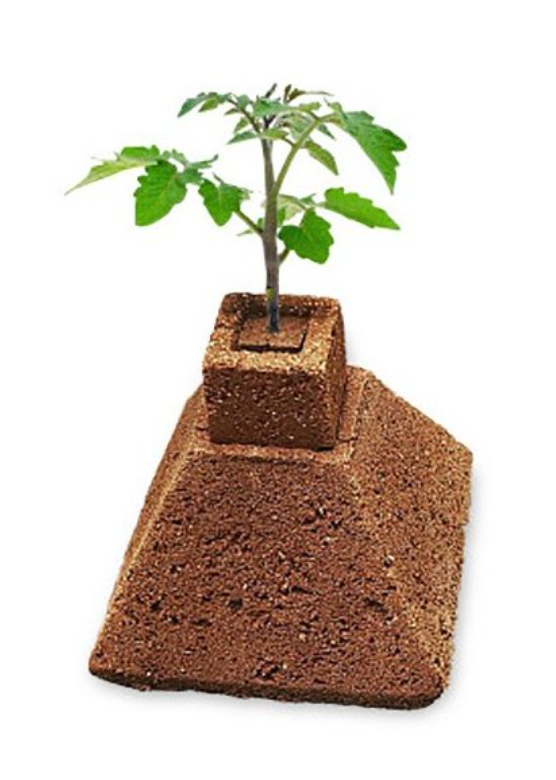 Eazy Plug is a versatile and very compact propagation medium suitable for practically all growing methods in combination with all types of substrates.
- To begin with, you can take a look at the video from the manufacturer.
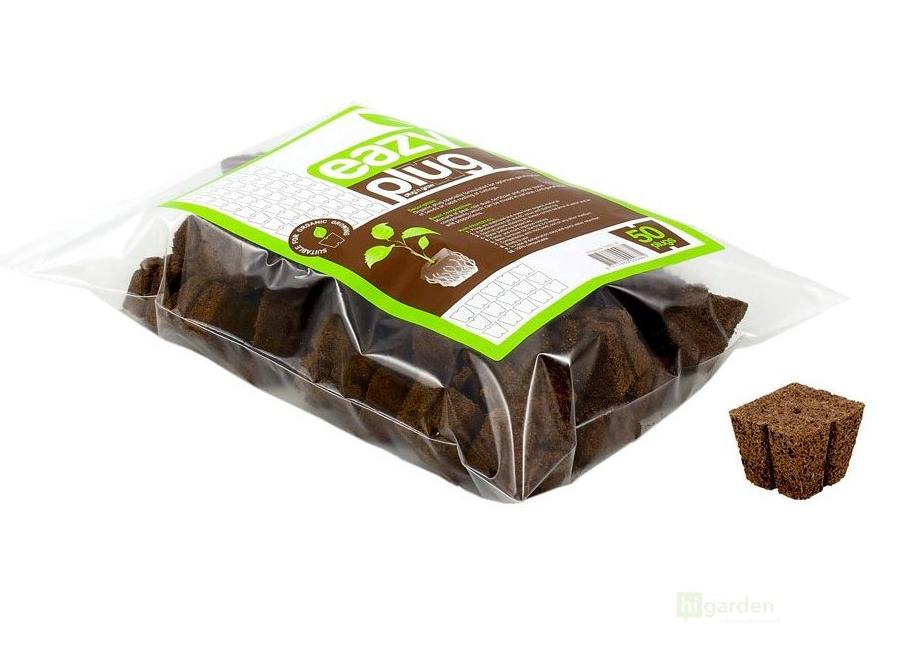
- For the pack of Eazy Plug cubes you will need a propagator. A comprehensive and by far the most effective solution is then provided by mini greenhouses (propagators). We recommend the popular propagator by ROOT!T, made of high-quality plastic and equipped with ventilation flaps to maintain an optimum microclimate and an even higher success rate when germinating or cloning.
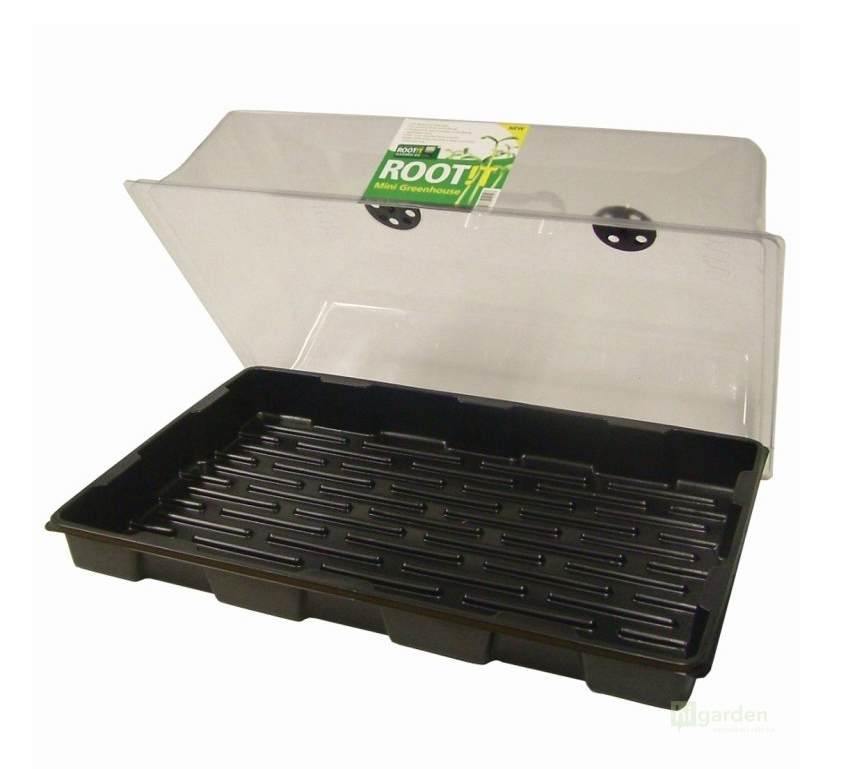
- Start by moistening the Eazy Plug cubes.
- Then plant seeds, cuttings and seedlings approximately 3 cm deep.
- Seed germination requires a temperature inside the propagator in the range of 20–25 °C; for cuttings, the upper limit is lower, namely 22°C.
- As you can see in the diagram (see below), once the roots begin to outgrow the size of the Easy Plug cube, it is time to involve the Eazy Block – the cube for Easy Plug in the process as well.
- Moisten it thoroughly again with clean water, as it is also self-regulating, so you will not face the consequences of overwatering.
- Then carefully transplant the young, rooted plant into it, as shown in the diagram, and take care not to damage the roots during transplanting.
- In the Eazy Block, the effect called air pruning, which we described a little above, will fully take off, and when the root system needs even more space, apply the same transplanting principle when moving the seedling from the Eazy Block cube to the top of the pyramid (Eazy Pyramid).
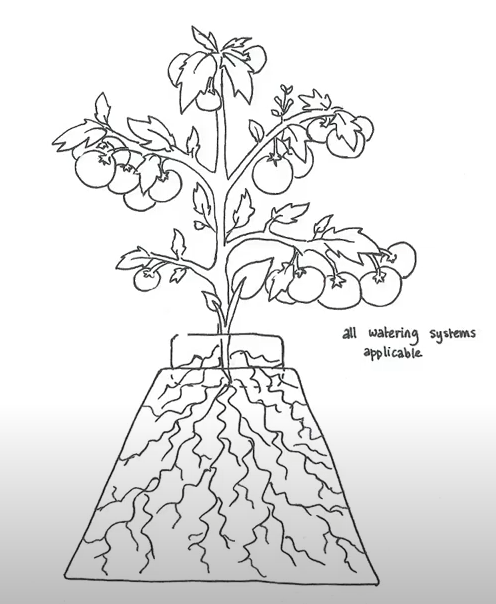
- Over time, the plant will become older and, as a result of the already richly branched root system, its extraordinary vitality will become even more apparent. Thanks to the trio of interconnected and pre-fertilised EazyPlug propagation segments, the roots absorb all nutrients excellently. Mature plants can therefore later be carefully transplanted again, so as not to damage the roots, into a standard pot and you can slowly begin applying fertilisers.
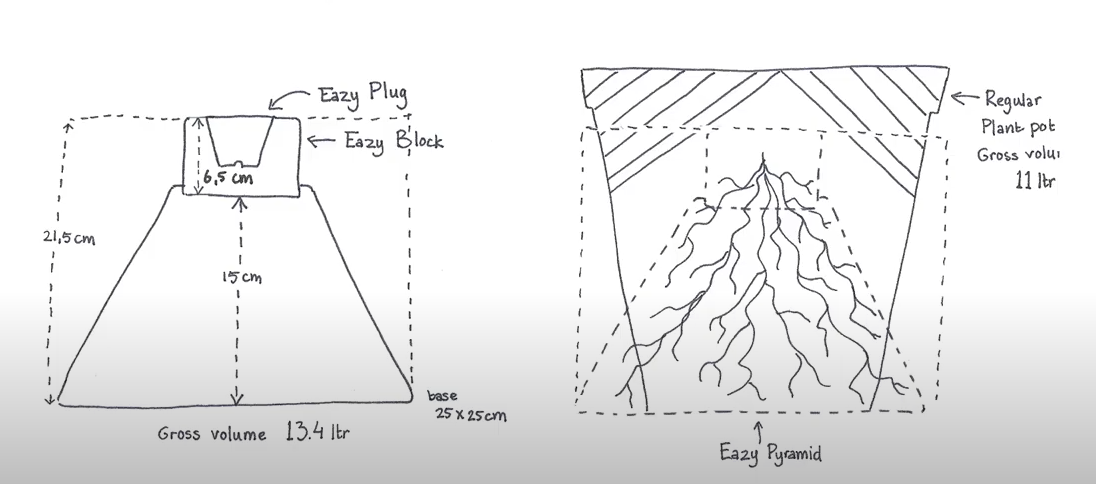
If you would like to ask us anything, we are here for you at the well-known e-mail address info@higarden.eu. We look forward to your questions!
We also recommend these products:
What to read next?
- ROOT!T for taking and propagating cuttings
- Organics Nutrients: a natural way to achieve high yields
- SHOGUN: the best British fertilisers with an emphasis on research
How to prepare rockwool?
Did you know that ROCKWOOL is already a commonly used term for basalt, or stone wool, because the company of the same name was one of the first to process this material for horticultural use?
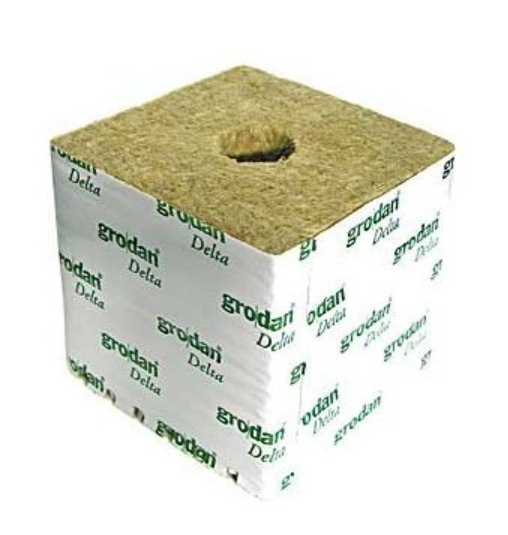
Which type of rockwool will you use?
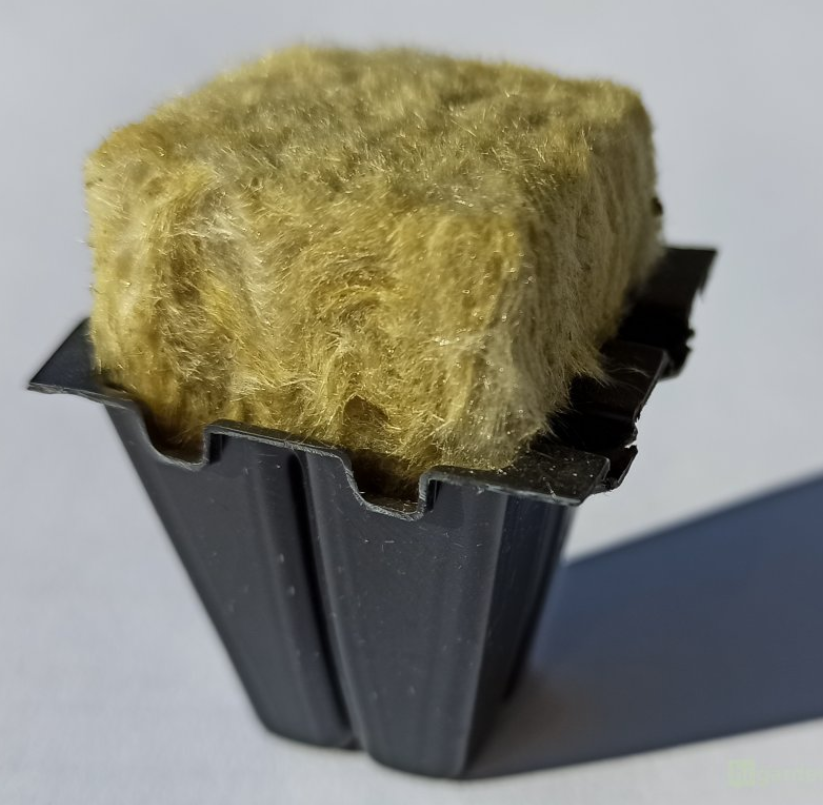
The range of recyclable stone wool products is very varied. You can choose whether to use, for example, propagation cubes wrapped in plastic film or without it, various growing cubes with holes, or very practical growing mats. Growing mats are becoming increasingly popular among growers, which is why we have devoted a separate article to them, which you can read HERE.
Preparing rockwool
- Prepare the rockwool propagation medium that you want to prepare for use.
- If the product is wrapped in protective film, clean and disinfect it. For disinfecting the substrate, you can use, for example, a cloth with a potassium permanganate solution or Purolyt.
- Have standing water ready at least 24 hours in advance.
- Adjust the pH value to 5.1 – 5.6 (the exact value always depends on the properties of the water, which may come from your own well or from the mains, as well as on the properties of the specific RW).
- Above all, make sure that the pH of the soaking solution is not too low, as this could undesirably damage the structure of the rockwool.
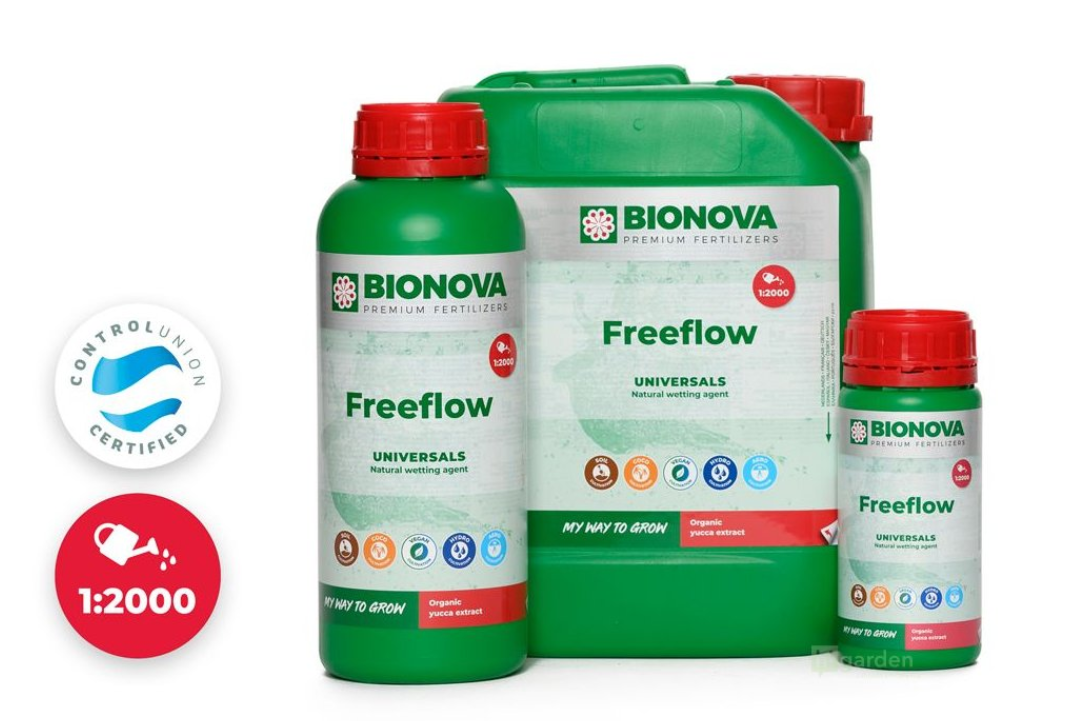
- For soaking rockwool, definitely use the proven BioNova FreeFlow wetting agent.
- After about a quarter of an hour, the pH value should stabilise at the required level.
- Provided that the rockwool will be used immediately for planting, in addition to adjusting the pH it is also advisable to check the water temperature, which should be around 24 °C.
- When lowering the pH of water, always use only suitable products, such as BioNova pH- or Canna pH- growth 17%. A common mistake is, for example, using products intended primarily for aquarium care.
- Electrical conductivity of the solution (EC) is measured using an EC metre. For soaking rockwool, its value should not exceed 0.8.
- At this point, we therefore have water prepared with an EC of up to 0.8, a temperature of approximately 24 °C, and a pH in the range of 5.1 – 5.6. It is time to immerse the rockwool in it for 24 hours.
- Beginning growers sometimes tend to squeeze rockwool after soaking. This damages its fibres, and as the structure degrades, any aeration of the propagation medium also disappears.
- The best approach is to stack the rockwool cubes on top of each other and simply let the water drain away naturally.
- A separate chapter are growing mats, which, after soaking, should be moved straight from the water into the Libra planter.
- Finally, it is important to note that the soaking itself should also take place in a suitable container, which should always be chosen with regard to the size and quantity of the rockwool being soaked.
If you have any questions about ROCKWOOL, please do not hesitate to send them to the well-known address info@higarden.eu. We are here for you!
We also recommend these products:
- Grodan - propagation cubes (from CZK 1)
- Growing mats (from CZK 89)
- BioNova FreeFlow - wetting agent (from CZK 429)
What to read next?
ROOT!T for taking and propagating cuttings
Do your cuttings sometimes fail to perform as you expect? Do they not have the right shape, or do they mature too quickly without having time to root properly? If your cutting attempts have not gone as well as you would like so far, then please read on. It is time to dramatically increase your cloning success rate!
Removing a part of a plant during cutting propagation is extremely stressful for both the mother plant and the resulting cutting. There is certainly no point pretending otherwise. And that is precisely why, from a grower’s perspective, it is right to work intelligently with the plant’s adequate physiological response to this shock:
- Experts believe that plant ageing is the result of the action of two substances that arise on the basis of the stress present. These are:
- Abscisic acid (ABA): a vital plant hormone that is produced by the plant, for example, as a reaction to a sudden change in the surrounding environment. For instance, with the arrival of a cold front, ABA is the initial impulse for a change leading to the protection of leaves from the cold.
- Ethylen (ethylene): ethylene has long been known to accelerate plant ripening when they are exposed to stress. The function of ethylene in such cases is to ensure that the plant reaches a point of sufficient maturity, meaning viability and self-sufficiency independently of the mother plant. A fine example is cut flowers or ripening fruit.
- If this pair of substances is present in the plant, it is evidence of a lack of sugar and oxygen, which is the result of disrupted translocation processes caused by stress.
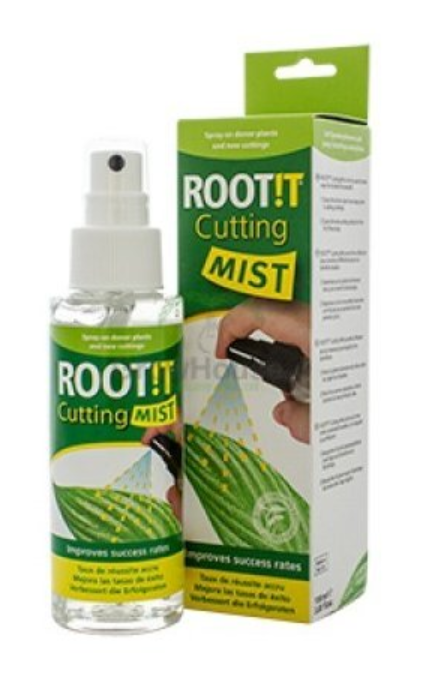
- ROOT!T Cutting Mist is a special cloning spray that we recommend applying to the mother plant two to three days before taking cuttings, as it helps keep sugar production in the leaves at a normal level. Keeping these levels closer to normal will greatly help reduce stress and the associated excessive production of ABA and ethylene.
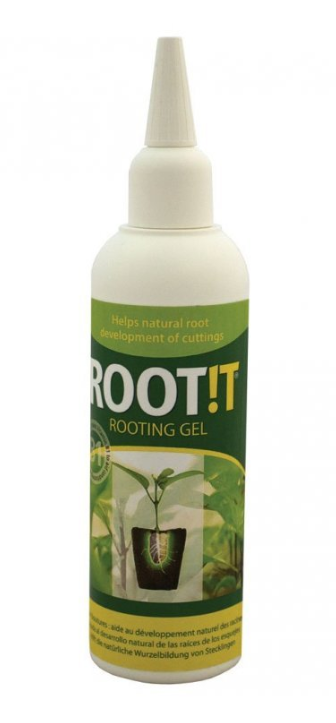
- ROOT!T Rooting gel creates a protective barrier around the cut site (where the cutting is taken), helping to keep the plant in a low-stress state. Because the plant does not experience enormous stress as a result of the effects of Rooting gel, it is able to regenerate its tissues much more quickly through the natural processes of plant renewal.
- Our TIP: ROOT!T First Feed forms a powerful combination during plant cloning with the above-mentioned products from the ROOT!T brand. Thanks to this combination, your cuttings will be destined for successful development.
- The nutrients and micronutrients contained in ROOT!T Rooting gel and the cloning spray ROOT!T Cutting Mist are precisely balanced so that they work at a molecular level in harmony with the plant’s natural physiology and support the formation of root buds in cuttings.
- You will achieve the best results in cloning if you supplement these three exceptional products, designed directly for the needs of cuttings, with Natural Rooting Sponges – a 100% natural propagation medium with the perfect balance of airiness and moisture, developed for rapid rooting of cuttings, as well as sowing seeds and their germination. ROOT!T Rooting Sponges can later be transplanted with the plant into any growing medium, such as soil or coconut fibre.
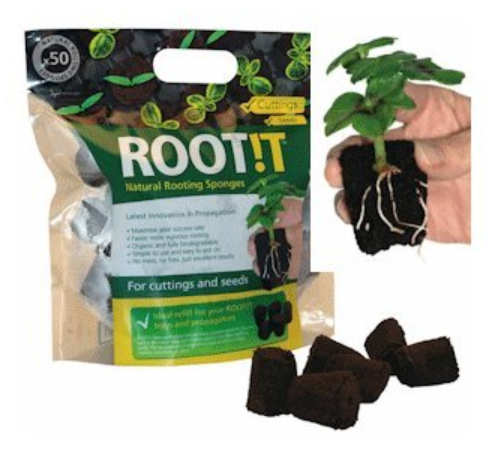
On the topic of cloning/cutting propagation, a more general article has also been published on our blog, which we link to below. If you have any questions related to successful cloning, whether of a purely practical nature or because you are interested in the indispensable helpers from the Root!t brand, we will be happy to advise you at the well-known address info@higarden.eu.
We also recommend these products:
What to read next?
- Cloning/cutting propagation
- How to use growing mats?
- How to grow mother plants and how to care for them?