
Speciality Crops
List of articles
Save Your Winter Vitality with Microgreens: A Powerful Health Boost from Nature
Winter is approaching, and with it the flu and cold season. How can we prepare for these discomforts and maintain strong health? One of the best answers is microgreens – small plants that have a huge impact on our health. In this article, we will look at what microgreens are, which types you can grow, and what effect they have on your health. We will also give you practical advice on how to grow them best and care for them.
What Are Microgreens?
Microgreens are young plants that are harvested shortly after germination, usually within two to three weeks of sowing the seeds. They are small but nutritious plants that are full of vitamins, minerals and antioxidants. These mini green treasures have many benefits for our health and are a great way to strengthen the immune system and supply the body with the nutrients it needs.
There are many different types of microgreens that you can grow. The most common include:
Spinach microgreens: They contain large amounts of iron and vitamin C, which helps with energy and immunity.
Broccoli microgreens: They are rich in vitamins A, C and K, and are known for their antioxidant properties.
Rocket microgreens: They have a sharp flavour and are full of vitamin K, which is important for healthy bones.
Onion microgreens: They contain sulphur and antioxidants that support heart health and reduce inflammation.
Effects of Microgreens on the Body
Adding microgreens to your diet can have many positive effects on your health. Thanks to their concentrated nutrition, they can:
Strengthen the immune system: The vitamins and antioxidants in microgreens help the body fight infections.
Improve digestion: The fibre in microgreens supports healthy digestion and blood sugar regulation.
Increase energy: Thanks to their iron and vitamin C content, microgreens can increase your energy and reduce fatigue.
Support healthy skin: The antioxidants in microgreens help protect the skin from damage caused by free radicals.
Practical Advice for Growing Microgreens
If you decide to grow microgreens, here are some useful tips:
Seed selection: Buy high-quality seeds specifically intended for growing microgreens.
Growing medium: Choose a suitable growing medium, such as peat or coconut substrate.
Light: Microgreens need plenty of light. If you do not have access to natural sunlight, you can use LED light sources.
Water: Keep the substrate moist, but not soaked. Misting is often better than watering from above.
Temperature: Make sure the temperature is suitable for the specific type of microgreens you are growing.
Conclusion
Microgreens are a small secret for maintaining health and vitality, especially during the winter months. Growing and consuming these small green crops can significantly improve your health and strengthen your immunity. Remember the quality of the seeds, proper care, and enjoy the rich benefits that microgreens offer.
Medicinal Herbs for Outdoor and Home Growing
Are you among passionate herbalists who enjoy making honest homemade tinctures or teas from various kinds of medicinal plants? Medicinal herbs of all kinds are an integral part of practically every garden, including indoor ones. Their enduring popularity, stretching far back into history, is due not only to their pleasant fragrance but above all to their beneficial effects on mental and physical well-being. In this article, in addition to traditional species, we will also focus on less well-known medicinal plants. What is more, you can grow them not only in the garden, but also at home.
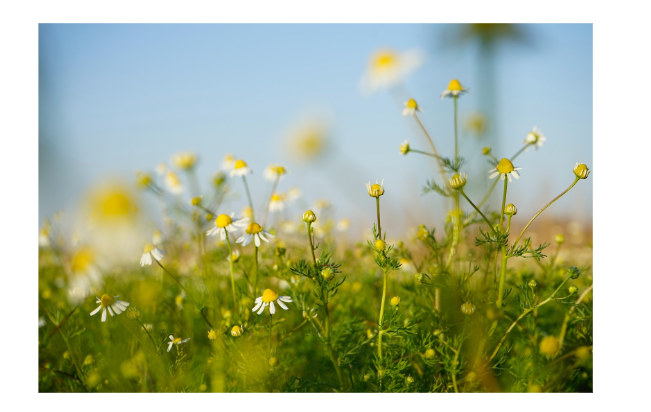
When medicinal herbs are mentioned, many of us immediately think of common chamomile. And why not, when this plant is also known as medicinal chamomile, which is why its species name, familiar to many, directly invites us to think of it. Usually, however, it is chamomile growing in the wild, as we can see in the picture. You can buy chamomile seedlings in specialised shops. Not only fresh and extra-high-quality chamomile can always be at hand if you pre-grow it from seed in a greenhouse (see separate article: How to grow in a greenhouse?). In the colder months, do not forget about greenhouse heating. If you have a complete grow box at home, then there is nothing to solve and you can harvest all the medicinal plants mentioned here all year round without having to step outside.
Some of the plant species we recommend below are often grown mainly for their beauty as ornamental perennials. However, they are often also herbs with a beneficial effect on human health. Other traditional medicinal plants you will love include:
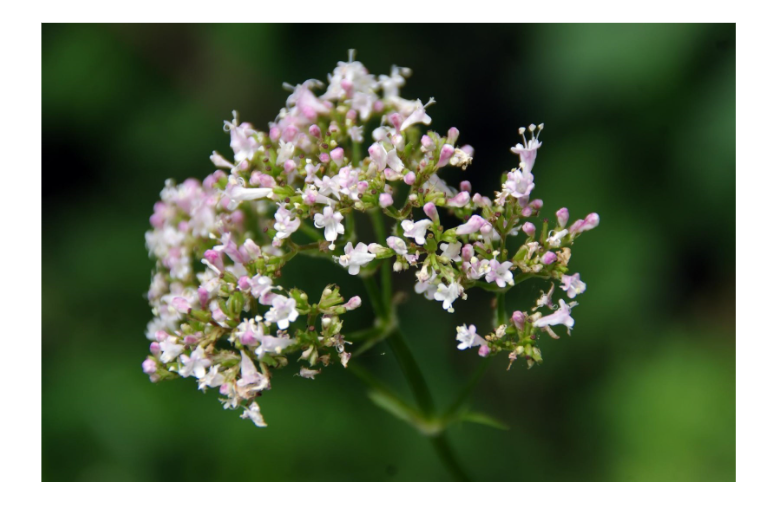
- common valerian (Valeriana officinalis): the medicinal herb from the introductory photograph, whose Czech species name clearly signals its beneficial and especially sedative effects on the human body, will adorn any garden with its dense inflorescences full of small white or pinkish flowers. You may also know valerian by the folk name baldrian. It has been used in natural medicine since the Middle Ages. This medicinal plant, which becomes poisonous in high concentrations, has been used by people in small amounts since time immemorial, among other things against insomnia, nervousness, anxiety, depression or stomach cramps. Interestingly, it is one of the first herbs to have been processed homeopathically. In addition to the sedative effects mentioned above, valerian is a powerful natural antioxidant that effectively combats the effects of free radicals. For medicinal purposes, only the roots of valerian with rhizomes are used. The above-ground parts of valerian are not used.
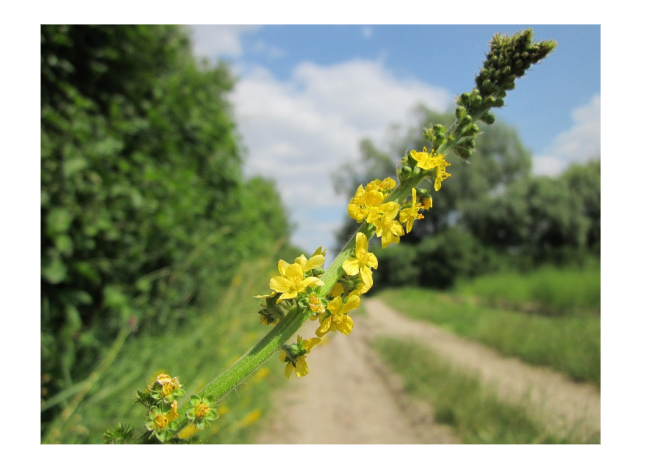
- common agrimony (Agrimonia eupatoria): agrimony flowers are yellow and have a characteristic fragrance reminiscent of apricots. In terms of cultivation, it is an undemanding herb for which sufficient light is particularly important. From a medicinal point of view, agrimony is well known for its anti-inflammatory effects. This popular herb, usually growing to a height of just under one metre, is also processed for the treatment of liver disorders. Interestingly, the flowering aerial parts of common agrimony were already used by the ancient Egyptians.
- Mauritanian mallow (Malva mauritiana): striking pink-purple flowers, reaching up to 5 cm in size, are a decoration for any garden or balcony. In addition, mallow, which grows to a height of up to one and a half metres, is used for inflammation of the upper respiratory tract. This is due to its high content of mucilaginous substances. Growing mallow is exceptionally easy. A decoction of Mauritanian mallow is also used in folk medicine to address skin problems, including the healing of inflamed wounds. Last but not least, the colourful flowers are an edible decoration suitable for a wide range of dishes and beautifully colour any tea blend.
Interesting medicinal plants that are often forgotten
There are also various kinds of useful herbs that our great-grandmothers would not have given up, but which over time have fallen into obscurity. This category includes, for example:
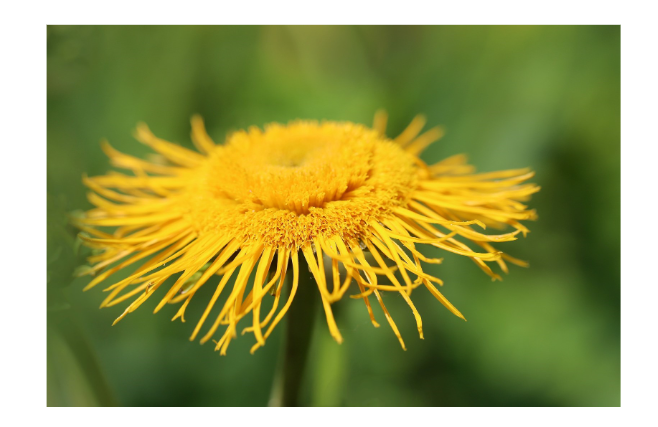
- elecampane (Inula helenium): on this plant, which produces unmistakable sulphur-yellow flowers (see picture), the most valuable part of all are its roots, which are collected in both spring and autumn and have the potential to address metabolic problems ranging from loss of appetite to poor digestion. They also help to relieve spasms in the respiratory tract. In folk medicine, elecampane is used in the form of tea, tincture or syrup. For example, for bronchitis.
- marshmallow (Althaea officinalis): this is another medicinal plant that is often grown only for decoration, although all its parts (root, leaves, flower) have also been collected for medicinal purposes since ancient times. From an aesthetic point of view, its delicate pink flowers are particularly attractive. It is another medicinal plant containing mucilaginous substances that make expectoration easier and soothe the irritated mucous membrane of the respiratory tract. However, marshmallow is also used in natural medicine, for example, for inflammation of the urinary tract or diarrhoea. The greatest effects of marshmallow are attributed to its macerated roots.
Proper storage will preserve valuable substances and the original fragrance
Whether the medicinal herbs mentioned above will decorate your outdoor garden, balcony or terrace, or whether one herb will interest you so much that you decide to set aside a place for it in your grow tent and ensure a year-round supply, do not underestimate the proper storage of fresh or dried herbs. In this respect, a separate article will help you: How to store your harvest properly?
If you would like to ask us anything, we are here for you at the well-known e-mail address info@higarden.eu.
We also recommend these products:
What to read next:
Strawberry Plants After Harvest. How Should You Care for Them?
It would be a great pity to neglect strawberry plants after fruiting. On the contrary, after harvest they need your care. And this applies to both the plant and the soil. It is high time to treat the beds from which you have recently harvested sweet and juicy fruit. Avoid unnecessary mistakes so that you can enjoy a rich strawberry harvest again next year!
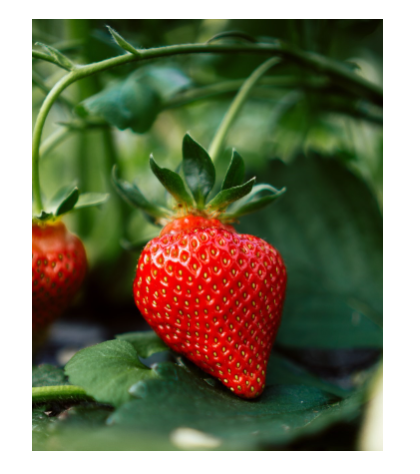
At this time, the strawberry crop is usually in, to put it mildly, an undesirable condition, with weeds present in the compacted soil (nettles, dandelions, chamomile, thistle, etc.) and in the rows between you may notice runners spreading and forming new plants. It is best to remove weeds by hand and lightly hoe the strawberry plants. For larger areas, spraying can then be applied. Cutting runners off the strawberry plants effectively prevents the clumps from weakening, and the cut runners can also be used to prepare new planting material.
Strawberries also spread readily on their own. That is why, when renewing strawberry beds after harvest, you may also come across completely new seedlings. The closer they are to the original (mother) plant, the greater their potential. You can transplant such plants into a pot or window box and keep them for autumn.
You will achieve the best yields with two-year-old strawberry plants. For three-year-old crops, already expect that very few strawberry stands remain healthy. Strawberry plants of this age are usually already affected by diseases or pests, and next year new planting material will bring you much greater benefit and pleasure.
Cutting the leaves across the whole area stops assimilation
Many growers then make the mistake of cutting back strawberry leaves across the whole area. The fact that the strawberry plants in your bed have already fulfilled their purpose for the season and finished fruiting does not mean that these plants no longer need to assimilate. And it is precisely by cutting the leaves across the whole area that you prevent further uptake and conversion of substances by the plant, which then remains significantly weakened. So how should you correctly remove leaves from strawberry plants?
It takes patience and it is best to cut off only unhealthy or damaged leaves one by one. High-quality garden shears will make the job easier.
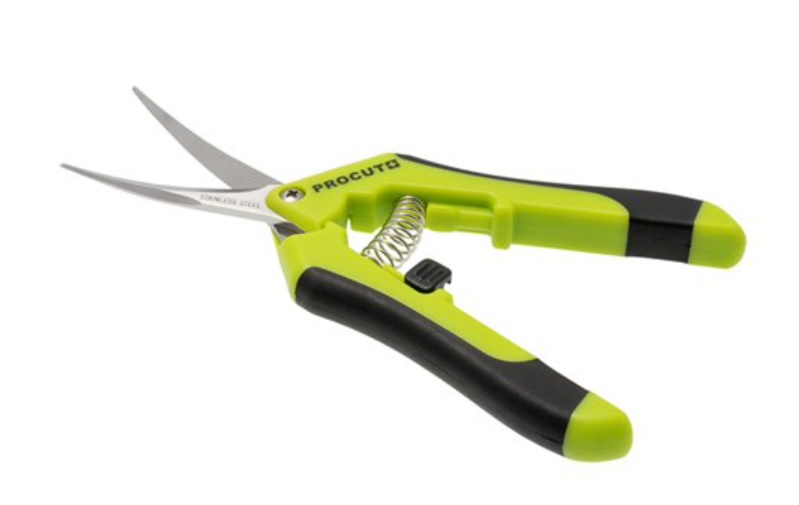
Do not be misled by the fact that large-scale growers, and following their example many gardeners as well, remove leaves after harvest by simply mowing the crop, and if they do not damage the crowns of the plants, the strawberry plants will have plenty of new leaves by winter. This does not apply to everbearing varieties, and by winter they will not have had time to renew their leaves. For this reason, they would then be at risk from frost. It is not worthwhile to mow young crops across the whole area either.
Suitable fertilisation after strawberry harvest and the importance of watering
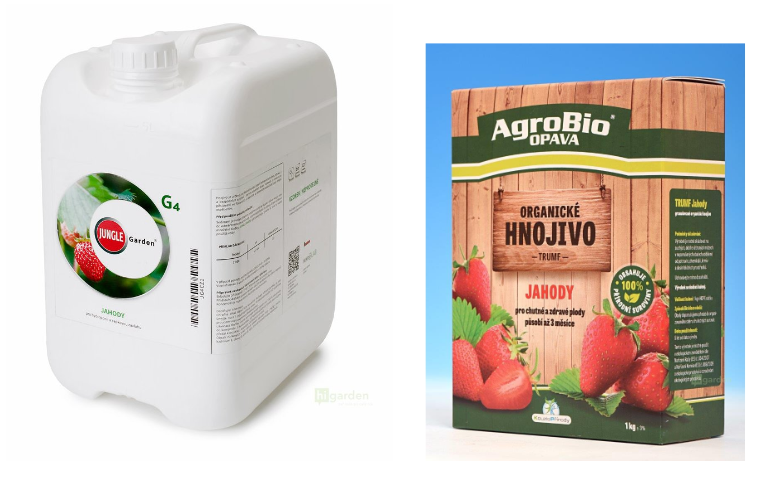
The strawberry plants have already used all their energy and available nutrients to produce flowers, and especially fruit. To fertilise such exhausted strawberry beds after harvest, you can use both special fertilisers for strawberries and basic plant nutrition with a balanced ratio of nitrogen, phosphorus and potassium (see separate article: NPK – what is it?). The advantage is that high-quality fertilisers for strawberries are also produced in the Czech Republic. Here is the proof:
- Jungle GARDEN G4 – strawberries (in the picture) together with the BASE component. We also recommend the separate article: Jungle Indabox maximises the advantages of chelate binding.
- AgroBio TRUMF is suitable if you prefer purely organic fertiliser for strawberries, as well as other small fruit crops.
The world-famous brand Terra Aquatica produces the fertiliser PermaBloom, which you can use not only for strawberries, but also for all other common crops that produce repeatedly.
Strawberry plants belong among plants that usually root relatively shallowly and we cannot count on them having a very branched root system. Sufficient watering after harvest is therefore very important so that a lack of moisture in the winter months does not cause the plants to die. Before the onset of winter, every strawberry plant that has finished fruiting needs to be supplied with both water and nutrients.
From September onwards, avoid a higher content of nitrogen and magnesium in strawberry nutrition.
Later comes the winter protection of strawberry plants. This will also decide what kind of harvest you can look forward to a year later. Crops planted in autumn can be covered for winter with conifer branches. Bear in mind that everbearing varieties will be more susceptible to frost. Non-woven fabric helps in the fight against severe frosts. non-woven fabric.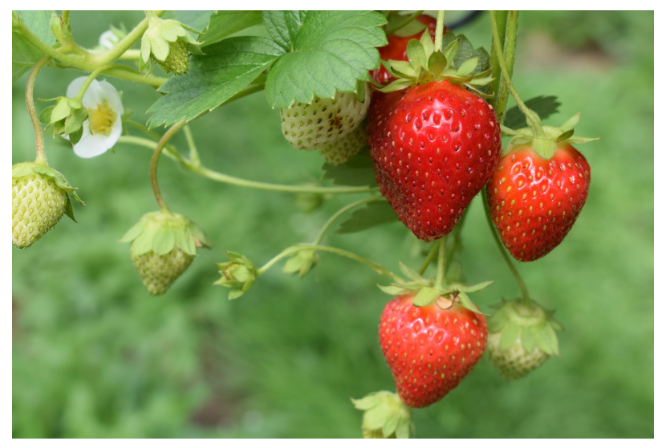
Regularly renew strawberry beds
Simply put, the soil in a strawberry bed needs to be loosened and fertilised after harvest.
When it comes to renewing strawberry beds, it is worth relying on the proven ¼ area rule. This means that every year we renew at least a quarter of the bed, where we prepare exactly the kind of soil that suits strawberry plants best and in which they are able to resume growth most quickly after winter, namely light, airy and slightly acidic soil. Light soil also warms up more easily. A digital pH metre for substrate, equipped with a suitable type of probe, will help you measure the acidity of the soil.
If you overdid the watering the first time round and your strawberry beds were waterlogged this year, as a result of which they only rotted, do not despair. You now know that suitable soil will also become the reason why you will be able to grow vigorous plants next year, producing beautiful and tasty fruit. You can solve moisture in the beds by placing the strawberry plants on a dry material (wood wool, cardboard, etc.). Beds also dry out more easily under black film.
If you would like to ask us anything, please do not hesitate to write to us at the well-known e-mail address info@higarden.eu. We will be happy to advise you!
We also recommend these products:
- Vermiculite
- Aerated HERCULES pots
- LED Set 720W Lumii Black
What to read next:
- How to grow delicious strawberries at home?
- How to grow chilli peppers?
- BIOTABS – organic fertilisers and soil amendments
How to Grow Ornamental Chilli Peppers
Ornamental chilli peppers with brightly coloured fruits are a beautiful addition to gardens and interiors, but growing them can be quite a challenge for beginners. That is why we have prepared a guide to growing ornamental peppers, in which you will learn everything about germination, planting, and caring for these beautiful plants.
Ornamental peppers belong to the same genus as other chilli varieties, but they are cultivars bred for dwarf growth and colourful fruits. Because breeders’ main goal was not heat, flavour, or aroma, but appearance, they often have bitter and not very hot fruits. Another important feature of ornamental peppers is that the fruits usually grow at the tops of the plants, rather than between the leaves, as is the case with most edible varieties. Popular ornamental chilli varieties include:
 Chilli pepper CANCUN is an ornamental variety with brightly red, orange to dark purple round fruits and small leaves. The plants are bushy with trailing branches and reach a maximum height of 50 centimetres. The CANCUN variety is suitable for growing in beds, greenhouses, and pots.
- Chilli pepper AZTECO is an ornamental chilli with elongated triangular fruits that are green at first and turn bright red to burgundy-black as they ripen. An ornamental pepper variety suitable for growing in growing containers, greenhouses, beds, or indoors. Although it is an ornamental variety, AZTECO has fruits that reach a heat level of up to 450,000 SHU.
When and how to plant ornamental peppers
One of the most common mistakes made by beginner growers of ornamental peppers is planting too early. Garden centres often sell seedlings much earlier than the weather is suitable for planting them outside. Start moving seedlings to an outdoor location only after the last frosts have passed. It is also important that the night-time air temperature does not fall below 15 °C.
Seeds of ornamental pepper varieties need a temperature of at least 21 °C to germinate, and if you want to sow them directly into a bed or greenhouse, wait until the soil has warmed up sufficiently. In our climate, this can take quite a long time, which is why many growers of ornamental peppers prefer to pre-grow seedlings from seed indoors. You can find out how to do this on our blog.
Read also: Chilli peppers: How to germinate and pre-grow them
Plant ornamental pepper seedlings with three to four true leaves into the soil, 12-24 centimetres apart, in holes approximately 5 centimetres deep. Ornamental chilli plants tend to be small and branched and usually do not require support.
Choosing a site for planting chilli
Ornamental peppers need at least 6-8 hours of sunlight a day, so look for a sunny spot in the garden. The advantage of ornamental chilli varieties is that the plants are relatively low and do not shade other plants in beds. You can also grow the plants in medium-sized fabric or plastic pots.
Make sure that the soil for growing chilli has adequate drainage and retains water well. Ornamental peppers are relatively sensitive to drought, and the growing medium should never dry out completely. If the soil at your chosen site does not seem entirely suitable, you can improve it with compost, worm humus or a quality horticultural substrate.
How to care for ornamental peppers
- Light
Ornamental peppers thrive best in full sun, which gives them the energy to produce flowers and fruits. If you decide to grow the plants indoors and want to achieve a plentiful harvest of chilli peppers, it is advisable to supplement the plants with artificial lighting for indoor plant cultivation.
- Soil

Ornamental peppers will grow best in slightly acidic soil (pH 6.0 to 6.8) rich in nutrients. If you are growing outdoors, remember to enrich the soil in beds in spring with compost, vermicompost, or a quality horticultural substrate. When growing chilli in pots, use a medium to heavily pre-fertilised light substrate with perlite.
Read also: How to choose a horticultural substrate
- Watering
Ornamental peppers do not tolerate drought, but be careful not to overwater the substrate. Water whenever the surface of the soil has dried out, but there is still enough moisture in the root zone. Check plants grown in pots more often, as the soil in them dries out faster.
- Temperature and humidity
Peppers like hot weather, so they thrive best in full sun and grow faster at temperatures above 24 °C. Be careful when planting seedlings into cold soil, as this can cause the plants to remain stunted throughout the growing season.
- Fertiliser and nutrition

Ornamental peppers are somewhat less demanding in terms of nutrition than varieties intended for consumption, but they still need a steady supply of nutrients. During the vegetative growth period before flowering begins, the plants need more nitrogen for rapid development of leaves and the root system. During flowering, ornamental peppers need more phosphorus and potassium, which support flowering. Fertilisers for growth are usually labelled “grow”, and fertilisers for the flowering phase as “flower”. A simple solution is special fertilisers for growing chilli.
- Pollination
Like other pepper varieties, ornamental ones have perfect flowers, which means that each plant is equipped with male and female reproductive organs and can reproduce without pollinating insects.
Would you like to start growing chilli peppers, but are missing the equipment? In our e-shop you will find everything you need for growing chilli indoors and outdoors.
How to Grow Chilli Peppers Under Artificial Lighting
 Autumn is waiting just around the corner, and for many chilli pepper growers that means the season is coming to an end. Not for everyone, though! Some chilli enthusiasts are not discouraged even by bad weather and grow their beloved plants throughout the winter as well. With the possibilities offered by indoor growing, you can not only overwinter chilli, but also grow tasty peppers. Not sure where to start? In the following lines, we will teach you the basics of indoor growing and introduce the essential equipment you will need.
It is likely that chilli peppers originally came from Central or South America and were first cultivated by the people of Mexico. Chilli reached the European continent only towards the end of the 16th century, but this unusual plant quickly won over its admirers, which gradually led not only to cultivation all over the world, but also to the emergence of five distinct chilli species.
- Capsicum anuum includes many common varieties, such as bell peppers, wax peppers, cayenne, jalapeños, Thai peppers, chiltepin and all forms of chilli peppers from New Mexico.
- Capsicum frutescens includes tabasco, malagueta, labuyo, piri piri and kambuzi.
- Capsicum chinense includes the hottest peppers, such as naga, habanero, datil and Scotch bonnet.
- Capsicum pubescens includes South American rocoto peppers.
- Capsicum baccatum includes South American pepper varieties
The variability of the Capsicum species has allowed growers to breed hundreds and possibly thousands of cultivars with different properties and flavours, but all peppers have one thing in common: they only thrive in warm weather. As soon as the temperature outside drops below 15 °C, their plant growth stops and they cease to bear fruit. Although you can theoretically overwinter chilli in a winter garden or on a windowsill, in our latitude there is little light during the winter months and the plants will probably suffer or even die. Indoor plant growing under artificial lighting consists of creating favourable conditions so that plants can grow even without natural sunlight. Growing chilli indoors brings many advantages, above all:
- Year-round harvest: You no longer have to wait for summer! Enjoy fresh chilli peppers regardless of the season.
- Pest protection: Growing under cover in controlled conditions significantly reduces the risk of common outdoor pests, such as slugs, caterpillars, spider mites or aphids.
- Controlled environment: Consistently stable humidity, temperature and high light intensity allow plants to achieve optimal growth. Harvest more, and faster!
- Efficient use of space: Thanks to grow tents, you can grow your own peppers even without an outdoor garden or balcony. The efficiency of indoor growing allows you to produce a huge amount of harvest even in a small space.
Basics of indoor chilli growing
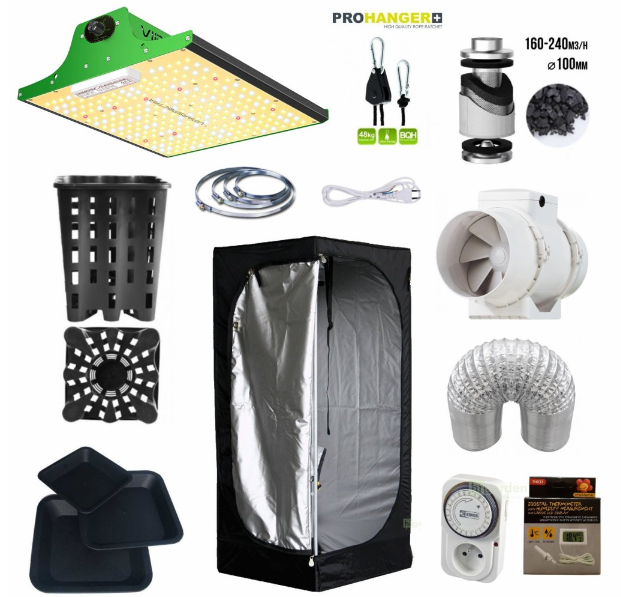
To start growing chilli under artificial lighting, you will need basic equipment for indoor growing.
Grow tent
A grow tent, also known as a grow box, is essential for creating a controlled environment. It provides a space where you can regulate light, temperature and humidity. Grow tents are made in various sizes, so it is possible to grow just a few plants in a small grow box or, conversely, turn an entire room in a flat into a flowering garden.
Grow lighting
Grow lighting is the most important and probably also the most expensive component of your indoor garden. Since plants grown indoors in a grow box are not exposed to sunlight, they are entirely dependent on the energy from grow lights. Quality grow lighting must have sufficient intensity and the correct wavelength, which is why it is necessary to use full-spectrum LED lights designed specifically for use in agriculture.
You may be interested in: Light spectrum and its effect on plant growth: Outdoor vs greenhouse vs indoor
 Ventilation and air circulation
Plants need a constant supply of fresh air for their growth. The grow tent or room must be ventilated sufficiently to prevent mould, rot and other plant diseases. The main drivers of your indoor garden are two fans: an extract fan, which serves to vent the “stale” air from the growing space, and a circulation fan to move air around inside the grow box. Extract fan is simply connected to the purpose-made sleeve in the upper part of the grow tent and, if necessary, can be supplemented with a odour filter, which minimises odour from the grow room. Place circulation fans with an oscillator inside the tent so that the air flow is directed slightly above the tops of the plants in the direction of the grow lights.
You may be interested in: How to grow ornamental chilli peppers
Temperature and humidity control
Chilli peppers thrive in a warm and slightly humid environment. While you cannot do much about the weather outdoors, when growing indoors it is essential to constantly monitor and, if necessary, adjust the microclimate in the growing space. You will need a proper thermometer with hygrometer, or possibly heating for the grow box, dehumidifier or air humidifier. The optimal temperature and humidity values in the growing space will vary depending on the species grown, but in general chilli peppers prefer temperatures in the range of 22-26 °C and relative humidity of 70-90%.
Nutrients and soil
When growing indoors, you can grow chilli in the traditional way in pots planted in horticultural substrate, but you also have the option of trying less common methods of plant cultivation. Hydroponics consists of growing plants without soil using a nutrient solution and is an extremely efficient and clean method. You can use a wide range of growing substrates, for example coconut or rockwool, which also allow you to try various fertilisers, from fully organic to highly effective mineral ones. Do not be afraid to experiment! The beauty of indoor growing also lies in the possibility of changing or adjusting the growing technique at any time according to your needs.
Would you like to start growing chilli under artificial lighting, but do not know where to begin? We have prepared complete indoor chilli growing sets for you, with which even a beginner can manage it with ease. We also recommend visiting our blog, where you will learn everything important about indoor growing.
Grow sprouts or microgreens at home and beat spring fatigue
 The first spring rays are already slowly awakening nature from its winter sleep, and it is the best time to give your sleepy body a proper dose of vitamins, antioxidants and minerals in the form of juicy microgreens and sprouts that you grow yourself. Not sure how? Do not worry, with our guide to home sprouts and microgreens you can manage it with ease.
Although their inconspicuous appearance does not suggest it at first glance, young vegetables, legumes or cereals in the form of sprouts or microgreens are an excellent source of nutrients, vitamins, minerals, antioxidants and other health-beneficial substances. Some types have up to 40 times higher nutritional value than fully developed plants, and a scientific study (Wojdyło,Nowicka) confirmed that:
- sprouts have effective antioxidant capacity because they are rich in polyphenols and L-ascorbic acid
- microgreens are characterised by a high content of carotenoids, chlorophyll and organic acids, without any sugars
- some sprouts (broccoli, radish, lentils) and microgreens (radish, amaranth, lentils) can be included in the daily diet as superfoods and functional foods
Microgreens or sprouts, what is the difference between them?
The terms sprouts and microgreens are often confused, but they are two different categories of plants. When growing sprouts, we only soak the seeds in water and harvest them before the first leaves appear. The whole process usually takes about a week, and you will not need any growing medium or artificial lighting.
Microgreens grow a little longer than sprouts, usually 7 to 21 days after the seeds germinate, which is long enough for the first small leaves to appear. Unlike sprouts, microgreens require a light source and a growing medium for the roots to anchor into. While you can eat sprouts whole, including the split seed, with microgreens we only eat the above-ground part, namely the stems and young leaves.
What equipment do I need for growing sprouts and microgreens?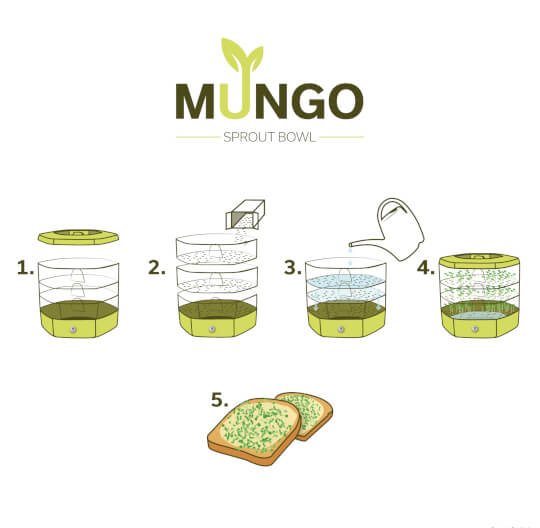
The main differences between growing sprouts and microgreens are the need to use a growing medium and the need for light. Although the process for growing sprouts and microgreens differs in several respects, some equipment can be used for both purposes, and the seeds used for growing sprouts and microgreens are the same.
OUR TIP: Would you like to grow sprouts and microgreens at the same time, but have little space or do not want to invest in two sets of equipment? Try the Mungo sprouting tray Mungo, in which you can grow up to three types of sprouts and microgreens at once, without using any growing medium.
How to grow sprouts
The simplest method for growing sprouts is to spread rinsed seeds in a shallow container and regularly rinse them with water until they germinate.
- First, cover the seeds with cold water and remove any impurities that float to the surface. Soak the seeds for 8-12 hours (overnight) or until the husks soften.
- Pour off all the water and let the seeds drain on a tray with drainage.
- Spread the seeds evenly, place the perforated tray on the base tray and leave the seeds to germinate in the fridge.
- Rinse the seeds every day with clean cold water and let them drain again until they germinate.
Growing equipment for growing sprouts
 How to grow microgreens
When growing microgreens, we do not soak the seeds, but sow them directly into a moistened growing medium. This can be mats made of mineral wool or other materials, or horticultural growing substrate that does not contain added nutrients (for example, seed and propagation substrate, light-mix, coconut substrate).
Microgreens also need a light source; you can grow them on a windowsill or use grow LED lights for microgreens. If you choose artificial lighting, it is more advantageous to grow microgreens in a grow tent, where they will have perfect conditions for growth and you will make better use of the electricity invested.
- Fill the tray with growing medium. If you are using soil or a similar substrate, fill the container to the brim and press it down lightly.
- Moisten the substrate with a sprayer.
- Sow the seeds very close together so that you achieve the richest possible harvest.
- Place the growing container on a window or under a grow LED light.
- Keep the substrate moist until it is time to harvest.
Growing equipment for growing microgreens
- tray or microgreens sowing tray
- growing medium (mineral wool growing mats or hemp fibres, perlan, horticultural substrate)
- hand sprayer
- grow LED light for microgreens (optional)
- grow tent for microgreens (optional)
How to choose seeds for growing sprouts and microgreens
A number of edible cereal species can be grown as sprouts or microgreens (barley, wheat, maise, oats, rice) or legumes (lentils, peas, chickpeas, beans). For growing sprouts and microgreens, use only seeds that have not been treated with pesticides or other chemical substances.
However, all sprouts and microgreens have one thing in common: they are packed with nutrients and flavour that will certainly pleasantly surprise you with its intensity. Do not be afraid to experiment and alternate plant species. You can also try various seed mixes for growing microgreens or our practical microgreens growing kits for beginners. To begin with, we include a list of our most popular sprouts and microgreens.
The End of Summering. Move Houseplants Back Indoors
Summer is ending, and with it the period when some popular houseplants could be moved outdoors for the season. Outside, they safely gathered life-giving energy through fresh air, natural sunlight and gentle summer rain. During September, however, it is time to move houseplants back indoors. How can you do this so that they survive the return to the interior in the best possible condition?
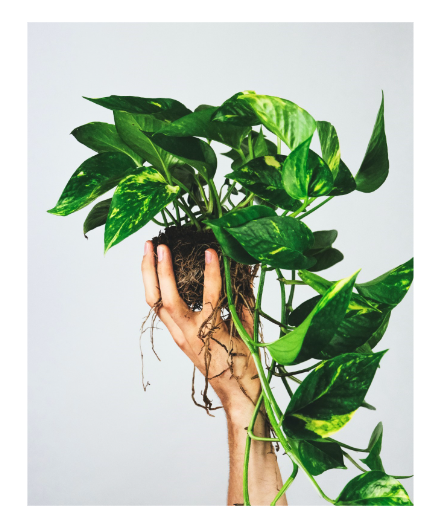
Well-known houseplants that particularly benefit from the above-mentioned summer outdoors include cacti and succulents. Ficus, hibiscus, spider plants and yuccas are also among them. If you left them outside over the summer, they will have gained plenty of new strength, which will allow them to bring you even more joy during the long winter months. However, if you do not manage to move them home sensitively before the heating season begins, an unhappy scenario may occur in which the leaves start to lose colour or even fall off. And as is well known, weakened plants also become much more susceptible to attack by various pests (see separate article: How to deal with pests?).
However, returning indoors is not a simple matter for a plant. On the contrary, it can be quite a shock. A different temperature, light intensity or air humidity – these are all factors, or rather significant changes, that are often forgotten, despite the fact that some houseplant species are highly sensitive to the changes mentioned. That is precisely why we should make this “move” easier for houseplants. The best approach is to do it gradually (see below).
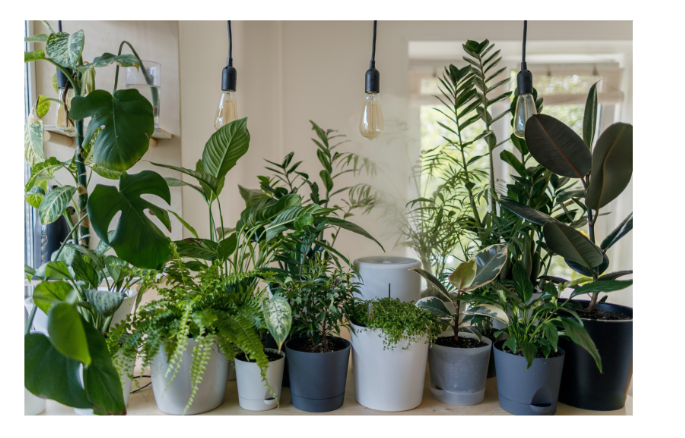
- First of all, all houseplants that have been outside over the summer need to be thoroughly checked and any pests identified. If one of your plants is infested, you will usually notice it by looking at the underside of its leaves, where pests that attack houseplants are most commonly found.
Our TIP: AgroBio INPORO is a natural product that protects green houseplants during the occurrence of pests or fungal diseases.
- A reliable signal that it is time to bring houseplants into the warmth of the home is given by night-time temperatures. Once they fall below 10 °C, it is high time to put the houseplants somewhere safe, and if they are tropical species, move them indoors even earlier just to be safe!
- Do not be too hasty, though! A proven approach is to change the outdoor position before moving houseplants into the flat. First, simply move the plants from a sunny spot to somewhere shaded.
- Wait a few days, and then you can safely move the houseplants to a cooler room. Avoid the common mistake of moving them straight onto a windowsill or a short distance from the heater.
- Now it is necessary to set the right regime for the houseplants. You do this mainly by reducing watering to the absolute minimum. In winter, houseplants receive much less light and the plants enter a period of vegetative rest. They therefore need less water and fertiliser. If you notice yellowing leaves or roots rotting more easily, you are probably overwatering unnecessarily.
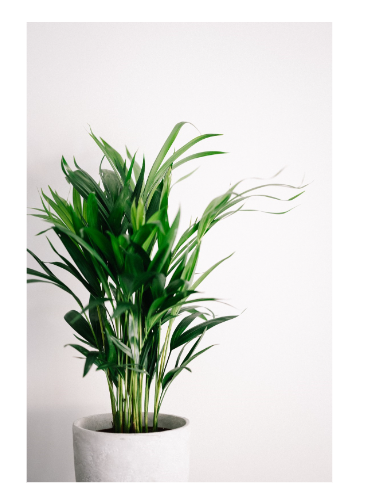
It is sometimes truly remarkable how much houseplants benefit from spending the summer outdoors in fresh air, and they quite literally come into their own before your eyes. In addition to becoming hardier and generally more resilient, they also develop much firmer leaves and, in some cases, larger and more beautiful flowers. And as they grow more beautiful, their original flowerpot may no longer be enough. In such cases, they will survive the winter better if you do not wait until spring, the usual time for repotting plants, to move them into a larger flowerpot. Inspiration for choosing a new flowerpot can be found in the following separate articles:
Our TIP: If you are looking for a fertiliser for palms, dracaenas or other types of green houseplants, try the mineral fertiliser FANTAZIE from the traditional Czech brand AgroBio. Thanks to its content of humic, stimulating and anti-stress substances, it is very beneficial for these houseplant species.
We also recommend these products:
- Smart flowerpot Cobble or Smart flowerpot Cobble Trio
- KP Flowering Houseplants 100 ml
- AgroBio INPORO Green Houseplants
What to read next:
How to Grow Microgreens
Fully grown sprouts that we harvest and consume before they reach the stage of young plants are a long-standing trend in healthy nutrition. Growing them is also extra easy. Read on to find out how!
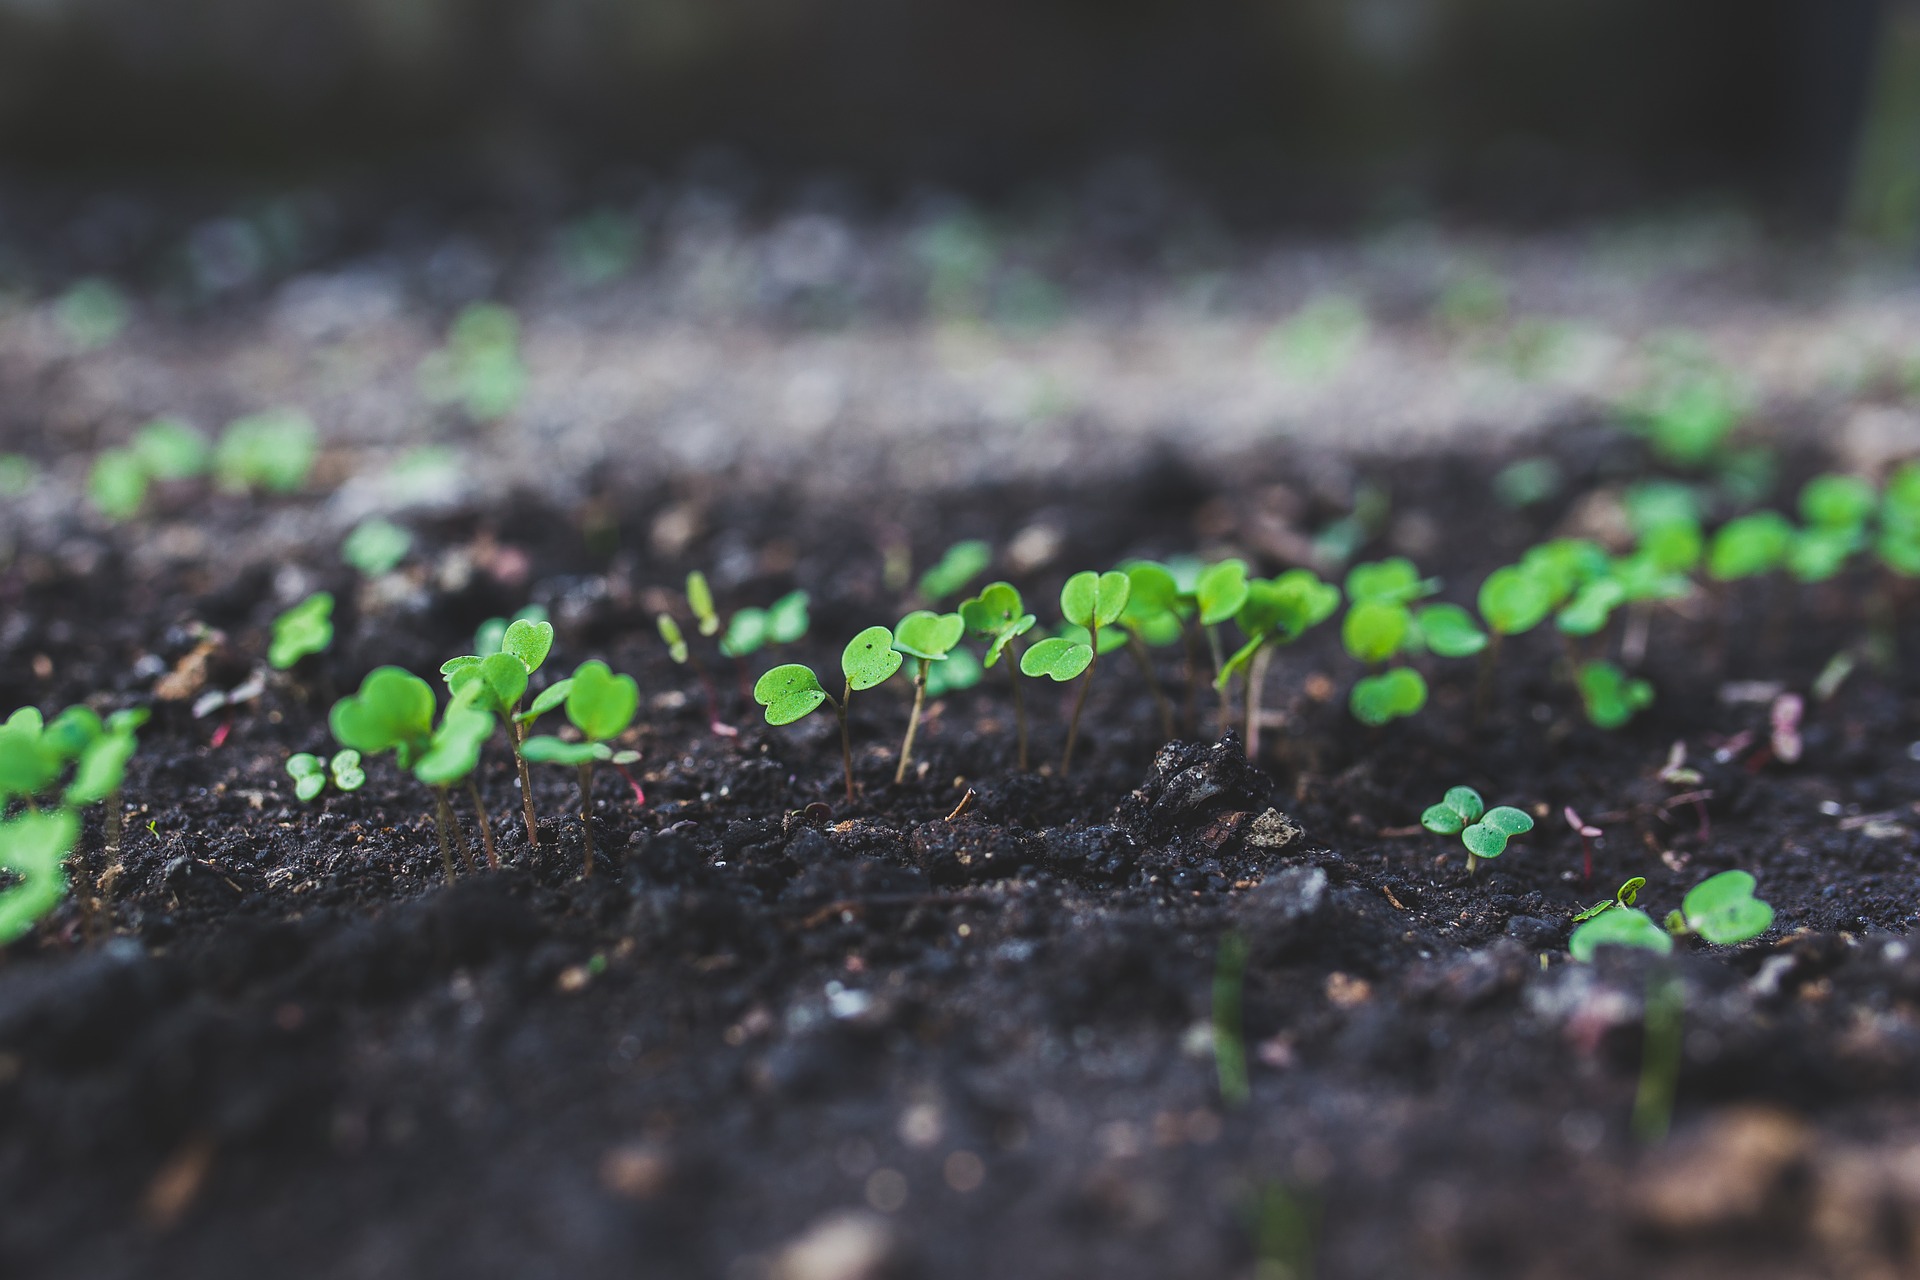
First of all, it is worth keeping in mind that microgreens also need a quality foundation in order to thrive and benefit your health. However, the very fact that growing MICROGREENS is “easy” often leads in practice to reduced care for the sprouts and, as a result, poorer growth or final quality. And that is certainly a pity, because this is a real vitamin bomb.
The quality of the substrate matters
The most common mistake when it comes to growing microgreens is poor soil. This can cause unnecessary problems when growing “microherbs”. We mean mould, uneven growth or even a complete stop in growth.
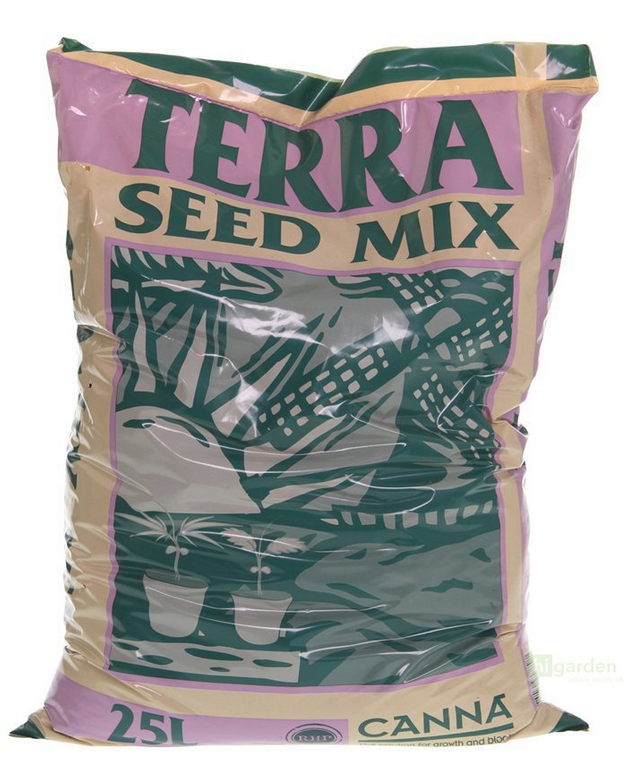
Also remember that with microgreens you consume practically everything the soil contains. A 100% organic substrate composition without added artificial fertilisers is a given here. And which substrate is suitable for cultivating microgreens? For this purpose, we can recommend for example Canna Terra Seed Mix.
How much substrate?
When planting microgreens, growers most often ask how much substrate to use in a pot or planter box. Although the seeds are packed with nutrients needed for successful germination and rooting, from the moment the sprout touches the soil and its roots begin to branch out, the young plant starts absorbing nutrients from the soil substrate. The answer therefore depends mainly on the herb variety you choose:
- Some varieties have large seeds and grow very intensively. These include peas, maise or sunflower. In such a case, the rule is: the more substrate, the better. Even a 6 cm layer is not too much.
- Varieties with smaller seeds are fine with a substrate layer about 3–4 cm thick; there is no need to overdo it. Typical examples include mustard or broccoli.
How do you plant microgreens?
Most of us gradually find our own way of planting microgreens. But you cannot go wrong if you take inspiration from the following points:
- Think through which microgreens variety will suit you. Do you already know what you will plant? Some seeds need to be soaked for half a day, for example pea, mustard or beet seeds. Depending on whether the chosen variety prefers a lit space, you may or may not cover it with a thin layer of soil.
- Use only seeds with no trace of chemical treatment for planting.
- Prepare everything you need for the job: quality substrate (planting medium), growing containers, seeds, water, etc.
- Pour the appropriate amount of substrate (see above) into the pot. Then moisten and compact the soil. A proven tool is a pressure sprayer (atomiser).
- This will give you a clearly defined and precisely prepared area intended for sowing seeds. It should be as smooth and as level as possible. Likewise, the sowing of seeds should be as even as possible. Excessive seed density in the substrate will mean that, although MICROgreens are MICRO, they will not have enough space for healthy growth. As a result, the risk of mould will also increase. If you spread the seed in the growing container only sparsely, you cannot expect microgreens.
- Next it is time to water the seeds, again as evenly as possible. For successful germination, moisture is more than enough; avoid wet substrate.
- The seed is covered at the beginning and it is also advisable to weigh it down with something. In addition to sufficient moisture, germination mainly requires darkness.
- Most microgreens appreciate being covered for just under a week. In the meantime, they will already have stretched nicely and, once uncovered, will green up quickly.
- Do not forget regular checks of the sown seeds! Remember that they must not dry out. Keep the substrate suitably moist throughout the entire germination process.
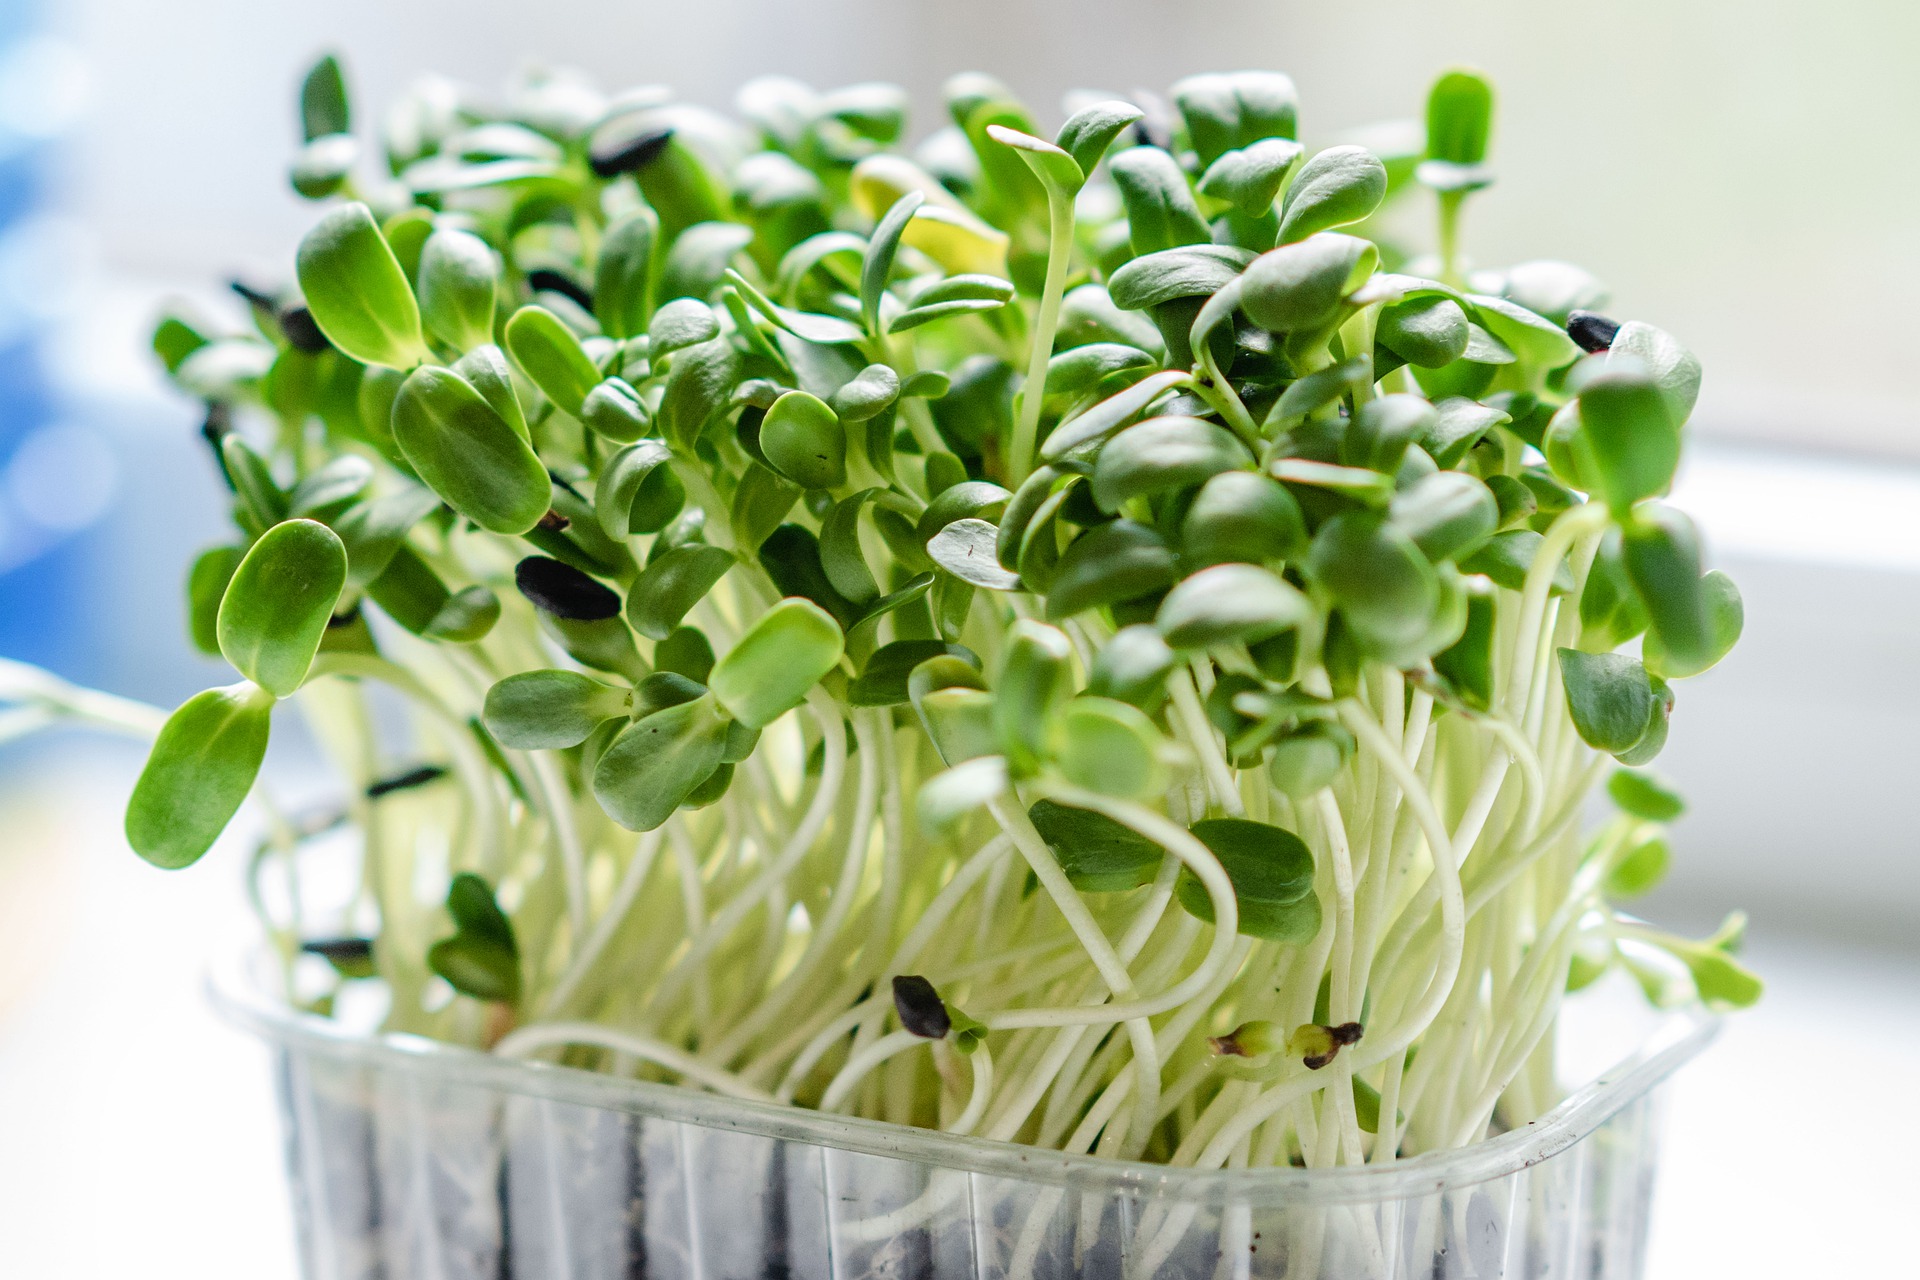
- As soon as the young plants are exposed to light, they will turn a rich green, or take on a healthy colour (red, yellow, purple or a combination thereof depending on the specific variety) as a sign of maturity.
How do you water microgreens?
While the plants are still only sprouts, from which the first roots are just emerging, water them in the usual way from above. Once they reach the bottom of the pot and at the same time the overall vegetation in the growing container becomes denser and denser, start watering from below.
Our TIP: Do not forget that when viewed from above, the substrate may appear dry, while the roots have enough moisture and further watering has already caused undesirable overwatering.
If you have any questions on the topic of MICROGREENS, we will be happy to answer them at the well-known address info@higarden.eu.
We also recommend these products:
- Canna Terra Seed Mix 25l (299 Kč)
- BioNova Bio Soilmix 50L (279 Kč)
- Pressure Sprayer PROPUMP, 2 l (249 Kč)
- Everything for growing microgreens
What should you read next?
- Expanded clay as a growing medium
- Indoor cultivation of plants and the savings associated with it
- How to grow mother plants and how to care for them?
How to Grow Delicious Strawberries at Home?
Do you know anyone who does not like strawberries? We certainly do not. Ensure a supply of fresh, organic-quality fruit all year round. All you need to do is follow the advice in this article, and shop-bought “artificial” strawberries will be a thing of the past. Here are our tips for a healthy harvest, grown at home, extra rich in vitamins and other beneficial substances for the body!

Let us get straight to the point. How can you look forward to a fairy-tale strawberry harvest several times a year?
- The key is to choose a suitable variety that bears fruit all year round (for example, the Rujana everbearing strawberry), as some types of strawberries only produce in summer. By contrast, the year-round ones will delight you for up to five years. There are also varieties that are more resistant to diseases than others.
- For a continuous supply of this favourite vitamin-rich fruit, a controlled growing environment will serve you best, namely a grow box or a room. A greenhouse or conservatory is also suitable.
- On a balcony or in the garden, in a self-watering planter or hanging pots, you can comfortably grow trailing varieties that form red fruit on long runners. Runners require their own care, namely trimming at the third offshoot, and in winter do not be afraid to cut them back completely.<
- For growing strawberries outdoors and indoors, growers have recently also taken a liking to fabric wall planters, which save space and create a strawberry decoration on any wall.
Whichever pot you choose, it is important to prepare it properly for strawberries:
- First, spread a drainage layer of expanded clay on the bottom of the pot for better water drainage, which also permanently reduces the risk of overwatering strawberries to a minimum.
- Then fill the pot or planter with soil up to the crown of the young plant. The substrate must not cover the crown, because the stems grow from it.
- Pots for growing strawberries should not be less than 35 cm in diameter. The root system of strawberries is rather shallow, but the runners definitely need space. Here you can choose from a wide range of pots and planters in a suitable size.
- Place the pots where they will receive as much sunlight as possible, or under a quality artificial light source. In winter, do not be afraid to place the pots near a radiator.<
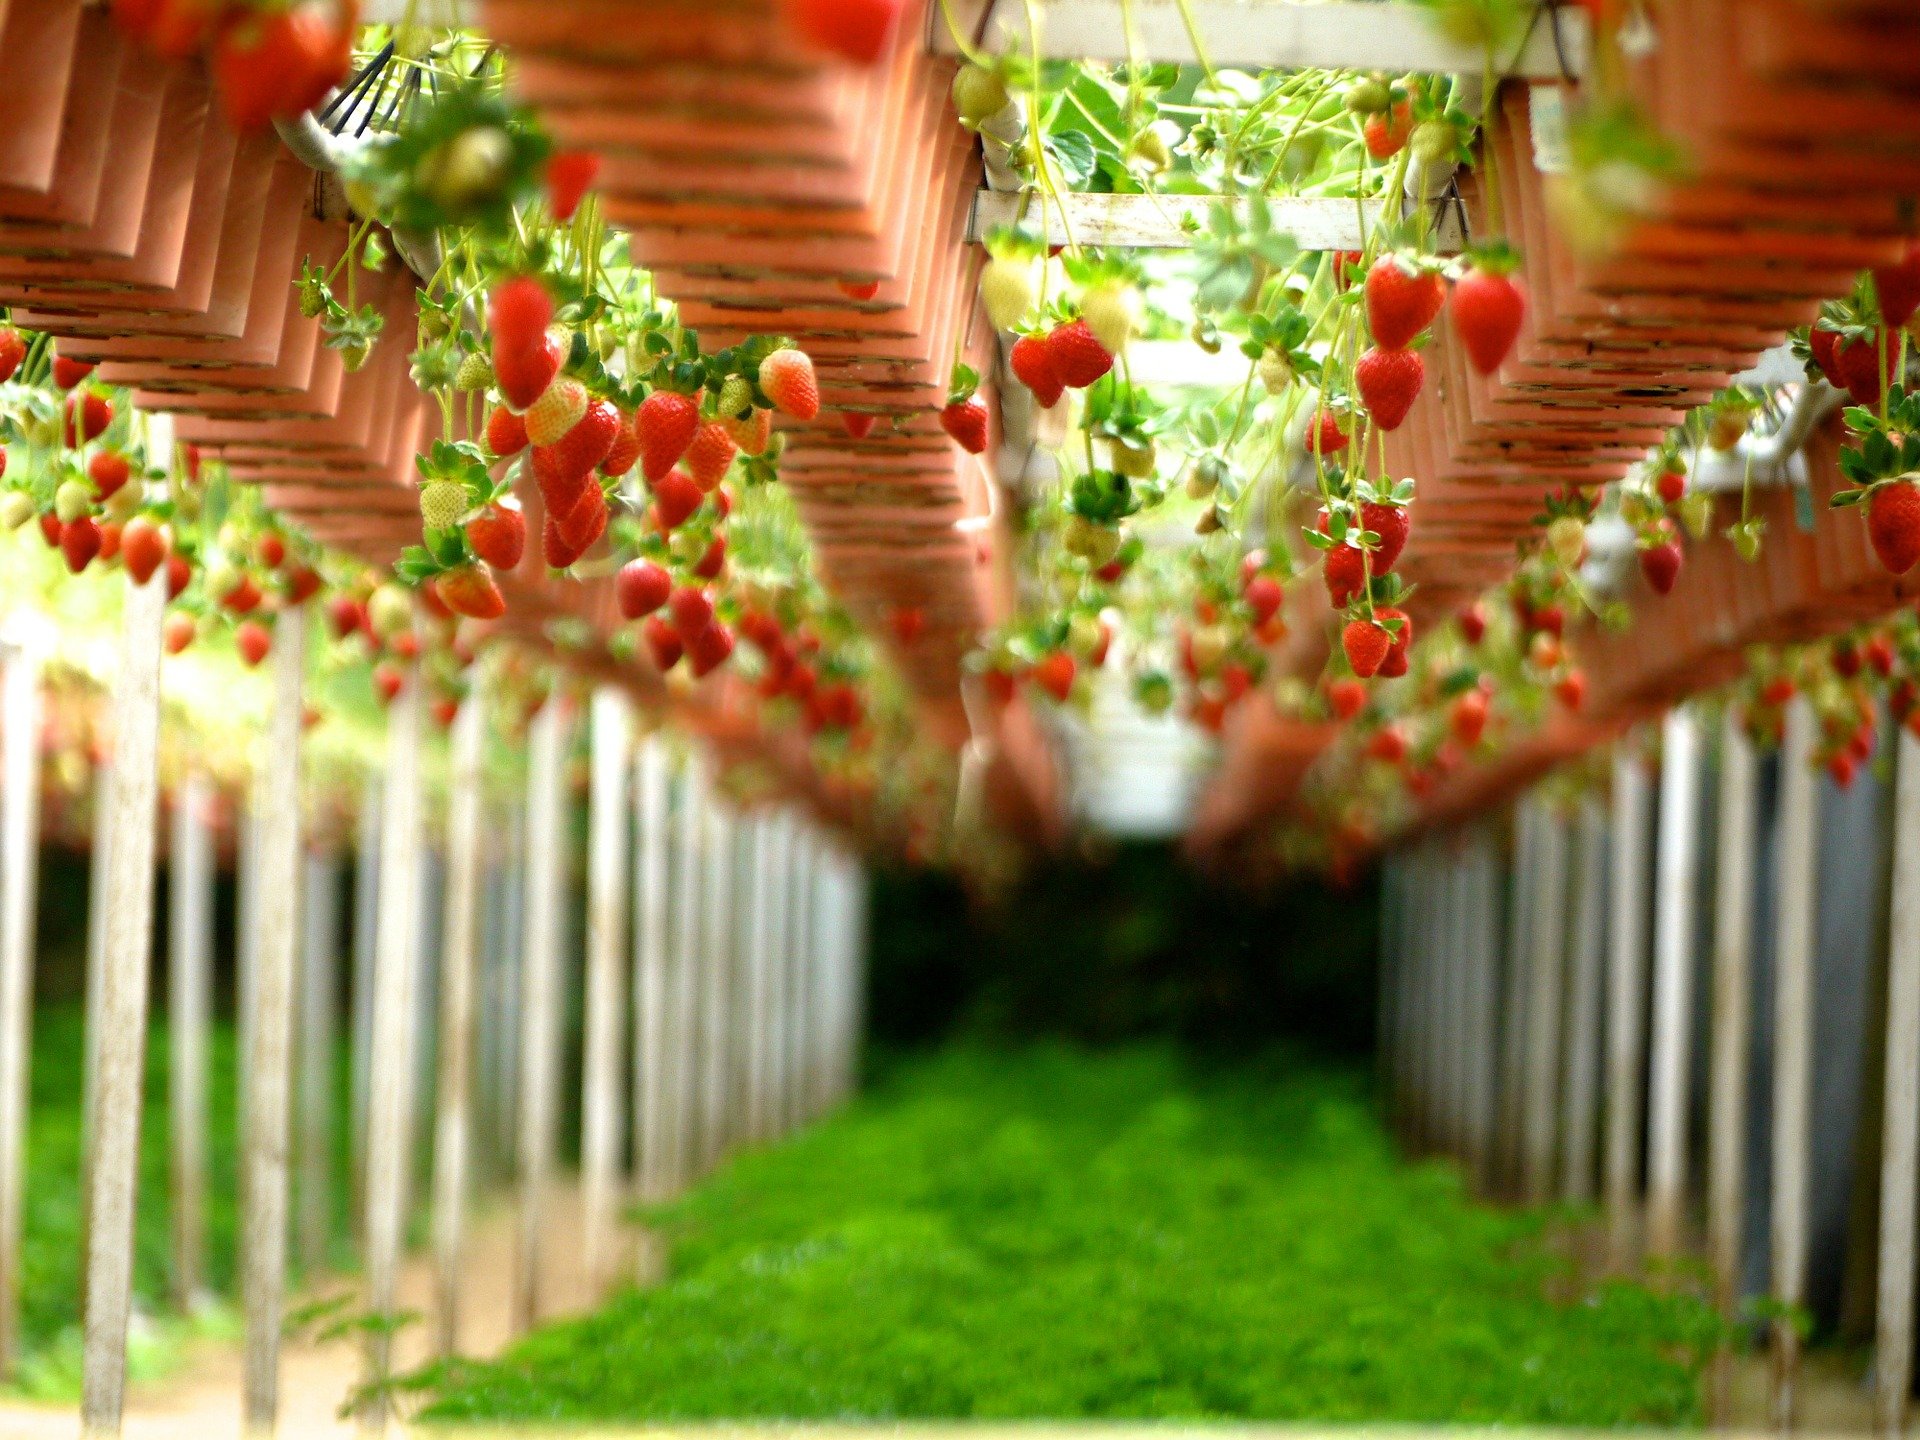
- You can grow strawberries in practically any soil. For certainty of excellent taste, 100% natural Bio Soilmix will provide you with. And because we see no reason to want anything other than 100% organic fruit with an intense and full natural flavour when it comes to strawberries, we also recommend for their cultivation the organic fertiliser range from BioNova, offering an excellent price-performance ratio, both for basic nutrition and supplements for optimal strawberry development.
- Another option for fertilising strawberries well for a rich and juicy harvest is the Czech-made nutrition JUNGLE Garden, which contains one Base component and the second component G4 is developed specifically for growing delicious strawberry fruit.
- In addition to soil and moisture, strawberries only need enough light, whether in the form of direct sunlight or artificial lighting in a grow tent.
- Buy strawberry seedlings at the moment when you plan to plant them straight into the ground, or into a pot. Small plastic pots from the shop are not intended for young strawberry plants to remain in for longer than absolutely necessary; otherwise, they will root and after transplanting their growth will no longer be optimal.
- When buying strawberry seedlings, make sure their leaves are clearly completely healthy, meaning without any spots and beautifully green. Brown and curled edges are definitely not to be taken! Also check the root system, which should already contain a considerable number of light white roots.
- You can also grow strawberries from seeds. In that case, these propagators will serve you perfectly. They are also ideal for rooting cuttings.
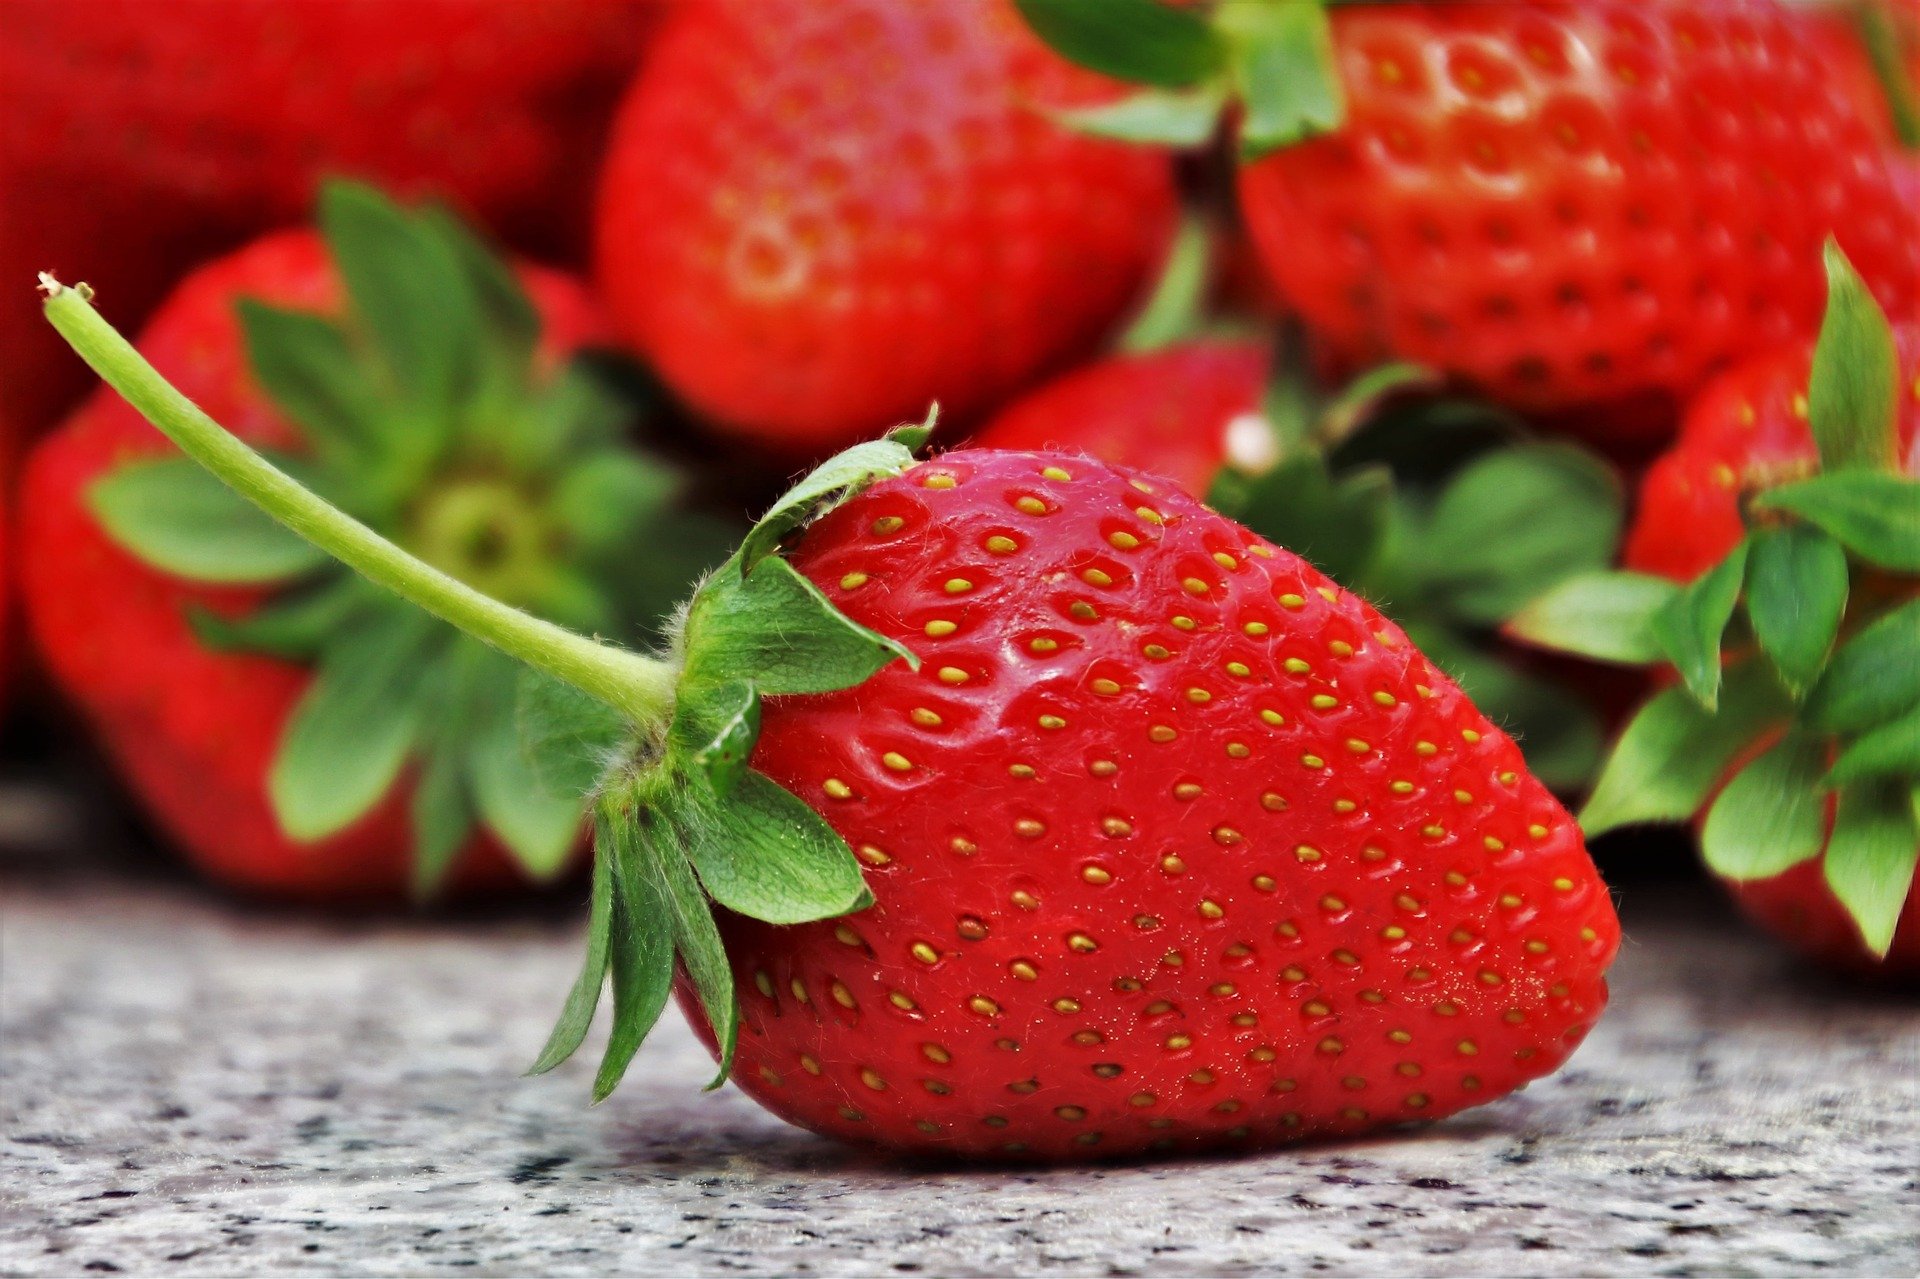
- Growing strawberries is really easy and brings a lot of joy. You only need to watch out for rot and various diseases, which is helped by the quality natural prevention CANNA CURE. Strawberries are particularly prone to mould, so one of the fungicides will also come in handy.
We recommend these products:
- Pro Pot Wall 8 (599 Kč) - a practical fabric planter with 8 pockets creates ideal conditions for strawberries and, in a home environment, also a living still life with fresh strawberries.
- ROOT!T propagator (549 Kč) - the complete propagation set contains a propagator, propagation sponges, 2x fertiliser and even a book.
- Canna CURE (from 349 Kč) - a spray representing perfect prevention against plant diseases, including mould and the most common pests that could spoil the strawberry harvest.
- Jungle GARDEN Base + G4 strawberries – a combination of Czech-made fertilisers that is tailored directly for growing all strawberry varieties.
What to read next?
If you have any questions about growing strawberries or if you need advice on choosing products, do not hesitate to contact us at the well-known address info@higarden.eu.
How to Grow Chilli Peppers?
Read everything you need to know about growing popular hot peppers. If you love chilli, all you need is a complete growbox with accessories, and you will be set for a spicy harvest several times a year. We will also add tips for growing chilli in the garden or in a greenhouse. Whether you prefer growing hot peppers indoor or outdoor, you will never need to go to the shop for them again, and you can also choose specific varieties that you will enjoy.
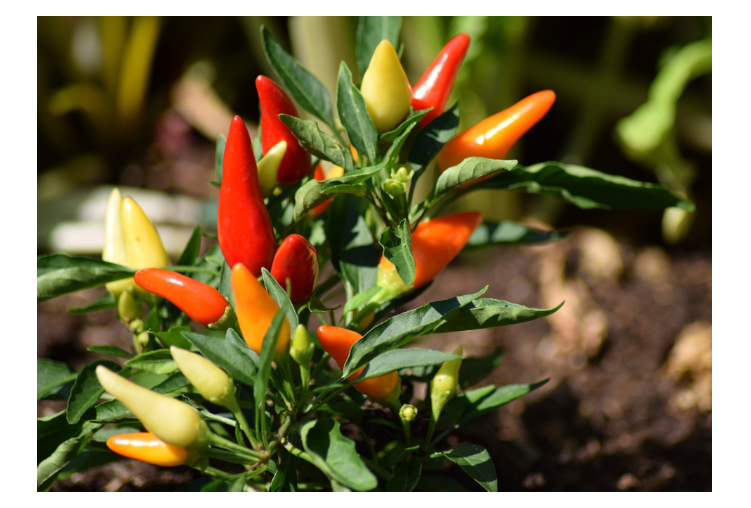
Variety and heat are characteristics that play an important role even before you start growing chilli peppers. Individual chilli varieties require their own specific growing conditions. However, these differences would only slow you down at the beginning unnecessarily, so we will simplify everything as much as possible so that you can start growing chilli peppers with the prospect of a hot and juicy harvest. You only need to avoid a few basic mistakes and shortcomings, which we will focus on.
Pre-growing chilli peppers
- Seed quality and germination time
Vital seeds are the basis. And the basic prerequisite is that they have not been stored for longer than 3 years. To ensure germination, they should also be stored in a dry, dark and cool place. Apart from the variety capsicum pubescens, whose seeds are naturally black, do not germinate seeds on which you notice black spots. Obvious mechanical deformities, softening, or visible signs of pests or mould are also undesirable. It is worth selecting the seeds. Choose only the largest ones with a proven history and clear genetic potential.
When it comes to pre-growing chilli peppers, you are probably mainly interested in how long it takes from the start of germination until you can look forward to new growth. For most varieties, the germination time is a maximum of three weeks. Varieties such as Habanero or Tupin require twice as long, up to six weeks.
- Correct timing
It is essential to determine the sowing time if you are growing chilli peppers somewhere other than in a growbox. In a grow tent, you do not need to deal with timing, which is a huge advantage of growing chilli peppers indoor. The disadvantage is the consumption of electrical energy by the artificial lighting source. In sunlight, chilli plants need an average of 6-9 months to ripen their fruits. This means that when growing outdoors (outdoor), young chilli seedlings need to be pre-grown during the last frosts in early spring, ideally transplanted outdoors after the last frost, and then the ripe fruits harvested before the first winter frosts.
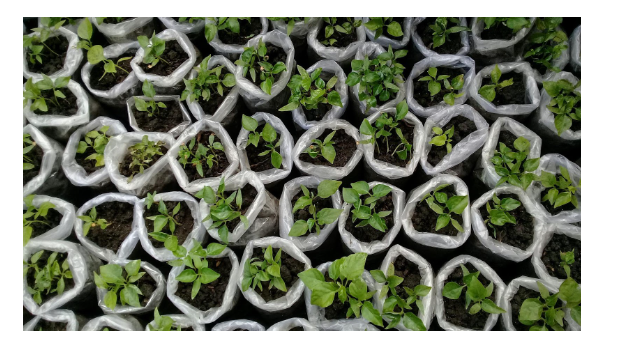
- Sowing media and climatic conditions
Of course, the climatic conditions for growing chilli peppers outdoors do not play much in favour of growers in Central Europe, and pre-growing is one of the factors that can compensate for the unfavourable climate. Another option is in polytunnels or greenhouses, the advantage of which is the extension of the plants’ vegetative period and getting closer to ideal climatic conditions. It is, of course, also worth choosing the most resilient chilli varieties for growing.
Which medium should you choose for successful pre-growing of chilli peppers? Probably the gentlest way to germinate is to use rockwool, or mineral wool, from which the popular Grodan propagation cubes are made. These are inert, so they are also perfect for hydroponic growing of chilli peppers.
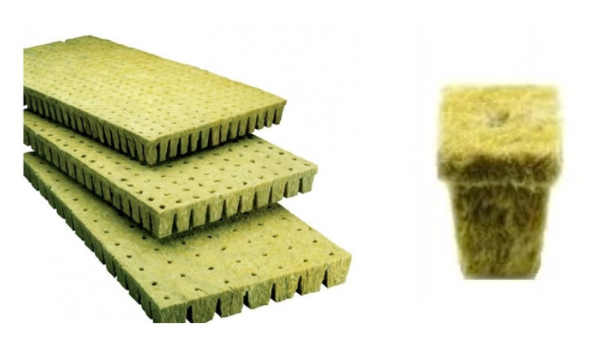
You can also use a quality substrate for pre-growing, but do not forget to ensure its sterility. When using a substrate, it is important not to sow the seed deeper than 3 mm below its surface.
During germination and pre-growing, it is important to maintain an optimal temperature and relatively high humidity in the growing space. Mini greenhouses and propagators or propagators (in combination with grow light) will make your work easier during pre-growing and increase the likelihood that you will transplant vital seedlings a little later. A simple way to successful seed germination and pre-growing of chilli seedlings is the practical SMALL propagation set.
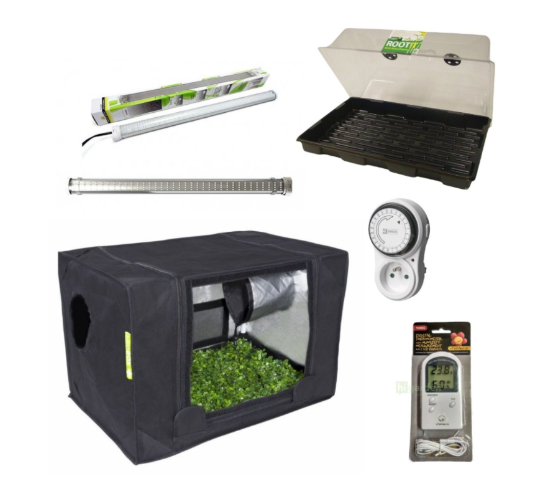
At the beginning of the article, we mentioned that individual varieties have their own specific requirements. To simplify things, we can state a temperature of 29 °C as universal for chilli peppers. And it is precisely in a propagator that you will be able to maintain a constant temperature much more easily. This also applies if you decide to maintain the optimal temperature so that a specific variety germinates for you. Let us give at least a few examples. The suitable temperature for germinating tropical varieties of the chinense genus is 24-32 °C, whereas for germinating varieties of the annuun genus it is ideal to maintain a temperature in the range of 10-24 °C.
Our TIP: Shogun Start will provide young plants with full-strength trace elements at the time when they are still weak and need them most. Great nutrition for seedlings of all chilli varieties!

Transplanting chilli plants
The more we help young plants in the early stages of development, and this does not apply only to chilli peppers, the more they will repay us in adulthood with stable growth, vitality and the final quality of the crop.
During the pre-growing stage, the key factors were mainly temperature and humidity inside the growing space. As soon as cotyledons appear on the plant, light is added to these climatic factors as well! The day should already be sufficiently long when transplanting chilli plants. If young plants lack light, you can provide supplementary lighting (see below). A light deficit can be recognised by the fact that pepper plants stretch their stems upwards, making them fragile and unstable.
If you are growing plants indoor in a growbox, we recommend in particular full-spectrum LED lighting by Lumatek, which perfectly simulates natural sunlight for them. You can learn more in a separate article dedicated to a comparison of the TOP LED lights. In propagators or for supplementary lighting of shaded areas in the grow tent, you can use the 100W full-spectrum supplementary Lumatek BAR 2.9 light. Discharge lamps can also be used as a light source, which is why the topic of growing under artificial lighting, as well as the differences between lighting technologies, is summarised in another HPS vs. LED article.
Transplant young plants into the growing substrate or soil together with the rockwool base. This way you will not unnecessarily pull at the plant’s roots and you will increase the success rate of transplanting. This also applies if you used peat tablets Jiffy. Here we will briefly return to the choice of propagation medium, because although both rockwool and Jiffy allow a young plant to be transplanted with its root ball, the casing of peat tablets breaks down over time, unlike rockwool, and does not prevent the roots from further development. The fact that rockwool does not break down can, on the other hand, cause problems for weaker plants during growth or metabolism. If you use hydroponic systems, prefer rockwool. If you germinated, for example, on a damp paper towel or by another method, remember that the first roots are very sensitive and require the most careful handling during transplanting.
The minimum size of a pot for growing one plant is at least 10x10 cm in the case of chilli peppers. We recommend trying aerated pots instead of cheap plastic pots, for example HERCULES.

Caring for mature chilli plants
When it comes to caring for mature plants, we will again focus on the key factors leading from trouble-free ripening to the intense and fresh flavour of the spicy fruits:
- Light: Hot peppers are classified, just like sweet peppers, as light-loving plants. If you are growing chilli outdoors, it is therefore important to choose a place where the sun’s rays fall for as long as possible during the day. Plenty of sunlight (in indoor growing, full-spectrum lighting replaces it for the plants - see above) also means plenty of energy for pepper plants, which they then put into the development of the root system, flowers and, above all, fruits. It is important to choose a place with sufficient light intensity, but too much of a good thing is harmful, so be careful in the hot summer months if you are growing chilli peppers in a garden greenhouse with clear glass, to avoid scorching the plants. Chilli peppers require a slightly atypical photoperiod, namely: 14 hours of light - 10 hours of darkness.
- Temperature: The good news is that nowadays you can easily obtain so-called acclimatised varieties on the market. These are pre-adapted to our climatic conditions, but that is not yet a reason to completely forget that nature is simply nature, and so even these varieties of mature plants have a “coded” tendency to return to their original requirements from tropical areas. That is why they do not tolerate frosts well and low temperatures are very exhausting for them. This can lead, for example, to slowed growth. It therefore makes no sense to plant seedlings on days with short sunshine, when the weather outside is still relatively cold. The opposite extreme is temperatures that are too high, above 35 °C, which are typical of unventilated greenhouses and cause significant metabolism problems for mature plants. Chilli peppers appreciate it when you ensure air movement in the upper parts of the plants. Outdoors, wind takes care of this. In a greenhouse, we recommend ventilating often and ideally near the ceiling. Indoors, a circulation fan will come in handy.

- Humidity: High air humidity is suitable during germination and pre-growing, for example in a propagator, as already mentioned. However, although this may be surprising for originally tropical plants, it is no longer beneficial for mature chilli peppers. A typical problem is therefore steamy polytunnels that are poorly ventilated. Practically any insufficiently ventilated growing environment is often the cause of mould. Watering is also related to humidity. Mature chilli plants need to be watered with lukewarm and sufficiently settled water. Beginning growers often make a major mistake in summer, when it is hot, and plants watered with cold water suffer a considerable temperature shock. Another common mistake, which you should definitely avoid, is permanently waterlogged soil. The ideal state, on the other hand, is soil that is kept slightly moist on an ongoing basis. During the fruit ripening period, we recommend reducing watering a little more to prevent osmotic pressures in the fruits, which can cause ripening peppers to split. Reducing watering at this stage is also desirable in terms of increasing the heat of the final product. Are you interested in what affects the heat level of individual chilli varieties? It is a substance called capsaicin, the concentration of which affects the heat of a given variety, and by the heat you can also estimate the time until harvest, because it usually holds that the hotter the variety, the longer it takes to ripen.
Our TIP: Not only with chilli does it apply that the cleaner the water we use to water the plants, the more vital and tastier the harvest we will get. Therefore, we recommend reading the article Reverse osmosis (RO).
- Soil properties: Soil preparation is important. Well-loosened soil, or an aerated substrate, is an excellent basis for a beautiful and abundant harvest. For this purpose, the substrate for chilli peppers is enriched with perlite. A versatile natural helper for improving soil properties is vermiculite. For growing peppers, alkaline soil is ideal. In hydroponics, expanded clay balls known as clay pebbles (hydroton) are most commonly used.
Our TIP: If you are looking for quality soil that will allow you to grow your own chilli in organic quality, we recommend, for example, BioNova Bio Soilmix.

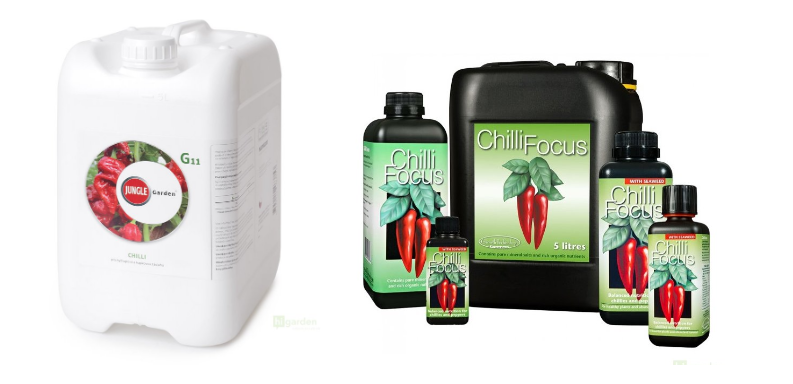
- Fertilisers: The most important elements in pepper nutrition are carbon, nitrogen, phosphorus, potassium, calcium, hydrogen, oxygen, sulphur, manganese, magnesium, iron, copper, zinc, boron, chlorine and molybdenum. When growing chilli peppers, you have the option of choosing top-quality fertilisers from the Jungle Indabox brand, made in the Czech Republic, which are also specially adapted directly for growing chilli peppers thanks to the Jungle GARDEN product line. You need the basic fertiliser Garden BASE and, with it, the specialised component, in the case of fertilising chilli peppers G11. (You can use the same procedure for other popular types of herbs, vegetables, fruit, as well as ornamental flowers including roses. Choose the larger BASE component pack for growing citrus fruits, strawberries or tomatoes right through to summer lettuce, spinach and cress.) From the very beginning of the vegetative phase you can also try the premium liquid fertiliser Chilli Focus from Growth Technology.
- Plant protection: We have already explained that soil that is too wet or a steamy growing space is an invitation to fungal diseases in plants. Furthermore, do not let chilli peppers grow outdoors in the presence of weeds, which provide shelter for harmful insects. Check the plants regularly during the growing cycle and rely above all on prevention. An excellent helper in the protection of chilli plants will be, for example, Canna CURE - pest spray. You can learn more in a separate article: How to deal with pests?
Hydroponic pot for easy growing of chilli peppers
We have saved the extra handy helper for the end! It is a hydroponic pot, which is very popular among home chilli growers! This design piece represents, from a functional point of view, a circulation system that starts automatically every three hours thanks to the built-in pump, which floods the entire clay pebbles, and you only change the watering. No timers are needed, no watering, the pot works automatically by itself once plugged into the socket.
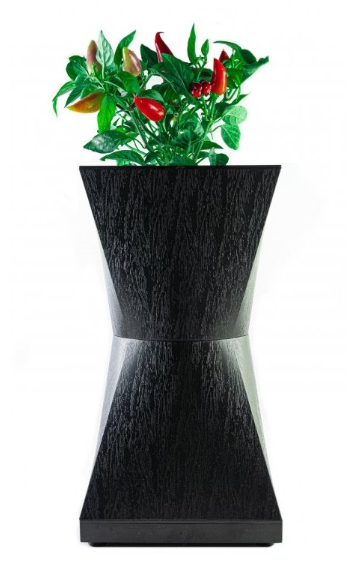
If you do not yet have any experience with growing chilli peppers, we recommend less hot varieties for beginners to start with, which are among the less demanding ones, such as Tabasco, Habanero Chocolate, Apache, Giallo or Serrano Balin.
Do not hesitate to ask us anything you are interested in. We will also be happy to advise you on choosing specific products and their use. We are here for you at the well-known e-mail address info@higarden.eu. We look forward to your questions!
We also recommend these products:
- BioNova VitaSol
- Shogun fertilisers
- Digital temperature and humidity metre VF with external probe
- Everything for growing chilli peppers
What to read next: