
Step-by-step growing, Page 7
- Growth phase
- Flowering and Harvest
- Processing and storage
- Hydroponic growing
- Seedlings and propagation
- Speciality Crops
- Outdoor Growing
- Seeds and Germination
List of articles
Eazy Plug for Easy Rooting and Sustainable Growth
HGA Garden Eazy Plug Propagation Media stand out for the highest possible level of seed germination, and for environmentally minded growers they are the answer to how to increase yields without compromising sustainability. Better success with cloning, cuttings or seed germination will, however, be clearly appreciated by every grower. In addition to the benefits of Eazy Plug propagation cubes, in this article you will find out how to use them correctly in cultivation practice.
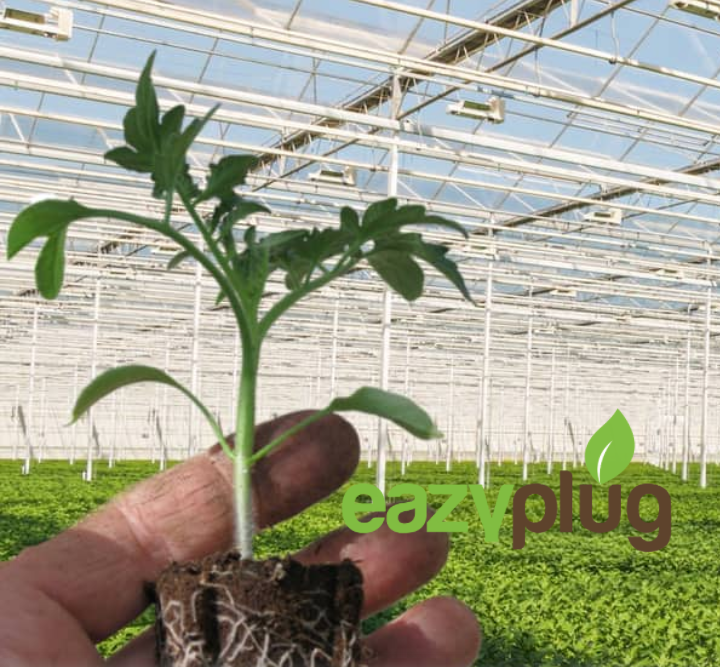
Eazy Plug cubes, which, like Eazy Block and Eazy Pyramid, represent an innovative propagation medium with an emphasis on the ecological aspect of growing, were created in the Dutch centre of cultivation technologies.
All HGA Garden Eazy Plug propagation media are purely organic and 100% compostable. So much for sustainability. And what else makes them unique?
- They come pre-fertilised and also with predetermined levels of EC 1.0 and pH 5.8.
- They excel in their ability to self-regulate to achieve the optimum air-to-water ratio in the propagation medium, or rather in its pores. Because the medium regulates the amount of water itself, it is simply impossible to overwater it, which will be appreciated not only by enthusiastic beginners.
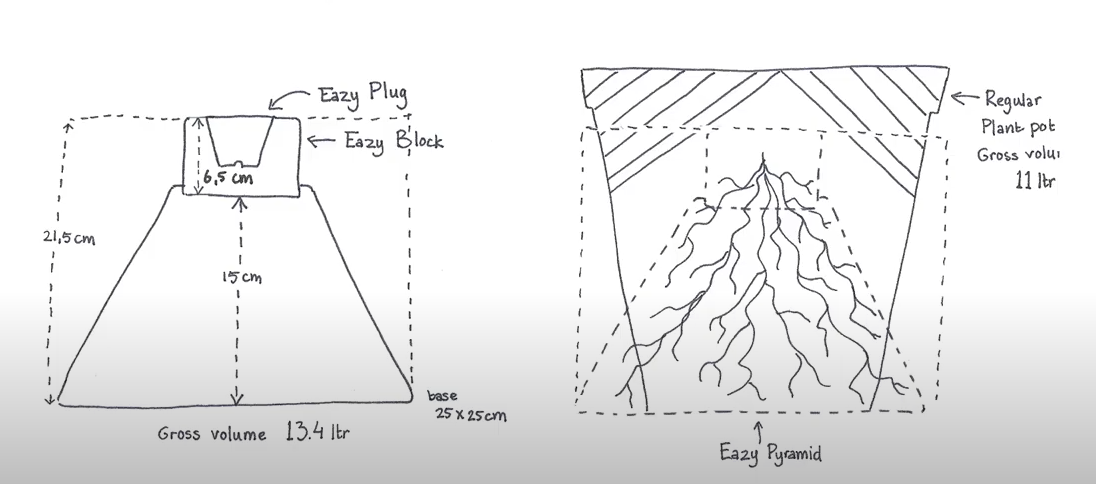
- The strong binding of organic components is the reason why no additional growing containers are needed, and HGA Garden propagation products hold their shape perfectly on their own even without the use of a pot. If propagation medium is placed in a rigid growing container, the plant cannot effectively use the volume of the medium itself, nor do the roots receive as much oxygen. Thanks to the absence of a pot, given by the firm organic structure of this medium, the young plant, on the other hand, has enough air and space to form a strong structure of fine roots in line with the effect of “air pruning”, known among growers rather as the so-called air-pruning effect, when the plant roots grow through the propagation cubes and are exposed to relatively dry air, whereupon they dry out and the root tip dies. The plant naturally responds to this process by forming new, healthy and above all branching rootlets, instead of continuously extending the primary root. In this way, secondary rootlets develop and branch along the entire length of the primary roots until the whole process repeats again and again, and the fine root hairs gradually grow through the entire propagation cube. The result of a highly branched root system with a wide network of root hairs and root tips is better absorption of water and nutrients, and thus more vigorous growth and greater overall plant vitality. Moisture is distributed evenly throughout the medium and, thanks to this, the propagation medium in the form of Eazy Plug products can also be supplied to the market in a dehydrated state for truly unlimited shelf life, which also allows growers to store it for long periods.
- As you can see in the pictures, the manufacturer has come up with a comprehensive concept of interlocking propagation cubes and pyramids.
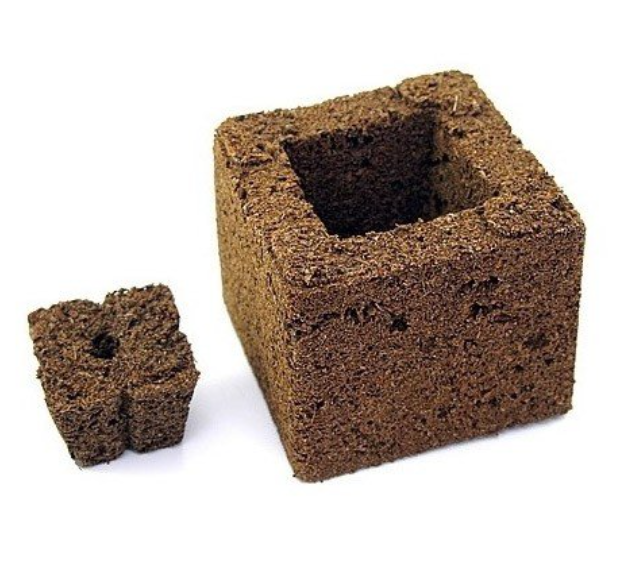
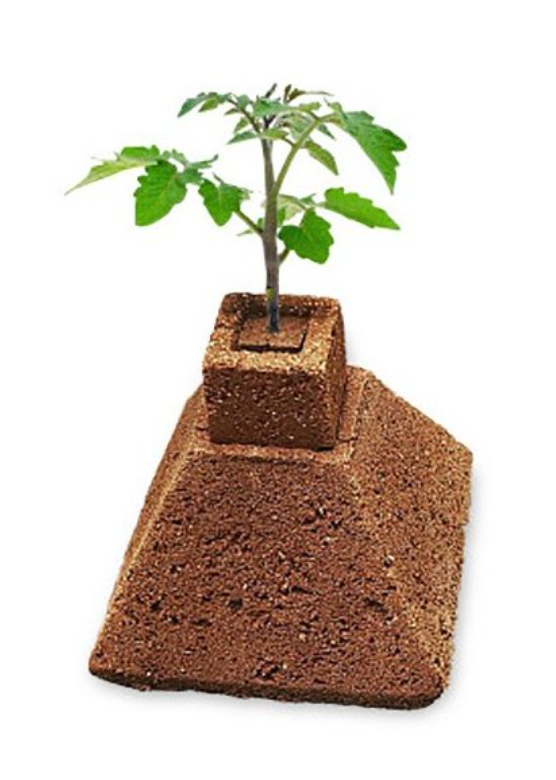 Eazy Plug is a versatile and very compact propagation medium suitable for practically all growing methods in combination with all types of substrates.
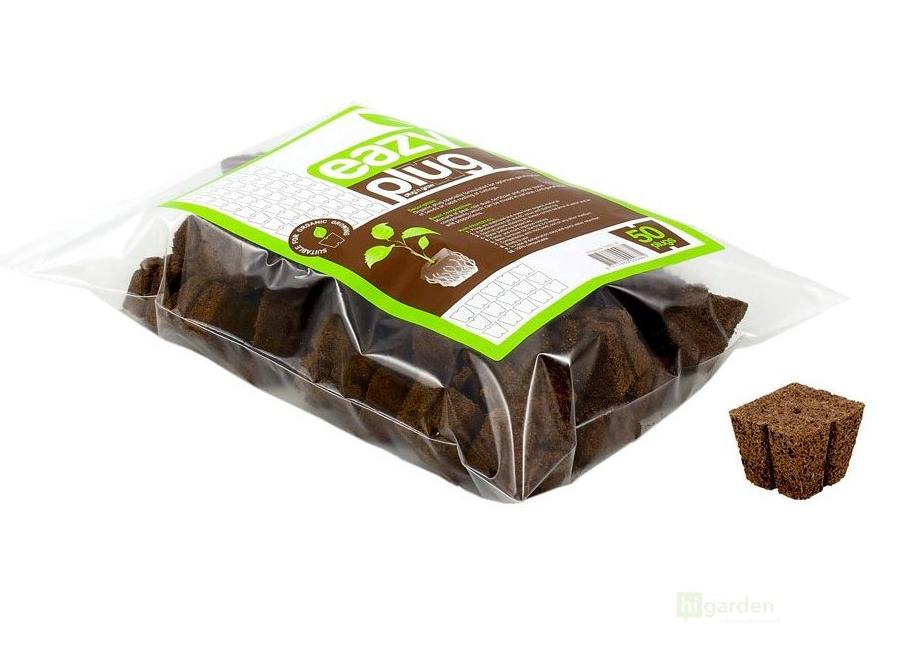
- To begin with, you can take a look at the video from the manufacturer.
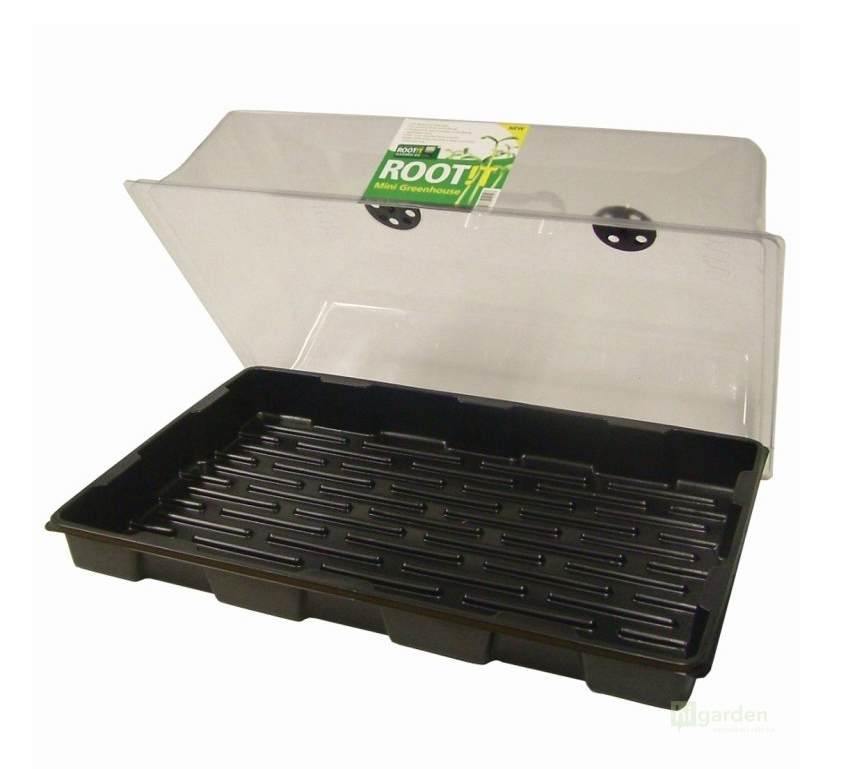
- For the pack of Eazy Plug cubes you will need a propagator. A comprehensive and by far the most effective solution is then provided by mini greenhouses (propagators). We recommend the popular propagator by ROOT!T, made of high-quality plastic and equipped with ventilation flaps to maintain an optimum microclimate and an even higher success rate when germinating or cloning.
- Start by moistening the Eazy Plug cubes.
- Then plant seeds, cuttings and seedlings approximately 3 cm deep.
- Seed germination requires a temperature inside the propagator in the range of 20–25 °C; for cuttings, the upper limit is lower, namely 22°C.
- As you can see in the diagram (see below), once the roots begin to outgrow the size of the Easy Plug cube, it is time to involve the Eazy Block – the cube for Easy Plug in the process as well.
- Moisten it thoroughly again with clean water, as it is also self-regulating, so you will not face the consequences of overwatering.
- Then carefully transplant the young, rooted plant into it, as shown in the diagram, and take care not to damage the roots during transplanting.
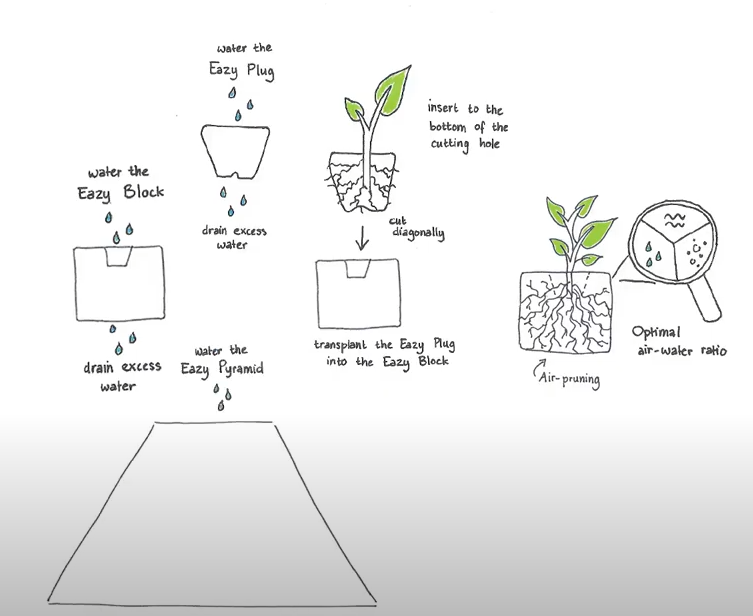
- In the Eazy Block, the effect called air pruning, which we described a little above, will fully take off, and when the root system needs even more space, apply the same transplanting principle when moving the seedling from the Eazy Block cube to the top of the pyramid (Eazy Pyramid).
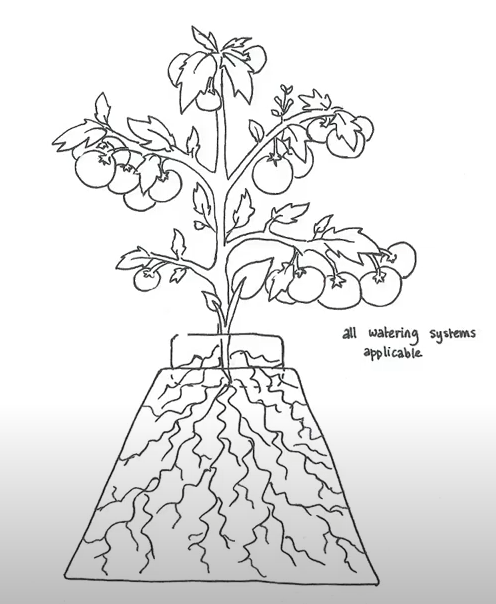
- Over time, the plant will become older and, as a result of the already richly branched root system, its extraordinary vitality will become even more apparent. Thanks to the trio of interconnected and pre-fertilised EazyPlug propagation segments, the roots absorb all nutrients excellently. Mature plants can therefore later be carefully transplanted again, so as not to damage the roots, into a standard pot and you can slowly begin applying fertilisers.
If you would like to ask us anything, we are here for you at the well-known e-mail address info@higarden.eu. We look forward to your questions!
We also recommend these products:
What to read next?
- ROOT!T for taking and propagating cuttings
- Organics Nutrients: a natural way to achieve high yields
- SHOGUN: the best British fertilisers with an emphasis on research
How to prepare rockwool?
Did you know that ROCKWOOL is already a commonly used term for basalt, or stone wool, because the company of the same name was one of the first to process this material for horticultural use?
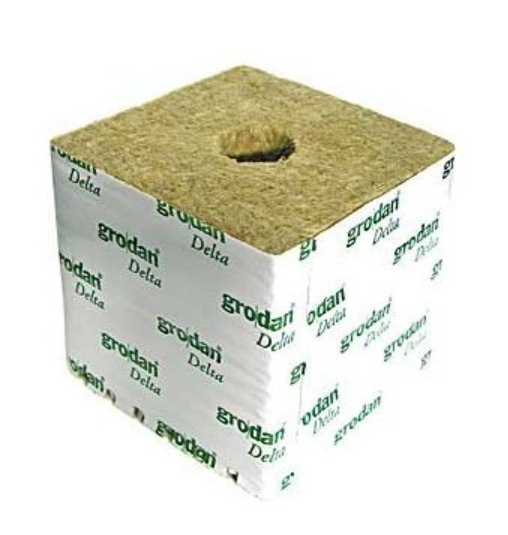
Which type of rockwool will you use?
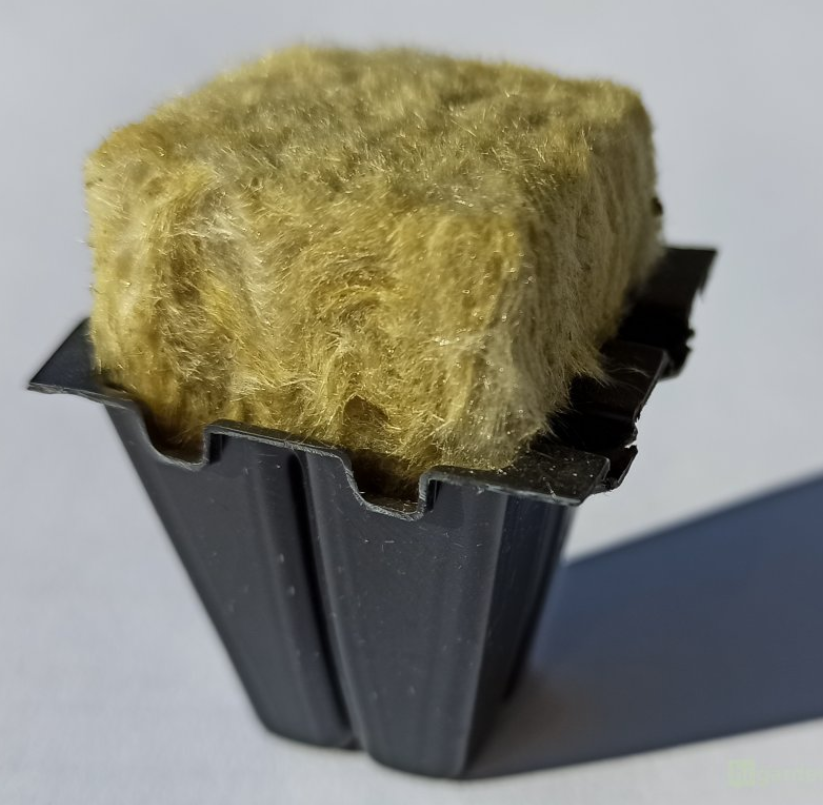
The range of recyclable stone wool products is very varied. You can choose whether to use, for example, propagation cubes wrapped in plastic film or without it, various growing cubes with holes, or very practical growing mats. Growing mats are becoming increasingly popular among growers, which is why we have devoted a separate article to them, which you can read HERE.
Preparing rockwool
- Prepare the rockwool propagation medium that you want to prepare for use.
- If the product is wrapped in protective film, clean and disinfect it. For disinfecting the substrate, you can use, for example, a cloth with a potassium permanganate solution or Purolyt.
- Have standing water ready at least 24 hours in advance.
- Adjust the pH value to 5.1 – 5.6 (the exact value always depends on the properties of the water, which may come from your own well or from the mains, as well as on the properties of the specific RW).
- Above all, make sure that the pH of the soaking solution is not too low, as this could undesirably damage the structure of the rockwool.
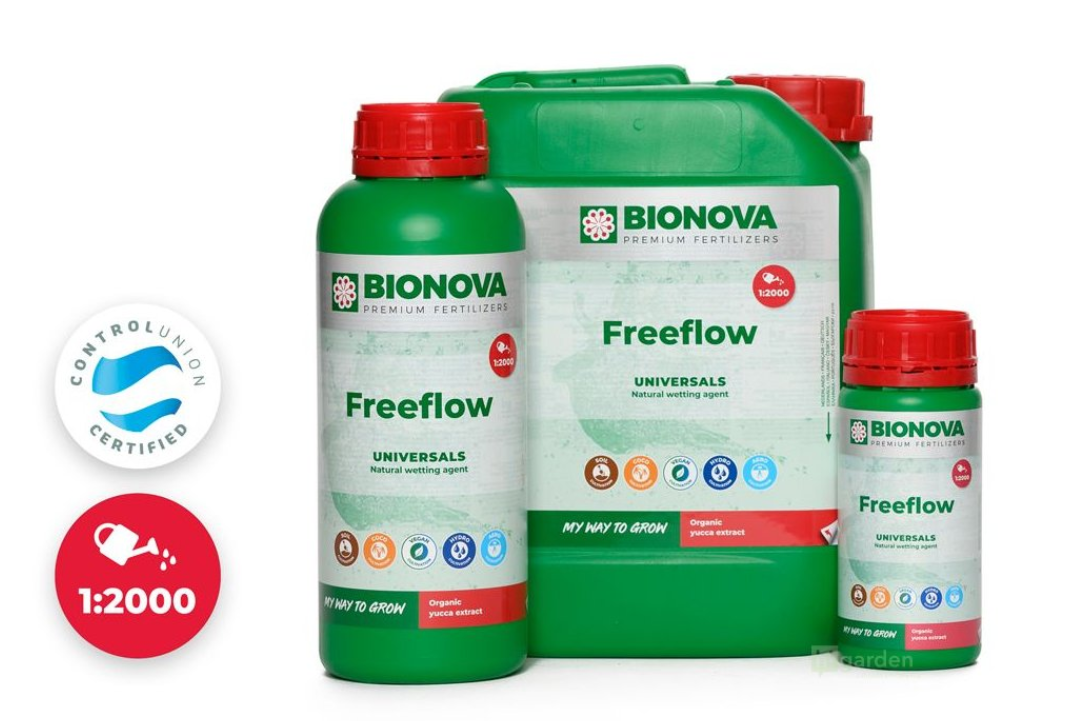
- For soaking rockwool, definitely use the proven BioNova FreeFlow wetting agent.
- After about a quarter of an hour, the pH value should stabilise at the required level.
- Provided that the rockwool will be used immediately for planting, in addition to adjusting the pH it is also advisable to check the water temperature, which should be around 24 °C.
- When lowering the pH of water, always use only suitable products, such as BioNova pH- or Canna pH- growth 17%. A common mistake is, for example, using products intended primarily for aquarium care.
- Electrical conductivity of the solution (EC) is measured using an EC metre. For soaking rockwool, its value should not exceed 0.8.
- At this point, we therefore have water prepared with an EC of up to 0.8, a temperature of approximately 24 °C, and a pH in the range of 5.1 – 5.6. It is time to immerse the rockwool in it for 24 hours.
- Beginning growers sometimes tend to squeeze rockwool after soaking. This damages its fibres, and as the structure degrades, any aeration of the propagation medium also disappears.
- The best approach is to stack the rockwool cubes on top of each other and simply let the water drain away naturally.
- A separate chapter are growing mats, which, after soaking, should be moved straight from the water into the Libra planter.
- Finally, it is important to note that the soaking itself should also take place in a suitable container, which should always be chosen with regard to the size and quantity of the rockwool being soaked.
If you have any questions about ROCKWOOL, please do not hesitate to send them to the well-known address info@higarden.eu. We are here for you!
We also recommend these products:
- Grodan - propagation cubes (from CZK 1)
- Growing mats (from CZK 89)
- BioNova FreeFlow - wetting agent (from CZK 429)
What to read next?
Modern Trimmers Make Working with Fresh Harvest Easier
Trimmers and trimming machines, as practical helpers for professional and hobby growers alike, are modern tools that allow the quick processing of freshly harvested herbs and, especially for growers who regularly harvest larger quantities of plants, represent a significant time-saver and a major acceleration of work.

The best is often saved for last, but this time we simply cannot resist and must introduce you right away to the Trim Buddy trimmers from Great Britain.
- A practical trimming tool for cutting plants and crops using the shaking method.
- This is the most modern way to separate leaf matter from the finished product. Lightning-fast, without scissors and without unpleasant blisters or pressure sores on the hands.
- With this helper, trimming harvested plants becomes a matter of minutes instead of several hours.
- The design is adapted for easy handling.
- The tool contains no perishable or moving blades, which has enabled the manufacturer to achieve a high level of safety and product durability.
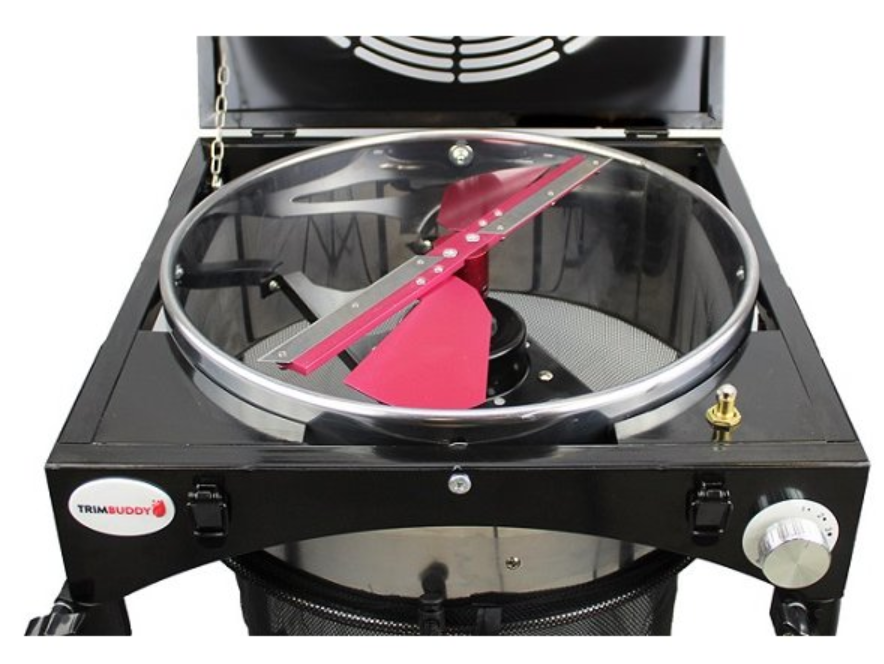
Automated trimmer for processing up to 8 kg of plants per hour!
If you harvest from a grow box several times a year and know that you want to invest in a modern trimmer, then in our view this new product on the market is the clear choice. Why?
- Table Trimmer V2 is made with feedback from thousands of professional growers in mind, and it shows. The very first reactions from our customers suggest that, in terms of price, performance and cutting quality, this machine has no competition on the market!
- The result is an easy-to-assemble and extremely efficient trimmer for surgical cutting precision, which remains incredibly even and consistent. Recessed screws also contribute to an exceptionally tight and precise cut without the slightest damage to flowers.
- Here is a list of other improvements that the new version has received based on customer feedback:
- More robust base, improved output door and a new motor.
- Adjustable height for the health of your back.
- Adjustable blades.
- Increased work safety thanks to new covers that fully seal all electronics.
- The glossy surface makes cleaning easier.
- A new bag for convenient carrying of the processed harvest.
The versatile double table plant trimmer takes the possibilities and efficiency of final harvest finishing even further. This innovative device is also height-adjustable, and the list of its most important benefits is again long. You will find it in the product description. Likewise, if growing is more than just a hobby for you and you appreciate a tip for the best possible investment in a trimmer for commercial growers who need to trim on a large scale, where both enormous time savings and the resulting quality of plants or crops in the form of finished products after trimming become apparent.
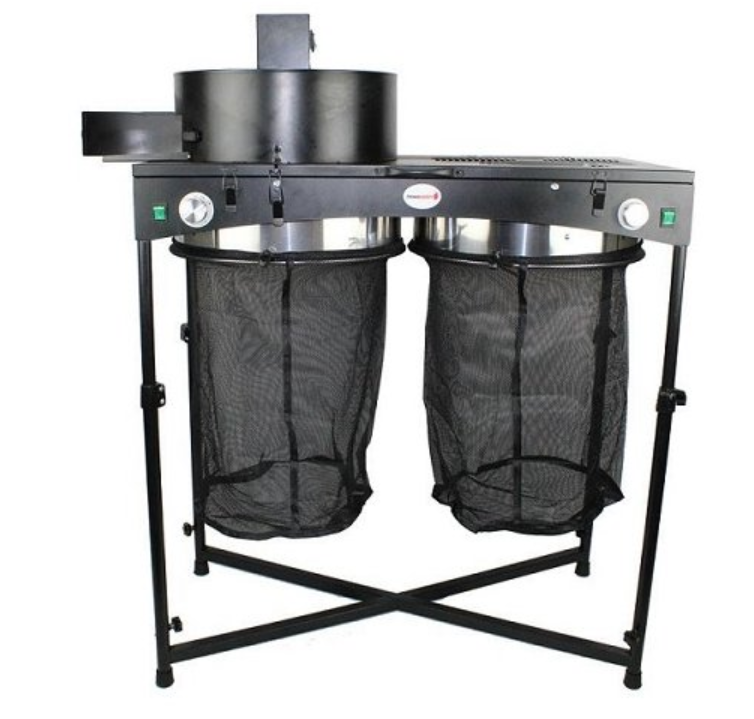
Trimbuddy are simply trimmers that few devices can match. Nevertheless, in our range you can also choose products from other brands, which will certainly serve their purpose and are also characterised by high quality. While the above-mentioned Table Trimmer V2 is fully automatic, the best-selling device in the trimmer category is the mechanical VF Trimmer with manual drive. Among the prestigious manufacturers and long-standing names on the market for sophisticated trimming tools are Trimpro trimmers, aimed primarily at professional growers in terms of both price and workmanship.
At this point, all that remains is to calculate how worthwhile it is for you to invest in a more or less sophisticated trimmer. We will of course be happy to advise you on your choice, and if you have any questions about this range, please do not hesitate to contact us at the well-known address info@higarden.eu.
We also recommend these products:
- Handheld electric trimmer Trimer Rapido Trim (7 790 Kč)
- Trim Bin Harvest Cut Tray trimming tray - complete set (1 749 Kč)
- TightVac vacuum containers (from 205 Kč): the best way to store fresh and dried plants or food.
What to read next?
Germination trays are in demand. Choose Czech quality!
Today we present a new product not only for growers, but for all enthusiasts of a healthy lifestyle and lovers of “fresh” foods, such as fresh sprouts and young shoots. This bowl for sprouting seeds, nuts and legumes has immediately become a hit.
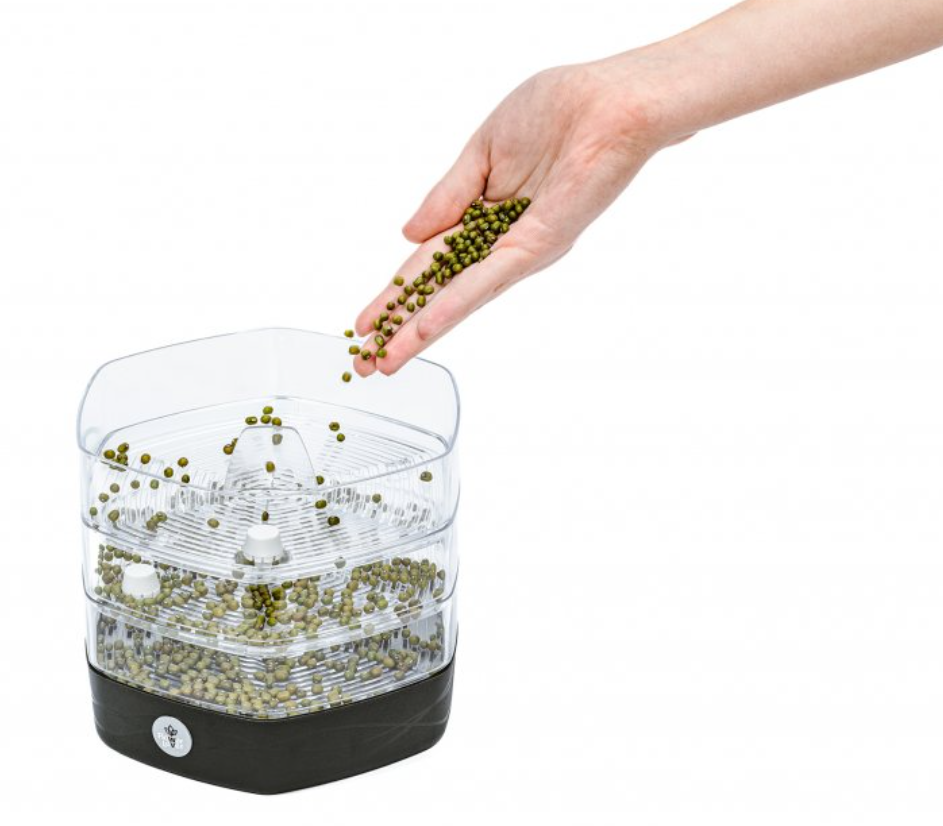
Choose the quality and practical design of the MUNGO sprouting bowl (MUNGO SPROUT BOWL), which allows easy and quick sprouting of 3 types of seeds at once! As you can see from the following lines, this bowl clearly stands out above conventional products commonly available on the market for home seed sprouting. It is a purely Czech product from PLASTKON, which you may already know especially thanks to the unique Cobble smart pots.
To avoid being misled by the name of the sprouting bowl itself, it should be mentioned that the sprouting bowl is universal and suitable for sprouting all types of seeds, from cress seeds through mustard to radish, for example. You will find even more examples below.
Practicality above all
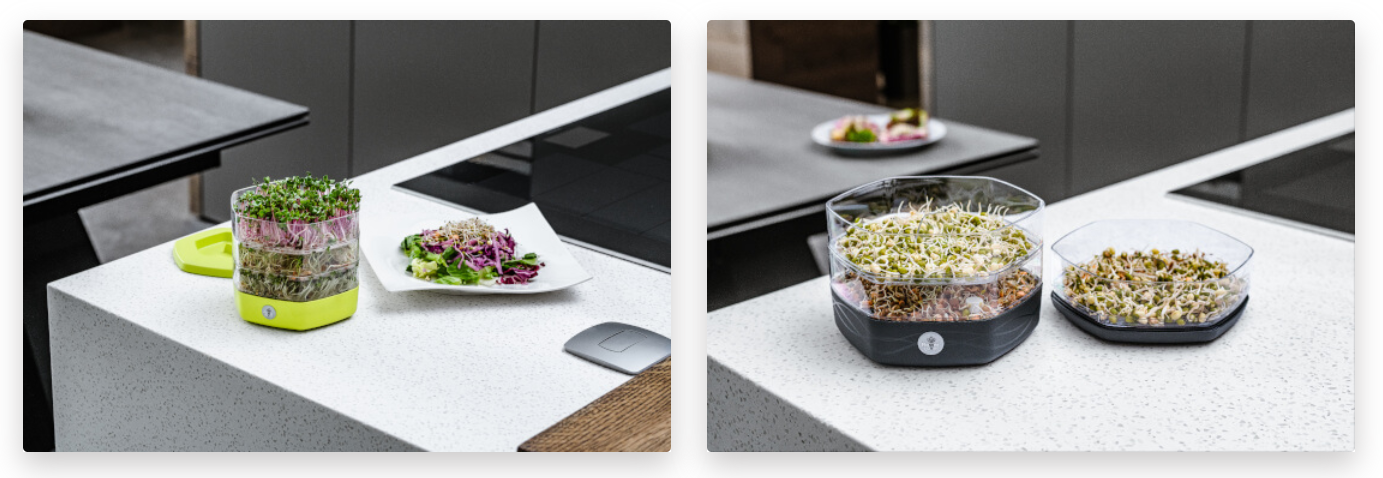
We have mentioned the practical design, which includes a non-slip base. Using this sprouting bowl is also completely intuitive, and anyone can manage it with ease, so you will always have fresh and healthy “snacks” at hand at home.
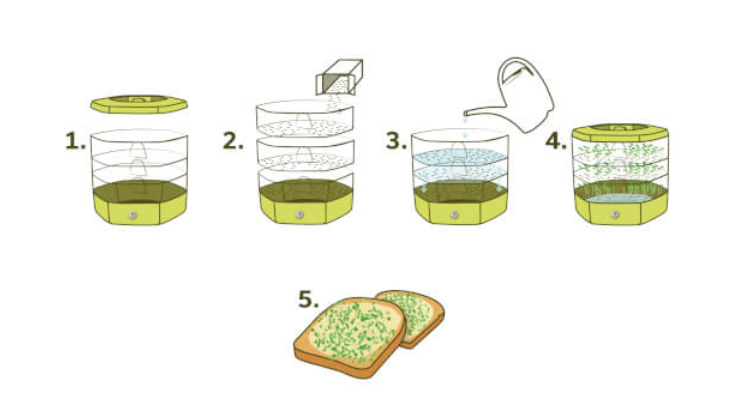
The PLASTKON brand is able to come up with an innovative watering method for each product, and the same applies to the MUNGO sprouting bowls. The unique watering system makes the sprouting process as easy and fast as possible, so all you need to do is rinse the contents of the bowl twice a day with a glass of clean water and regularly pour away the excess water that collects at the bottom. As you can see in the video, within a week you can serve extra fresh sprouts or shoots on your plate, either as a side dish with meals or just as a snack.
How does it work?
- Spread any seeds over the surface of one, two or three bowls.
- Twice a day, rinse the seeds with a glass of water.
- Regularly empty the bottom bowl.
Simple, isn’t it? So, cheers and enjoy your meal!
What can you grow at home using this bowl?
- Mung bean sprouts
Mung bean sprouts are a healthy and tasty ingredient that never gets boring. But in their case, freshness is paramount. Letting them sprout regularly in a special bowl is also much cheaper than repeatedly buying them already sprouted in the shop. Secure a supply of them elegantly and once and for all with a quality sprouting bowl. This “superfood” will provide your body naturally with fibre and a wide range of vitamins and minerals:
- Antioxidants
- Vitamins A, C, D, E, K
- Omega 3
- Magnesium (magnesium)
- Calcium
- Phosphorus
- Enzymes
In addition to the popular mung bean sprouts, a varied selection of many other very healthy natural ingredients awaits you:
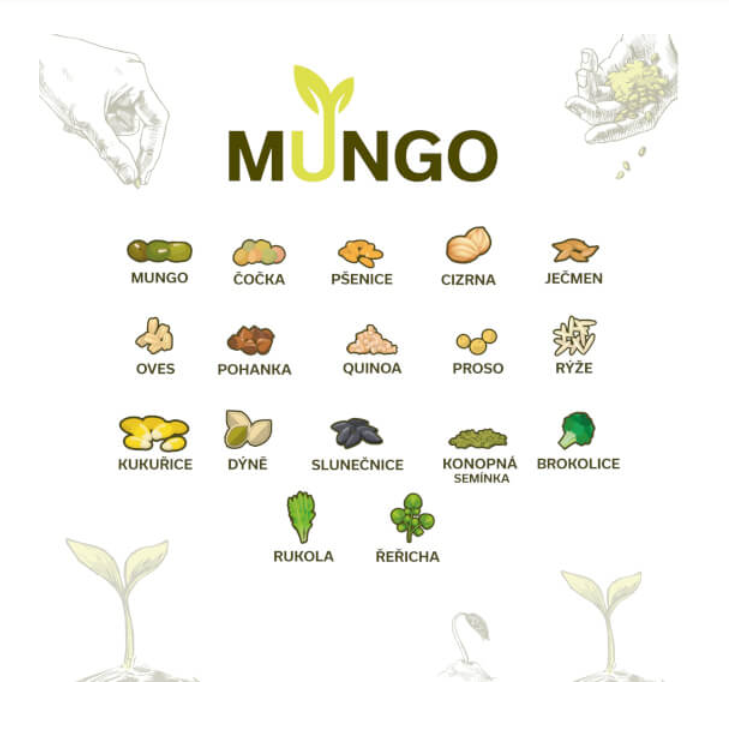
With the MUNGO sprouting bowl, available in 4 colour variants, you can sprout practically anything you can think of. However, for sprouting to make sense, both for health and taste, there is one single condition: do not use treated seeds intended for standard cultivation. Always choose purely natural seeds in BIO quality for sprouting.
The difference between sprouts and microgreens
These two terms are often confused in both theory and practice, so we will now explain them, as it is really simple. Microgreens are more developed sprouts, or rather their next developmental stage in the form of small green plants, which are also very popular among home hobby growers and housewives, so if you are interested in their cultivation, read the separate article How to grow microgreens.
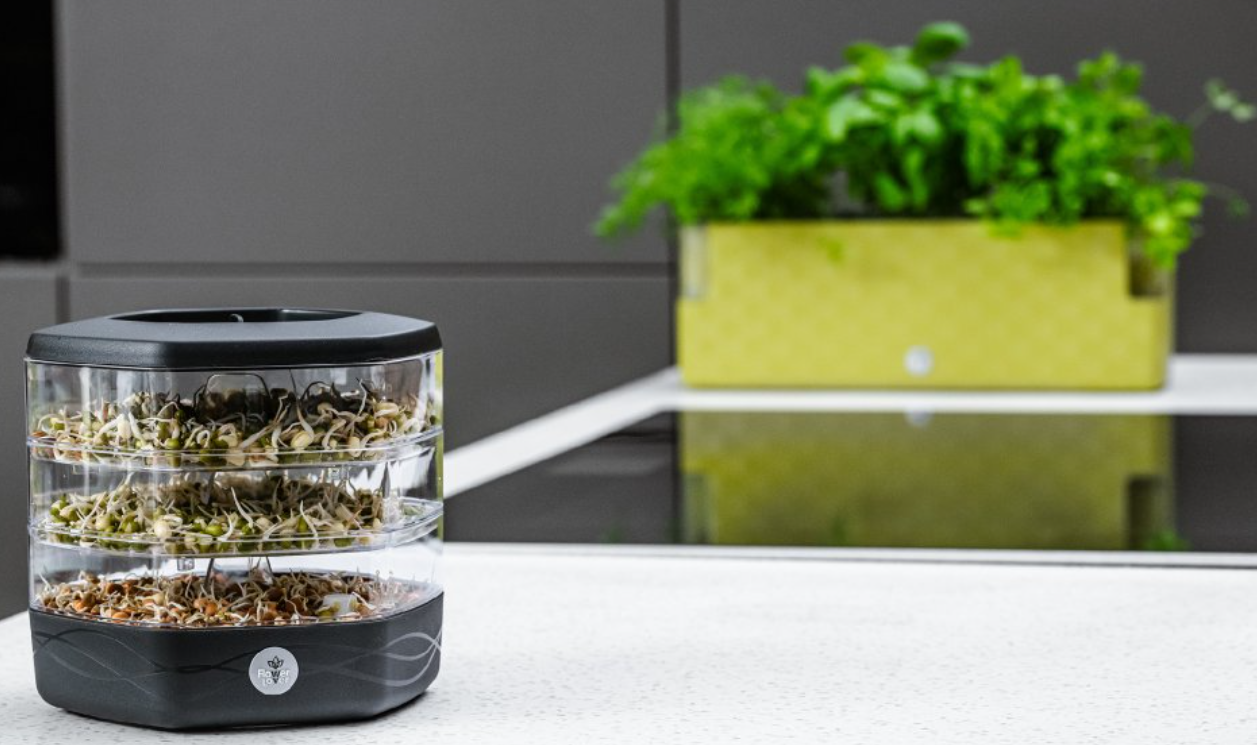
Our TIP: As the picture nicely illustrates, PLASTKON Czech products are, in addition to practicality and quality, also design pieces that fit together beautifully in the home. Therefore, do not hesitate to look through our range for the Cobble smart pots Cobble, designed for one plant, or Cobble Trio for multiple cultivated plants. Cobble Trio is the yellow variant in the background of the picture. You will see how easy it is to care for flowers with these flower pots, available in several trendy variants. For more information, you can also have a look at the separate article Decorative, hanging and smart pots.
If you would like to ask us anything, we are here for you at the well-known e-mail address info@higarden.eu. We look forward to your questions!
We also recommend these products:
- Self-watering planter Supreme, length 50 cm
- Planter Garden, length 50 cm
- Self-watering planter Extra Line SMART, length 50 cm
- Mungo - sprouting bowl
What to read next?
- Organics Nutrients: a natural way to high yields
- How to grow orchids?
- How to grow potatoes and sweet potatoes from the comfort of home?
Czech Sunflower Trimmer electric trimmers are enjoying success all over the world
“Trimming is easy,” says the slogan of the Czech company SUNFLOWER TRIMMER, which manufactures unique professional trimmers, with which it has already broken through worldwide and which have recently also enriched our range. Discover a revolutionary high-end solution with Czech support and service!
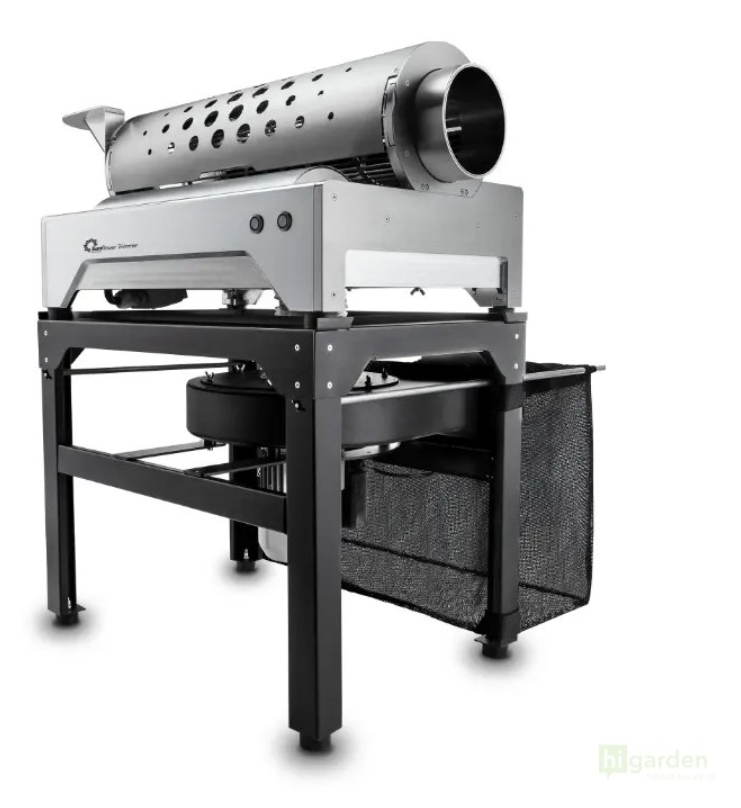
What stands behind the massive success of Sunflower Trimmer trimmers?
- Exceptionally easy to operate and clean.
- Simple capacity expansion.
- Robust trimmers are fully portable.
- Industrial design that is pleasing to the eye.
- The manufacturing materials guarantee an unusually long service life. With proper handling, your SunFlower trimmer (trimming machine) will serve you reliably forever. That is what we call a good investment!
It all began with the vision of a group of engineering enthusiasts in the heart of Europe, who carefully examined the products available on the market until they found room for improvement. Improvements thanks to a sense of detail and precision. The results were not long in coming, and in 2019 the first-class Czech-made plant trimmers received the prestigious international A’DESIGN AWARD.
In short, after years of observing everything available on the market and years of intensive research and development, Czech engineers were able to begin producing a product for customers who are looking for the best available quality on the market.

Professional growers on a global scale have long appreciated these trimmers not only for comfort, safety or quality workmanship, but also, among other things, as a means of achieving the primary goal in harvest processing, which is optimisation of production costs.
- SunFlower trimmers feature a unique industrial design, created through cooperation with a team of specialists from Brno University.
- In its own factory, the production of SunFlower trimmers is subject to strict final quality control not only for the whole unit, but also for every single component.
- The main frame or chassis of each trimmer, in other words the trimming machine, is always made from a single piece of the highest-quality aluminium, unlike other machines available on the market, which consist of several smaller and cheaper pieces welded together. This welding of multiple pieces creates joints which, one could say, form the Achilles’ heel of such devices, as they are much more prone to cracking.
Responsive customer care
- At Sunflower Trimmer, after many years of conversations and feedback from growers, they look at things exclusively from the end customer’s perspective, and therefore they know that it is not only the quality or uniqueness of the device itself that matters, but they place the same emphasis on customer care (online support) and service.
- These services are provided to you for as long as you own or rent the device. The warranty on every Trimmer Sunflower is valid for 5 years!
- With the purchase of a machine of this brand, the relationship and interaction with the customer only begins. Technical support for customers operates 24/7. This is an important part of the company’s philosophy and, we believe, also part of its success in the domestic and foreign markets.
- Based on feedback from an ever-growing number of satisfied yet demanding customers, the Czech brand does not rest on its laurels and is constantly working on further innovations that it will be able to excite them with and that will certainly receive the same or even greater response as the electric trimmers, which you can already order from us at a favourable price. We will also keep you informed about further news and expected innovations from Sunflower Trimmer.
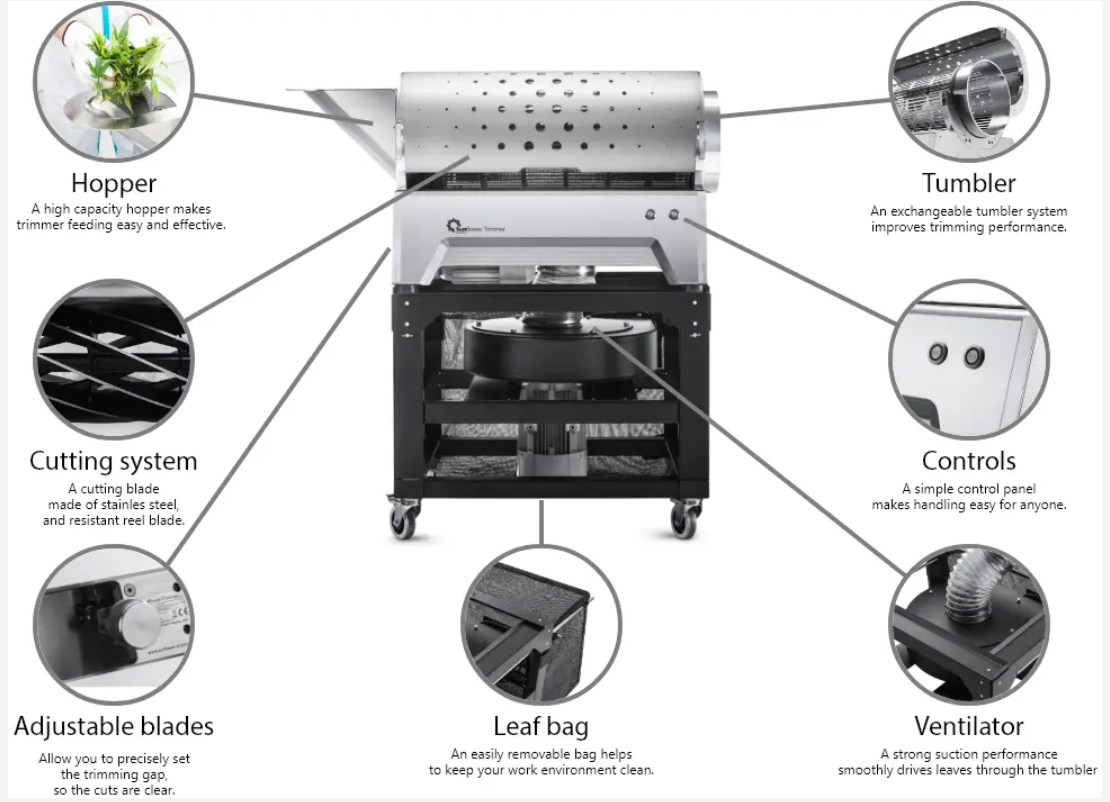
On our website, you can already order the electric trimmer in the L or XL version, as well as original accessories such as the dust filter with regeneration. Spare parts are also available, for example the replacement tumbler (cylinder), adjustable wheel pads, waste bag or grids. Do not hesitate to ask us anything about the SUNFLOWER TRIMMER range at the well-known email address info@higarden.eu. We look forward to your questions!
We also recommend these products:
- LUMii Black Digital Kit 600W (2,990 Kč)
- Lumatek ZEUS 600 W PRO 2.9 (24,990 Kč)
- Qnubu Rosin Press automatic press 20 tonnes AUTO LION, pressing area 15x20cm (49,900 Kč)
What to read next?
ROOT!T for taking and propagating cuttings
Do your cuttings sometimes fail to perform as you expect? Do they not have the right shape, or do they mature too quickly without having time to root properly? If your cutting attempts have not gone as well as you would like so far, then please read on. It is time to dramatically increase your cloning success rate!
Removing a part of a plant during cutting propagation is extremely stressful for both the mother plant and the resulting cutting. There is certainly no point pretending otherwise. And that is precisely why, from a grower’s perspective, it is right to work intelligently with the plant’s adequate physiological response to this shock:
- Experts believe that plant ageing is the result of the action of two substances that arise on the basis of the stress present. These are:
- Abscisic acid (ABA): a vital plant hormone that is produced by the plant, for example, as a reaction to a sudden change in the surrounding environment. For instance, with the arrival of a cold front, ABA is the initial impulse for a change leading to the protection of leaves from the cold.
- Ethylen (ethylene): ethylene has long been known to accelerate plant ripening when they are exposed to stress. The function of ethylene in such cases is to ensure that the plant reaches a point of sufficient maturity, meaning viability and self-sufficiency independently of the mother plant. A fine example is cut flowers or ripening fruit.
- If this pair of substances is present in the plant, it is evidence of a lack of sugar and oxygen, which is the result of disrupted translocation processes caused by stress.
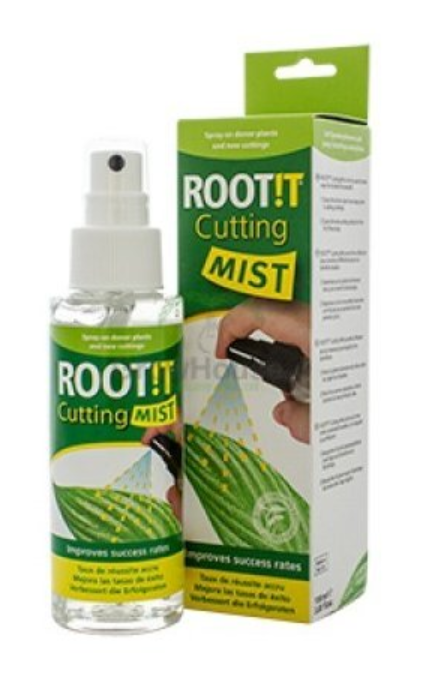
- ROOT!T Cutting Mist is a special cloning spray that we recommend applying to the mother plant two to three days before taking cuttings, as it helps keep sugar production in the leaves at a normal level. Keeping these levels closer to normal will greatly help reduce stress and the associated excessive production of ABA and ethylene.
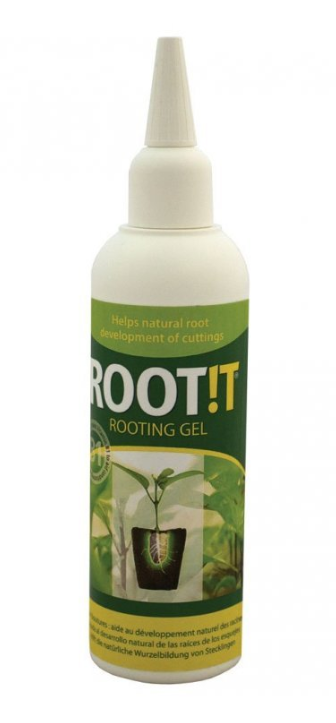
- ROOT!T Rooting gel creates a protective barrier around the cut site (where the cutting is taken), helping to keep the plant in a low-stress state. Because the plant does not experience enormous stress as a result of the effects of Rooting gel, it is able to regenerate its tissues much more quickly through the natural processes of plant renewal.
- Our TIP: ROOT!T First Feed forms a powerful combination during plant cloning with the above-mentioned products from the ROOT!T brand. Thanks to this combination, your cuttings will be destined for successful development.
- The nutrients and micronutrients contained in ROOT!T Rooting gel and the cloning spray ROOT!T Cutting Mist are precisely balanced so that they work at a molecular level in harmony with the plant’s natural physiology and support the formation of root buds in cuttings.
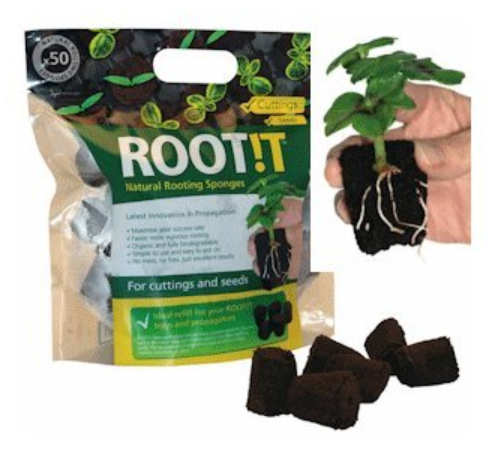
- You will achieve the best results in cloning if you supplement these three exceptional products, designed directly for the needs of cuttings, with Natural Rooting Sponges – a 100% natural propagation medium with the perfect balance of airiness and moisture, developed for rapid rooting of cuttings, as well as sowing seeds and their germination. ROOT!T Rooting Sponges can later be transplanted with the plant into any growing medium, such as soil or coconut fibre.
On the topic of cloning/cutting propagation, a more general article has also been published on our blog, which we link to below. If you have any questions related to successful cloning, whether of a purely practical nature or because you are interested in the indispensable helpers from the Root!t brand, we will be happy to advise you at the well-known address info@higarden.eu.
We also recommend these products:
What to read next?
- Cloning/cutting propagation
- How to use growing mats?
- How to grow mother plants and how to care for them?
How to recognise quality seeds?
A seed, which stands at the beginning of every plant’s story, is practically a dormant organism waiting to be awakened. How can you recognise the quality and condition of seeds you have prepared at home for storage, or have just bought? And what is the likelihood that they will produce a beautiful and healthy plant?
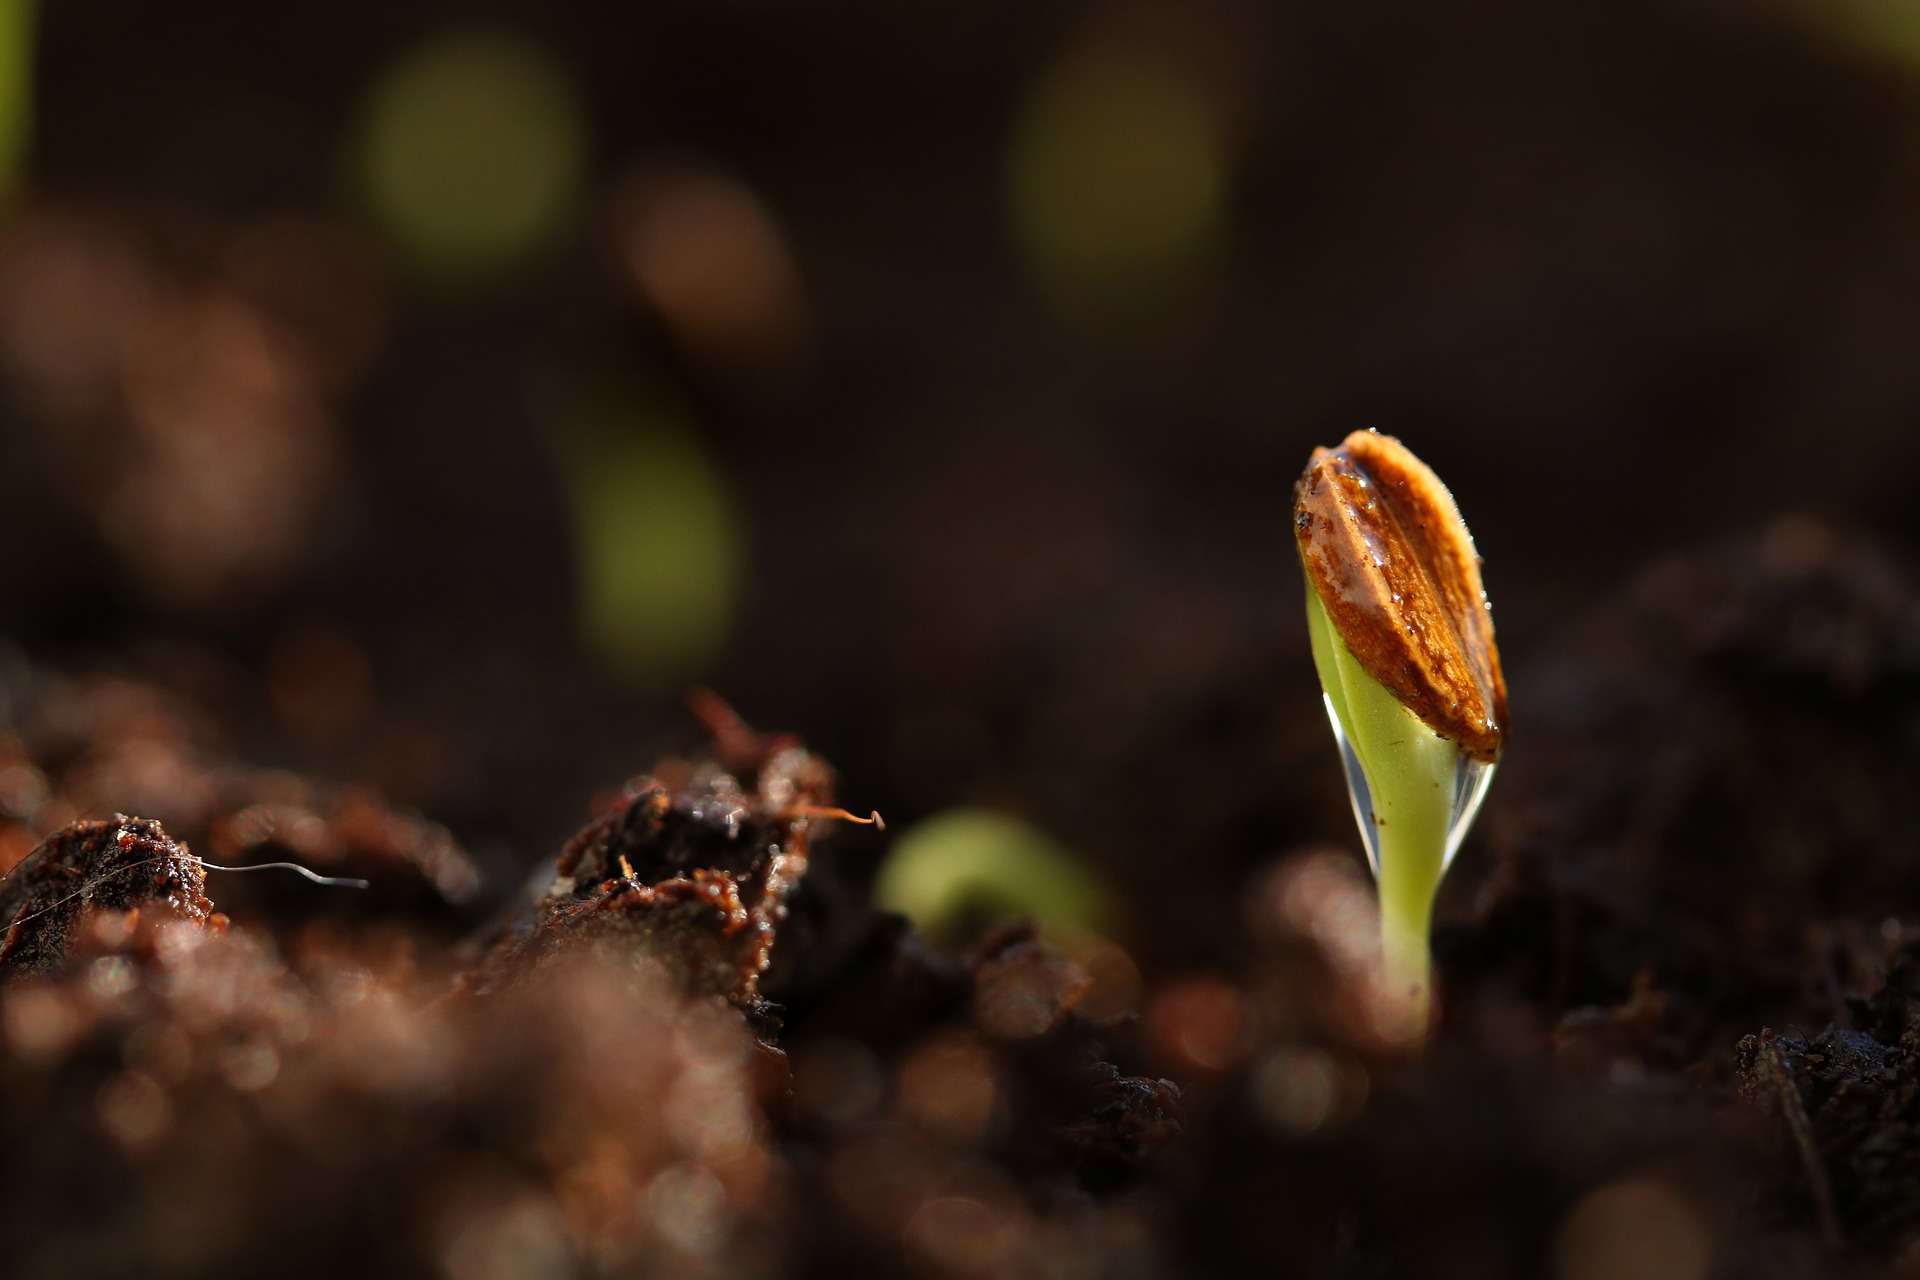
- The fact is that, by sight alone, a grower will not answer these questions in the case of smaller seeds, which are the basis of most plants commonly grown in a growbox. Even a magnifying glass will not be enough. We will not determine what we want by touch either. The only exception is really large seeds, such as those of pumpkin, where we can recognise their fullness by feel.
- Growers’ experience speaks clearly. The only proven way to predict the condition of a seed and thus the potential of the future plant is to store seeds in an optimal environment and do everything possible to ensure they remain in good condition.
- The word “germination” undoubtedly belongs among the terms most frequently used in the world of gardening, and it expresses a seed’s ability to produce a sprout. Most seed producers (seedbanks) guarantee seed germination to a certain extent, primarily by the expiry date stated on the packaging.
- However, if you have found seeds that you would like to try after the date has passed, do not despair and give them a go. It is common for seeds whose expiry date on the packaging has already passed to germinate without any problems.
- This does not change the fact that, for seeds of all kinds, a simple direct relationship applies: the older they are, the harder it is for them to emerge into life.
- You can best support germination through proper storage. For this purpose, TightVac vacuum containers are ideal, and you can also use them later for storing the harvest.
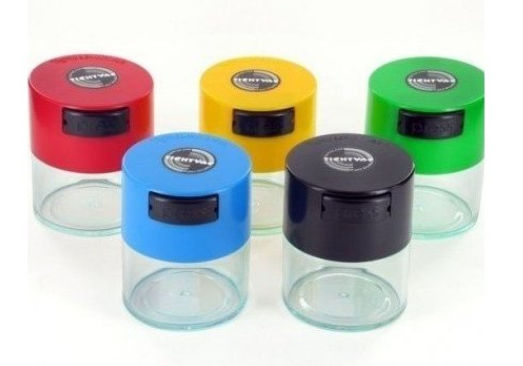
- The conditions for flawless seed storage can be summarised in three points:
- Darkness
- Coolness
- Absence of moisture
- Finding a dark place where temperatures remain consistently lower, yet where there is not the slightest moisture, can sometimes be a bit of a challenge. In terms of darkness and coolness, a cellar is often an option, but there is usually also a certain level of humidity there. Some growers then store seeds in the fridge, with emphasis on thoroughly sealing the container.
- Seeds stored under vacuum provide a considerable assurance of quality and improved success in subsequent germination.
- No matter what we do, we simply will not significantly extend the lifespan of some seeds, even with flawless storage. For example, onion seeds, which are very small, lose germination capacity already during the first year.
- These are, on the other hand, examples of seed that are worth taking good care of, because if they are stored under the right conditions (see above), they will retain a high level of germination for a very long time:
- Cucumber
- Pumpkin
- Courgette
- Tomato
- Brassica vegetables
- The concept of GERMINATION is also closely linked to the widely used germination test among growers. What does this checking method involve and what is it good for? The germination test allows us to quickly form a closer idea of the condition of the seeds and therefore how many to plant so that we later harvest the planned quantity of mature flowers decorating vital adult plants. The procedure is as follows:
- Lay several clean paper towels (kitchen towels, napkins, paper tissues, toilet paper, etc.) on top of each other.
- Place the test seeds on them. The larger the sample, the better. Ideally, at least 10.
- Spread the top paper layer over the seeds (see above) and moisten the surface, ideally using a fine spray bottle. It should contain water that has not just been drawn fresh directly from the tap. If you have tap water available, let it stand for at least one day before pouring it into the spray bottle.
- Remember that the seeds should definitely not be floating in water, otherwise they could “drown” and start to rot instead of germinating.
- Once the seeds are prepared in this way, cover them with any glass or plastic bowl and move them from a lower-temperature environment to one with a temperature of 18–20 °C.
- Now all that remains is to keep the towels moist by gently misting them with water (not wet!)
- Everything you can learn about the seeds from a grower’s perspective will become apparent over the following days, or rather weeks. It depends on how long it takes the seeds to wake from dormancy.
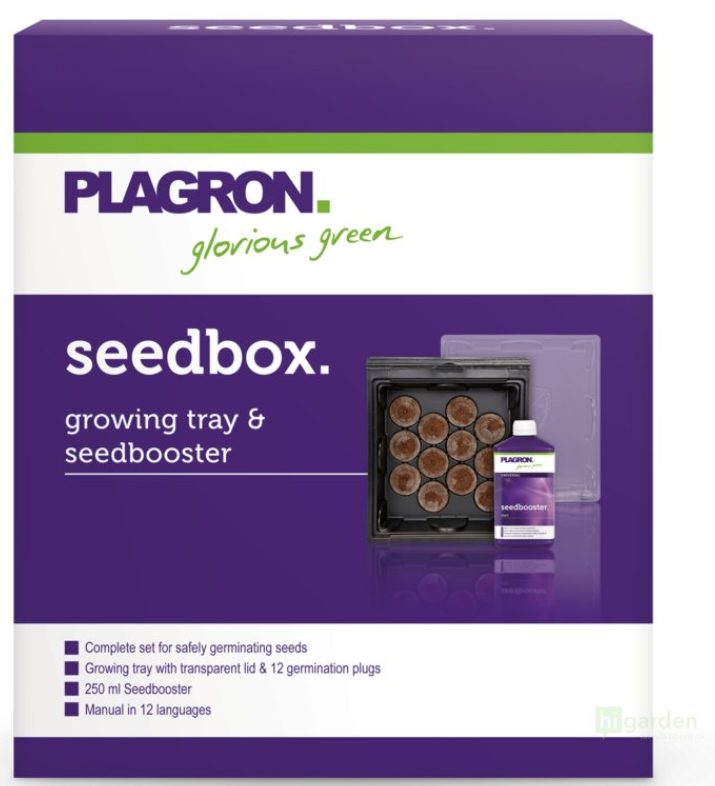
Our TIP: Get the complete Plagron Seedbox set at a discounted price, which contains everything needed for successful germination of 12 seeds, from a small propagator through propagation tablets to the highly effective Seedbooster for rapid rooting. A perfect solution for all beginners, we recommend it!
- A separate topic we would like to highlight at the end is seed treatment. Sometimes this is done using chemicals whose purpose is to protect seeds from pests or moulds. Chemically treated seeds can be recognised by their distinctive colouring.
- However, we recommend choosing seeds that are treated biologically. You can also manage the whole process yourself. Proven natural methods of seed treatment include infusions of chamomile, agrimony or yarrow as readily available herbs with a significant disinfecting effect.
- Make use of the strength of nettle and horsetail as well. These plants have a strengthening effect on the emerging seedling and support its growth.
- There are no limits to combining the herbs mentioned in an effort to strengthen seeds. And the more you strengthen them, the better the results of testing and the subsequent germination of all the seeds you decide to plant will be, whether completely without testing or only after carrying it out and evaluating it.
If you have any questions on the topic of MICROGREENS, we will be happy to answer them at the well-known address info@higarden.eu.
We also recommend these products:
- PLAGRON Seedbboster plus 10 ml (499 Kč)
- B.A.C. X-Seed cup, 10 g (249 Kč)
- Tlakový postřikovač PROPUMP, 2l (249 Kč)
What to read next?
How to Grow Cacti and Succulents?
Almost every household has at least one cactus or succulent. We know this because you often ask us about growing cacti, so we have prepared this article for you, in which you will learn how to care for these specific plants properly.
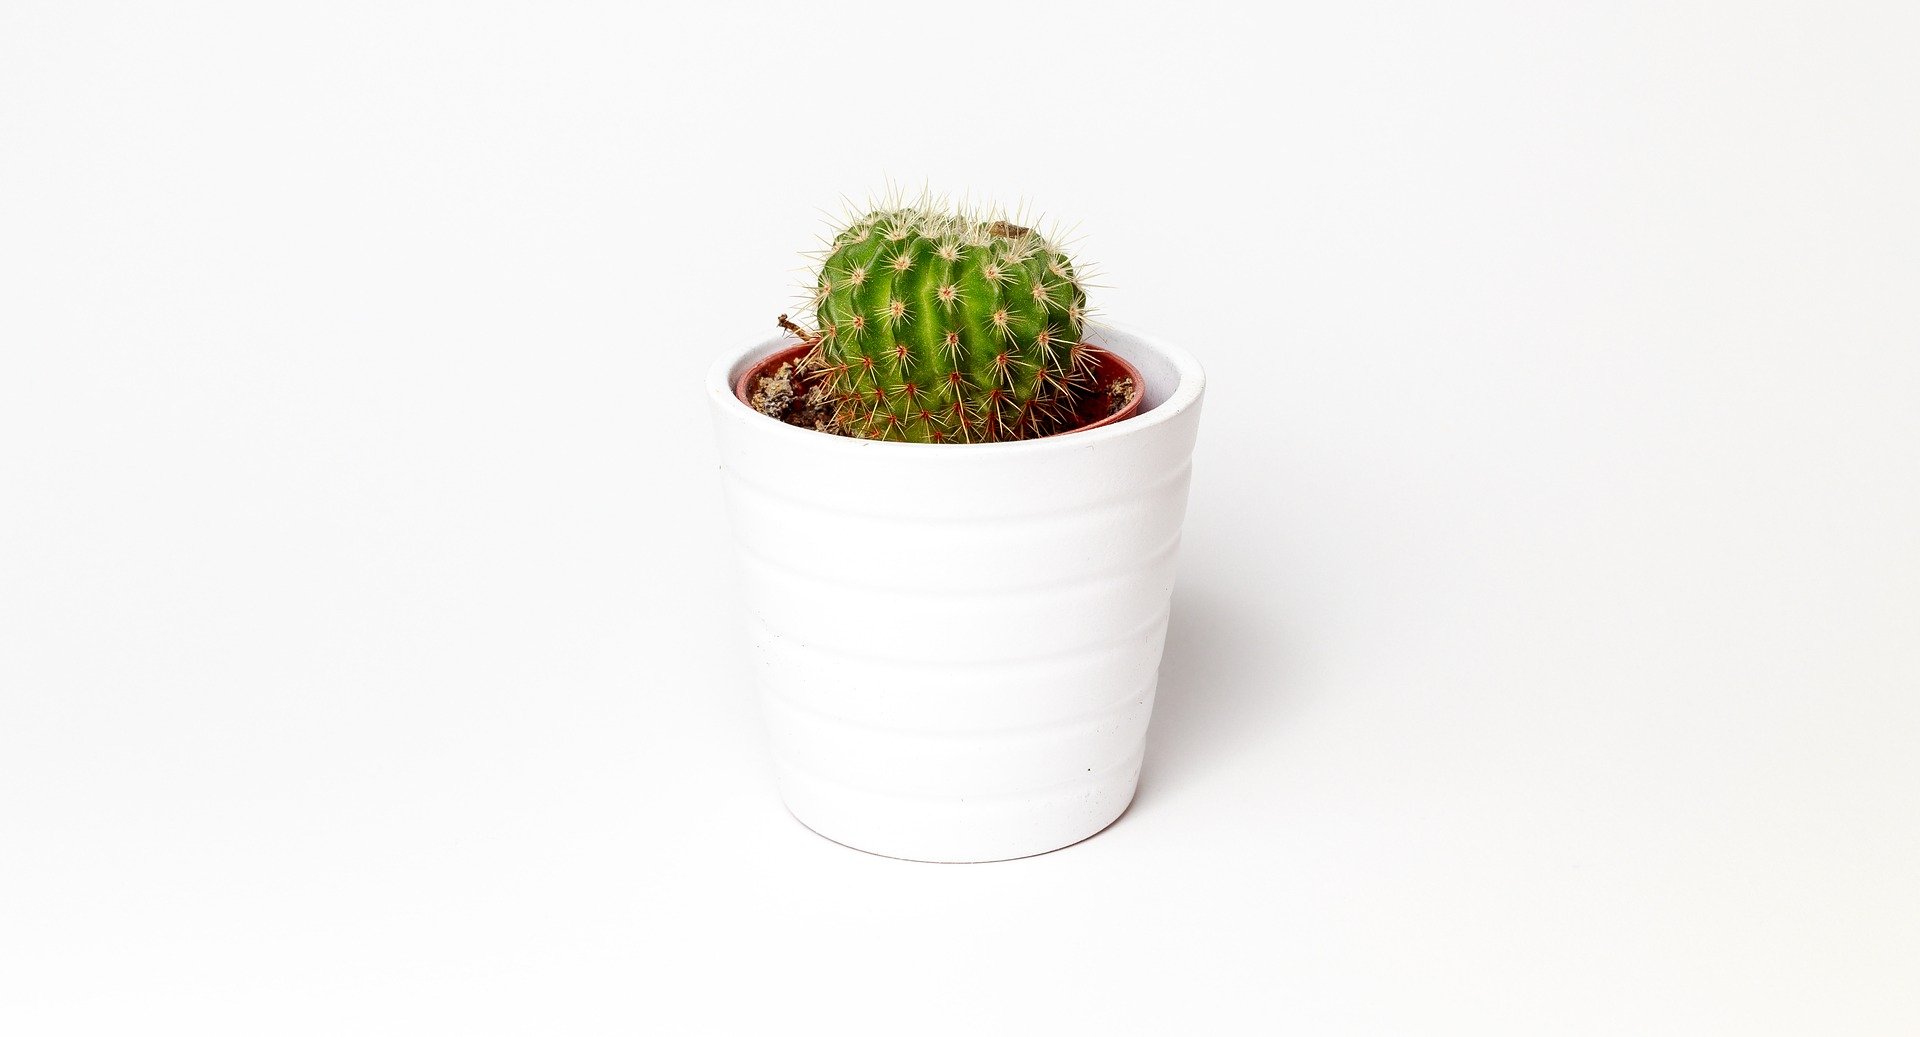
To begin with, a botanical aside, or a quick quiz. What is the difference between cacti and succulents? We will not make it unnecessarily complicated. Simply put, every cactus is a succulent, but not every succulent is a cactus.
- All succulent plants share the ability to retain a significant amount of plant sap in their tissues and cells.
- Some succulents, such as the popular aloe vera or agave, retain sap in their leaves.
- Succulents that retain sap in their stems can be considered cacti.
- Cacti have different needs from ordinary houseplants. The growing environment in the pot you prepare for them should simulate as closely as possible the environment in which cacti grow in the wild. Wet growing medium is therefore, of course, wrong.
- As soon as you buy a cactus or another succulent, you need to repot the plant without delay. Ordinary peat-based growing media in which cacti and succulents are placed when we buy them from a garden centre or other shop do not represent a growing medium suitable for their long life.
- It is definitely worth choosing quality. The more airy the growing medium, the better. You can use a mix of perlite or clay pebbles.
- Choosing the right growing container is also crucial. Choose pots with a large opening or smart pots that allow sufficient water drainage.
- What would happen if you repotted the plant and left it without watering for two weeks? The answer is clear: it would die. A repotted cactus is, however, the exception that proves the rule, because that is exactly what it requires. Therefore, after repotting, wait another 14 days before watering it.
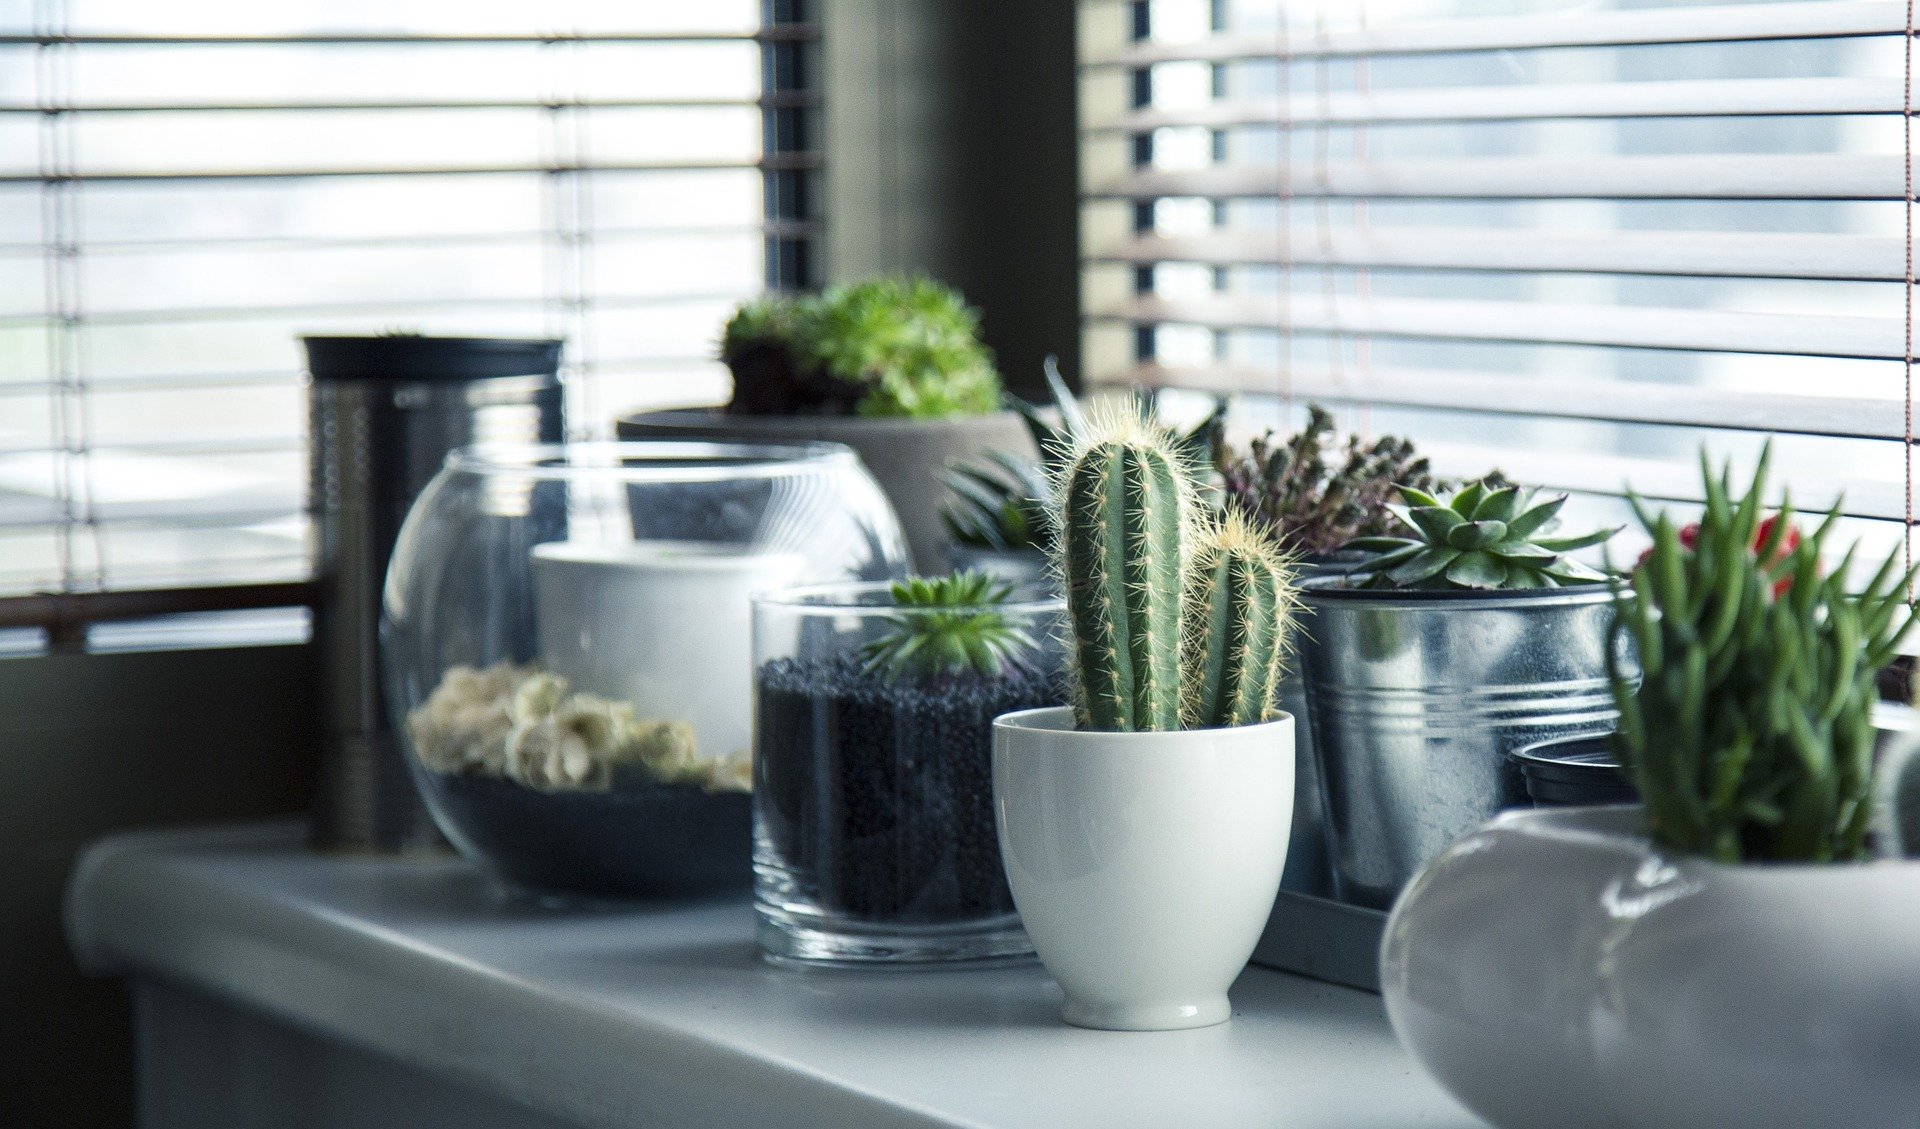
- A cactus flowering is a beautiful sign that it is being cared for properly. However, this is by no means a given, so do not be disappointed if it does not happen. Sometimes, on the other hand, a cactus flowers relatively quickly simply because the chosen variety is undemanding.
- It often happens that you bring home a flowering cactus from a garden centre or supermarket. But why does it stop flowering at home and start to rot?
- One reason may be a lack of direct sunlight. Succulent plants, and cacti in particular, should always be placed where sunlight reaches them fully every day. The best places in the home are usually south-facing windows. West-facing and east-facing windows are also suitable. Inner windowsills are ideal. If your home is permanently darkened, cacti will not thrive very well.
- Another reason why cacti stop flowering and do not thrive is incorrect watering. Cacti are best watered in the evening. The water should be lukewarm and left to stand. During the growing season, we recommend watering cacti once a week, thoroughly. A common mistake is to water cacti lightly but often.

- Cacti only need the nutrients contained in the growing medium. Fertilisers are not needed.
- However, instead of using fertilisers, cacti require annual repotting into fresh growing medium from which they draw nutrients.
- If for some reason we do not repot the cactus into fresh growing medium, we can apply liquid fertiliser at most three times a year. But be careful, only during the growing season.
And finally, a little inspiration. Here is a list of the most popular cactus species among local growers:
- Astrophytum
- Echinocactus
- Echinocereus
- Mammillaria
- Gymnocalycium
- Notocactus
- Rebutia
- Lobivia
If you have any questions about growing cacti, please do not hesitate to send them to the well-known address info@higarden.eu.
We also recommend these products:
- Plagron Growmix with perlite 50 l (319 Kč)
- BioNova Bio Soilmix 50 L (279 Kč)
- Cobble smart pots (from 219 Kč)
What to read next?
- How and why to revitalise growing medium?
- Clay pebbles as a growing medium
- What are the developmental stages of a plant?
Everything for the autumn harvest
Autumn is here, and with it comes the time for harvesting and processing the crop. Together with our experts, we have prepared a selection of gadgets, tools and procedures that may come in handy during this period. Before the plants show us that they are ripe, it is a good idea to have all the necessary processing tools and storage containers ready. You can always improvise, but why underestimate the most important stage of the entire growing cycle and risk losing a valuable harvest?

Harvesting Larger plants can be divided straight away into smaller parts, but in any case the plant can be cut down whole. More robust stems are easily handled by branch shears. For dividing the plant, it is advisable to use protective clothing or at least gloves. First, contamination is avoided, and second, you will save yourself a lot of work cleaning your skin. For cleaning hands, as well as tools, PoKling - resin removal soap is excellent. 
Processing plants
The plants are now divided into individual branches, or offshoots. We are at the first fork in the harvesting process, namely in the method of drying and processing, because some people prefer to dry whole plants and only then trim the flowers to perfection, while another group of growers prefers to process the flowers straight away. We will focus on immediate processing after harvest and only then drying.
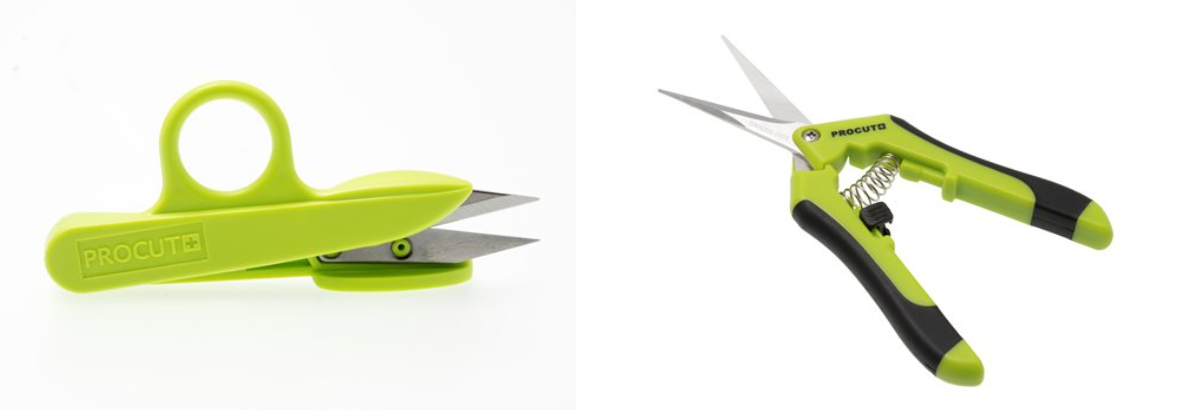
After we have separated the leaves from the stem, the flowers are trimmed, as there are still a few leaves hidden in them. Excess leaves retain moisture for longer and the odour of chlorophyll, which we do not want. Scissors with small blades are perfect for cutting tiny leaves or for precise trimming of flowers. For manual trimming, it is more convenient to leave the flowers on the stems and separate them only before placing them into the drying net.
Semi-professional and professional trimmers take care of perfect processing of herbs and flowers without the use of scissors. These trimmers can save you an enormous amount of time. You can place whole flowers into the trimmers, including smaller leaves (we recommend leaving only those that are no larger than the palm of your hand).
Drying plants
The flowers are free of leaves and separated from the stems. Now spread the flowers out in the net so that, if possible, they do not touch each other. Drying nets are a compact and practical solution for quick drying not only of herbs, but also fruit or mushrooms. They do not take up much space and, thanks to the ample air flow, there is no risk of mould. We offer nets of various diameters and sizes. All nets can be easily hung in a room or in a tent, and thanks to the individual tiers, stable drying is ensured. Some nets also include a practical clip fastening, which allows easy attachment or detachment of the tiers as needed.
The flowers are free of leaves and separated from the stems. Now spread the flowers out in the net so that, if possible, they do not touch each other. Drying nets are a compact and practical solution for quick drying not only of herbs, but also fruit or mushrooms. They do not take up much space and, thanks to the ample air flow, there is no risk of mould. We offer nets of various diameters and sizes. All nets can be easily hung in a room or in a tent, and thanks to the individual tiers, stable drying is ensured. Some nets also include a practical clip fastening, which allows easy attachment or detachment of the tiers as needed.
But back to the process. Once the flowers have been placed into the drying net, we must ensure optimal conditions for proper drying. In our case, this means a space without daylight, which degrades valuable material, and we try to gradually reach a humidity of 55%, while keeping the temperature around 21ºC. A small compact Teplo-vlhkoměr VF with external probe will help you with monitoring. The air in the space should be changed continuously using an extract fan with an odour filter (for example Prima Klima PK-Kombo 125-2S - 400 m3/h, fan and filter) and you can also add a smaller circulation fan, but place it so that it does not point at the herbs.
And how do you know when the herb is ready to be moved into storage containers? The simplest trick is to try breaking the flowers. If the stem cracks but does not snap off, then the herb is ready to be moved. Drying usually takes 5 to 12 days, depending on your conditions and the size of your flowers.

Storage and curing
Once your herbs start to crackle, the right time has come for curing care. Storage containers must be clean. For storing herbs, we recommend sealable containers, which create a vacuum inside thanks to negative pressure. This prevents the herbs from losing moisture and odour from escaping. The vacuum containers TightVac are made from health-safe food-grade plastic and are also suitable as a practical kitchen accessory for storing food (coffee, spices, loose-leaf teas).
Once your herbs start to crackle, the right time has come for curing care. Storage containers must be clean. For storing herbs, we recommend sealable containers, which create a vacuum inside thanks to negative pressure. This prevents the herbs from losing moisture and odour from escaping. The vacuum containers TightVac are made from health-safe food-grade plastic and are also suitable as a practical kitchen accessory for storing food (coffee, spices, loose-leaf teas).
Fill the jar or container to a maximum of 75% of its capacity. This will create space for the release of so-called internal moisture. Close the jars and store them in a place where it is dark and around 21ºC. The next day, it may seem to you that the flowers have gained a little moisture. This is caused by the released internal moisture, and what should you do with it? Open the jars for 20 to 30 minutes every day. It does not hurt to shake the flowers around in the jar from time to time. If you keep this up for at least a month, you will be surprised by the aromas and flavours your herbs conceal. Anyone who manages a quarter or even half a year is a true gourmet.
Humidity control
Supporting curing has never been easier. Say goodbye to over-dried harvests or mould. Humidity control sachets work by humidifying the surrounding environment to the required level if it is too dry, and conversely, when the environment is too humid, they absorb water so that the required humidity is achieved.
Discover perfectly balanced humidity and beautifully preserved aroma and flavour of your harvest thanks to Integra Boost sachets, which are safe, salt-free and 100% non-toxic. Your herbs deserve nothing less!
You can find all the products needed for a complete harvest HERE.

If you have any questions or need advice with your selection, our experts are available at info@higarden.eu.
We also recommend these products:
What to read next?
- Do not underestimate air exchange and circulation inside the growing space
- How can you increase the terpene content in the crop?
- Prima Klima - activated carbon odour filters you can rely on
Home Mushroom Growing
Mushrooms are not grown indoors on their own, but they are certainly easy and quick to cultivate. Not only are they usually a welcome ingredient in our cuisine, but consuming some species also brings us a considerable number of health benefits. Today you will learn how and which mushrooms to grow at home.
Czechs are undoubtedly among Europe’s mycophilic nations. Mushroom picking has deep roots here and has maintained its popularity since time immemorial.
However, we do not always have time to go to the nearest forest for our favourite delicacy, and sometimes someone else gets there first. When cultivating mushrooms indoors in a grow box, but also perhaps in a cellar or a small heated greenhouse, you will secure a steady supply of your favourite mushrooms and will not be limited to the mushroom season only!

How to do it?
Remember that with mushrooms, one thing is absolutely essential: sterilising the substrate. The optimal microclimate inside a growing tent is mainly high humidity above 90%, which will ensure that your mushrooms grow beautifully at home. As for temperature, it depends more on the specific variety, but you cannot go wrong if you start at higher temperatures in the range of 24–29 °C and then move the mushrooms to a cooler environment with a temperature of 5-14 °C a little later. Try to stay closer to the lower limit. This procedure best activates the mycelium, and you will soon see the first mushroom harvest. You can also do without growing systems, forget about pests, humidification and extracting hot air from the growing area. Some species do not need light at all for their growth; such button mushrooms will grow practically anywhere. They can make do with living, but also dead, organic matter.
Oyster mushrooms, button mushrooms and more
From the experience of growers and gardeners, this pair can be singled out as the most popular in home mushroom cultivation.
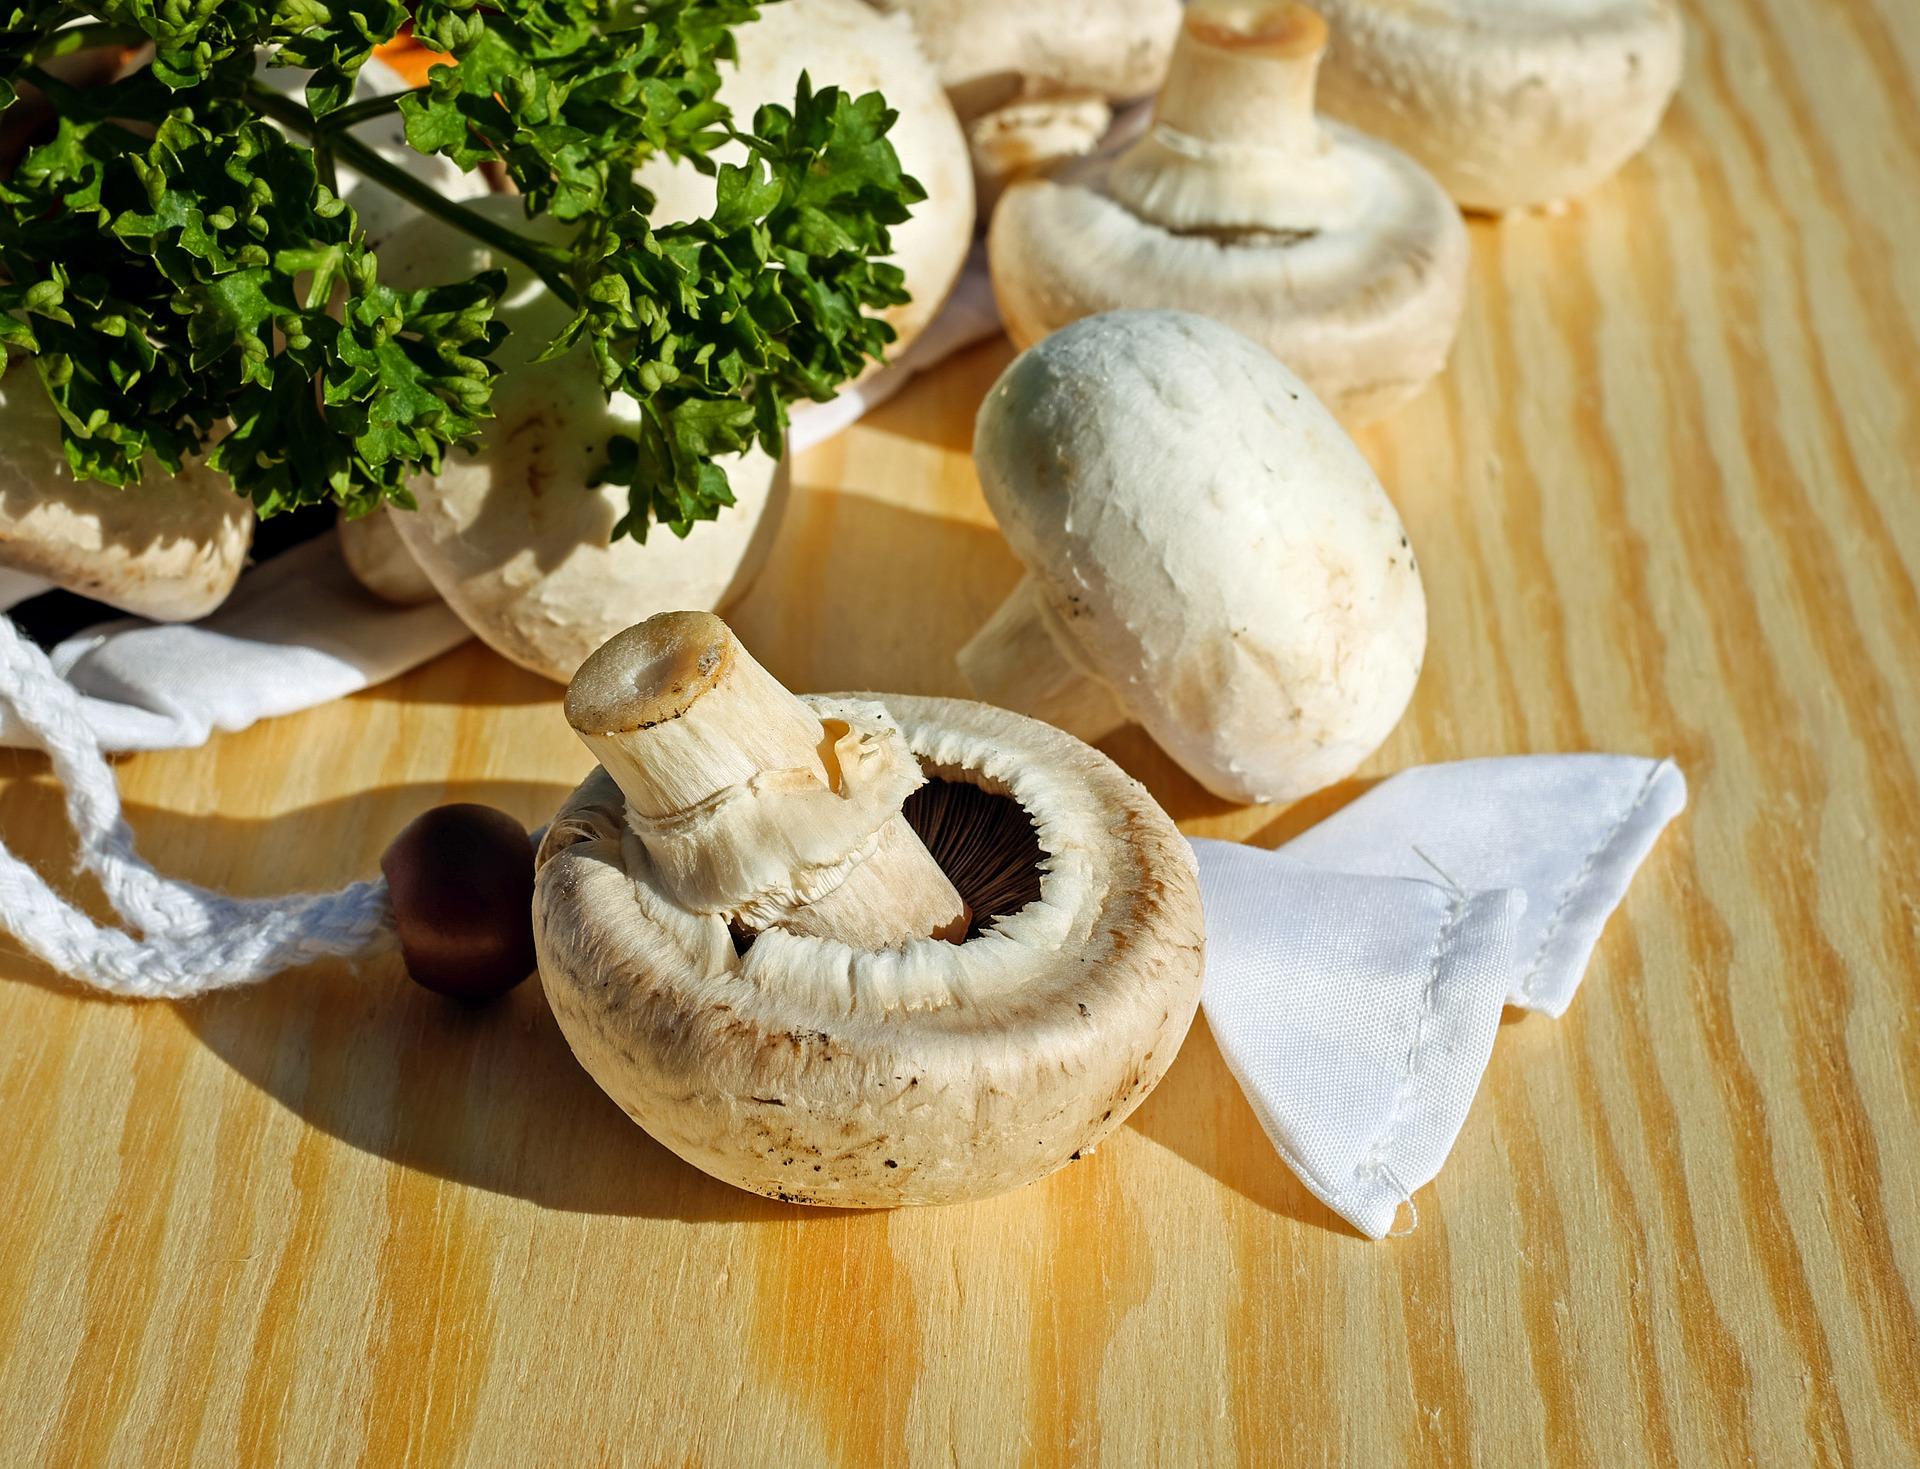
Button mushrooms are a typical undemanding mushroom that has been grown in artificial conditions for many years. Perhaps the most proven substrate for growing button mushrooms is perlite.
Oyster mushrooms, which got their species name from the colour of the cap strikingly resembling oysters, are becoming increasingly popular, especially thanks to their beneficial effects on the human body. They contain plenty of vitamins, minerals, proteins, sterols and fibre. They support the liver and help the body regulate cholesterol. You can inoculate them onto a log or into a stump. Oyster mushroom clusters usually grow within a quarter of a year.
If you decide to start with these mushroom species, you will probably easily find someone who already has some experience with them. However, if you are among mushroom lovers, once the first button mushrooms and oyster mushrooms appear at home, you will most likely want more. Again, no problem. With minimal effort and minimal costs, you can grow Judas’s ear (elder bracket), shiitake mushrooms (edible lentinula), penny bun, field blewit, shaggy ink cap or even coral fungus in the comfort of your home.
Mushrooms in the garden
You can also grow forest mushroom species yourself, and it can be done in the garden too. Boletes, chanterelles, birch boletes, parasol mushrooms, practically anything you like. In any case, this is a higher level and it does not always work out. If you have a plot with mature trees situated near a forest, you are halfway there, because mushrooms can spread to you via spores from the forest stands. You will often also find spores on firewood.
Home mushroom cultivation, whether in a grow box, on a cupboard, in a cellar or in the garden, has one more advantage. Mushrooms can be harvested exactly when they reach the ideal size for kitchen processing, so unlike unnecessarily young or overripe mushrooms, we can then enjoy them to the fullest.
Proper storage for maximum benefit
Finally, we have one more practical tip for you regarding storing mushrooms in hermetically sealed containers. When harvest time comes, there is nothing better than placing the mushrooms in a TightVac vacuum container. You can also get several sizes, depending on the variety and how abundant the harvest will be. In this way, mushrooms and small mushrooms will retain 100% of their flavour for a year or longer without any problem, and you will have them at hand at any time, whether mushroom soup or a proper mushroom sauté is on the menu. You may know that drying is a gentle preservation method that allows the vast majority of active or even medicinal substances in food to be retained (which is especially useful in the case of medicinal mushrooms). For storing dried mushrooms, use the smart Integra Boost packs, which will maintain optimal humidity in any container.
Do not hesitate to ask us anything you are interested in. Indoor mushroom cultivation is no exception. We will be happy to advise you on choosing suitable products and look forward to your questions at the well-known address info@higarden.eu.
- Grow boxes
- Perlite
- TightVac containers