
Step-by-step growing, Page 2
- Growth phase
- Flowering and Harvest
- Processing and storage
- Hydroponic growing
- Seedlings and propagation
- Speciality Crops
- Outdoor Growing
- Seeds and Germination
List of articles
BioFilm Buster Pro: A Revolutionary Natural Cleaner for Hydroponic and Irrigation Systems
 Blocked pipes, hoses, nozzles and drippers in hydroponic and irrigation systems are a common problem faced by indoor and outdoor growers. The most common culprit is a build-up of biofilm – a slimy organic mass formed by bacteria that thrive in cool, damp environments. We will show you how to keep irrigation and hydroponic systems perfectly clean and functional with minimal effort and cost.
Growers can now choose from a wide range of hydroponic and irrigation systems suitable for different types of media and feeding programmes. However, whether you grow indoors in rockwool using mineral fertilisers or farm on a large scale outdoors and feed organically, biofilm will eventually start to form in the pipes of your irrigation system. Water rich in nutrients flowing through the pipes benefits not only the plants, but also the microbes inhabiting irrigation systems. If you do not clean it regularly, bacteria settled in the pipes will begin to multiply and form a dense biofilm that can cause considerable damage.
- bacteria forming biofilm draw nutrients from the nutrient solution
- biofilms increase the risk of harmful bacteria multiplying (E. coli and others)
- biofilm can damage moving parts of the system (pumps, rotary nozzles, spinners)
Natural vs chemical cleaners: Which removes biofilms better?
Cleaners based on hydrogen peroxide, chlorine compounds and other chemical substances are very effective at removing salt deposits or algae, but they often cannot cope with stubborn biofilm. This is due to its dense consistency, which makes it difficult for the cleaner to penetrate beneath the surface of the dirt.
The density of biofilm depends on:
- the amount of bacteria in the water entering the system (filtered vs unfiltered water)
- the temperature of the water and nutrient solution (the higher the temperature, the faster bacteria multiply)
- the nature of the piping and the type of irrigation system
- the type of nutrients used (organic fertilisers create more biofilm)
Natural cleaners contain bacteria and enzymes that actively break down biofilm deposits and, with regular use, help prevent them from forming again. Their natural composition also guarantees that cleaning cannot damage plants, as is the case with some more aggressive chemical products.
OUR TIP: We recommend thoroughly cleaning irrigation and hydroponic systems after each cycle with hydrogen peroxide, Terra Aquatica FlashClean, Athena Cleanse or a similar product.
BioFilm Buster Pro: Microbial cleaner for irrigation systems and hydroponics
BioFilm Buster Pro is a completely natural product for cleaning irrigation systems with OMRI (Organic Materials Review Institute) certification, containing bioenzymes and effective microbes. It is a product with immediate effect that also acts as a preventative measure.
MAIN BENEFITS OF BIOFILM BUSTER PRO
- universal solution for all types of hydroponic and irrigation systems
- suitable for use throughout the entire growing season
- non-toxic to plants
- removes biofilms, mineral deposits and other dirt
- with regular use, prevents deposits from forming again
- easy application and fast action
Instructions for use of BioFilm Buster Pro
Always use BioFilm Buster Pro with non-chlorinated water. Chlorine kills the bacteria that make the product work.
- In case of heavy contamination or blockage, apply BioFilm Buster Pro at a ratio of 1:100 (10 ml/litre of water). For preventative treatment, use a ratio of 1:500 (2 ml/litre of water).
- Start the system and let it run until the solution has flowed through the entire piping.
- Switch off the system and leave BioFilm Buster Pro to act for at least 8 hours.
- Restart the system in the usual way.
How to Properly Pre-Grow Seedlings? A Guide to Equipment for the Spring Season
Spring is approaching, and it is time to start preparing for the upcoming growing season. If you want to get ahead of the weather, raise seedlings at home and your plants will reward you with rapid growth, strong health and an early harvest. What will you need, and how do you do it? We have prepared a clear guide to raising seedlings for you.
Why raise seedlings?
Raising seedlings indoors in the comfort of your home is an excellent way to get ahead of the start of the season. Avoid the risks associated with unpredictable spring weather, and your plants will quickly adapt to outdoor conditions after transplanting. Another advantage is that, thanks to raising seedlings, you can also grow plant species that would otherwise not thrive in our climatic conditions.
- Ideal conditions: Germination and raising seedlings indoors allows you to create an optimal environment for plants.
- Faster growth and earlier harvest: Plants spend the first weeks of their lives in a protected environment, where they can strengthen and develop a rich root system. Once planted outdoors, they then grow faster and ripen earlier than with direct outdoor sowing.
- Ability to grow different species: Many plants take too long to grow and ripen to mature in our geographical conditions. However, if you raise these species before the start of spring, you can shorten this period.
Which plants are suitable for raising?
Not all plant species need to be raised first, and some, such as radishes, peas or carrots, are sown directly into the bed because they do not tolerate transplanting or they grow quickly and ripen very early. The most common crops that are raised include:
- Fruit vegetables: tomatoes, peppers, aubergines, chilli
- Medicinal and exotic species: hemp
- Cucurbit vegetables: cucumbers, courgettes, pumpkins
- Leafy vegetables and brassicas: lettuces, broccoli, cauliflower, cabbage
- Aromatic herbs: basil, marjoram, thyme, rosemary
- Ornamental flowers: marigold, petunia, snapdragon, lobelia
What will you need to raise seedlings at home?
Although it is possible to raise seedlings on a windowsill or in a conservatory, you will achieve the best results in a grow tent (growbox), where you can create a protected and stable environment for the plants. Inside a grow tent, you can easily control temperature, humidity and the amount of light, and the plants can germinate and grow without the influence of weather fluctuations. Seedlings in a stable environment grow faster and are more resistant to pests, mould and disease. In addition to a growbox, for raising seedlings you will also need:
- Propagator: Miniature greenhouses will help you create the ideal climate for germinating seeds and young plants. For growing some species, propagators with heating are suitable.
- Seedling tablets, cubes or cylinders: Seedling cubes make germination and handling seedlings easier. They can be made from various materials, such as rockwool, coco or peat. Remember that seedling cubes are intended for germination, and after a few days it will be necessary to transplant the plants into a suitable growing medium.
- Growing medium: The choice of growing medium for seedlings depends on the species and the growing method. It is important that the medium is airy and does not contain a high amount of fertilisers that could burn young plants. You can read about the advantages and disadvantages of different growing media here.
- Grow lighting: For rapid growth, plants need enough light. For raising seedlings, the most suitable option is energy-efficient LED grow panels with a growth spectrum.
- Heating mat: Some species germinate and grow better at higher temperatures. Heating mats are especially suitable when growing heat-loving species, such as tomatoes or chilli.
- Sprayer: Watering young plants by hand can easily wash them out of the medium, so we recommend adding a hand sprayer to your basket.
Unsure which equipment to choose for raising seedlings? We have prepared complete seedling-raising sets for you, containing everything you need to get the outdoor season started.
How to raise seedlings – step-by-step instructions
- Seed selection and preparation
- Use only quality seeds with high germination rates.
- It is advisable to soak the seeds of some species (tomatoes, peppers) in lukewarm water for several hours before sowing.
- To increase the success rate of germination for rare or old seeds, use a germination stimulant.
- Sowing and first watering
- Sow the seeds into seed-starting medium or into a seedling tablet, cube or cylinder.
- Cover them with a thin layer of medium and gently moisten with a sprayer.
- Place the seeds in a warm, well-lit place (20–25 °C).
- Ideal conditions
- Temperature: Seeds of most plants germinate best at a temperature of 20–25 °C.
- Light: Provide at least 12–16 hours of light per day.
- Humidity: Keep the medium moist, but not waterlogged.
- Ventilation: Ventilate the propagator regularly to prevent mould growth.
- Transplanting and hardening off
- As soon as the seedlings produce their first true leaves, transplant them into larger pots.
- Water the seedlings regularly and you can use a weak growth fertiliser.
- Before planting them out in their final outdoor position, harden the plants off. First leave them outside for a few hours a day, then for the whole day later on.
Looking for more growing tips and expert gardening advice? Take a look at our Higarden blog, where you will find recommendations and guides for beginners and advanced growers alike.
How to Process and Store Mushrooms at Home?
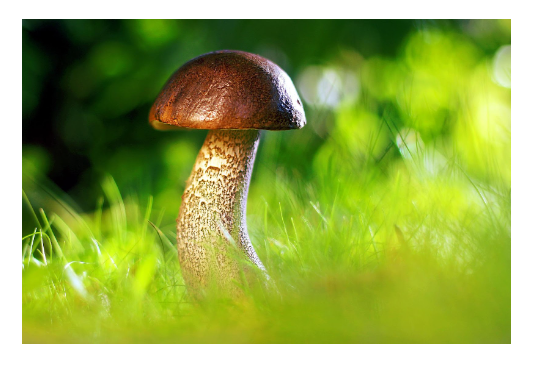
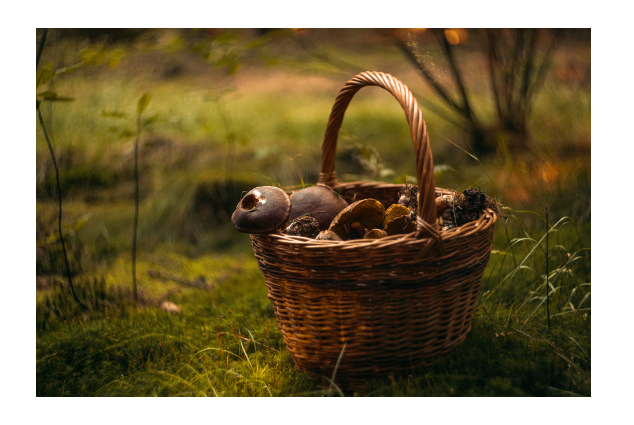
Full baskets can be admired in the hands of passionate mushroom pickers during autumn days on the way home from the forest and on social media. Mushroom season is in full swing, and for lovers of fresh mushrooms, the smell of home becomes literally intoxicating at this time of year. Mushrooms are food like any other. A substantial part of them will certainly be enjoyed in many ways soon after you clean and slice them. But what about all those remaining porcini? Read on to find out how to process and then store mushrooms so they do not spoil and retain their original nutritional values for a long time!
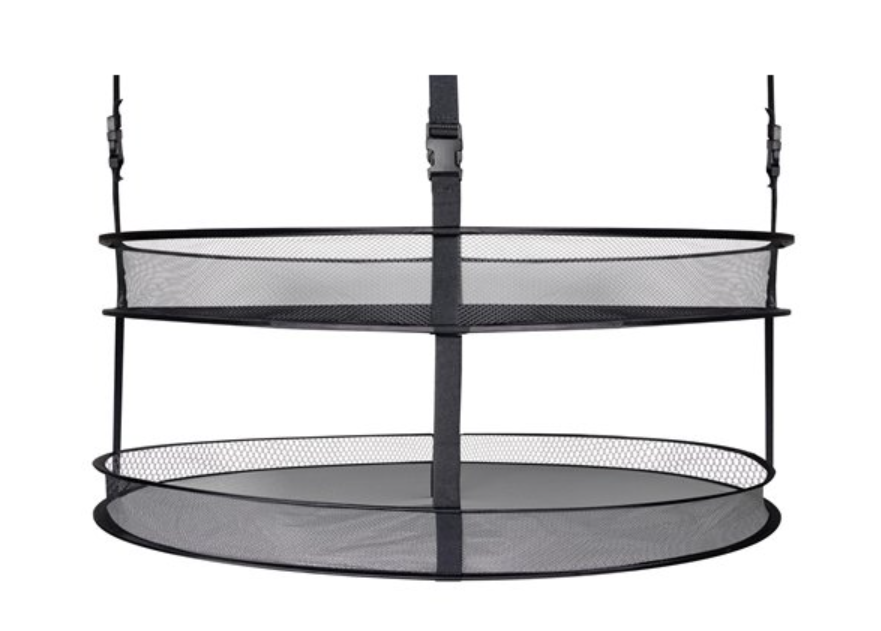
Use drying nets
If you dry mushrooms properly, they will not lose any of their nutritional value. Practical aids for mushroom pickers therefore already include drying nets. Depending on the diameter or number of tiers, you can simply choose from a wide range of options according to how much your fragrant autumn finds have started to pile up at home. The individual tiers together create a considerable drying area, which means that you can easily dry a large quantity of carefully cleaned and sliced porcini at home without them taking up too much space indoors, as drying nets are by their nature very space-saving. And because the sliced mushrooms will not be everywhere you look, you can focus only on the ideal places for drying mushrooms, which are shady and airy.
Quality drying nets for mushrooms are also useful all year round for indoor growing (see separate article: Home mushroom growing). In addition to mushrooms, they are also intended, for example, for drying herbs grown in a grow tent.
Airtight containers are the answer
Once the mushrooms are properly dried, it is worth not underestimating their storage. And by that we do not mean only the classic advice such as: “Put the mushrooms into jars and store them somewhere dark.” A much more sophisticated solution is available, which, like drying nets, also allows for universal use in the future beyond storing mushrooms. TightVac airtight containers are excellent for smart storage of practically all kinds of food you can think of! Transparent or opaque storage containers of various sizes will not let through even strong aromas, which are inseparably linked with some types of produce, yet you do not want them to be smelled all over the flat.
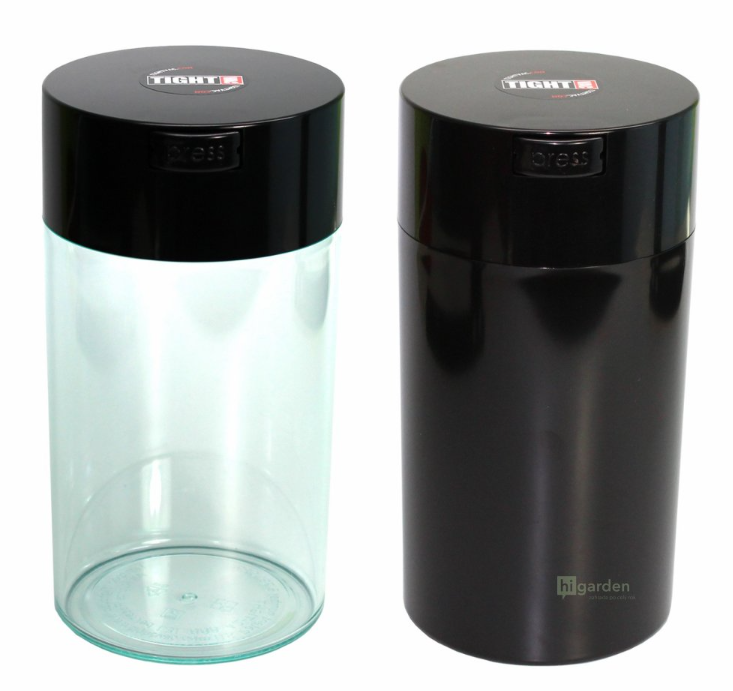
The airtight food containers shown in the picture work on the principle of vacuum. They will protect your food long-term from external moisture and at the same time will not allow unwanted odours accumulated inside the storage container to escape. They are made of health-safe plastic that is also durable. This is, after all, another unobtrusive but major advantage over ordinary jars, which must be handled carefully every time so that, before long, you do not end up sorting shards and dried produce from the floor with your knees, Cinderella-style, because of a moment’s inattention. And cheap plastic substitutes are hardly worth mentioning.
Maintaining optimal humidity inside the storage container is key to preserving mushrooms
And it really takes very little! Storing mushrooms in such a way that they remain a source of distinctive flavour and part of a healthy diet even after a longer time requires one more handy trick. It is small, inexpensive, and yet it will take care of maintaining ideal humidity inside the storage container, preventing sad scenarios in the form of over-dried mushrooms or, even worse, mould caused by excessive moisture, which means the final loss of the stored porcini. In terms of preventing mould, it is generally not recommended to rinse picked mushrooms with water, but only to clean them thoroughly with a knife before drying (see above). You are probably already wondering what this simple and popular tool for perfectly balanced humidity is. We will not keep you in suspense. They are sachets with the patented Integra Boost technology, which we have already mentioned several times on our blog. The detailed description of each variant explains how easy they are to use.

The picture also shows which pack size you should use depending on the size, or rather the weight, of your harvest. For the third time, it also applies that Integra Boost two-way humidity control is useful not only for storing mushrooms, but also dried herbs and other foods, from fruit and vegetables to favourite coffee or tea. And what does two-way humidity control actually mean in practice? The patented technology either releases or absorbs moisture. This achieves optimal humidity in a sealed environment, which the Integra Boost sachets then maintain until the smart, easy-to-read indicator card clearly signals in blue that it is time to use a fresh sachet again.
Now it is up to you whether you save time and hassle with the above-mentioned tricks, or whether you stick with the oven, radiators and jars. Finally, let us briefly summarise all our recommendations for processing and storing mushrooms for greater clarity:
- Do not rinse freshly picked mushrooms with water, but clean them carefully with a knife.
- Then place the sliced mushrooms into the individual tiers of the drying net.
- For hanging the mushroom drying net, always choose a shady and airy place if possible.
- Move well-dried mushrooms into an airtight container made of health-safe plastic. Not only for practical reasons, but above all to preserve their original properties and health-beneficial nutrients for a long time.
- Maintain optimal humidity inside the storage container so that your mushrooms remain in perfect condition for the whole year or even longer by using sachets with the patented Integra Boost technology.
Do not forget that if you would like to ask us anything about storing your harvest, we are here for you at the well-known e-mail address info@higarden.eu.
We also recommend these products:
- Biotabs Starterpack
- PLANT!T GEMINI - Hydroponic circulation system
- Plant Success Mycorrhizae Great White Granular 1
What to read next:
- High temperatures when growing indoors. How can you avoid them?
- Aqua Master Tools - digital measuring instruments from the Netherlands
- How to deal with plant diseases?
Growth Phase: A Guide for Outdoor Growers
Would you like to grow strong and healthy plants in the garden this year and harvest a proper yield? You need to start during the growth phase already – the period when plants build roots, leaves and stems, which will later form the basis of your harvest. In our guide, we will advise you on how to support vegetative growth in outdoor cultivation.
During their life, plants go through two specific periods – the vegetative (growth) phase, when they grow and form leaves, roots and stems, and the generative (flowering) phase, when they flower and produce seeds. The length of the vegetative and generative phases varies among different plant species; some species have a long vegetative phase and short flowering (for example, trees), others move quickly into the generative phase (for example, annuals), and in some plants (for example, perennials) these phases repeat cyclically over several years.
You may also be interested in: Photoperiod: Short-day and long-day plant species
Why healthy stems and roots are important
During the growth phase, it is very important for plants to develop enough roots, leaves and stems, because during flowering they will focus most of their energy on producing flowers, fruits and seeds. Simply put, without strong stems and healthy leaves and roots, you will not achieve a proper harvest. Stems support the leaves, flowers and fruits and contain the vascular system that transports water and nutrients throughout the plant. The root system also serves several functions at once. Roots draw nutrients and water from the substrate and serve as a reservoir for plants during dry periods. In addition, sufficiently deep and branched roots are a guarantee that plants will withstand strong winds as well, which is important in outdoor growing.
Enough nitrogen
As with people, the right composition of the diet is half of health for plants too. During their entire life, plants need a total of 17 different nutrient elements. Some are taken from the air and water (carbon, oxygen, hydrogen), but most are obtained from the soil through the roots. If any of these important nutrient elements are missing, it has a major impact on plant health. Fertile soil and the right fertilisers are therefore the first step to ensuring that your plants are in good condition during the vegetative phase and quickly form robust stems and many roots.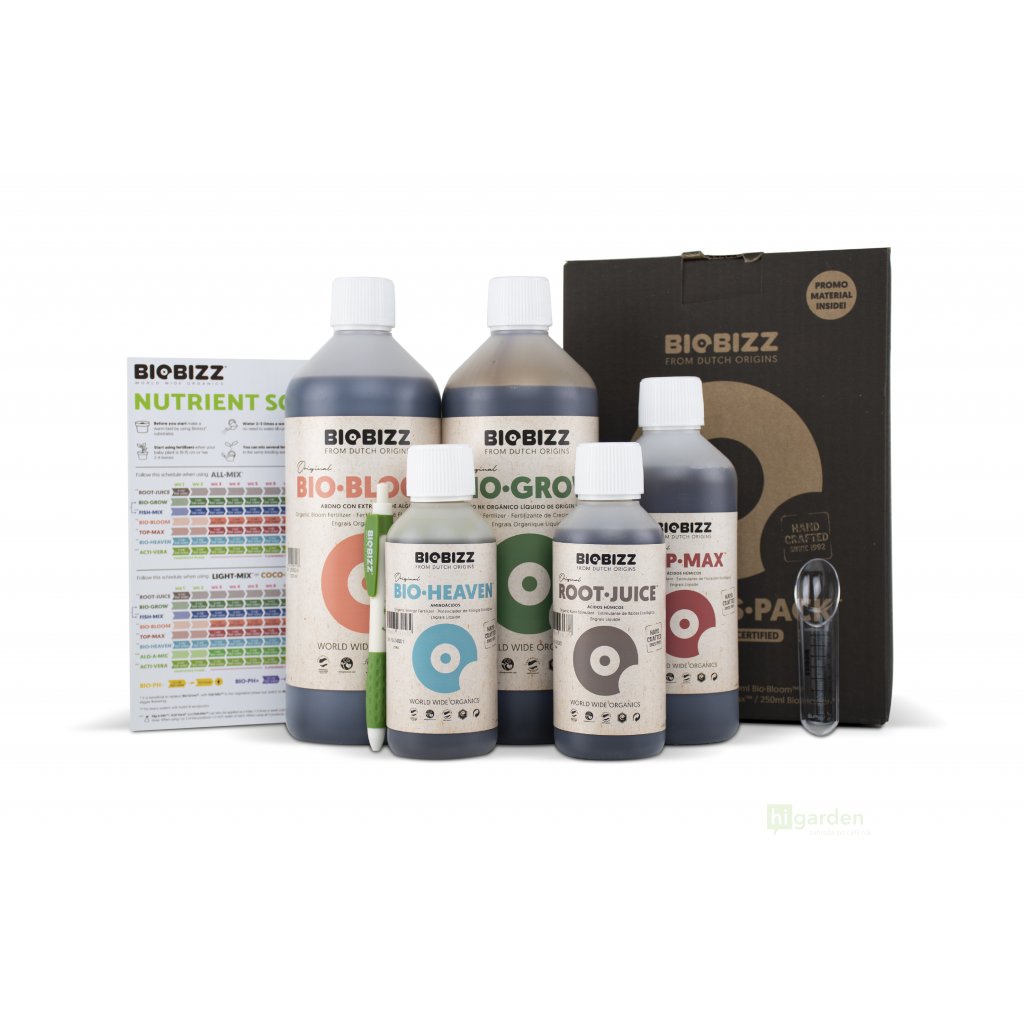
The three most important nutrients in the soil for plants are nitrogen (N), phosphorus (P) and potassium (K), which they consume in the greatest quantities. During the growth phase, nitrogen plays the main role, as it is the cornerstone for the formation of proteins, which are the “building blocks” of all plant cells and tissues. Without proteins, plants would not be able to form new leaves, stems or roots. Nitrogen is also part of chlorophyll, the green pigment that enables photosynthesis, that is, the conversion of light into energy. Last but not least, nitrogen is also part of RNA, DNA and enzymes. Nitrogen enters the soil in several ways:
Biological nitrogen fixation: Some bacteria (for example of the Rhizobium or Azotobacter genus) convert atmospheric nitrogen (N₂) into ammonia (NH₃). These bacteria live both in the soil and on the roots of leguminous plants (peas, beans, clover). Planting these plants in beds (green manure) is a great natural way to increase the amount of nitrogen in the soil.
Organic matter: Nitrogen also enters the soil as part of decomposing organic matter, which soil microorganisms transform into nitrates (NO₃⁻). The most effective way to add organic matter to the soil is compost, humus and mulching.
Growth fertilisers: There is a huge range of fertiliser types, from fully organic to purely mineral, with slow-release or fast-acting effects, in powder or liquid form. Choosing the right one depends mainly on your growing method. While liquid, fast-acting fertilisers are suitable for growing in pots, organic slow-release variants are more suitable for soil. Whatever type you choose, growth fertiliser should always contain a high proportion of nitrogen (N).
You may also be interested in: Growth fertilisers: What they are for and how to use them
Supporting nutrient elements
 Calcium (Ca) and silicon (Si) are two nutrient elements that most outdoor growers do not pay much attention to, because there is usually enough of them in the soil. Nevertheless, a lack of silicon or calcium during the growth phase can have a major effect on plants, because both of these elements directly influence the strength of cell walls. When a plant receives enough silicon and calcium, it has stronger leaves and stems and better withstands wind, drought and pathogens.
Calcium: This element is essential for the development of new cells and also regulates the transport of water and nutrients between cells. Calcium deficiency in plants is shown by deformed or dying young leaves and slowed growth. A good source of calcium for outdoor growing is dolomitic limestone, which also helps reduce soil acidity. A quick source of calcium for plants in the growth phase is liquid fertilisers containing calcium and nitrogen (CalMag). Decomposing organic matter, for example in compost or during mulching, also contains calcium.
Silicon: In outdoor growing in open soil, silicon is widely available to plants, but if you are growing, for example, in coco or inert substrates, your plants may lack it. Silicon increases the strength of cell walls, so plants better withstand high temperatures, dry air and drought. If you want to supply silicon to plants quickly and protect them against warm weather, try silicon in foliar application form, for example Terra Aquatica Silicate.
Watering and soil moisture
The vegetative phase is a period of rapid and intensive growth, and plants need a regular supply of water. Especially young plants with developing roots can be significantly slowed down by drought. On the other hand, overwatering the substrate can result in root rot and the development of mould. Therefore, when watering outdoor plants, it is good to follow these rules:
- Water more often and in smaller amounts rather than in one large dose.
- Regularly check the soil moisture – it should feel moist to the touch, but not muddy.
- Water in the morning or evening.
- During periods of heavy rain, ensure sufficient soil drainage.
For more useful tips and guides for outdoor and indoor growers, visit our Higarden blog!
How Can You Increase the Terpene Content in Your Harvest?
In today’s article, we will focus on how to fully use the potential of growing aromatic and medicinal plant species. Fragrant herbs such as lavender, but also citrus fruits, for example. You will learn how to ensure that your harvest is characterised once and for all by an exceptionally intense fragrance. And as the title of the article suggests, it is above all necessary to maximise the amount of contained terpenes, which are responsible not only for a pleasant scent, but also for beneficial effects on our physical or mental well-being.
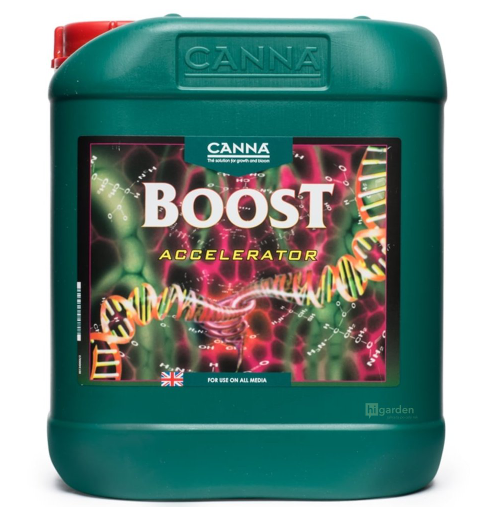
It is precisely terpenes that, as specific organic compounds, give individual plants their unmistakable scent. It is simple. The more terpenes there are, the more intoxicating aroma we can expect. Beautiful and healthy plants should pleasantly impress every grower with a proper natural fragrance, and so we will now explain everything essential that relates to a high terpene content in every harvest.
There are tens of thousands of these volatile substances, formed in the trichomes on the surface of plant leaves, in nature, and each terpene has its own unique aroma. And because nature is a master of alchemy, once we smell a particular plant, the scent we perceive represents a combination of terpenes that are currently dominant. As you can see from the following lines, fragrance is not the only reason to try to achieve the maximum possible terpene content with every harvest. Let us mention at least the most important ones:
- Limonene: at the beginning of the article, we mentioned citrus fruits, and it is limonene that is responsible for their fresh scent. Numerous health benefits have also been proven for this substance, whether in the form of anti-inflammatory, antioxidant or anti-stress properties.
- Myrcene: lemon grass, mango, thyme or hops, for example. Myrcene predominates everywhere there, and a small amount of it is also added to beer.
- Pinene: herbalists know this terpene with its spicy forest scent very well, and have used its beneficial effects since time immemorial as part of therapy for easing inflammation or asthmatic problems. Pinene is commonly found, for example, in conifers, oranges, rosemary, dill or parsley.
- Beta-caryophyllene: the spicy and woody scent of this terpene is probably best known thanks to cloves. It is no coincidence that in herbalism and natural healing, cloves are often used to treat painful dental conditions. Beta-caryophyllene relieves pain because it contributes to the release of analgesic endorphins in the body and at the same time suppresses the psychological component of perceived pain. Besides cloves, it can also be found, for example, in black pepper or basil.
- Eucalyptol: a remarkable amount of this terpene can be found not only in eucalyptus, but also in sage, wormwood, bay leaf, or cardamom.
- Nerolidol: the woody and earthy scent of this terpene can most easily be compared to fresh tree bark. Nerolidol is found in ginger, jasmine, cajeput, lavender, lemon grass, eucalyptus, basil, black and green tea, cardamom, stevia, tarragon, lemon verbena, thyme or star anise. It is interesting that this terpene, for which numerous studies point to possible anti-inflammatory or even neuroprotective effects, also plays a protective role in the wild against being eaten by certain herbivores.
After introducing some of the best-known and most useful aromatic terpenes, we can move on to the methods that allow growers to support their content in the final harvest as much as possible.
Factors that most affect terpene content in the harvest
- Careful selection of the variety
It should be borne in mind that the representation and composition of rare terpenes in the harvest are largely influenced by the genetic predispositions of the selected variety. The genetics of a given variety or phenotype literally determine which terpene will dominate in the composition, as well as which terpene will not be represented at all. If, for example, when growing medicinal herbs you expect certain health-related properties, it is important to take an interest in the choice of genetics in relation to dominant terpenes in advance and accordingly carefully select the variety to which you will then devote proper care when growing in a grow box, in a greenhouse or in the garden.
- Optimal growing conditions
This point should not surprise you in any way, as it is obvious that if you provide your plants with a stable and favourable microclimate, they will reward you with a high level of production of rare aromatic substances. This is easiest to achieve in a grow tent, and you will be able to enjoy a harvest with a high terpene content several times a year (see, for example, the separate article: Choosing your first tent with everything included).
Our TIP: Discover modern Garden Highpro grow boxes!
It is also necessary to avoid degrading already formed terpenes due to an unsuitable growing environment, which would be a great pity and would be reflected significantly in the final quality and value of your harvest. Therefore, do not forget to keep an eye above all on insufficient humidity or excessively high temperatures. The most critical period in this respect is the late flowering stage. At this point, the plants have usually already managed to produce most of the terpenes. And because terpenes belong among volatile substances, you must do everything as a grower to protect ripening plants from high temperatures, whether when growing outdoors during hot summer months or indoors, where quality grow room ventilation will also help provide your plants with optimal conditions for development all year round.
- Spectrum and intensity of the light source
Light has a huge influence on terpene production. Whether it is grow lamps or the sun, plants mainly need truly usable light for terpene production, from which they draw energy for key biochemical processes.
On the other hand, it is important to emphasise that you will not support the desired content of aromatic substances at all if you overdo it with the intensity of the light rays falling on the surface of your plants. Excessive light intensity causes so-called flower bleaching, and you can almost say goodbye to terpenes.
That is why we will be happy to advise you on choosing a suitable grow lamp for a grow box, or you can use ready-made complete grow box sets. On this topic, we have also prepared these separate articles for you:
- Growing under artificial lighting: HPS vs. LED
- How high above the tops of plants should the light be hung?
The experience of professional growers from around the world also clearly points to the fact that the overall terpene content in plants can be effectively increased by the action of the ultraviolet UV-A and UV-B light spectrum. However, this spectrum is not found in ordinary grow lights. That is what supplementary lighting sources are for, created directly for this purpose (see the separate article: How to use UV radiation indoors?).
Some growers have also wondered why plants grown outdoors, exposed to natural sunlight, ultimately show a significantly higher amount of contained terpenes than those grown in a greenhouse or polytunnel. This is because the sun emits ultraviolet radiation, but film and polycarbonates then filter it out in order to extend the life of the material before it reaches the plants.
- Timing of the harvest
We have already mentioned that we find the most terpenes in plants in the later stages of flowering. The ratio of terpenes, as well as their content, changes during plant ripening, so harvesting at the right time is also crucial for the best possible results. Even beginners will surely realise that insufficiently ripe flowers have not yet reached their full potential in terms of terpene content. Terpenes contained in overripe flowers or fruits gradually degrade. So before you decide to harvest, if you have the opportunity, consult a more experienced grower, especially at the beginning, and you will see that over time, with increasing experience, you will learn to recognise the perfect moment for a terpene-rich harvest yourself.
- Overall plant health
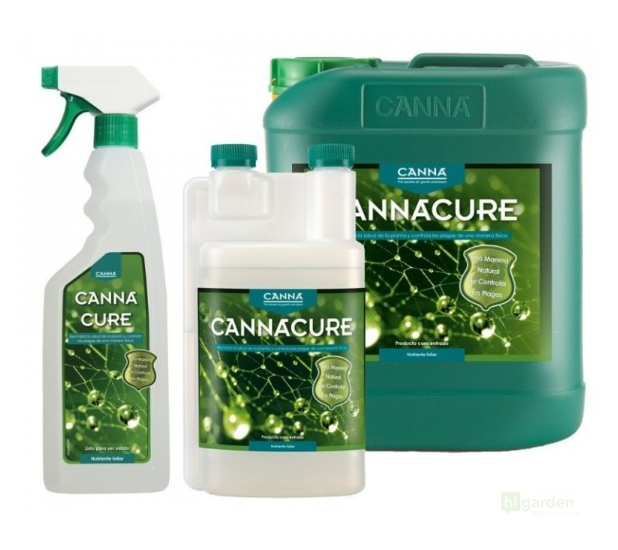
If pests or diseases attack your plants, terpene production will start to decline rapidly. That is why we recommend not underestimating prevention. We have also prepared the following separate articles for you:
- Proper plant nutrition
You will find a whole range of proven fertilisers and stimulators in our e-shop range, which are characterised by their ability to maximise the content of aromatic and health-promoting substances in cultivated plants. Popular BIOCANNA organic fertilisers, which unlike mineral fertilisers contain a wide spectrum of various plant substances formed during organic plant cultivation as a result of the activity of beneficial microorganisms in the root zone, contribute for example to a higher content of fragrant substances and sugars in the final harvest. In addition to the basic organic fertilisers Canna BIO Vega (100% organic fertiliser for growth) and Canna BIO Flores (100% organic fertiliser for flowering), a similar principle is also used by the additive CANNABOOST Accelerator, which significantly stimulates and accelerates plant metabolism. In addition to strengthening the photosynthetic activity of plants, it also contains plant regulators, ensuring higher yields and better taste and aroma of the final harvest. It is a powerful stimulator that increases the concentration of fragrant terpenes as much as possible!
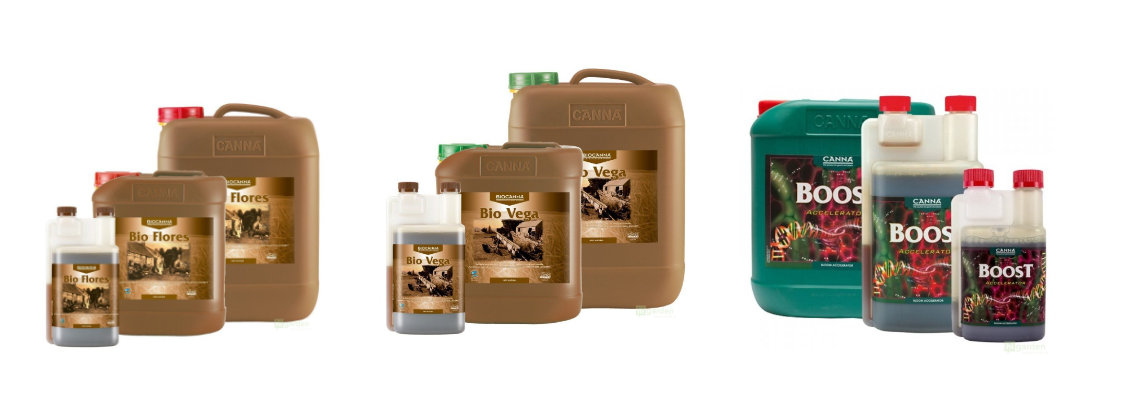
If you would like to ask us about other quality fertilisers and supplements that will raise the concentration of terpenes contained in your harvest to the maximum possible level, and thus also increase the overall value of your harvest, or if you have any other questions, do not hesitate to consult us at the well-known e-mail address info@higarden.eu.
We also recommend these products:
- LED Set 720W Lumii Black
- Clip fan PF 15 cm 15 W 2 speeds
- Plant Success Mycorrhizae Great White Granular 1
What to read next:
Medicinal Herbs for Outdoor and Home Growing
Are you among passionate herbalists who enjoy making honest homemade tinctures or teas from various kinds of medicinal plants? Medicinal herbs of all kinds are an integral part of practically every garden, including indoor ones. Their enduring popularity, stretching far back into history, is due not only to their pleasant fragrance but above all to their beneficial effects on mental and physical well-being. In this article, in addition to traditional species, we will also focus on less well-known medicinal plants. What is more, you can grow them not only in the garden, but also at home.
When medicinal herbs are mentioned, many of us immediately think of common chamomile. And why not, when this plant is also known as medicinal chamomile, which is why its species name, familiar to many, directly invites us to think of it. Usually, however, it is chamomile growing in the wild, as we can see in the picture. You can buy chamomile seedlings in specialised shops. Not only fresh and extra-high-quality chamomile can always be at hand if you pre-grow it from seed in a greenhouse (see separate article: How to grow in a greenhouse?). In the colder months, do not forget about greenhouse heating. If you have a complete grow box at home, then there is nothing to solve and you can harvest all the medicinal plants mentioned here all year round without having to step outside.

Some of the plant species we recommend below are often grown mainly for their beauty as ornamental perennials. However, they are often also herbs with a beneficial effect on human health. Other traditional medicinal plants you will love include:
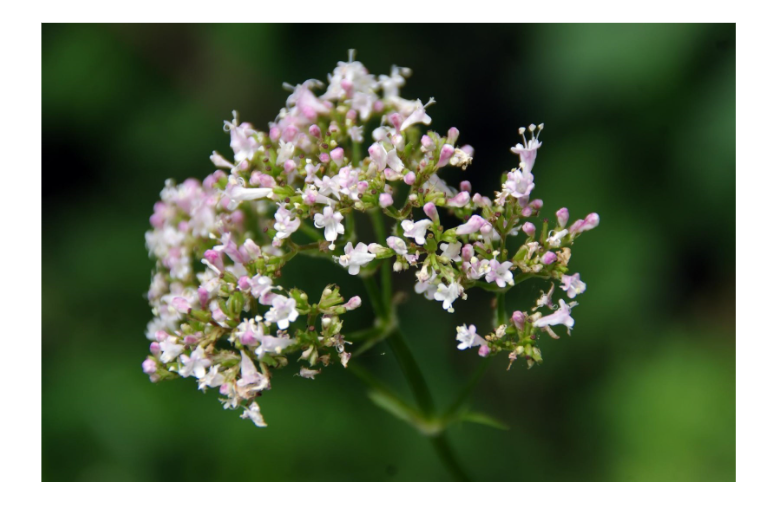
- common valerian (Valeriana officinalis): the medicinal herb from the introductory photograph, whose Czech species name clearly signals its beneficial and especially sedative effects on the human body, will adorn any garden with its dense inflorescences full of small white or pinkish flowers. You may also know valerian by the folk name baldrian. It has been used in natural medicine since the Middle Ages. This medicinal plant, which becomes poisonous in high concentrations, has been used by people in small amounts since time immemorial, among other things against insomnia, nervousness, anxiety, depression or stomach cramps. Interestingly, it is one of the first herbs to have been processed homeopathically. In addition to the sedative effects mentioned above, valerian is a powerful natural antioxidant that effectively combats the effects of free radicals. For medicinal purposes, only the roots of valerian with rhizomes are used. The above-ground parts of valerian are not used.
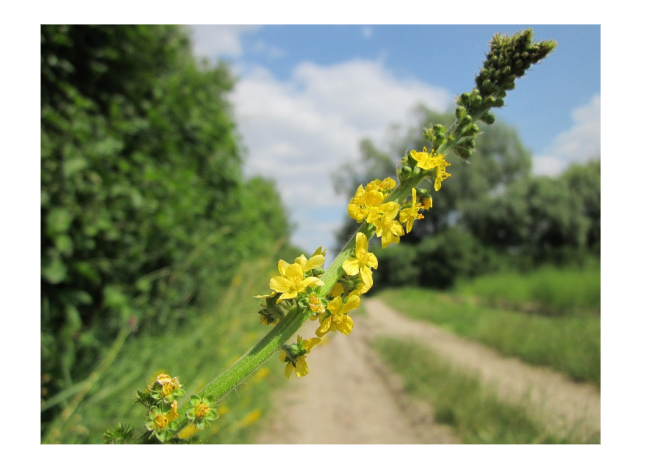
- common agrimony (Agrimonia eupatoria): agrimony flowers are yellow and have a characteristic fragrance reminiscent of apricots. In terms of cultivation, it is an undemanding herb for which sufficient light is particularly important. From a medicinal point of view, agrimony is well known for its anti-inflammatory effects. This popular herb, usually growing to a height of just under one metre, is also processed for the treatment of liver disorders. Interestingly, the flowering aerial parts of common agrimony were already used by the ancient Egyptians.
- Mauritanian mallow (Malva mauritiana): striking pink-purple flowers, reaching up to 5 cm in size, are a decoration for any garden or balcony. In addition, mallow, which grows to a height of up to one and a half metres, is used for inflammation of the upper respiratory tract. This is due to its high content of mucilaginous substances. Growing mallow is exceptionally easy. A decoction of Mauritanian mallow is also used in folk medicine to address skin problems, including the healing of inflamed wounds. Last but not least, the colourful flowers are an edible decoration suitable for a wide range of dishes and beautifully colour any tea blend.
Interesting medicinal plants that are often forgotten
There are also various kinds of useful herbs that our great-grandmothers would not have given up, but which over time have fallen into obscurity. This category includes, for example:
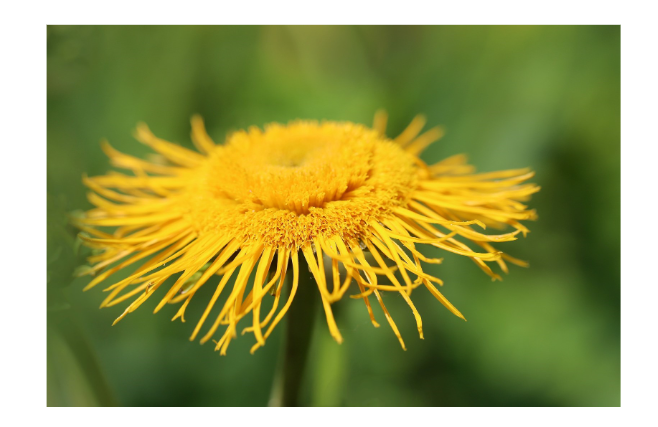
- elecampane (Inula helenium): on this plant, which produces unmistakable sulphur-yellow flowers (see picture), the most valuable part of all are its roots, which are collected in both spring and autumn and have the potential to address metabolic problems ranging from loss of appetite to poor digestion. They also help to relieve spasms in the respiratory tract. In folk medicine, elecampane is used in the form of tea, tincture or syrup. For example, for bronchitis.
- marshmallow (Althaea officinalis): this is another medicinal plant that is often grown only for decoration, although all its parts (root, leaves, flower) have also been collected for medicinal purposes since ancient times. From an aesthetic point of view, its delicate pink flowers are particularly attractive. It is another medicinal plant containing mucilaginous substances that make expectoration easier and soothe the irritated mucous membrane of the respiratory tract. However, marshmallow is also used in natural medicine, for example, for inflammation of the urinary tract or diarrhoea. The greatest effects of marshmallow are attributed to its macerated roots.
Proper storage will preserve valuable substances and the original fragrance
Whether the medicinal herbs mentioned above will decorate your outdoor garden, balcony or terrace, or whether one herb will interest you so much that you decide to set aside a place for it in your grow tent and ensure a year-round supply, do not underestimate the proper storage of fresh or dried herbs. In this respect, a separate article will help you: How to store your harvest properly?
If you would like to ask us anything, we are here for you at the well-known e-mail address info@higarden.eu.
We also recommend these products:
What to read next:
Strawberry Plants After Harvest. How Should You Care for Them?
It would be a great pity to neglect strawberry plants after fruiting. On the contrary, after harvest they need your care. And this applies to both the plant and the soil. It is high time to treat the beds from which you have recently harvested sweet and juicy fruit. Avoid unnecessary mistakes so that you can enjoy a rich strawberry harvest again next year!
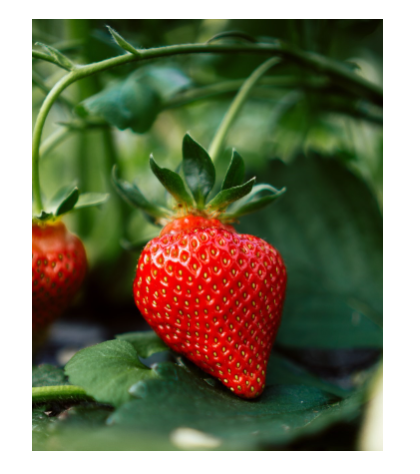
At this time, the strawberry crop is usually in, to put it mildly, an undesirable condition, with weeds present in the compacted soil (nettles, dandelions, chamomile, thistle, etc.) and in the rows between you may notice runners spreading and forming new plants. It is best to remove weeds by hand and lightly hoe the strawberry plants. For larger areas, spraying can then be applied. Cutting runners off the strawberry plants effectively prevents the clumps from weakening, and the cut runners can also be used to prepare new planting material.
Strawberries also spread readily on their own. That is why, when renewing strawberry beds after harvest, you may also come across completely new seedlings. The closer they are to the original (mother) plant, the greater their potential. You can transplant such plants into a pot or window box and keep them for autumn.
You will achieve the best yields with two-year-old strawberry plants. For three-year-old crops, already expect that very few strawberry stands remain healthy. Strawberry plants of this age are usually already affected by diseases or pests, and next year new planting material will bring you much greater benefit and pleasure.
Cutting the leaves across the whole area stops assimilation
Many growers then make the mistake of cutting back strawberry leaves across the whole area. The fact that the strawberry plants in your bed have already fulfilled their purpose for the season and finished fruiting does not mean that these plants no longer need to assimilate. And it is precisely by cutting the leaves across the whole area that you prevent further uptake and conversion of substances by the plant, which then remains significantly weakened. So how should you correctly remove leaves from strawberry plants?
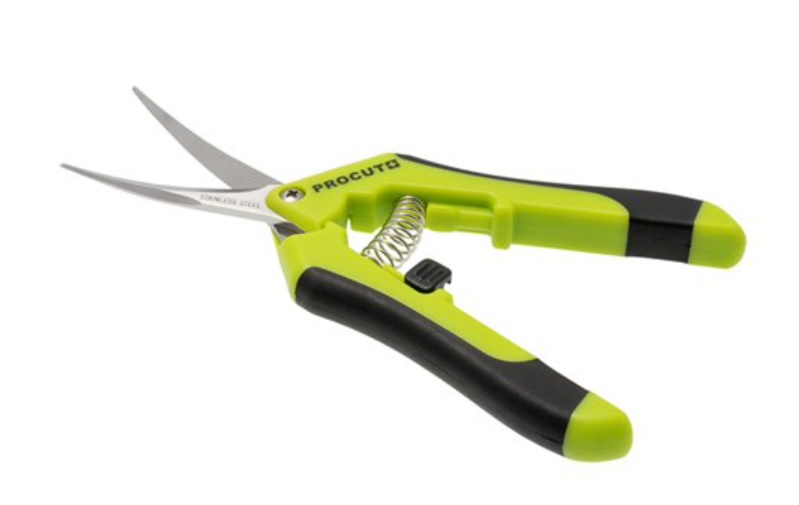
It takes patience and it is best to cut off only unhealthy or damaged leaves one by one. High-quality garden shears will make the job easier.
Do not be misled by the fact that large-scale growers, and following their example many gardeners as well, remove leaves after harvest by simply mowing the crop, and if they do not damage the crowns of the plants, the strawberry plants will have plenty of new leaves by winter. This does not apply to everbearing varieties, and by winter they will not have had time to renew their leaves. For this reason, they would then be at risk from frost. It is not worthwhile to mow young crops across the whole area either.
Suitable fertilisation after strawberry harvest and the importance of watering
The strawberry plants have already used all their energy and available nutrients to produce flowers, and especially fruit. To fertilise such exhausted strawberry beds after harvest, you can use both special fertilisers for strawberries and basic plant nutrition with a balanced ratio of nitrogen, phosphorus and potassium (see separate article: NPK – what is it?). The advantage is that high-quality fertilisers for strawberries are also produced in the Czech Republic. Here is the proof:
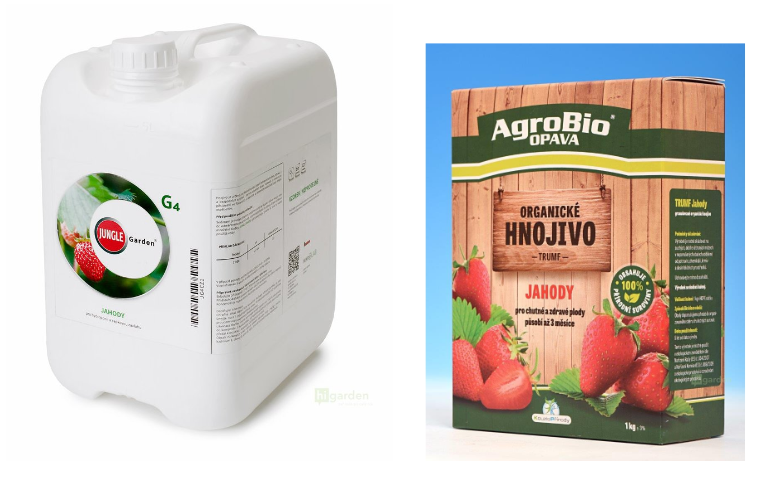
- Jungle GARDEN G4 – strawberries (in the picture) together with the BASE component. We also recommend the separate article: Jungle Indabox maximises the advantages of chelate binding.
- AgroBio TRUMF is suitable if you prefer purely organic fertiliser for strawberries, as well as other small fruit crops.
The world-famous brand Terra Aquatica produces the fertiliser PermaBloom, which you can use not only for strawberries, but also for all other common crops that produce repeatedly.
Strawberry plants belong among plants that usually root relatively shallowly and we cannot count on them having a very branched root system. Sufficient watering after harvest is therefore very important so that a lack of moisture in the winter months does not cause the plants to die. Before the onset of winter, every strawberry plant that has finished fruiting needs to be supplied with both water and nutrients.
From September onwards, avoid a higher content of nitrogen and magnesium in strawberry nutrition.
Later comes the winter protection of strawberry plants. This will also decide what kind of harvest you can look forward to a year later. Crops planted in autumn can be covered for winter with conifer branches. Bear in mind that everbearing varieties will be more susceptible to frost. Non-woven fabric helps in the fight against severe frosts. non-woven fabric.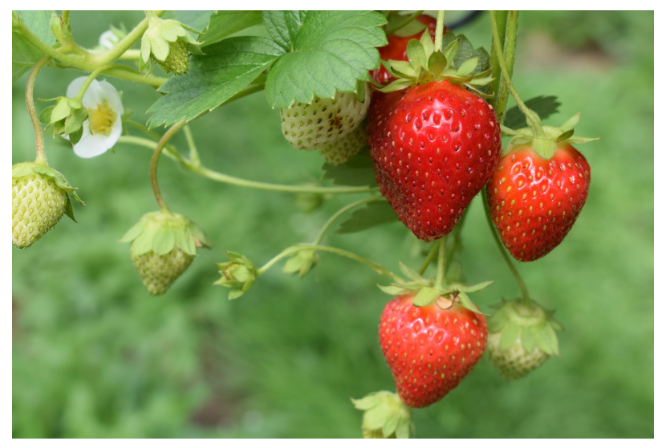
Regularly renew strawberry beds
Simply put, the soil in a strawberry bed needs to be loosened and fertilised after harvest.
When it comes to renewing strawberry beds, it is worth relying on the proven ¼ area rule. This means that every year we renew at least a quarter of the bed, where we prepare exactly the kind of soil that suits strawberry plants best and in which they are able to resume growth most quickly after winter, namely light, airy and slightly acidic soil. Light soil also warms up more easily. A digital pH metre for substrate, equipped with a suitable type of probe, will help you measure the acidity of the soil.
If you overdid the watering the first time round and your strawberry beds were waterlogged this year, as a result of which they only rotted, do not despair. You now know that suitable soil will also become the reason why you will be able to grow vigorous plants next year, producing beautiful and tasty fruit. You can solve moisture in the beds by placing the strawberry plants on a dry material (wood wool, cardboard, etc.). Beds also dry out more easily under black film.
If you would like to ask us anything, please do not hesitate to write to us at the well-known e-mail address info@higarden.eu. We will be happy to advise you!
We also recommend these products:
- Vermiculite
- Aerated HERCULES pots
- LED Set 720W Lumii Black
What to read next:
- How to grow delicious strawberries at home?
- How to grow chilli peppers?
- BIOTABS – organic fertilisers and soil amendments
How to Grow Ornamental Chilli Peppers
Ornamental chilli peppers with brightly coloured fruits are a beautiful addition to gardens and interiors, but growing them can be quite a challenge for beginners. That is why we have prepared a guide to growing ornamental peppers, in which you will learn everything about germination, planting, and caring for these beautiful plants.
Ornamental peppers belong to the same genus as other chilli varieties, but they are cultivars bred for dwarf growth and colourful fruits. Because breeders’ main goal was not heat, flavour, or aroma, but appearance, they often have bitter and not very hot fruits. Another important feature of ornamental peppers is that the fruits usually grow at the tops of the plants, rather than between the leaves, as is the case with most edible varieties. Popular ornamental chilli varieties include:
 Chilli pepper CANCUN is an ornamental variety with brightly red, orange to dark purple round fruits and small leaves. The plants are bushy with trailing branches and reach a maximum height of 50 centimetres. The CANCUN variety is suitable for growing in beds, greenhouses, and pots.
- Chilli pepper AZTECO is an ornamental chilli with elongated triangular fruits that are green at first and turn bright red to burgundy-black as they ripen. An ornamental pepper variety suitable for growing in growing containers, greenhouses, beds, or indoors. Although it is an ornamental variety, AZTECO has fruits that reach a heat level of up to 450,000 SHU.
When and how to plant ornamental peppers
One of the most common mistakes made by beginner growers of ornamental peppers is planting too early. Garden centres often sell seedlings much earlier than the weather is suitable for planting them outside. Start moving seedlings to an outdoor location only after the last frosts have passed. It is also important that the night-time air temperature does not fall below 15 °C.
Seeds of ornamental pepper varieties need a temperature of at least 21 °C to germinate, and if you want to sow them directly into a bed or greenhouse, wait until the soil has warmed up sufficiently. In our climate, this can take quite a long time, which is why many growers of ornamental peppers prefer to pre-grow seedlings from seed indoors. You can find out how to do this on our blog.
Read also: Chilli peppers: How to germinate and pre-grow them
Plant ornamental pepper seedlings with three to four true leaves into the soil, 12-24 centimetres apart, in holes approximately 5 centimetres deep. Ornamental chilli plants tend to be small and branched and usually do not require support.
Choosing a site for planting chilli
Ornamental peppers need at least 6-8 hours of sunlight a day, so look for a sunny spot in the garden. The advantage of ornamental chilli varieties is that the plants are relatively low and do not shade other plants in beds. You can also grow the plants in medium-sized fabric or plastic pots.
Make sure that the soil for growing chilli has adequate drainage and retains water well. Ornamental peppers are relatively sensitive to drought, and the growing medium should never dry out completely. If the soil at your chosen site does not seem entirely suitable, you can improve it with compost, worm humus or a quality horticultural substrate.
How to care for ornamental peppers
- Light
Ornamental peppers thrive best in full sun, which gives them the energy to produce flowers and fruits. If you decide to grow the plants indoors and want to achieve a plentiful harvest of chilli peppers, it is advisable to supplement the plants with artificial lighting for indoor plant cultivation.
- Soil

Ornamental peppers will grow best in slightly acidic soil (pH 6.0 to 6.8) rich in nutrients. If you are growing outdoors, remember to enrich the soil in beds in spring with compost, vermicompost, or a quality horticultural substrate. When growing chilli in pots, use a medium to heavily pre-fertilised light substrate with perlite.
Read also: How to choose a horticultural substrate
- Watering
Ornamental peppers do not tolerate drought, but be careful not to overwater the substrate. Water whenever the surface of the soil has dried out, but there is still enough moisture in the root zone. Check plants grown in pots more often, as the soil in them dries out faster.
- Temperature and humidity
Peppers like hot weather, so they thrive best in full sun and grow faster at temperatures above 24 °C. Be careful when planting seedlings into cold soil, as this can cause the plants to remain stunted throughout the growing season.
- Fertiliser and nutrition

Ornamental peppers are somewhat less demanding in terms of nutrition than varieties intended for consumption, but they still need a steady supply of nutrients. During the vegetative growth period before flowering begins, the plants need more nitrogen for rapid development of leaves and the root system. During flowering, ornamental peppers need more phosphorus and potassium, which support flowering. Fertilisers for growth are usually labelled “grow”, and fertilisers for the flowering phase as “flower”. A simple solution is special fertilisers for growing chilli.
- Pollination
Like other pepper varieties, ornamental ones have perfect flowers, which means that each plant is equipped with male and female reproductive organs and can reproduce without pollinating insects.
Would you like to start growing chilli peppers, but are missing the equipment? In our e-shop you will find everything you need for growing chilli indoors and outdoors.
Prepare for the autumn harvest
Our plants are enjoying the last summer rays and the scent of ripening harvest hangs in the air. Harvest time is approaching, and all the effort invested can finally begin to pay off. To get the most from your crop, you will need the right tools. We bring you proven products and tips that will help you harvest like professionals.
Scissors
 Quality gardening scissors with a thin tip should be part of every grower's basic equipment. You will use them not only for harvesting, but also for trimming and shaping plants or cloning. Here we would like to emphasise that paper scissors or manicure scissors are not a suitable substitute in this case, unless you want to end up with carpal tunnel inflammation. For heavy work (thick stems, large leaves), large spring-loaded gardening scissors are suitable, where you can choose the version with straight or curved blades. Fine finishing and trimming are best handled with pruning scissors or Mini Clippers.
Protective equipment
The resin of some plants can cause a mild allergic reaction on direct contact with the skin, manifesting in a similar way to a nettle sting. When harvesting and handling plants, protect your hands with disposable nitrile or vinyl gloves. Long clothing covering the forearms is also suitable, and if the season has been successful and you are facing a real jungle to tackle, you may also find a protective suit useful. Finally, one more secret tip from us. Resin can stick to any surface, and the easiest way to remove it from tools, hands or clothing is with pure ethyl alcohol.
Harvesting and trimming
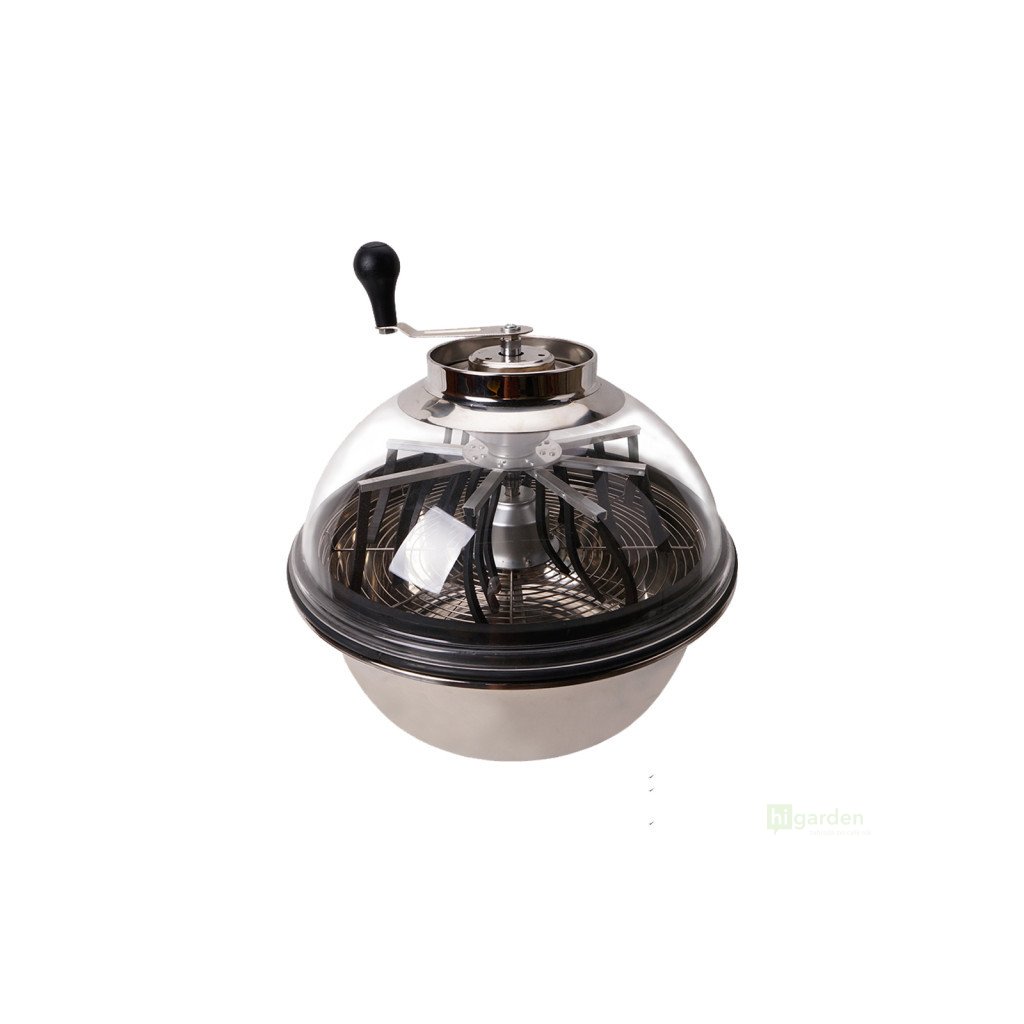 Most growers do not use the whole plant and, when harvesting, must separate the useful parts (flowers) from those that will be used in another way or discarded (stems, leaves). During trimming (cleaning), the aim is to remove all excess leaves from the final product, which increases quality and helps prevent mould during drying. You can clean the flowers before drying (wet trim) or after drying (dry trim). In both cases, you are looking at several to dozens of hours of work with scissors, and if you want to save your back, it is worth investing in a trimming tray, which also catches the valuable resin falling from the flowers during harvest. For larger growers and the lazy, there are mechanical trimmers and trimbags that will do a good part of the work for you.
Drying
Properly dried herbs retain their strength, aroma and medicinal properties even during long-term storage, without the risk of mould or spoilage. The best place for drying herbs or mushrooms is a well-ventilated dark room with a temperature of around 20 °C and humidity of approximately 40-50%. Be careful of dust or other impurities that could spoil the final product. Drying nets are practical, as they ensure the material dries evenly. If you are processing the harvest at home and are bothered by an unpleasant odour that may disturb those around you, dry the crop in a grow tent, which you should ventilate with a fan with a carbon odour filter.
Storage
Under the right conditions, it will take approximately two weeks to a month for the flowers to dry sufficiently and be ready for storage. If you want your herbs to retain their aroma, we recommend storing them in a dark, cool place in jars with airtight lids, which you should open regularly (at least once a week) for a few minutes to vent excess moisture. This will prevent mould and degradation of the dried material. To preserve quality, it is important that the plant material does not dry out completely. To maintain the appropriate humidity, use Integra Boost or Boveda sachets.
And something extra: How to extract resin
 Some growers are constantly looking for ways to multiply the pleasure brought by the aroma of herbs even further. For those of you who want to enjoy a pure terpene profile, there is resin extraction, thanks to which you can obtain high-quality concentrates such as rosin and others. There are various extraction methods, such as mechanical sieving or using solvents (DME and others), but the cleanest product is guaranteed by water separation. This consists of soaking resin-rich dried material in cold water, where the resin glands called trichomes separate from the plant material and are then captured in a series of sieves with microscopic holes. To get started, all you need are Urban Bubble Bags and several buckets. If you want to save yourself work when mixing and get the maximum from the dried material, we recommend equipping yourself with a pollen separation washer.
Are you sorry that the growing season is coming to an end and would you rather grow all year round? Try indoor cultivation of plants under artificial lighting. You can find out how on our Higarden blog!
How to Grow Chilli Peppers Under Artificial Lighting
 Autumn is waiting just around the corner, and for many chilli pepper growers that means the season is coming to an end. Not for everyone, though! Some chilli enthusiasts are not discouraged even by bad weather and grow their beloved plants throughout the winter as well. With the possibilities offered by indoor growing, you can not only overwinter chilli, but also grow tasty peppers. Not sure where to start? In the following lines, we will teach you the basics of indoor growing and introduce the essential equipment you will need.
It is likely that chilli peppers originally came from Central or South America and were first cultivated by the people of Mexico. Chilli reached the European continent only towards the end of the 16th century, but this unusual plant quickly won over its admirers, which gradually led not only to cultivation all over the world, but also to the emergence of five distinct chilli species.
- Capsicum anuum includes many common varieties, such as bell peppers, wax peppers, cayenne, jalapeños, Thai peppers, chiltepin and all forms of chilli peppers from New Mexico.
- Capsicum frutescens includes tabasco, malagueta, labuyo, piri piri and kambuzi.
- Capsicum chinense includes the hottest peppers, such as naga, habanero, datil and Scotch bonnet.
- Capsicum pubescens includes South American rocoto peppers.
- Capsicum baccatum includes South American pepper varieties
The variability of the Capsicum species has allowed growers to breed hundreds and possibly thousands of cultivars with different properties and flavours, but all peppers have one thing in common: they only thrive in warm weather. As soon as the temperature outside drops below 15 °C, their plant growth stops and they cease to bear fruit. Although you can theoretically overwinter chilli in a winter garden or on a windowsill, in our latitude there is little light during the winter months and the plants will probably suffer or even die. Indoor plant growing under artificial lighting consists of creating favourable conditions so that plants can grow even without natural sunlight. Growing chilli indoors brings many advantages, above all:
- Year-round harvest: You no longer have to wait for summer! Enjoy fresh chilli peppers regardless of the season.
- Pest protection: Growing under cover in controlled conditions significantly reduces the risk of common outdoor pests, such as slugs, caterpillars, spider mites or aphids.
- Controlled environment: Consistently stable humidity, temperature and high light intensity allow plants to achieve optimal growth. Harvest more, and faster!
- Efficient use of space: Thanks to grow tents, you can grow your own peppers even without an outdoor garden or balcony. The efficiency of indoor growing allows you to produce a huge amount of harvest even in a small space.
Basics of indoor chilli growing
To start growing chilli under artificial lighting, you will need basic equipment for indoor growing.
Grow tent
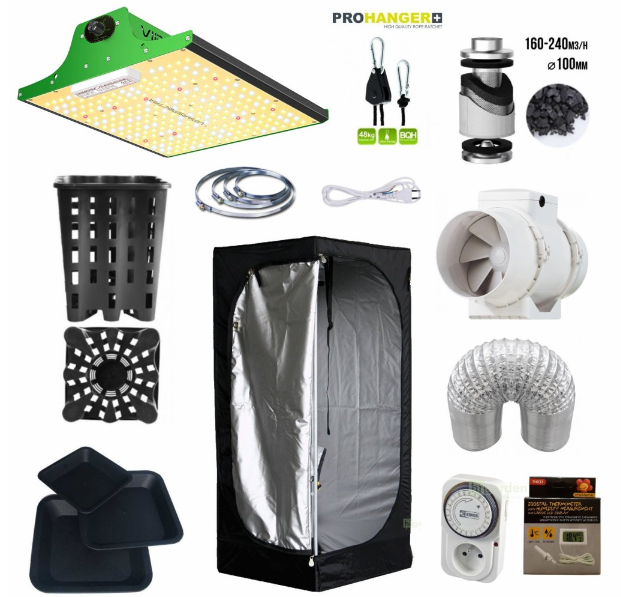
A grow tent, also known as a grow box, is essential for creating a controlled environment. It provides a space where you can regulate light, temperature and humidity. Grow tents are made in various sizes, so it is possible to grow just a few plants in a small grow box or, conversely, turn an entire room in a flat into a flowering garden.
Grow lighting
Grow lighting is the most important and probably also the most expensive component of your indoor garden. Since plants grown indoors in a grow box are not exposed to sunlight, they are entirely dependent on the energy from grow lights. Quality grow lighting must have sufficient intensity and the correct wavelength, which is why it is necessary to use full-spectrum LED lights designed specifically for use in agriculture.
You may be interested in: Light spectrum and its effect on plant growth: Outdoor vs greenhouse vs indoor
 Ventilation and air circulation
Plants need a constant supply of fresh air for their growth. The grow tent or room must be ventilated sufficiently to prevent mould, rot and other plant diseases. The main drivers of your indoor garden are two fans: an extract fan, which serves to vent the “stale” air from the growing space, and a circulation fan to move air around inside the grow box. Extract fan is simply connected to the purpose-made sleeve in the upper part of the grow tent and, if necessary, can be supplemented with a odour filter, which minimises odour from the grow room. Place circulation fans with an oscillator inside the tent so that the air flow is directed slightly above the tops of the plants in the direction of the grow lights.
You may be interested in: How to grow ornamental chilli peppers
Temperature and humidity control
Chilli peppers thrive in a warm and slightly humid environment. While you cannot do much about the weather outdoors, when growing indoors it is essential to constantly monitor and, if necessary, adjust the microclimate in the growing space. You will need a proper thermometer with hygrometer, or possibly heating for the grow box, dehumidifier or air humidifier. The optimal temperature and humidity values in the growing space will vary depending on the species grown, but in general chilli peppers prefer temperatures in the range of 22-26 °C and relative humidity of 70-90%.
Nutrients and soil
When growing indoors, you can grow chilli in the traditional way in pots planted in horticultural substrate, but you also have the option of trying less common methods of plant cultivation. Hydroponics consists of growing plants without soil using a nutrient solution and is an extremely efficient and clean method. You can use a wide range of growing substrates, for example coconut or rockwool, which also allow you to try various fertilisers, from fully organic to highly effective mineral ones. Do not be afraid to experiment! The beauty of indoor growing also lies in the possibility of changing or adjusting the growing technique at any time according to your needs.
Would you like to start growing chilli under artificial lighting, but do not know where to begin? We have prepared complete indoor chilli growing sets for you, with which even a beginner can manage it with ease. We also recommend visiting our blog, where you will learn everything important about indoor growing.