
Technology and Equipment, Page 6
List of articles
Prima Klima Azerwing vs Adjust-a-Wings
For several years now, Prima Klima, best known for its reliable fans and filters, has also been manufacturing reflectors for discharge lamps. Prima Klima calls its reflector range Azerwing and is trying to compete with the better-known manufacturer that introduced this reflector design at Adjust-a-Wings. Just like Adjust-a-Wings, Prima Klima Azerwing reflectors are made in 2 sizes, M and L, which match their better-known competitor in dimensions and recommended use, and also in 2 quality levels. Prima Klima Azerwing reflectors without a suffix are a direct competitor to the cheaper Adjust-a-Wings Defender range, while Azerwing Vegagreen reflectors compete with the very best from Adjust-a-Wings, namely the Avenger range.
Adjust a Wings Avenger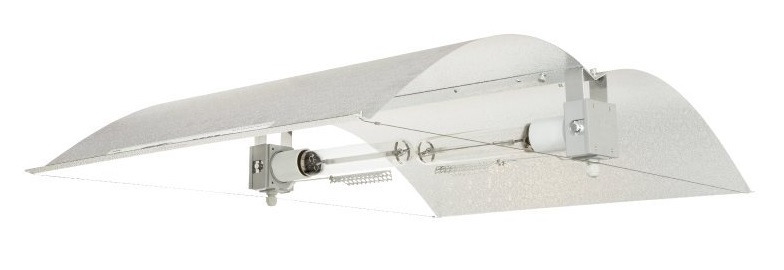
In practice, the reflectors use different but very similar materials, which in tests achieve very similar results in the percentage of reflected light. In the cheaper Adjust-a-Wings Defender and Prima Klima Azerwing ranges, this is around 86%, and compared with their cheaper competitors with a different construction they have the advantage mainly of distributing light evenly across the entire growing area, without pronounced so-called heat spots, that is, places where reflected light concentrates and can therefore burn the plant locally, while elsewhere the plant lacks light.
The more expensive variants, namely Adjust-a-Wings Avenger and Prima Klima Azerwing Vegagreen, are top-quality reflectors with reflection between 95-98% depending on the testing methodology, and you will not find anything better on the market unless you look at systems that are an order of magnitude more expensive.
Prima Klima Azerwing Vegagreen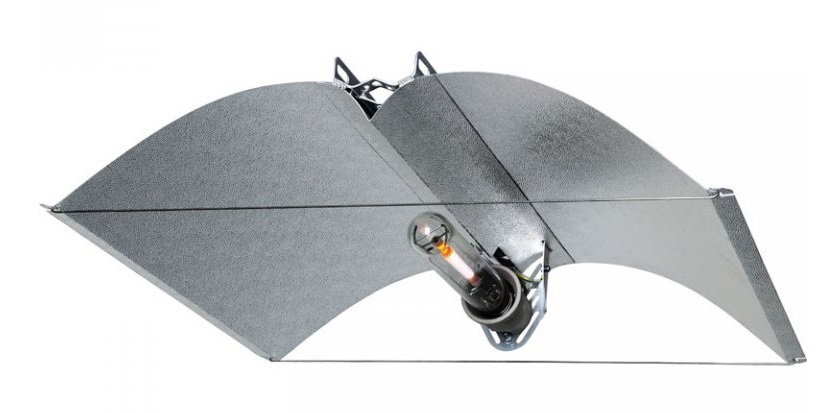
So far, we have said that Adjust-a-Wings and Prima klima Azerwing reflectors are almost the same and, according to growers' experience, differ only in details. So what is the difference?
The first and probably most important difference when choosing will be the price. Adjust-a-Wings reflectors are approximately 30-50% more expensive than their younger competitors from Prima Klima Azerwing. The second major difference is the complexity of installation. Prima Klima Azerwing reflectors cover the centre of the reflector with a special part for better light distribution, which makes assembly more complicated and does not show any demonstrable advantage in tests. It should be said, however, that this is not a disadvantage either and, if nothing else, in my subjective view it looks more "professional". However, because of this, putting together an Adjust-a-Wings reflector is quicker and easier.
It is therefore up to you whether you choose a well-known, time-tested brand with simple installation, or a newer, cheaper brand with more demanding installation. In neither case will you make a mistake, and you will have a quality home for your discharge lamps for many years!
Videos clearly showing how each reflector is assembled:
Prima Klima Azerwing:
Differences Between Axial and Radial Fans: What Are They and Why?
Unlike axial fans, radial fans also have no problem with fragments of activated carbon from filters. These properties have made them popular not only among home growers.
Is something unclear? Do you have a question? Write to us at info@higarden.eu We will be happy to expand the article with relevant questions.
Many growers try to save money on the fan they choose right from the start by opting for the cheapest fan possible, assuming that the choice of fan does not matter. As long as it has the required m3 per hour.
Unfortunately, it is not that simple. Fans differ in many respects, and behind that is, of course, mathematics and physics, which I will not present here, and if you wish, you can look it up on Google. ;-)
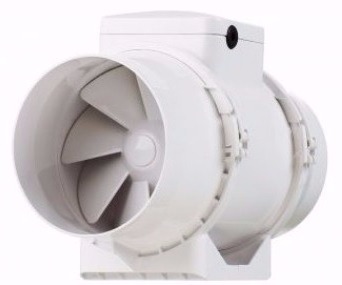
In practical terms, fans are divided into AXIAL (nicknamed toilet fans by some), typically represented by the TT and TD series, and RADIAL fans, which are further divided into fans with forward-curved blades, backward-curved blades and radially ended blades.
Unfortunately, it is not that simple. Fans differ in many respects, and behind that is, of course, mathematics and physics, which I will not present here, and if you wish, you can look it up on Google. ;-)
In practical terms, fans are divided into AXIAL (nicknamed toilet fans by some), typically represented by the TT and TD series, and RADIAL fans, which are further divided into fans with forward-curved blades, backward-curved blades and radially ended blades.
Axial TT fans are the cheapest you can find on the market, and if your ducting is no longer than 2 metres, you do not bend it, and you do not use any silencers, filters (yes, these "pipes" are in fact a significant obstacle to airflow), or any other components that restrict airflow, then TT fans will work quite successfully for several growing cycles.
TD fans are the same, but they use better bearings. The fan is better protected against clogging and generally achieves a much longer service life than TT fans, which is reflected in the price. Airflow for an axial fan is stated at zero pressure.
With one 90-degree bend, the pressure in the ducting increases by 10 Pa and the performance of the axial fan drops by approximately 25%. If you add, for example, a filter, the performance will drop by another 25%, and there is also a risk, in addition to insufficient fan performance, of insufficient cooling of the fan and burning out the thermal fuse. (If this happens, the manufacturer knows that the fan was operated improperly and will not accept the complaint.)
Another obstacle can even stop the airflow completely, and the fan will only "consume power" but do nothing.
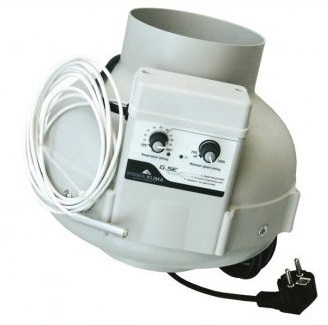
Radial fans, on the other hand, are designed for use in long ducting runs and, by their principle, create pressure that "pushes" air through obstacles and bends. This does not, of course, mean that your ducting can be infinitely long or that you can make a "snake" around the entire room and expect airflow not to be affected. Performance drops are in single-digit % for each obstacle, and under normal conditions, when you use a filter or silencer and have 2 bends in 10-metre ducting, you do not need to worry about the fan's performance or service life.
TD fans are the same, but they use better bearings. The fan is better protected against clogging and generally achieves a much longer service life than TT fans, which is reflected in the price. Airflow for an axial fan is stated at zero pressure.
With one 90-degree bend, the pressure in the ducting increases by 10 Pa and the performance of the axial fan drops by approximately 25%. If you add, for example, a filter, the performance will drop by another 25%, and there is also a risk, in addition to insufficient fan performance, of insufficient cooling of the fan and burning out the thermal fuse. (If this happens, the manufacturer knows that the fan was operated improperly and will not accept the complaint.)
Another obstacle can even stop the airflow completely, and the fan will only "consume power" but do nothing.
Radial fans, on the other hand, are designed for use in long ducting runs and, by their principle, create pressure that "pushes" air through obstacles and bends. This does not, of course, mean that your ducting can be infinitely long or that you can make a "snake" around the entire room and expect airflow not to be affected. Performance drops are in single-digit % for each obstacle, and under normal conditions, when you use a filter or silencer and have 2 bends in 10-metre ducting, you do not need to worry about the fan's performance or service life.
Unlike axial fans, radial fans also have no problem with fragments of activated carbon from filters. These properties have made them popular not only among home growers.
Is something unclear? Do you have a question? Write to us at info@higarden.eu We will be happy to expand the article with relevant questions.
To buy a fan with speed control or without?
When customers ask us whether they should choose a fan with control or not, we almost always answer in favour of controlled fans. Why?
In short: they are more practical. Estimating the optimal fan speed setting in advance is not easy. Many factors play a role, such as the temperature inside the tent, the temperature outside the tent, the location (in a cellar you will need to reduce the temperature less, in an attic more), humidity and more.
At the same time, the conditions in the tent change during the growing cycle (and during the day), and the ventilation must reflect that. The temperature outside the grow room also changes, so you draw in warmer or, conversely, colder air. Without control, it is really difficult to respond to either.
At the same time the controlled fan does not run at full power when it is not needed, so you save on energy.
Some controllers (usually external ones) have adjustable hysteresis, so they do not react to a temperature change in an on-off manner, but when the temperature rises slightly, they slightly increase the speed so that the change is compensated. If the temperature keeps rising, they increase the output again. As a result, the temperature in the grow tent/room will move even closer to the optimal value you have chosen, and you can influence it effectively.
TIP: Is the fan running at full speed even with control? It is possible that you either have an insufficiently powerful fan or are bringing in air that is too warm.
These are the main reasons why we recommend fans either with built-in control, or at least adjustable ones, for which you can buy a controller separately. Of course, if you know the space in which you are growing well and are therefore going for certainty, a single-speed fan is not a problem and many people use them.
With an adjustable fan, you can better adjust the growing conditions for plants exactly to their needs. You thus have a much greater chance of achieving good results.
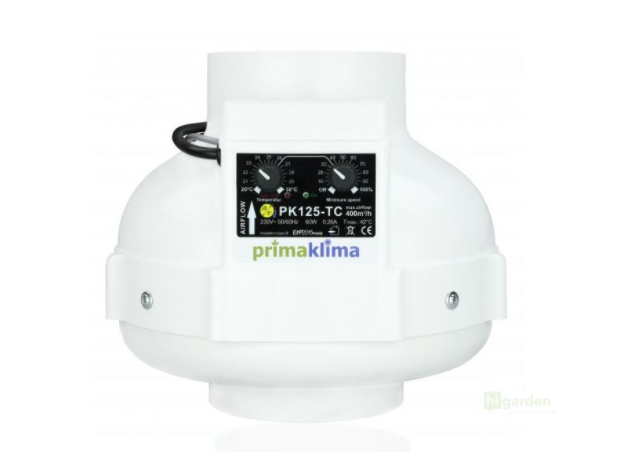
And which specific fan do we recommend? We have tested PrimaKlima fans, which are also popular among our customers. The PrimaKlima PK125-TC fan (400m3/h, 125mm) with thermostat is an unbeaten bestseller in its category.
Choosing a fan is not easy, and general advice is often not enough. We will be happy to advise you individually at info@higarden.eu and help you choose the type and power of fan.
We recommend:
- PRIMA KLIMA fan 400m3/h, 125mm, with thermal control (PK125-TC)
- Garden High PRO - PROFAN TT 125mm, 220-280m3/h, 2 speeds
Further articles:
How High Should You Hang the Light Above the Tops of the Plants?
A simple question, a simple answer. Yet for anyone who is starting to grow plants indoor in a grow tent, it is so fundamental that we have decided to explain it in more detail in this article. Read on to find out what the advantages of LED lamps are and why, unlike discharge lamps, you can place them safely very close to the tops of your plants.
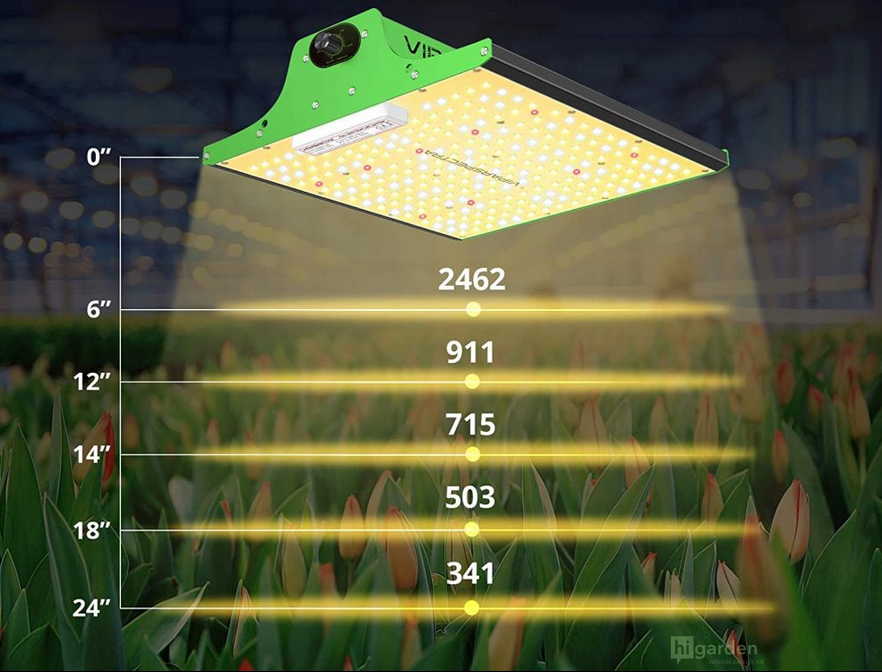
The answer to the question posed in the title is, of course, always the same: as close as possible.
- However, if you use, as most growers still do, classic high-pressure grow box discharge lamps (HPS, MH, etc.) as a powerful source of artificial lighting in a grow box, there is one significant catch. Discharge lamps are powerful, but together with the light radiation they release a considerable amount of heat into the enclosed growing space, and thus also into the immediate surroundings of the plants, which can harm them.
- It is therefore necessary to be very careful to ensure that you illuminate the plants sufficiently intensely, but at the same time do not burn them! This is not at all an easy task, especially at the beginning, and even more so if you only have a limited growing space and, like every grower in the world, your aim is the richest possible harvest made up of plants with lush flowers.
- When you move young seedlings under a powerful discharge lamp, we recommend hanging the lamp initially somewhat higher than is strictly necessary, with a certain margin, so that the plant can first get used to the intense light in the early stage of development. Depending on its growth, we raise the lamp to an appropriate height so that we use the light to the full.
- How can you tell that it is neither unnecessarily high nor too low? When using discharge lamps, the simplest way to find out whether the heat will not harm the plants is to hold your hand above their tops for one minute.
- Once the minute has passed and you still feel only pleasant warmth on your hand, similar to what the sun can create on your skin during a summer day, everything is fine.
- However, if you can barely keep your hand under the lamp after a minute and it is no longer particularly pleasant, then it is certainly not right for the plants either, and you need to address how to cool the air in the growing space effectively.
- If you cannot use the very simplest solution, which is to hang the discharge lamp higher above the tops of the plants to eliminate the risk of burning them, the following options are available:
- A taller grow tent
- For example, the popular Mammoth Pro+ HC grow tents have a structure that is 25 cm taller precisely so that the enclosed growing space provides enough room for plant growth and for placing all accessories, including the lighting source, and in the case of a discharge lamp, at a safe distance from the tops of the plants.
- Cooltube
- More powerful ventilation
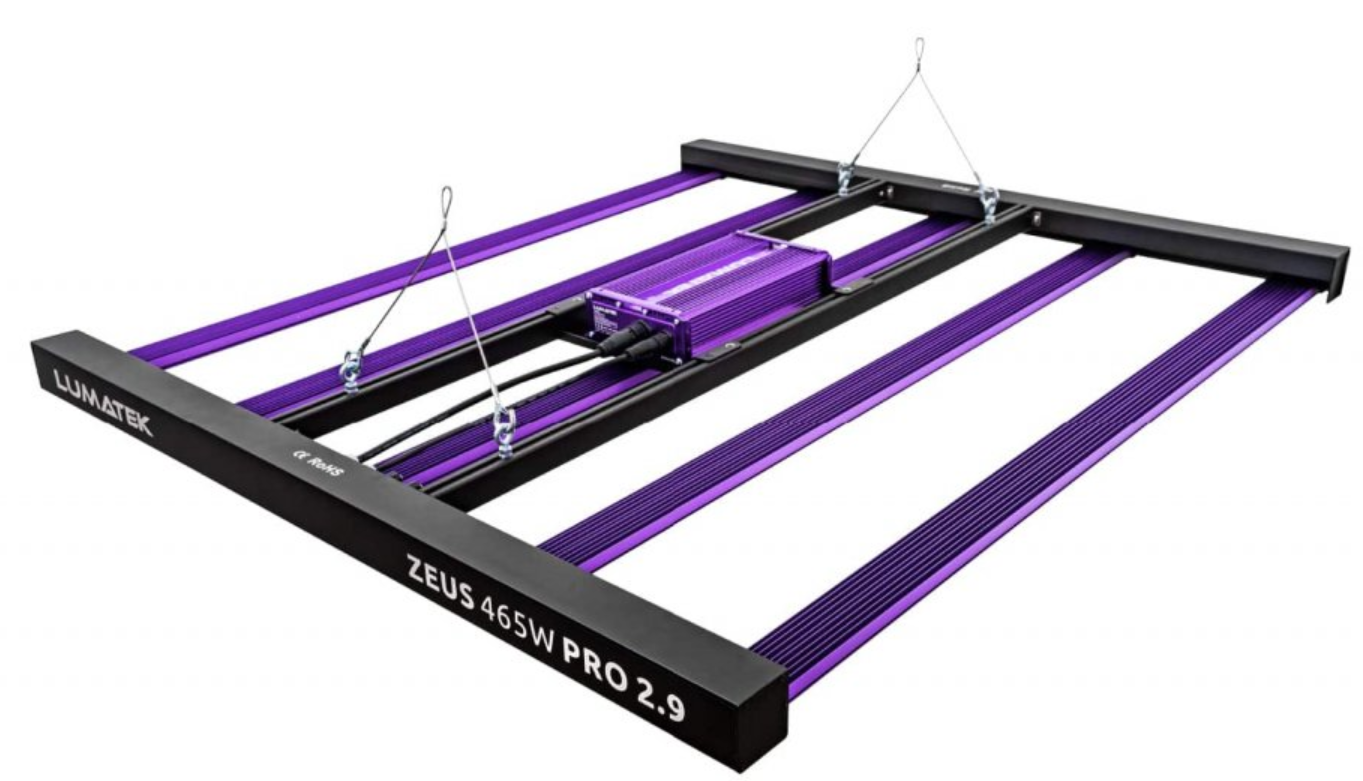
- The above options, however, are also associated with additional costs, and if you enjoy indoor growing, you should definitely start considering the advantages that full-spectrum LED lamps bring to growers, such as those made by Lumatek or Viparspectra.
- Because HPS discharge lamps need to be hung much higher above the plants, the plants naturally tend to stretch towards the light.
- Grow tents with an increased structure are a good solution, but if you have recently bought a grow box, the clearly best investment is a modern LED lamp, with which you will never again have to deal with the question, “How high above the tops should the lamp be hung?” You can dismiss it and look forward to a great harvest. So no more waving your hand under a discharge lamp.
The point, then, is that “LEDs” allow you to use the growing space to the maximum, and unlike discharge lamps, where you must constantly watch out for the risk of burning the plants, you can place them very close to the tops. If you are looking around for a new grow tent, then raised grow boxes are a practical choice, whether you grow with a discharge lamp or prefer LED lighting.
If you have any questions on the topic of MICROGREENS, we will be happy to answer them at the well-known address info@higarden.eu.
We also recommend these products:
- Viparspectra PRO Series P600 (2,990 Kč)
- Lumatek ZEUS 600W PRO 2.9 (24,990 Kč)
- Mammoth Pro+ HC grow tents (from 5,990 Kč)
What to read next?
Design Grow Tents HOMEbox Ambient Combine the Pleasant with the Useful
Thanks to the top-tier Ambient range from the manufacturer of precisely crafted grow tents, the traditional HOMEbox® brand, you no longer have to compromise between a reliable grow box and a tastefully furnished interior in your home. Ambient tents will delight experts and make the first steps more enjoyable!
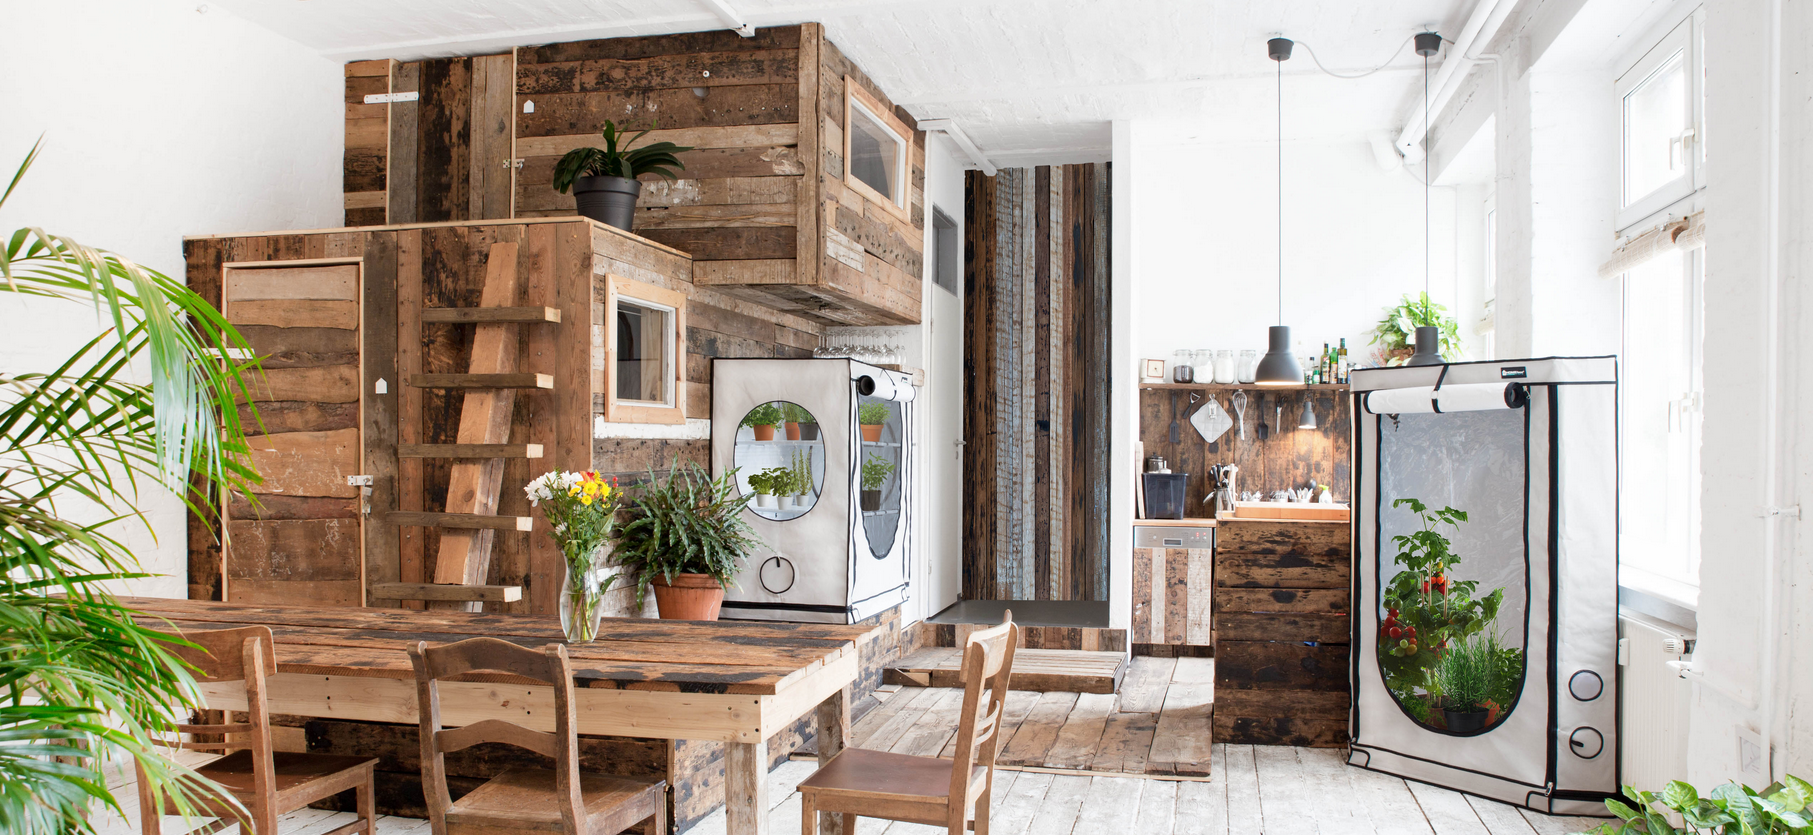
The philosophy of all grow tents in the Ambient product range lies in the natural integration of the selected grow box into the living space for perfect indoor gardening.
- The excellent design of these grow boxes makes it possible to fulfil this philosophy, whether you are growing in the comfort of your home with the aim of harvesting on a small or, conversely, large scale. You can choose a grow tent that blends easily into your home, from smaller models such as the R80 version, right up to the maximum indoor growing experience thanks to large models such as the Q200+ or Q240.
- Thanks to the HOMEbox Ambient range, even a larger grow box is no longer suitable solely for the least frequented corner of the flat. We will come to the other advantages of this range of grow tents shortly, but even the light-coloured finish instead of the classic black already makes these “magic cabinets” hugely popular among home growers. The best-selling model is the Homebox Ambient Q80+.
- Design is one thing, but German quality standards go hand in hand with it so that your herbs grow beautifully at home for repeated harvests several times a year. For this purpose, Homebox Ambient tents excel thanks to a special PARPAR+ reflective film for more light and less heat in the growing space, as well as a sturdy metal frame with robust poles, reinforced joints and durable, lightproof zips (TOTAL-BLACKOUT-ZIPPER) for long service life and easy operation and maintenance. Assembly of these tents also takes only a moment; it is truly easy.
- You may have noticed the plus sign in the above-mentioned Q80+ bestseller, so let us explain its meaning. Ambient+ grow tents feature an increased frame height. An extra 20 cm may not seem much, but the opposite is true, which quickly becomes apparent in growing practice, when the greater height of these raised grow boxes prevents the tops of plants from burning while also allowing you to cultivate taller species.
- The elegant Ambient grow boxes allow indoor growing of plants both in pots and in hydroponic systems. We particularly recommend the hydroponic systems AutoPot, Atami Wilma or Terra Aquatica.
- Ambient grow boxes are designed not only for easy and quick assembly, but also for connecting all accessories, starting with ventilation, so they are already equipped above standard with openings for intake and extract air, while with OMNIFLOW-AIRVENT technology fresh air will always be directed exactly where you need it. To put it briefly, once you have a HOMEbox Ambient at home, it becomes a pleasure to gradually equip it. You will always find a few of our tips at the end of each model description, or feel free to write to us.
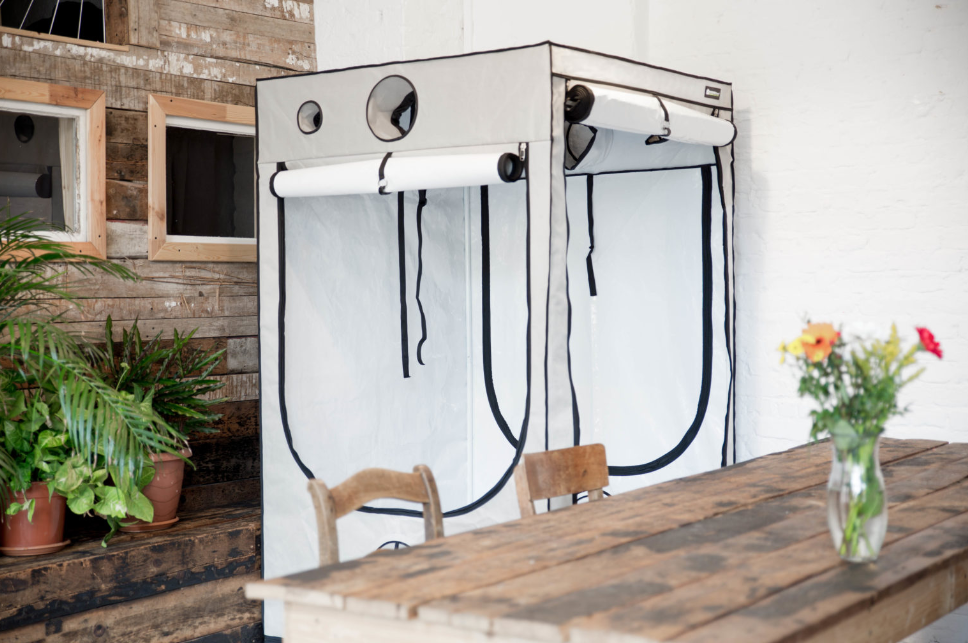
We will be glad if this article inspires you and if you enjoy the coming winter months to the fullest from the position of an indoor grower thanks to top-quality light-coloured grow boxes, whether you are just starting out or rightly consider yourself an experienced grower. We will be happy to advise you on choosing a specific model at the well-known address info@higarden.eu.
We also recommend these products:
- BioNova Starter pack AutoFlower Supermix (1 990 Kč): a comprehensive and discounted nutrition set of basic fertilisers for cultivating autoflower varieties of plants (autoflower).
- LED lighting for grow boxes from the Lumatek brand (from 6 990 Kč): the best investment in lighting for your new grow box.
- PRO-ECO VF carbon filters (from 899 Kč)
What to read next?
How to Use UV Radiation in Indoor Growing?
Ultraviolet radiation, whose natural source is the Sun, can also be provided to plants we grow in the comfort of our homes, supporting them during both the growth and flowering phases. Broaden your horizons in indoor gardening and read this article for all the essential information about UV radiation and its influence on plant development.
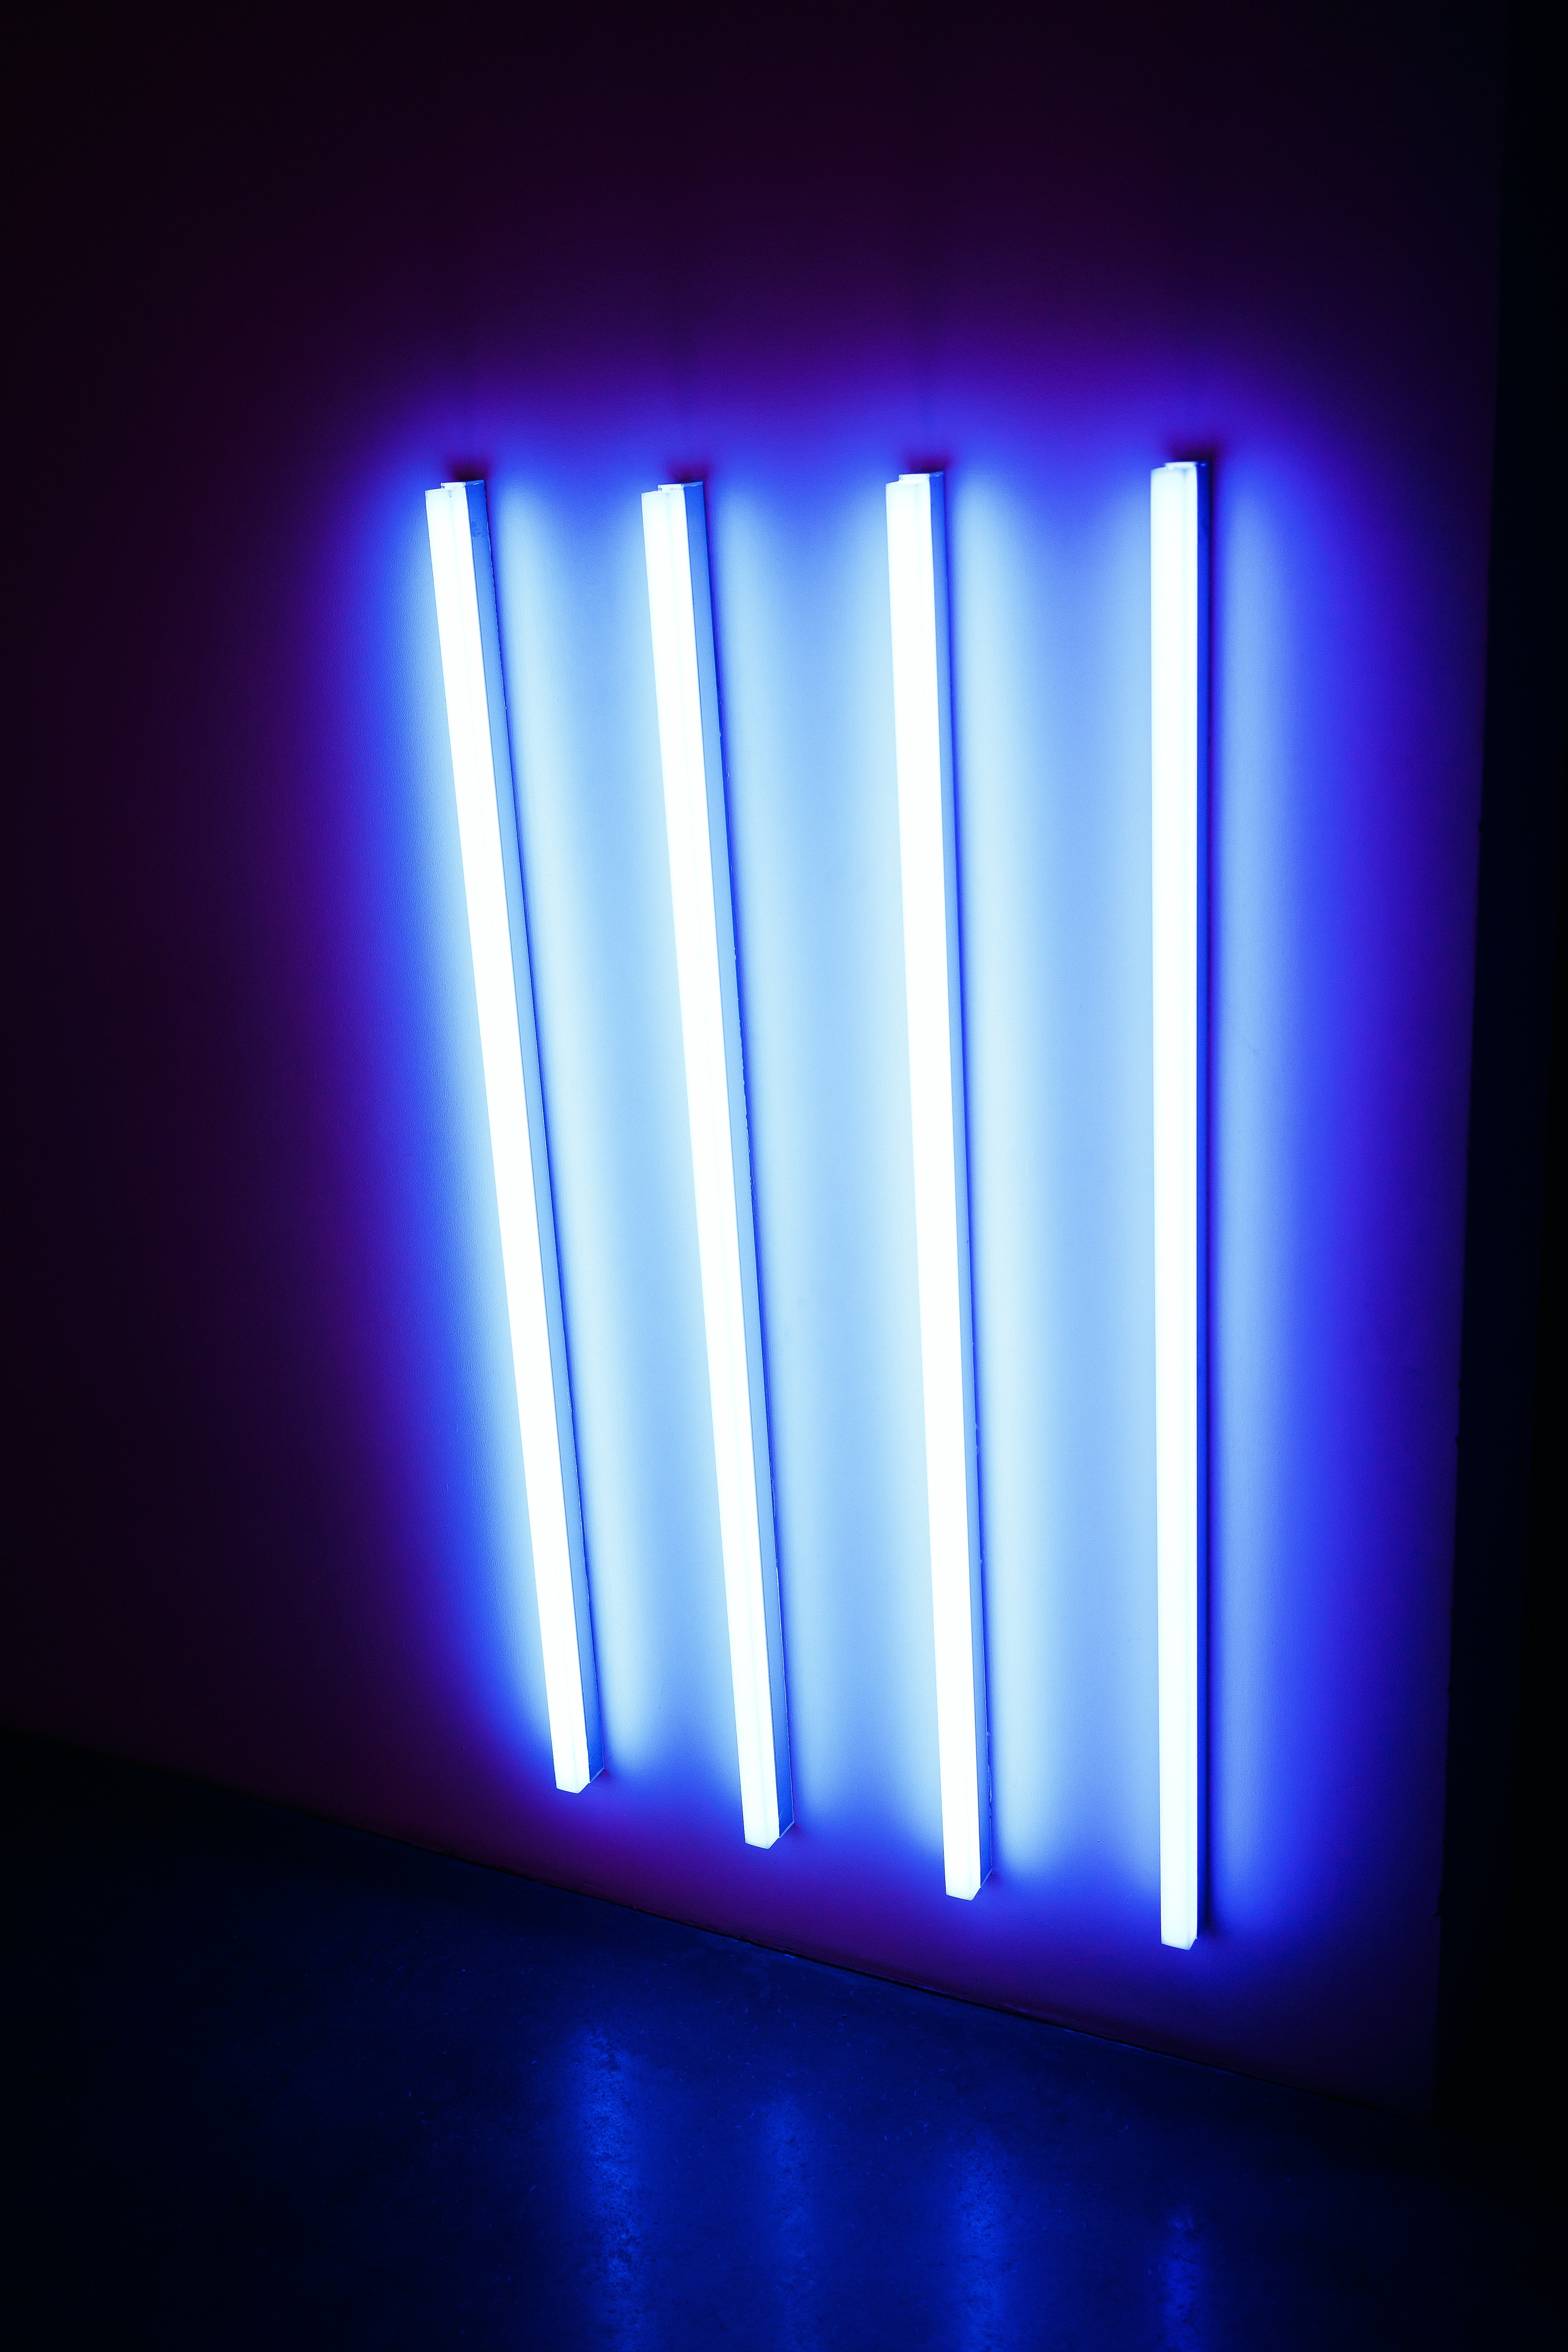
- What is UV, or ultraviolet radiation? You may still remember the answer to this question from physics lessons. It is electromagnetic radiation with a wavelength shorter than visible light, but at the same time longer than X-ray radiation. As a result, UV radiation is invisible to the human eye. For growers, however, the important fact is that a short wavelength means high light energy. And if, as a grower, you decide to use a UV lamp during cultivation processes, wavelength plays a crucial role in its selection.
- Did you know that there are several types of UV radiation? Yes, that is correct, and each type of UV radiation affects plants completely differently. It will probably not surprise you that the individual types of ultraviolet radiation are distinguished precisely by wavelength as follows:
- UVA: 315–400 nm
- A harmless light spectrum present in ordinary daylight, to which our skin is accustomed thanks to the sun.
- For plants grown in indoor environments, it is useful blue light that simulates natural sunlight, especially in those parts of the growing area where the primary source (výbojka, LED light) of artificial lighting does not reach sufficiently.
- This radiation is especially useful during the vegetative phase of plants.
- UVB: 280–315 nm
- This type of UV radiation is captured by the ozone layer.
- It is harmful to people in larger amounts.
- It has a negative effect on the photosynthetic activity of plants, which, however, may be desirable during the flowering phase, and therefore growers use it in reasonable amounts for higher yields and also to make the most of the genetic potential of herbs, for example with regard to beneficial active compounds.
- It also affects the intensity of the taste and scent of flowers or fruits.
- UVC: less than 280 nm
- The strongest form of UV radiation.
- The radiation penetrates cellular structures.
- It destroys viruses, bacteria, mould spores and microorganisms.
- It is used for water disinfection and sterilisation of spaces, including growing areas.
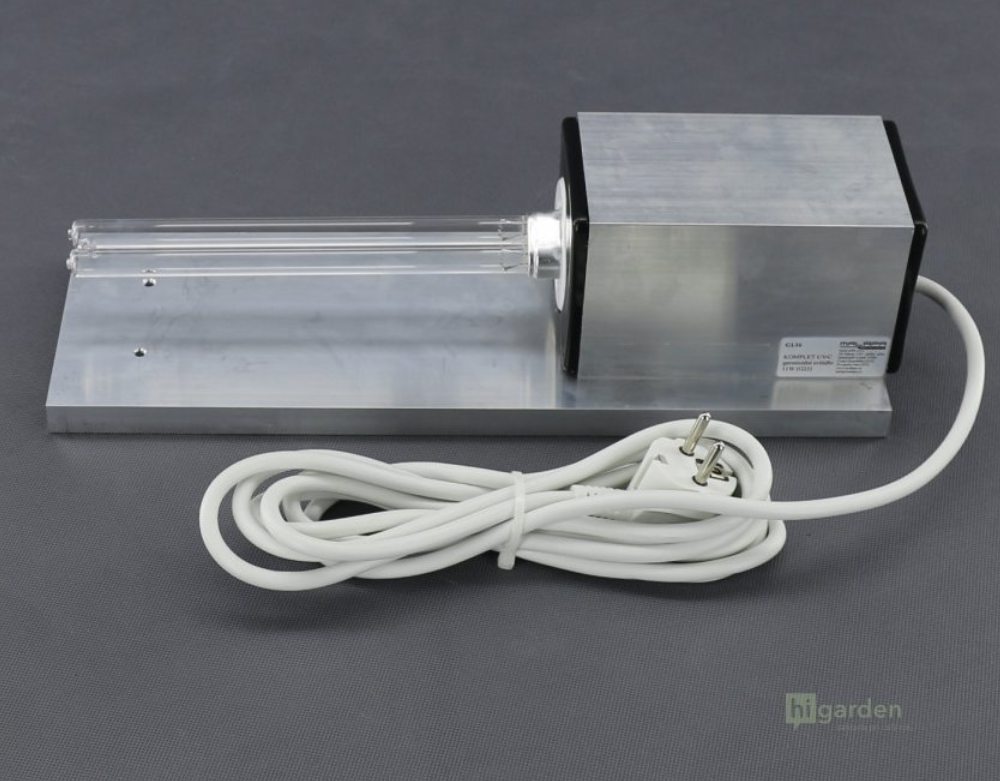
- Reliable sterilisation of your grow box is ensured by high-quality germicidal lamps.
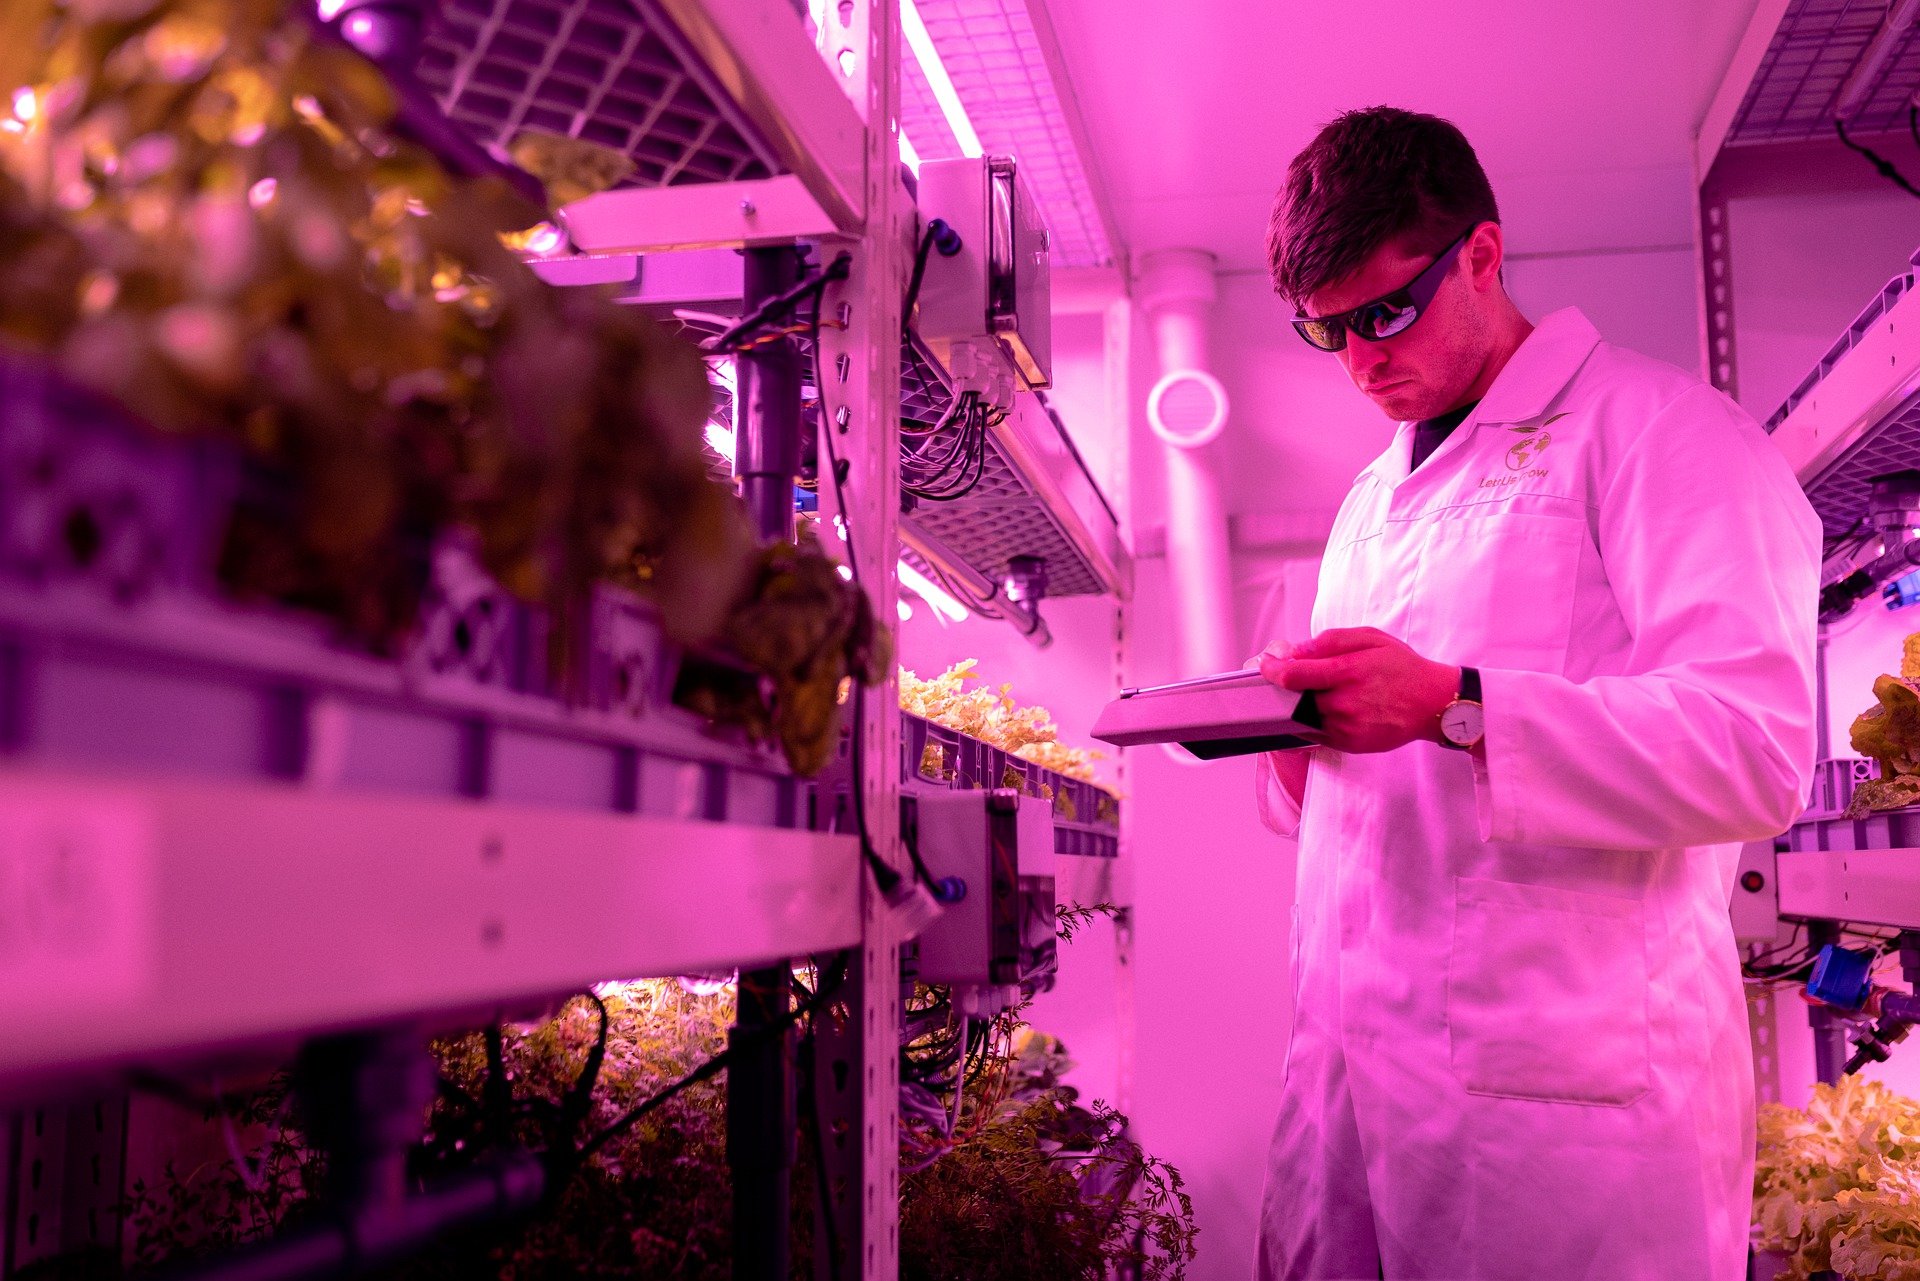
- Using all the above-mentioned types of UV radiation when growing indoor requires a certain discipline; otherwise, you could quite easily burn your precious little plants.
- We therefore recommend starting with a shorter lighting period, and if you consider it appropriate, you can gradually extend it. However, an ideal lighting time practically does not exist in the case of UV lamps, and it depends greatly on the individual characteristics and needs of each plant.
- Another way to prevent burning is to place the lamp emitting ultraviolet radiation at a sufficient distance from the plants. These are the recommended minimum distances:
- Discharge lamps: 40–60 cm
- LED lights: 30–40 cm
- Fluorescent tubes, energy-saving lamps, or less powerful LED lights, etc.: 10–15 cm
Are you looking for suitable lighting with UV radiation? Our specialists are available to you at the well-known address info@higarden.eu. We look forward to your questions!
We also recommend these products:
- GL16 – COMPLETE UV-C germicidal light 11 W (G23) (1,790 Kč)
- LUMii Black Digital complete 600 W KIT (2,990 Kč)
- Aerated HERCULES pots (from 49 Kč)
What should you read next?
- SHOGUN: The best British fertilisers with an emphasis on research
- How powerful a discharge lamp should you choose?
- succulents?
Plant Lighting – What to Use and How to Supplement Light?
In recent years, indoor plant growing, that is, cultivation in an indoor environment - in a room, grow tent or even a mini greenhouse - has become increasingly popular. In addition to a suitable growing container, substrate and nutrients, another important factor for plant growth and overall vitality is light. If you enjoy growing, but your flat or house does not exactly have an abundance of windows or enough window sills, supplementary lighting for plants may be the right step.
There is a wide range of plant lighting available on the market that can be used for cultivation. LED lighting, however, offers the best price-to-performance ratio. The main difference compared with classic discharge lamps, which can also be used in indoor growing, is that LED lights have lower energy consumption. Other advantages include a long service life, which manufacturers state at between 30,000 - 100,000 hours depending on the specific product, which is many times more than conventional discharge lamps. There is also a low amount of emitted heat, so it is not necessary to deal with its removal using additional fans or ventilation, and a high efficiency in converting input energy into visible light.
| Light source | Luminous efficacy |
| classic light bulb | 12 lm/W |
| sodium discharge lamp | 104 lm/W |
| metal halide discharge lamp |
115 lm/W |
| LED light bulb | 100 - 130 lm/W |
If you want to fully replace daylight for plants, you need to provide them with a light source with an appropriate spectrum for the vegetative or flowering stage. Full-spectrum LED fixtures are therefore ideal, as they provide the full range of colours. This allows plants to ensure photosynthesis and, with it, all physiological processes necessary for their life
How should plants be supplemented with light?
The duration of supplementary lighting will vary depending on whether the plant is shade-loving or light-loving. While the former will only need 2-4 hours in the evening to extend the day, light-loving plants placed far from a window will require more intensive supplementary lighting throughout the day. To make it easier to manage these cycles, a timer switch is used, which you can use to control when the light turns on according to your preferences.
Artificial light should be placed as close to the plants as possible, as its effectiveness decreases significantly with distance. The ideal placement is 20-40 centimetres from the plant, but no more than one metre. For supplementary lighting of smaller houseplants, you can use LED light bulbs with a standard E27 fitting, which can be placed in any household lamp. Artificial light is also excellent for pre-growing seedlings, forcing herbs at home or growing sprouts.
You can find further advice and everything you need for the care of your ornamental and useful plants at higarden.eu.
Shades: What Are They and How Do They Work?
Are you considering a reflector and looking for the most suitable solution at the best price? What should you choose based on, and which parameters should you look at? Then you are in the right place.
The basic parameters of reflectors that should be taken into account when choosing are the reflector’s reflectivity, light spread and its uniformity, the illuminated area, and the recommended reflector power.
Reflector reflectivity is stated in % and indicates how much of the incoming light is reflected back from the reflector onto the growing area. Reflectivity itself is very important, as the discharge lamp shines half of its output upwards, away from the plant leaves, and the reflector reflects this light back to where it is needed. Every lost percentage therefore counts, and the difference between a basic and the best reflector can mean up to 10% lost light output, thereby causing a lower yield or higher consumption due to the need to use a more powerful light source.
The cheapest reflectors have a value of around 80%. Typical examples are reflectors costing a few hundred, such as Hammer; in the lower mid-range, we reach reflectivity of around 90%, represented for example by Waveflector reflectors. The upper mid-range is represented, for example, by the WAVEflector Vegagreen range, which has reflectivity of around 95%.
The highest class is represented by reflectors from the Adjust-a-Wings brand and its derivatives, which in the top range have reflectivity above 97%, and all ranges also have the most even spread of reflected light.
This brings us to the second parameter, which is light spread. Making use of all the light produced by your source (usually a discharge lamp or CFL fluorescent lamp) does not yet ensure even plant growth and its maximum use. Every reflector reflects a different light intensity to a different place, so one plant has more light than another, to which the reflector reflects less light. The differences can be as much as 50%, and given that the reflector reflects around 50% of the light output of the discharge lamp, the difference can be very significant and have a negative effect on the plant. One will have too much light and may start to dry out - information for reducing the temperature in the tent - while the other has too little light and its full potential is not being used.
Quality reflectors are also manufactured in several sizes, and it is necessary to choose one that best matches your growing spaces, just as we do not recommend using light sources with a higher output than the reflector is recommended for. Unless you have a specific reason for doing so, you will probably not achieve a higher yield, quite the opposite.
A specific type is CoolTube reflectors, where the discharge lamps are enclosed in a glass tube and allow outside air to flow around the discharge lamp directly out, thereby affecting the temperature in the grow tent only minimally. Given the need to exchange air for plants as well, this solution is particularly suitable where the grower is dealing with problems of excessively high temperature in the tent and normal ventilation is no longer sufficient.
How to Choose and Set Up Tent Ventilation
When growing indoor, unlike outdoor growing, you cannot rely on natural air circulation. It is therefore necessary to depend on more or less sophisticated ventilation equipment and ensure a sufficient supply of fresh air for the plants, more precisely oxygen and carbon dioxide. The heat generated by artificial lighting inside the grow box must, on the other hand, be extracted out of the growing space. Read on to find out how to assemble ventilation easily so that your herbs can breathe properly!
We choose ventilation mainly according to the size of the tent or room. The basis is a fan. You will also need an odour (carbon) filter and, of course, flexible ducting.
Experienced growers use smart control of ventilation, which is governed by temperature and air humidity. Automatic control will ultimately save you time and money, and above all help you achieve an excellent harvest with ease.
Let us start with odour filters. You can find out what to look for in a separate article. A common beginner’s mistake is incorrect placement. The following lines will help you extend the filter’s service life and, thanks to correct installation, ensure smooth operation as well. We recommend placing a classic carbon filter always inside the tent and then drawing air through it...
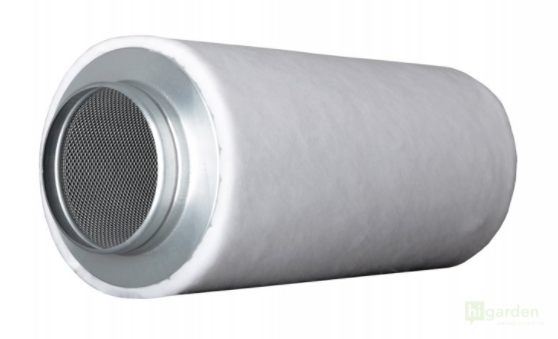
One of the best-selling odour filters on the market from the traditional Prima Klima brand.
The fan can also be inside the box, but it can also be outside; the key is that it should be positioned after the odour filter, as you can see in the picture. This is usually fitted with a pre-filter, which catches larger impurities, while the rest, such as odours or various microscopic impurities, is handled by activated carbon.
The opposite installation method is less common and requires the use of a inline carbon filter.
In general, we recommend ensuring that the filter always has a higher capacity than the fan, because although both components form an inseparable pair together, the carbon filter reduces the fan’s overall efficiency.
Fan
If you are planning to use a carbon filter and run ducting with more than one bend, we recommend a radial fan, whether with integrated control or without it. When it comes to home growing needs, it beats axial fans hands down.
Axial fan should be used rather for simple and short ducting. Filters and bends are obstacles that significantly reduce their performance when moving air.
Speed control, for example according to temperature, will also make the entire growing process much easier, because especially for a beginner it is not easy to set the fan during the growing cycle so that it ensures an optimal microclimate inside the grow box at every stage. And that is the goal, after all!
Prima Klima also manufactures first-class radial fans with temperature control.
Simply put, it does not pay to save on a fan at any cost, even at the start. The same certainly applies to fan noise, whether for your own comfort or your neighbour’s household. It is therefore necessary to bear in mind that the quieter you want the ventilation to be, the higher the purchase price will be. In reality, however, you would be hard pressed to find a grower who would regret not buying a noisier model without control, or even an odour filter, at the beginning...
An excellent helper for air circulation in the tent is a circulation fan. With a circulation fan, which ideally complements the main fan, your plants will not only breathe deeply, but will also be more vital and resilient thanks to the simulation of wind in the artificial growing environment. Practical clip-on fans are also ideal for smaller boxes.
When it comes to choosing ducting, the first consideration is again where your grow box is located and how audible the airflow may be. For large grow boxes, you will need ducting that can handle greater pressure as well. To begin with, for a smaller tent, basic flexible ducting will suffice. A completely discreet option is then the PhonicTrap ventilation ducting PhonicTrap.
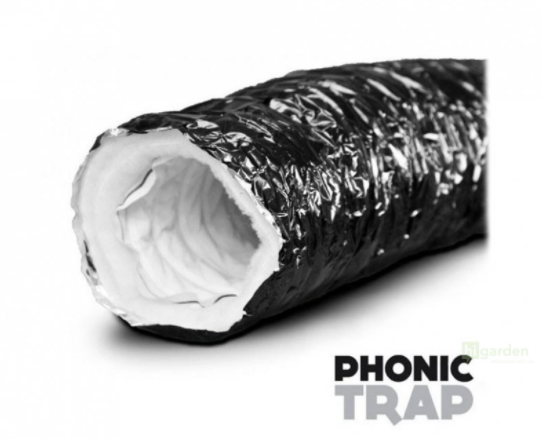
PhonicTrap flexible ducts are twice as effective as standard sound-dampened versions with glass wool. In addition, thanks to the absence of glass wool, there is no risk of contamination of your growing space.
We will be happy to help you choose ventilation, and do not hesitate to contact us when you are assembling your ventilation. We are here for you and our goal is your joy from growing. We look forward to your questions at the well-known address info@higarden.eu.
- Fans
- Flexible ducting
- Sound-dampened PhonicTrap ducting
- Carbon (odour) filter
Which reflective films work better in a growing space? Glossy or matte?
Recently, in the field of indoor plant cultivation, we have noticed one significant trend concerning reflective film, or rather the colour and surface finish of the reflective material on the inner walls of a grow tent or grow room. Many growers prefer, or at least believe, that the best reflective material is matt white. So read on to find out why diamond, mylar and glossy reflective materials in general are a better choice for any growing space.
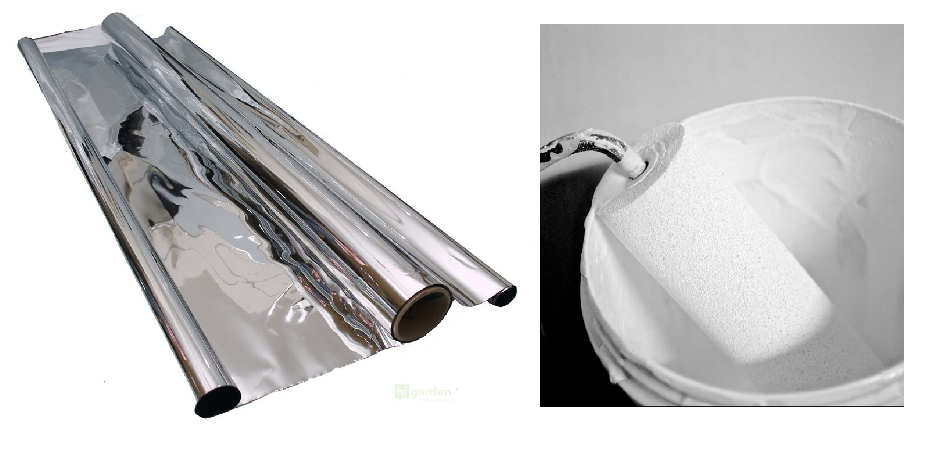
Many growers think that white, more precisely matt white, is always the best option for the inside of a grow room. To settle the matter once and for all, it was necessary to test a wide range of grow lighting inside growing spaces of different designs and sizes. The result may come as a surprise to many.
Independent tests show that matt white reflective surfaces are just as effective inside growing spaces as the standard reflective lining commonly found in grow tents, such as the bestseller Mammoth Pro+ 120 with 600D Mylar reflective material on the inside.
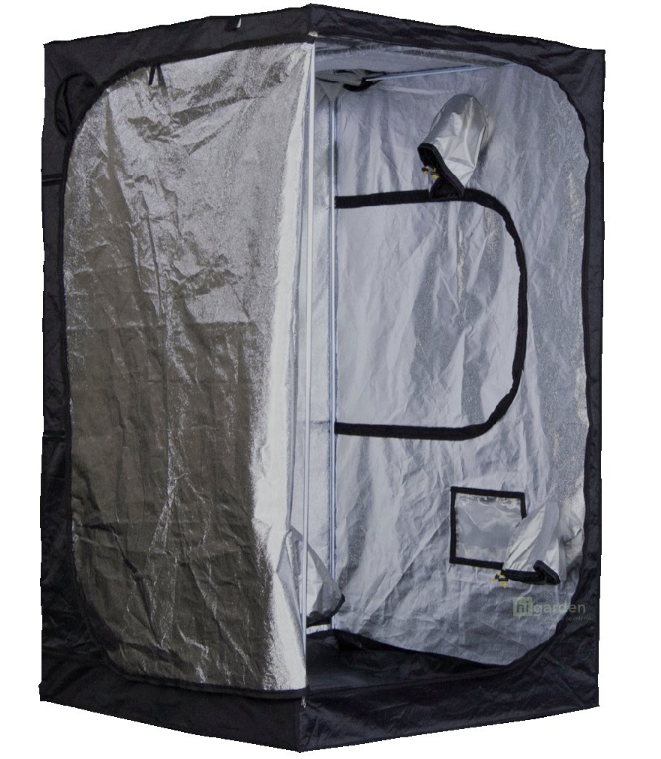
Matt white is therefore no better in practice than silver reflective film for indoor plant cultivation. In this case, the simplest and cheapest solution is simply the best - standard silver Mylar. Here are three more tips for reflective films that reliably outperform matt white in practice:
- Silver ECO film
- Diamond ECO film - 99.9% light reflection!
- Diamond REFLECT-A-GRO film
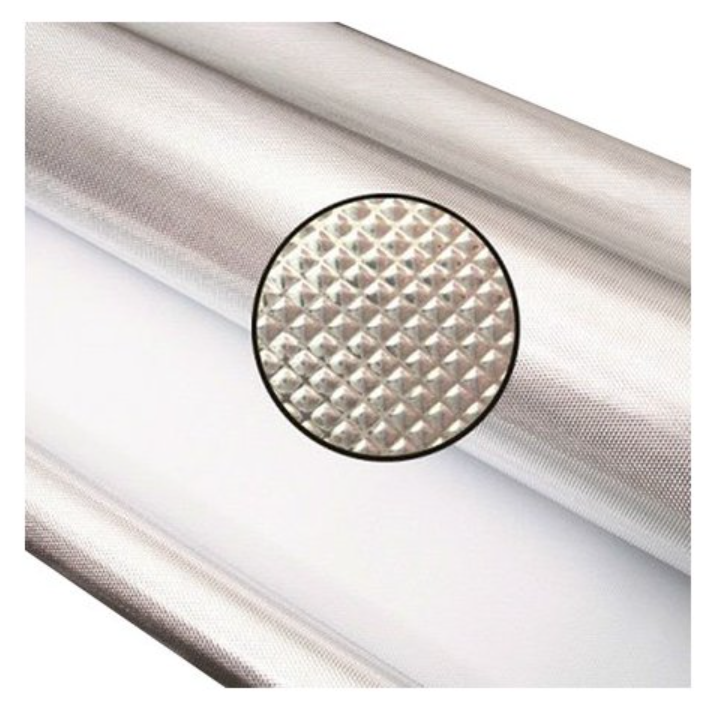
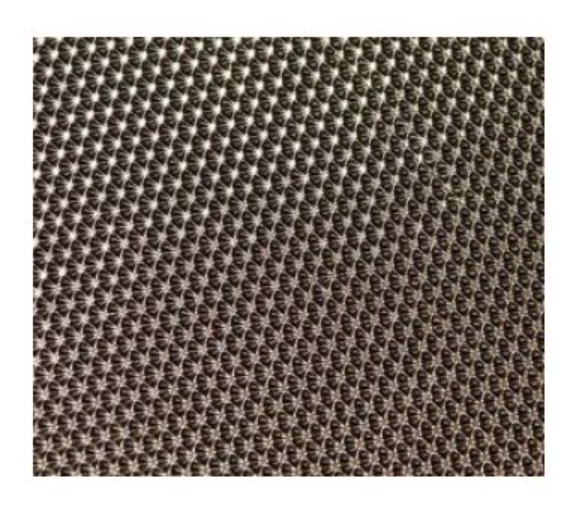
Advantages of silver reflective films and diamond reflective films
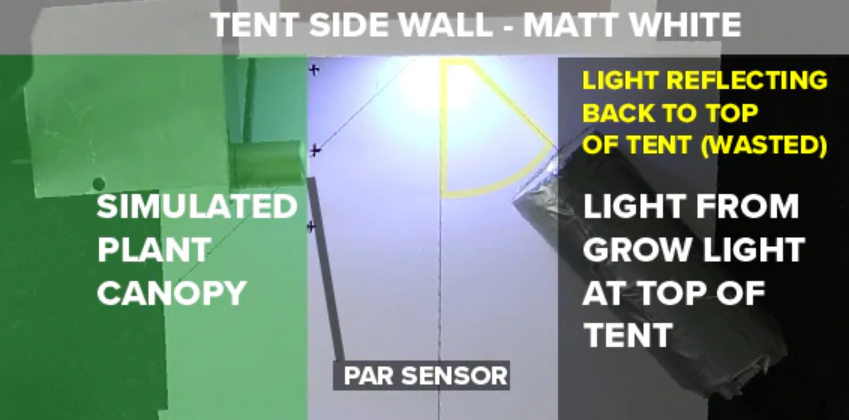
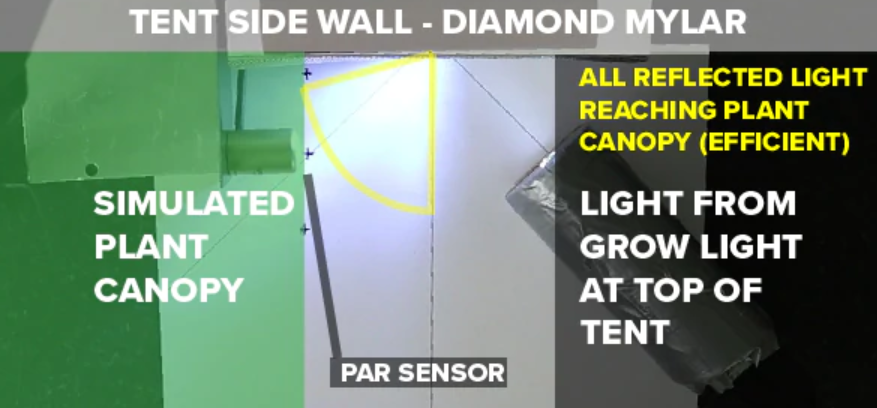
In both cases, this is a very good, proven reflective surface that does not crease and, above all, effectively directs light radiation. This means that light radiation from a discharge lamp or another artificial light source is reflected from the wall of the grow tent or room and directed downwards, in the case of a grow tent to the bottom of the tent. As shown by the results of independent testing, the disadvantage of a matt white reflective surface is that it reflects light radiation in all directions.
This fact is nicely illustrated by the photographs from the testing of reflective surfaces in diamond (fig. 1) and white (fig. 2) versions. The light source is on the right and the PAR sensor is on the left. The crosses simulate the tops of plants inside the tent.

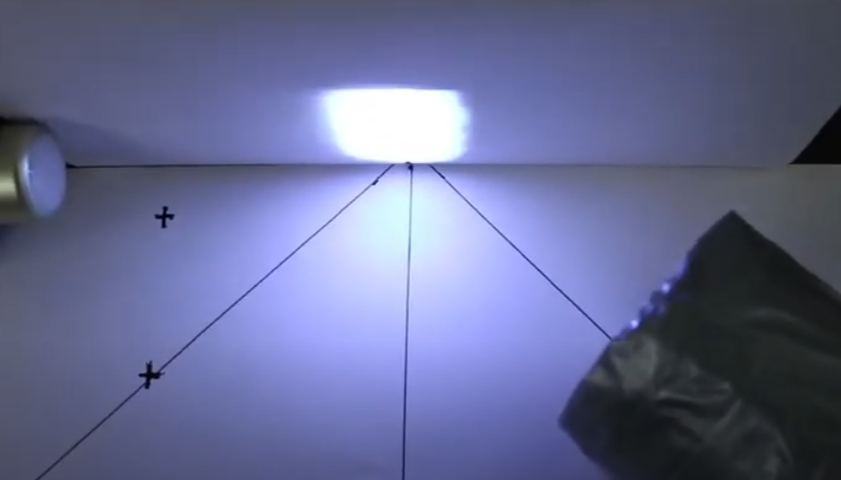
Can you see the difference?
- When light hits a matt white surface, it is scattered, i.e. emitted in all directions. A lot of the light then reflects back to the upper part of the tent, where it is of no use to the plants and its energy is therefore wasted. It is therefore true that when using matt white film, we are literally wasting light in the tent.
- And now the better option. As soon as light reflects from a silver Mylar surface or from diamond film, it is reflected down onto the tops of the plants. This means that the vast majority of the light falling on the side walls of the grow tent or room is directed exactly where it should be. That is, into the growing area, where the light energy is used to the maximum for the healthy development of your plants.
The images come from an elegant and convincing experiment, which you can watch in full in the video. To save you time, however, we have already told you which type of reflective surface will serve you more effectively, meaning one that ensures the light is evenly distributed in the tent while also directing it towards the growing plants. If you would like to ask us anything, not only about reflective film, we are here for you at the well-known e-mail address info@higarden.eu. We look forward to your questions!
We also recommend these products:
What to read next:
- AutoPot hydroponic systems for economical operation and high yields
- How to choose a circulation fan?
- TechGrow timers: a different league of switching!