
BioTabs - dosing tables
How should BioTabs fertilisers be dosed? Here is a proven method!
- The fertilisers from the Dutch manufacturer can be used in soil or coconut substrate, and they are commonly used in self-watering systems such as AutoPot.
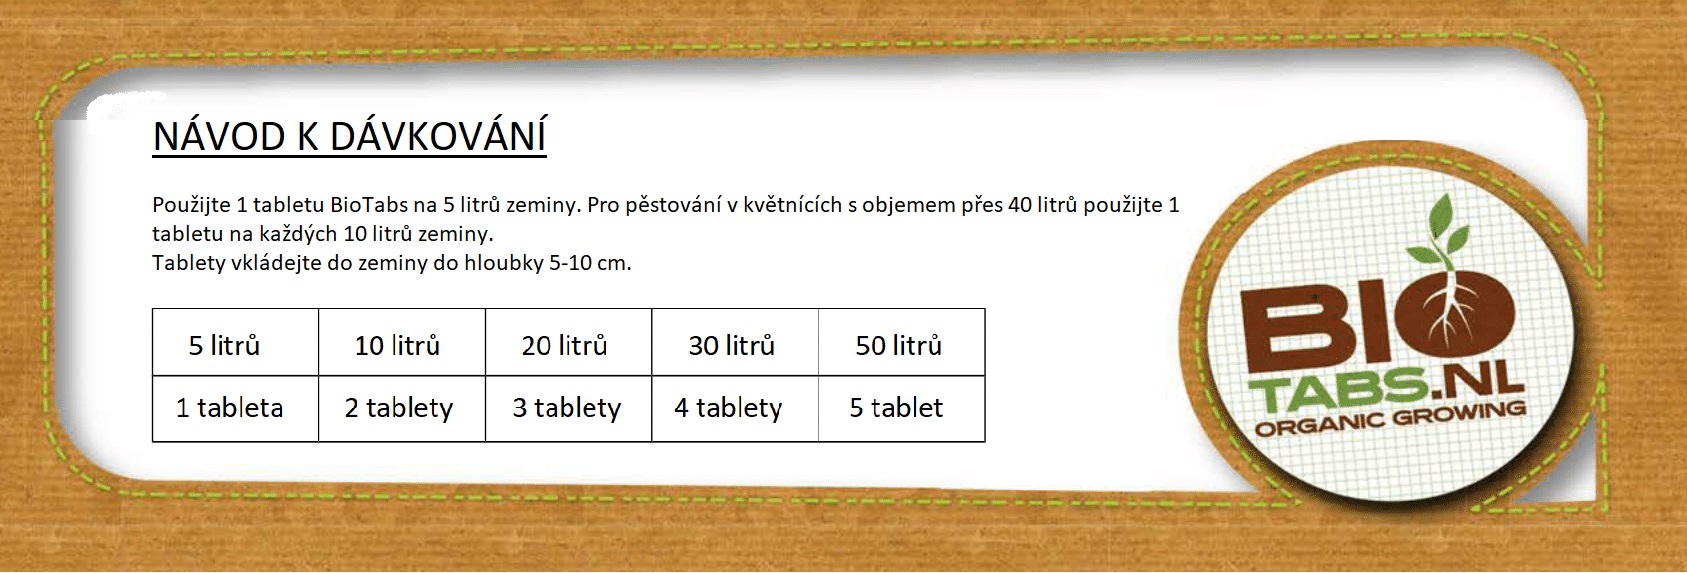
- 1 BioTabs tablet, which is an organic, slow-release fertiliser, can fertilise 5 litres of soil (for one growing cycle, intended for fast-growing annuals).
- In addition to the main product - the unique and practical tablets - for higher yields you will also find useful the classic liquid fertilisers Biotabs or practical supplements in the form of powder.
- If you use large pots with a volume above 40 litres, one tablet will be sufficient for every 10 litres of soil.
- Correct placement of the tablet in the soil is important. The ideal depth is between 5 – 10 cm.
- If you use AutoPot systems, we recommend choosing a soil mix in one of the following variants for effective dissolution and action of BioTabs tablets:
- 50 % coconut substrate + 50 % clay granules (expanded clay)
- 50 % coconut substrate + 50 % perlite
- 50 % soil (Soil Mix or Lightmix) + 50 % clay granules (expanded clay)
- 50 % soil + 50 % perlite
- The Dutch manufacturer aims for the simplest possible application of fertilisers. Instead of a measuring scoop, a teaspoon and a tablespoon are sufficient (always level).
- If, during the growing cycle, you come to think that your plants would welcome more fertiliser, you will do no harm by using the following solution: 5 ml of the liquid fertiliser ORGATEX, which serves as a supporting supplement to the tablets together with the supplementary powder fertiliser BACTREX, which you add to the solution in an amount of 1 gram per litre of water.
- Are you growing tomatoes, peppers, cucumbers or aubergines? Then after 8 weeks of the growing cycle add one extra BioTabs tablet and press it 10 cm deep into the substrate. The result will be juicy fruits full of vitamins!
- When using BioTabs organic nutrition, it is not necessary to measure pH values or the electrical conductivity of the solution (EC) during the growing cycle.
- The manufacturer’s table, focusing on the use of three volume variants of AutoPot hydroponic systems, is divided into the preparation phase (left) and the plant’s actual growing cycle (right).
- The 2nd week of the growing cycle is for the reservoir only tap water!
DOSING SCHEDULE FOR GROWING WITH THE AUTOPOT SELF-WATERING SYSTEM:
Preparation:
- In the preparation phase, first use the powder fertiliser and soil improver STARTREX together with the organic supplement MYCOTREX, which enriches any substrate with beneficial mycorrhizal bacteria and fungi.
- AutoPot 8.5 litres: 2 tablespoons STARTREX + 2 teaspoons MYCOTREX
- AutoPot 15 litres: 4 tablespoons STARTREX + 3 teaspoons MYCOTREX
- AutoPot 25 litres: 6 tablespoons STARTREX + 3 teaspoons MYCOTREX
- Mix everything well and the first step is complete.
- Prepare holes for planting and pour 2 teaspoons of MYCOTREX fertiliser into them. In the second step of the preparation phase, the amount is the same for all AutoPot system sizes.
- Now it is time for the actual planting of the seedling or cutting. Then add the basic nutrients using 2 BioTabs tablets, which press 10 cm deep into the substrate next to the plant. If you use an AutoPot with a volume of 25 litres, use one more tablet.
- Conclude the preparation for the growing cycle by watering the pots with a solution consisting of the stimulant ORGATEX (5 ml) + BACTREX (1 teaspoon). This ratio is the same for all AutoPot system sizes.
- Do not connect the hydroponic system yet for the whole following week so that the plant can take root in peace.
Growing cycle:
- During the 1st week of the growing cycle, use BACTREX in an amount of 2 ml per litre of plain water, every time you water the plants. Again, the size of the AutoPot system does not matter; leave it switched off for another 7 days.
- In the 2nd week, fill the reservoir with clean water and connect it to the Autopot system. Then leave the Autopot system to rest for 7 days.
- In the 5th week, mix a solution from half a litre of water, 20 ml of ORGATREX and half a teaspoon of BACTREX. Do not pour the solution directly into the reservoir and apply it in Autopot systems only once. Then you can already look forward to harvest time!
.jpg)
You can also use these BioTabs growing instructions without any problem in ordinary pots, in the garden, or in another self-watering system other than Autopot. The following table will help you with fertiliser dosing according to the size of the container:
In the left column you will find the substrate volume (coconut or soil), and in the column next to it the size of the Autopot containers. Fertilisers that are only sprinkled into the substrate are given in grams, or millilitres (they can be dosed with a measuring scoop), while products that are better dissolved in watering are given in grams (or millilitres) per litre of water.

You can find BioTabs products here.
DOSING SCHEDULE FOR THE "JUST ADD WATER" STRATEGY:
- The simplest way to use slow-release BioTabs fertilisers
- You fertilise the substrate with five basic solid fertilisers and then only water until harvest
- The amount of fertiliser is determined by the size of the pot (substrate volume) according to the table above this text.
Preparation:
- Mix STARTREX and SILICIUM FLASH into the substrate (coconut or soil) and mix thoroughly.
- Prepare planting holes for the plants and pour 5 teaspoons (5 g) of MYCOTREX into each one
- Plant the seeds or cuttings and press a BIOTABS tablet into the soil next to them (about 5 cm below the surface)
- Dissolve BACTREX in water and water the plants thoroughly with the solution.
The fertilisers will be slowly released in the soil naturally and will last the plant until harvest. Once every two weeks, we recommend adding more BACTREX so that the colony of beneficial bacteria is renewed and grows.

You can find BioTabs products here.
If you have any questions about fertiliser dosing, we will also be happy to answer them at info@higarden.cz