
Indoor Germination from A to Z
Whether you decide to start indoor germination of herbs, vegetables, microgreens, or ornamental and medicinal plant species, your success will depend on the environmental conditions you provide to the seeds. The undeniable advantage of indoor growing is that you have absolute control. We will show you how to use this and achieve 100%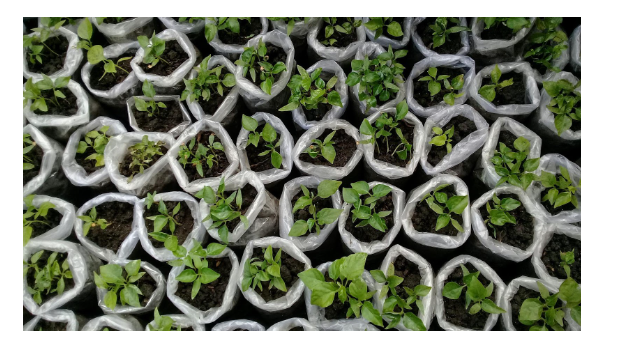 success in the following lines.
Unlike sowing seeds outdoors directly into the soil, where nature decides the outcome, with indoor growing you are in control of the weather. Thanks to grow tents (or propagators), you can keep germinating seeds in optimal conditions. By indoor germination we mean:
- germination in a plastic propagator on a windowsill (suitable for less demanding species)
- germination in a plastic propagator in a grow tent under artificial lighting (suitable for most species)
- germination directly in a grow tent or propagator under artificial lighting and without using a plastic propagator (suitable for most species, with the need to use a humidifier to maintain humidity)
OUR TIP: Would you like to start indoor germination, raising seedlings, or growing microgreens, and are you unsure when choosing equipment? Take a look at our complete sets for indoor raising of seedlings and propagation of plants.
Factors affecting germination
- Temperature is one of the most important environmental factors affecting seed germination. Most seeds of plants intended for indoor growing have a specific temperature range at which they will germinate, and these values differ from species to species; however, the vast majority germinate best at temperatures between 15-30 °C (more precise information can be found on the seed packaging).
- Water is another indispensable resource for seeds, without which they cannot germinate. As soon as the seeds enter a moist environment, they swell, the outer shell softens and bursts to make room for the sprout. Water is also important for activating enzymes inside the seed and releasing stored nutrients, from which the plants draw nourishment in the first days, when they are not yet able to photosynthesise.
- Light is an important environmental factor whose importance varies from species to species. Some seeds need light to germinate, while others require complete darkness. However, all seeds need light as soon as they germinate.
How to germinate indoors: A detailed guide
1) Choose a growing medium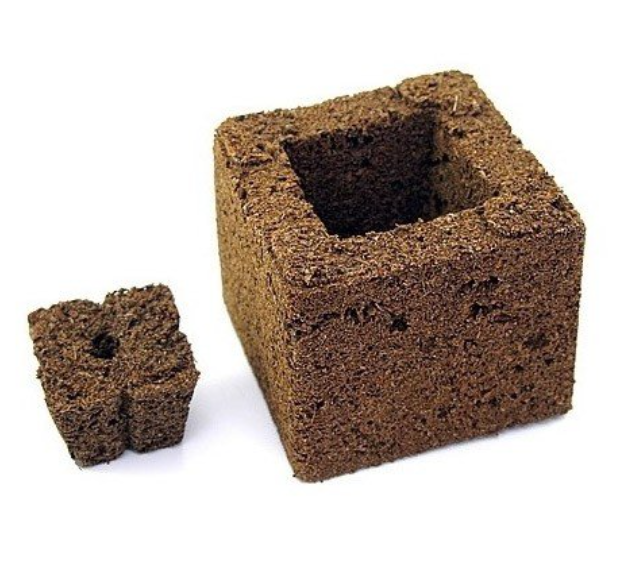
Choosing the right medium for seed germination depends mainly on your growing technique. In general, growing media made from organic materials (soil, peat, coco) are more suitable for cultivating plants in the traditional way, that is, in soil or coco substrate. In hydroponics or growing in inert substrates (rockwool, perlite, vermiculite, expanded clay), it is better to germinate in sterile media or in water.
- Soil-based sowing substrates are suitable for growing in soil mixes or coco substrates.
- Coco substrates combine the advantages of organic soil blends and hydroponic substrates. They are suitable for germinating seeds of plants grown in soil, coco and hydroponics.
- Propagation cubes and Jiffy made from peat, coco and other organic materials are designed to fit comfortably into propagators, saving both work and space. You can use them when growing in soil, coco and hydroponics.
- Propagation cubes made of mineral wool (rockwool) in various sizes and shapes are most suitable for cultivating plants in hydroponics and inert substrates, but they can also be used for seed germination for growing in soil mixes.
- Perlite and vermiculite are sterile media made from expanded rock, used as an additive to soil, but also suitable for seed germination, especially in hydroponic growing.
2) Moisten the growing substrate
When germinating in soil mixes and coco, the substrate must first be sufficiently moistened. You can easily test the moisture of soil or coco substrate by firmly squeezing a small amount in your palm. If only a few drops of water run between your fingers, the moisture is just right.
Coco propagation cubes (Jiffy), perlite, vermiculite and mineral wool cubes only need to be soaked in water before use. If you want the germination process to take place in as sterile an environment as possible, you can use a weak (0.5%) solution of hydrogen peroxide instead of water. This will prevent damping-off and stem rot caused by parasitic fungi.
You can also use compost teas containing beneficial microorganisms that protect plants against harmful moulds while also speeding up nutrient uptake and supporting plant vitality. For inoculation, simply soak the seeds in the prepared compost tea before placing them into the substrate. Note that treating the medium with a hydrogen peroxide solution and soaking seeds in compost tea cannot be combined, because the chemical will reliably kill the beneficial microorganisms.
OUR TIP: As an alternative to hydrogen peroxide, you can use Purolyt.
3) Fill the growing container with substrate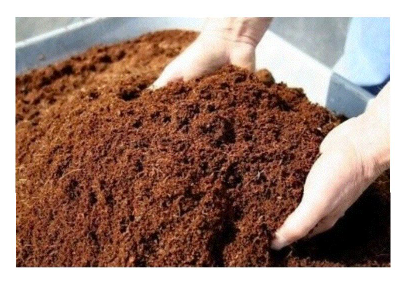
When germinating seeds in soil or coco substrate, use small pots. If you want to make transplanting easier, you can choose pots made from biodegradable materials. First fill the container to one third and lightly tap it with the bottom on the table so the substrate settles. Finally, heap the substrate up to the rim of the container and lightly press it down by hand.
Coco propagation cubes and mineral wool cubes are best arranged in a propagation tray. Again, you can choose practical propagation trays made from biodegradable materials. If you place them loosely on a tray or in a propagator, the seedlings will topple over after germination and the stems may break.
4) Plant the seeds into the growing medium
You can now begin planting. Different plant species have different germination requirements. Some seeds may require a cold period before germination (stratification) or longer soaking. Unless stated otherwise, plant the seeds to a depth equal to two to three times their length.
If you are growing several species or cultivars at once, it is a good idea to label the seeds clearly when planting. Hard plastic labelling tags are practical for this purpose.
5) Maintain the correct humidity and temperature
Once you have planted the seeds into a moist substrate, the germination process begins. It is now important to maintain the correct temperature, humidity and light intensity in the growing area. These factors differ for each species, but in general it can be said that most species grown indoors need temperatures between 15-30 °C and high air humidity to germinate.
OUR TIP: Heating mats are a great helper when growing species that need high temperatures to germinate.
The easiest way to maintain the right microclimate is in a small plastic propagator in which you keep the germinating seeds. You can then place it in a grow box, on a windowsill or in another suitable location. Alternatively, you can increase the humidity in the entire growing area with a humidifier, which is especially suitable when germinating a large number of seeds at once (for example when growing microgreens)
Check the substrate moisture every day, and if it seems too dry, moisten it with clean water from a spray bottle. It is not a good idea to water germinating seeds directly, as they could be washed to the surface. Seeds should germinate according to the species, with newer seed germinating faster than old or poorly stored seed, which may not germinate at all.
6) Provide the plants with light
Plants need light to live, and this also applies to germinating and freshly germinated seedlings. Many growers germinate seeds in a plastic propagator on a windowsill, which is a good solution for less demanding species or plants intended for outdoor planting. However, for indoor growing it is better to start straight under artificial lighting. This ensures that the plants receive enough light from the first days, speeds up their growth and prevents stems from stretching.
Grow lights for germination and seedling lighting have lower output and emit a light spectrum suitable for the growth stage. The choice of the correct shape and size depends mainly on the number of plants you plan to grow.
The hanging height of grow lights for germination and young seedlings depends on the intensity of the emitted light. Approximate hanging heights for grow lights for germination and seedlings according to output are:
- for lights intended for germination and seedlings up to 120 W - 10-40 centimetres above the tops of the plants
- for LED grow lights with an output of 120 W to 1,000 W – 60-90 centimetres above the tops of the plants
Photoperiod (the number of hours of uninterrupted light during 24 hours) depends on the species grown, but for most plants it is between 12-16 hours a day. Switching the lights on and off is easiest to control with adjustable timers.
7) Prepare seedlings for the growth stage
The germination stage ends as soon as the first two small cotyledons appear above the surface of the substrate. If you germinated in pots, your newly emerged plants should have enough root space for the first few days to weeks (depending on the species), and there is no need to transplant them immediately. If you germinated in Jiffy or propagation cubes, it is necessary to transplant the plants within a few days of germination.
Indoor germination can sometimes be a challenge, but we believe that with our advice you are ready for the task. Do not forget that no one is born knowing everything, and if you run into a problem with choosing equipment or need any other advice, do not hesitate to contact us. For more useful tips, visit our Higarden blog.