Grow three indoor plants – Part 3: First transplant and start of the growth phase
Grow three plants indoors – Part 3: First transplant and the start of the vegetative phase
In the third part of our indoor growing series we move from germination to the first steps toward harvest. We’ll show how and when to properly transplant germinated seeds, how to avoid transplant shock, and how to choose suitable nutrients for your plants.
In the previous installment of our series we picked a growing substrate and showed a simple seed germination method. Today we’ll look at when to make the first transplant, choose an appropriate fertilizer and kick off the vegetative phase.
Transplanting
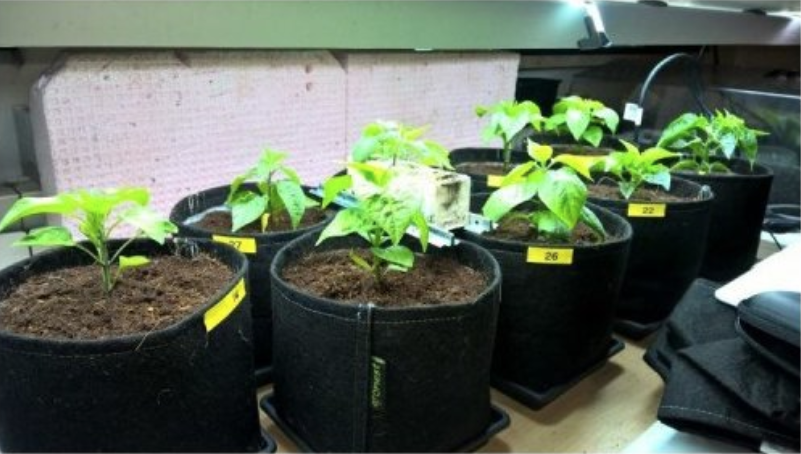 If you followed our advice from the previous part and germinated in seedling cubes, you’ll need to transplant the seedlings shortly after germination. The right time is when you see the roots growing through the cube. This usually happens one to two days after the first round cotyledons appear. If you germinated directly in a small pot, skip the next step.
Transplant the germinated seeds into a small pot up to 0.5 liters in volume filled with the substrate you selected for growing. It’s better to move the seedlings into a large pot only once the roots have grown through the substrate and start protruding through the bottom, which is typically about two to three weeks after germination. In a smaller pot it’s easier to keep the substrate evenly moist and repeated transplanting stimulates the plants to form new roots. To protect plants from transplant shock, water them after transplanting with a weak solution of a growth fertilizer plus a root stimulator. For the first watering reduce the manufacturer’s recommended dose by half.
The above method should be used only for photoperiod-sensitive varieties. Transplanting is generally not recommended for autoflowering cultivars because they have a very short life cycle. Transplanting a young plant causes stress and temporarily halts growth. For photoperiod varieties a grower can simply extend the vegetative period slightly, but autoflowers start flowering roughly three weeks after germination and if you transplant them at the wrong moment they may remain stunted.
You might be interested in: How to choose a cultivar for indoor growing
Start of the vegetative phase
Once you move the seedlings into the growbox under cultivation lights, the first true serrated leaves will appear. The vegetative phase begins, during which the plants focus on growth — producing new leaves and stems. Short-day plants start to flower only when night length approaches about 12 hours. With indoor growing we can use this to time flowering as needed. This applies only to photoperiod-dependent cultivars; for autoflowers it pays to keep lights on a bit longer each day throughout the whole growing cycle.
- Vegetative phase for photoperiod-dependent varieties: 16–18 hours light / 8–6 hours dark
- Vegetative phase for autoflowering varieties: 18–20 hours light / 6–4 hours dark
Plants need light not only to regulate flowering but primarily for photosynthesis. To make this process efficient in indoor growing, the grow lights must have the correct spectrum and intensity. Modern LED grow modules (which we recommend to growers) have the advantage of emitting light in a spectrum similar to sunlight, which is ideal for plants. The best way to monitor light intensity is by PPFD values — the amount of photosynthetically active light hitting the leaves. Young plants require approximately 200–400 µmol/m²/s, during the vegetative phase the target range is around 400–600 µmol/m²/s, and in bloom roughly 600–1500 µmol/m²/s. If your fixture supports dimming you can simply adjust intensity via power control. If there is no dimming function, the same effect can be achieved by changing the distance between the light and the plant canopy — the lower the hanging height, the higher the PPFD. Every quality LED module should list recommended hanging heights for the different cultivation phases and indicative PPFD values in its technical specification to guide you when setting the optimal height.
- PPFD seedlings: 200–400 µmol/m²/s
- PPFD vegetative growth: 400–600 µmol/m²/s
- PPFD flowering: 600–1500 µmol/m²/s
You might be interested in: The most important criteria for choosing grow lighting
During the vegetative period plants need high relative humidity in the range of 55% to 65%. During the day the temperature in the grow space should not fall below 24 °C or exceed 28 °C. At night with the lights off the air temperature can be lower (18–26 °C). In the first days after transplanting keep the grow space humidity high — around 70% — and reduce it only after several days. This helps seedlings establish roots more effectively.
- Humidity for rooting: 70 %
- Humidity during vegetative phase: 55 -65 %
- Temperature during vegetative phase: Day (24-28 °C) Night (18-26 °C)
You might be interested in: What are the ideal conditions for indoor growing?
How to choose fertilizer for indoor growing
In the previous part we explained the differences between various substrates for indoor growing. The choice of nutrition for your plants will largely depend on the chosen growing medium. Soil-based substrates give you the most flexibility, and you can choose either mineral or organic fertilizers. For hydroponics and coco you must use fertilizers specifically formulated for those systems.
- Fertilizers for soil
- Fertilizers for coco
- Fertilizers for hydroponics
You might be interested in: Complete guide to choosing fertilizers
 Beginners find a simple nutrient lineup divided by growth phase works best. This is usually two or three bottles used sequentially during vegetative growth and flowering. Vegetative fertilizers (labelled Grow) contain more nitrogen to support leaf mass and branching. Bloom fertilizers contain more phosphorus and potassium to support flower and fruit formation. Some growers use so-called Flush or Finisher products before harvest to cleanse the substrate of excess mineral salts. Remember that manufacturer dosing charts should be treated only as a guideline. Start with lower doses for young plants and gradually increase nutrient concentration in the feed solution. The first signs of overfertilization are burnt leaf tips and very dark green leaves. Conversely, slow growth and pale or yellowing leaves indicate nutrient deficiencies.
Fertilizing is closely linked to pH and EC control — the acidity of the nutrient solution and the amount of dissolved mineral salts. If you grow in soil and use standard fertilizers, precise measuring is not strictly necessary. However, if you move into coco or hydroponics you’ll need a pH and EC meter. Correct pH ensures the plant can take up nutrients, and optimal EC prevents plants from receiving too much or too little nutrition. In practice this means keeping soil slightly acidic around 6.0–6.5, while in coco and hydroponics aim a bit lower, roughly between 5.7 and 6.2.
You might be interested in: What pH should the nutrient solution be?
In the next installment we will look at how to water plants correctly and learn how to control plant growth and climate in the growroom. You’ll also find out about nutritional supplements suitable for the vegetative phase.