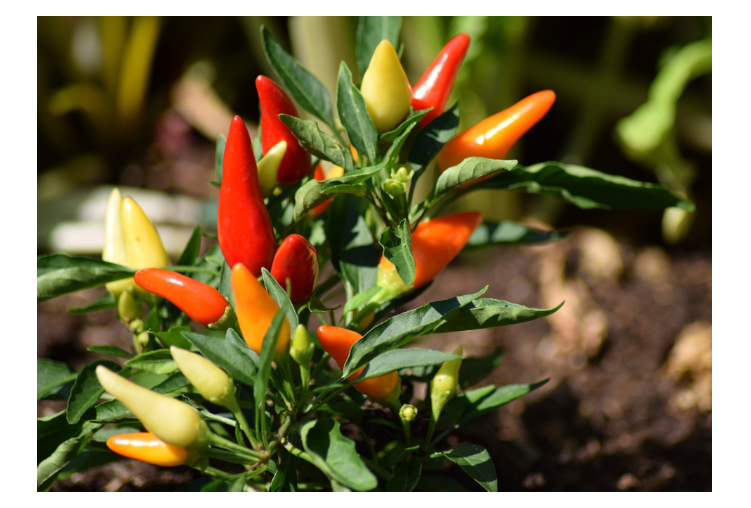
How to grow chili peppers?
Read everything you need to know about growing popular hot chili peppers. If you love chili, all you need is a complete growbox with accessories and you'll enjoy a spicy harvest several times a year. We will also add tips for growing chili in the garden or greenhouse. Whether you prefer growing hot peppers indoor or outdoor, you may never need to buy them again, and you can choose the specific varieties you enjoy.
Variety and heat level are characteristics that matter even before you start growing chili peppers. Individual chili varieties require specific growing conditions. However, these differences could slow you down at the beginning, so we will simplify everything so you can start growing chili peppers with the prospect of a spicy and juicy harvest. Just avoid a few basic mistakes and shortcomings, which we will focus on.
Seedling preparation for chili peppers
- Seed quality and germination time
Vital seeds are fundamental. As a basic rule, they should not have been stored for more than 3 years. To ensure germination, they should be stored in a dry, dark, and cool place. Except for the variety capsicum pubescens, whose seeds are naturally dark, do not try to germinate seeds that show black spots. Obvious mechanical deformities, softening, or visible damage from pests or mold are also undesirable. It's worth selecting seeds. Choose only the largest ones with a proven history and clear genetic potential.
If you're wondering how long it takes from the start of germination until you see new shoots, for most varieties germination takes up to three weeks. Varieties like Habanero or Tupin may require twice as long—up to six weeks.
- Correct timing
It is essential to determine the sowing time if you grow chili peppers somewhere other than in a growbox. In a grow tent you don't have to worry about timing—that is a huge advantage of indoor chili cultivation. The downside is the electricity consumption of artificial lighting. Under the sun, plants typically need 6–9 months for fruit to mature. This means that when growing outdoors you should start seedlings early in spring before the last frosts, ideally transplant them outside after the last frost, and harvest ripe fruits before the first winter frosts.
- Growing media and climate conditions
Central European growers naturally face less favorable climatic conditions for outdoor chili cultivation, and seedling preparation is one way to compensate for unfavorable climate. You can also use polytunnels or greenhouses, which extend the growing season and approximate ideal conditions. It's also wise to choose the most resilient chili varieties possible.
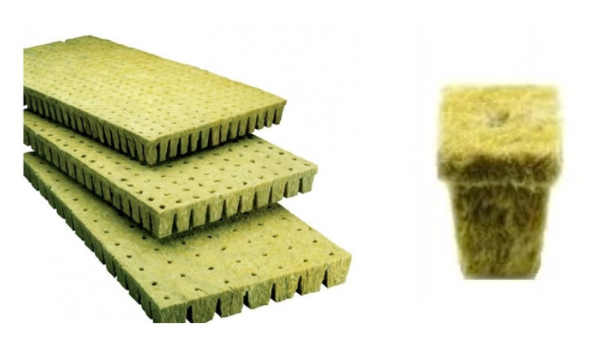
Which medium to choose for successful seedling preparation? The gentlest way to germinate seeds is using rockwool, also called mineral wool, from which popular Grodan starter cubes are made. They are inert, so they are perfect even for hydroponic chili cultivation.
You can also use a good-quality substrate for seedling preparation, but ensure it is sterile. When using substrate, do not sow seeds deeper than 3 mm below its surface.
During germination and seedling preparation it is important to maintain optimal temperature and relatively high humidity in the growing space. mini-greenhouses and seed trays or propagators (in combination with growth light) will make propagation easier and increase the chance of transplanting vital seedlings later. A practical PROPAGATION SET SMALL is an easy path to successful seed germination and seedling preparation.

Earlier we mentioned that individual varieties have specific requirements. To simplify, we can state 29 °C as a universal temperature for chili peppers. In a seed tray you can maintain a constant temperature much more easily. This also applies if you decide to maintain an optimal temperature for a specific variety. For example, the ideal germination temperature for tropical species of the chinense group is 24–32 °C, while for species of the annuum group it's ideal to keep temperatures between 10–24 °C.
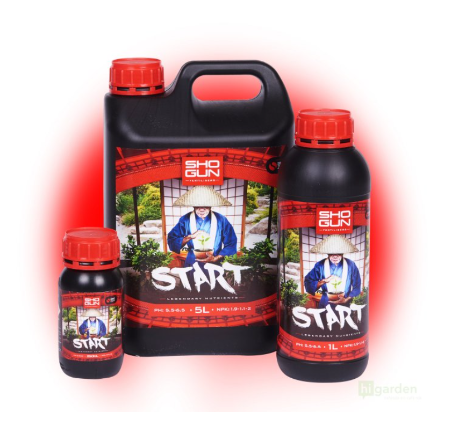
Our TIP: Shogun Start provides young plants with the trace elements they need when they are still weak. Great nutrition for seedlings of all chili varieties!
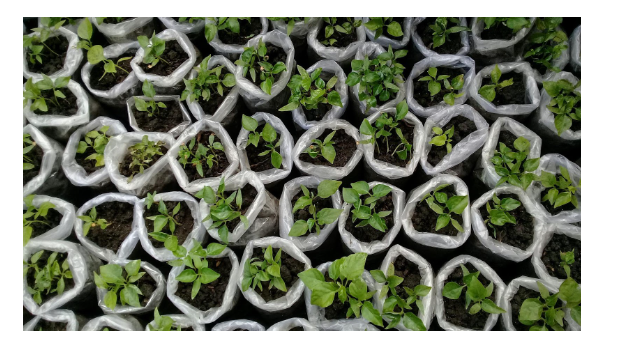
Transplanting chili plants
The more help you give young plants at the start of development—not only chili—the more they will repay you in maturity with stable growth, vitality, and quality produce.
In the seedling stage it was mainly about temperature and humidity inside the growing space. Once cotyledons appear, light is added to these climatic factors as well—light! The day should already be long enough at transplanting. If young plants lack light, you can supplement it (see below). Light deficit is noticeable when plants stretch their stems, becoming fragile and unstable.
If you grow plants indoors in a growbox, we especially recommend full-spectrum LED lighting by Lumatek, which perfectly simulates natural sunlight. You can learn more in a separate article comparing top LED lights. In propagators or for supplementing shaded spots in the grow tent you can use the 100W full-spectrum Lumatek BAR 2.9 supplemental lamp. Metal halide or high-pressure sodium lamps can also be used—see the article Growing under artificial lighting and the differences between lamp technologies in the HPS vs. LED article.
Transplant young plants into potting substrate or soil together with the rockwool base. This avoids pulling the plant by its roots and increases transplant success. This also applies if you used peat tablets such as Jiffy. Returning briefly to the choice of growing medium: although rockwool and Jiffy allow transplanting with the root ball, the peat tablet wrapper eventually decomposes unlike rockwool and does not restrict root growth. The fact that rockwool does not decompose may cause problems for weaker plants during growth or nutrient exchange. If you use hydroponic systems, prefer rockwool. If you germinated seeds on a wet paper towel or by another method, remember that the first roots are very sensitive and require the gentlest handling when transplanting.
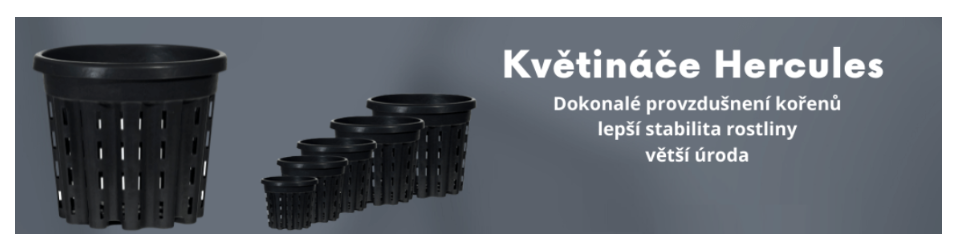
The minimum pot size for growing a single chili plant is at least 10x10 cm. We recommend trying aerated pots instead of cheap plastic ones, for example HERCULES.
Caring for mature chili plants
When caring for mature plants we again focus on key factors that lead from problem-free ripening to intense and fresh flavor of spicy fruits:
- Light: Hot peppers, like sweet peppers, are light-loving plants. If you grow chili outdoors, choose a spot that receives sunlight as long as possible during the day. Plenty of sunlight (replaced by full-spectrum lighting indoors) provides energy plants invest in root systems, flowers, and especially fruits. It's important to choose a spot with sufficient light intensity, but too much can be harmful—be cautious in hot summer months if growing chili in a greenhouse with clear glass to avoid sunburn. Chili plants prefer a slightly atypical photoperiod: 14 hours light - 10 hours dark.
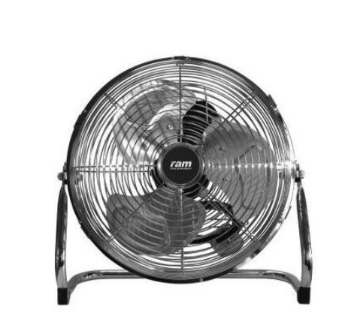
- Temperature: The good news is that you can now obtain acclimatized varieties suited to our climate. However, even these varieties retain tendencies from their tropical origins and do not tolerate frost; low temperatures exhaust them and can slow growth. Do not plant seedlings on days with short sunlight and cool temperatures. The opposite extreme is very high temperatures above 35 °C typical for unventilated greenhouses, which cause major problems with metabolism. Chili plants appreciate airflow around upper parts of the plants. Outdoors the wind provides this; in a greenhouse ventilate often, preferably at the roof. Indoors, a circulation fan is useful.
- Humidity: High air humidity is suitable during germination and seedling preparation, for example in a seed tray, as mentioned earlier. However, surprisingly for originally tropical plants, adult chili plants do not benefit from high humidity. A typical issue is humid polytunnels with poor ventilation. Any poorly ventilated growing environment often leads to fungal diseases. Watering is also related to humidity. Mature chili plants should be watered with lukewarm, well-settled water. Beginner growers often make the mistake of watering with cold water in hot weather, causing temperature shock. Another frequent mistake to avoid is permanently waterlogged soil. Ideally, the soil should be kept moderately moist. During fruit ripening, reduce watering somewhat to prevent osmotic pressures that can cause cracking of ripening peppers. Reducing watering at this stage also helps to increase the heat of the final product. Interested in what affects the spiciness of different chili types? It’s the compound called capsaicin, whose concentration influences a variety's pungency, and usually the spicier the variety, the longer it takes to mature.
Our TIP: Not only with chili does cleaner water lead to more vital and better-tasting yields. We therefore recommend reading the article Reverse osmosis (RO).
- Soil properties: Soil preparation is important. Well-aerated soil or an airy substrate is an excellent foundation for a beautiful and abundant harvest. For this purpose the perlite is often added to substrates for chili. A versatile natural helper to improve soil properties is vermiculite. For pepper cultivation slightly alkaline soil is ideal. In hydroponics expanded clay pebbles known as keramzit (hydroton) are used.
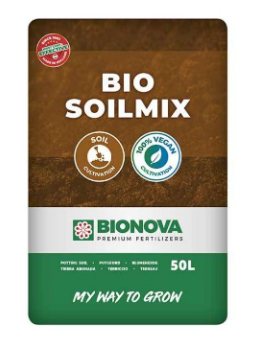
Our TIP: If you are looking for quality soil that allows you to grow your own chili in organic quality, we recommend for example BioNova Bio Soilmix.
- Fertilizers: The most important elements in pepper nutrition are carbon, nitrogen, phosphorus, potassium, calcium, hydrogen, oxygen, sulfur, manganese, magnesium, iron, copper, zinc, boron, chlorine and molybdenum. For chili cultivation you can choose top fertilizers from Jungle Indabox brand, made in the Czech Republic, which—thanks to the Jungle GARDEN product line—are specially adapted for growing chili peppers. You need a base fertilizer Garden BASE and a specialized component for chili such as G11. (The same approach works for other popular herbs, vegetables, fruits, and ornamentals including roses.) From the start of the vegetative phase you can also try the premium liquid fertilizer Chilli Focus by Growth Technology.

- Pest protection: We've already explained that overly wet soil or a humid growing space invites fungal diseases. Also, do not let outdoor chili grow next to weeds that shelter harmful insects. Regularly inspect plants during the growing cycle and focus on prevention. A great helper in protecting chili plants is, for example, Canna CURE - pest spray. Learn more in the article: How to deal with pests?
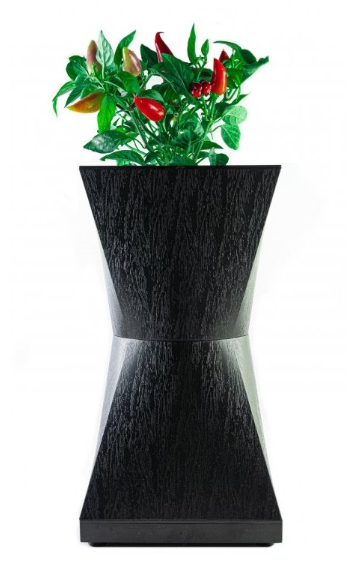
Hydroponic pot — easy chili growing
We saved an extra handy helper for last: the hydroponic pot, very popular among home chili growers! This designer piece functionally includes a circulation system that automatically runs every three hours thanks to a built-in pump that wets the entire keramzit, and you only change the nutrient solution. No timers, no watering—once plugged in the pot runs automatically.
If you have no experience growing chili yet, we recommend beginners start with less fiery and less demanding varieties such as Tabasco, Habanero Chocolate, Apache, Giallo, or Serrano Balin.
Feel free to ask us anything. We are happy to advise you on selecting specific products and their use. You can reach us at the well-known email address info@higarden.cz. We look forward to your questions!
We also recommend these products:
- BioNova VitaSol
- Shogun fertilizers
- Digital temperature-hygrometer VF with external sensor
- Everything for growing chili peppers
What to read next:
- Enzymes
- What water do you use to water your plants?
- How to properly store your harvest?