Cuttings: Cloning Plants Step by Step
By taking cuttings you can easily create genetic copies of your favorite plants. This method gives growers the opportunity to achieve consistent results, optimize growing conditions and preserve exceptional plants. In this article we will guide you through the cloning process from A to Z – from preparing equipment to rooting cuttings and transplanting them.
It will probably come as no surprise that sowing and germinating seeds are an integral part of gardening. However, it is not the only way plants reproduce. Apart from generative propagation (by seeds), plants can also reproduce vegetatively (from parts of the plant). This is because plant cells possess totipotency, which means any one of them can develop into an entirely new plant. In today’s article we will focus on a specific case of vegetative propagation: taking cuttings. For completeness, gardeners and growers also propagate plants vegetatively by dividing clumps, layering blackberries or grapevines, separating strawberries, grafting and propagating using tubers.
Cutting propagation
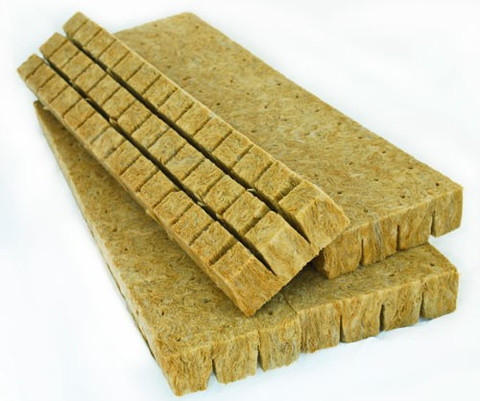
As hinted in the introduction, vegetative propagation differs from sowing seeds. When taking cuttings, we remove a suitable part from the donor (mother) plant, usually the tip of a healthy branch with several healthy leaves and internodes. The clones are then transferred into a suitable growing medium, commonly cubes of mineral wool or an appropriate propagation substrate. For freshly cut cuttings to successfully root they need suitable conditions, primarily high air humidity, warmth and sufficient light.
So how do cloned plants differ from those grown from seed? The main difference is that the new offspring are genetic copies of the donor plant. Clones therefore always have the same sex as the mother plant. An advantage, for example, is that when growing dioecious species growers do not have to worry about selecting males from females. Another benefit of taking cuttings is the genetic uniformity of the clones. Because the plants come from a single mother, they will display identical growth characteristics. Especially large-scale growers can optimize the cultivation process thanks to cloning and achieve consistently repeatable results. Finally, taking cuttings allows growers to preserve exceptional phenotypes long-term in the form of clones.
It should be added that cloning also has some disadvantages. The main issue is the risk of transmitting genetic disorders, pathogens and diseases. If the mother plant is infected with a plant virus (e.g. HLVd) or suffers from a genetic mutation, the offspring will be affected as well. The same applies to molds and many insect pests, although in certain cases clones can be treated with pesticides or fungicides. Unlike plants grown from seed, cuttings do not have a main taproot that grows deep into the ground. Cloned plants are therefore somewhat less suitable for outdoor cultivation, especially in locations exposed to strong gusts of wind and prolonged drought.
Advantages of taking cuttings
- same sex and genetic uniformity
- uniformity of yield
- preservation of exceptional plants
Disadvantages of taking cuttings
- transmission of genetic mutations and viruses
- spread of pathogens and pests
- less suitable for outdoor growing
How to take cuttings step by step
Before you start taking cuttings, make sure you have all the necessary equipment. You will need a growing medium, preferably mineral wool cubes or a suitable propagation substrate. Cuttings require a constant air humidity of around 75-85%, which is easiest to achieve in a small plastic greenhouse (propagator). Cuttings root the fastest at temperatures between 24-27 °C. Lower temperatures slow the process and increase the risk of molds. In the first days moderate-intensity light (100-200 µmol) with a blue-white spectrum is suitable. After the first roots appear you can increase the light intensity to double, which will speed up root system development. At this point it is also appropriate to start using a root stimulant. You can find cultivation lighting for cuttings and seedlings HERE.
Additional equipment needed
- scalpel
- disposable gloves
- disinfectants (alcohol, Purolyt, hydrogen peroxide solution)
- rooting gel
- thermometer with a hygrometer
- container for holding fresh cuttings
- paper towels
Detailed guide to cloning
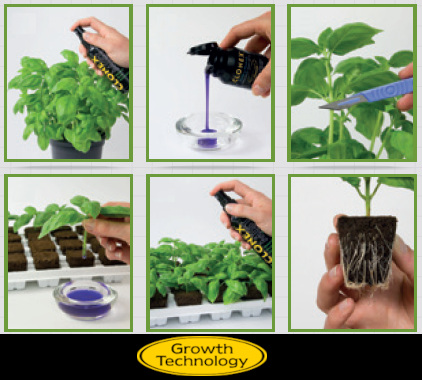
To maximize your chances of success when taking cuttings, take clones from recently grown branches of plants at the peak of vegetative growth. Before taking cuttings you can treat the donor plant with one of the special preparations (e.g. Clonex Mist) that support root formation and strengthen the cuttings’ resilience. Always work with clean tools, wear rubber gloves and do not smoke while working.
Aeroponic cloning units
Aeroponic cloning units are based on a simple principle where the ends of the stems are exposed to a mist of oxygenated water. Thanks to the high oxygenation, cuttings can root up to twice as fast as in other growing media. Another advantage of aeroponic cloning is that cuttings tolerate lower air humidity in the range of 50–60%. This makes subsequent acclimatization of new seedlings easier.
Finally, it is worth noting that in recent years a modern method of cloning using tissue culture has gained popularity. We will cover this modern propagation technique in a future article, but if you know how to work with it and want to try tissue culture in your nursery, you can find cloning systems for tissue culture on our site.
Want to learn more about indoor growing and modern gardening trends? Feel free to visit our Higraden blog.